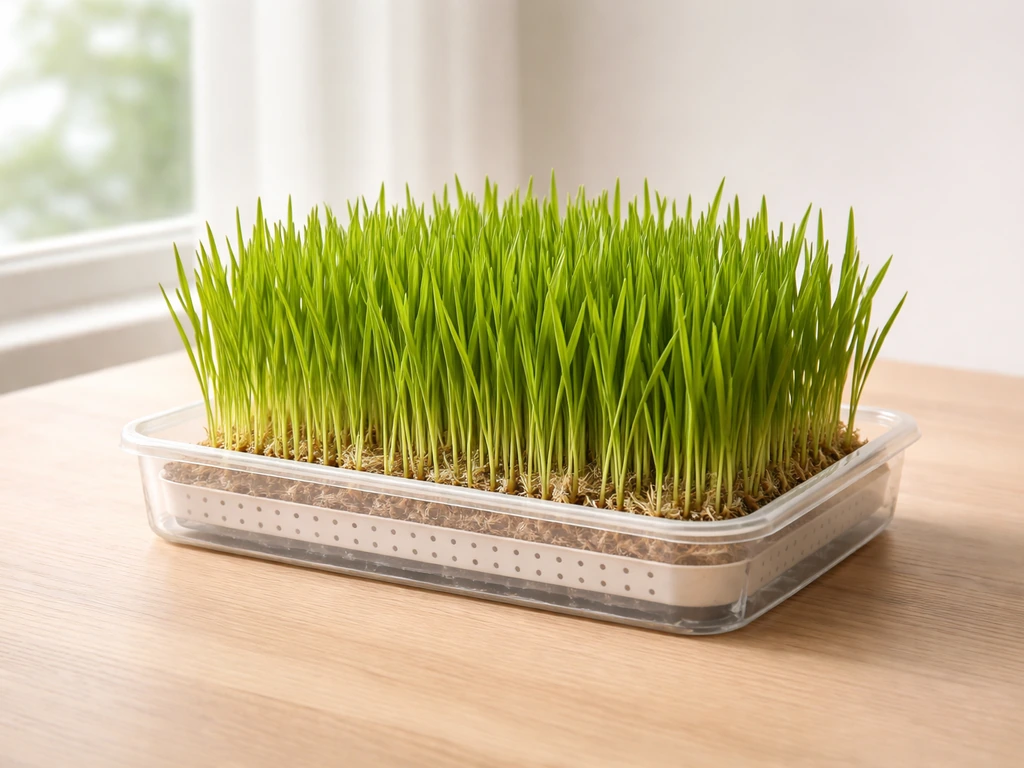
Trixie cat grass is barley grass grown in a small tray or container indoors so your cat has safe, edible greens to chew on whenever they want. Foods (MDPI), PMC, 'Seed Disinfestation Practices to Control Seed‑Borne Fungi and Bacteria in Home Production of Sprouts' (2023) notes that Home sprout/seed disinfection, for reducing microbial load on seeds before sprouting/growing: FDA/NACMCF historical commercial recommendation is high‑strength calcium hypochlorite (≈20,000 ppm Ca(OCl)2) for sprout production; peer‑reviewed synthesis and home‑oriented research (Foods/PMC) tested home‑friendly options and identified dilute household bleach (≈0.6% sodium hypochlorite) or freshly generated hypochlorous acid (~800 ppm chlorine) as effective, germination‑friendly treatments for many seed types (and safer/feasible for home users), while noting no method guarantees complete pathogen elimination blank" rel="noopener noreferrer">Foods (MDPI), PMC — 'Seed Disinfestation Practices to Control Seed‑Borne Fungi and Bacteria in Home Production of Sprouts' (2023). You soak the seeds for 8 to 12 hours, sow them densely on about 1 to 2 inches of moist potting mix (or skip the soil entirely and sprout them on a wet paper towel), keep the tray somewhere warm around 18 to 20°C (65 to 68°F), and in roughly 7 to 12 days you have a lush green canopy ready for your cat. That's the core of it. The rest of this guide fills in the exact measurements, timelines, and tips for staying mold-free and keeping the whole setup safe for your pet. For a concise, step-by-step walkthrough, see our guide on how to grow cat grass.
How to Grow Trixie Cat Grass: Soil, No-Dirt & Hydro Tips
What Trixie Cat Grass Actually Is (and Why It's Worth Growing)
The Trixie Cat Grass kit is marketed as a seed-substrate mix for growing barley grass (Hordeum vulgare) at home. It comes in two formats: a small bowl and a bag, both around 100 g, and the kit essentially packages what you'd find at any health food or farm supply store under a different name. Barley is the star ingredient, though some multi-grass cat grass mixes sold by other brands include wheat (Triticum aestivum), oats (Avena sativa), or cereal rye (Secale cereale). All of these are cereal grasses in the same family, all are safe for cats to nibble, and all follow nearly identical growing instructions.
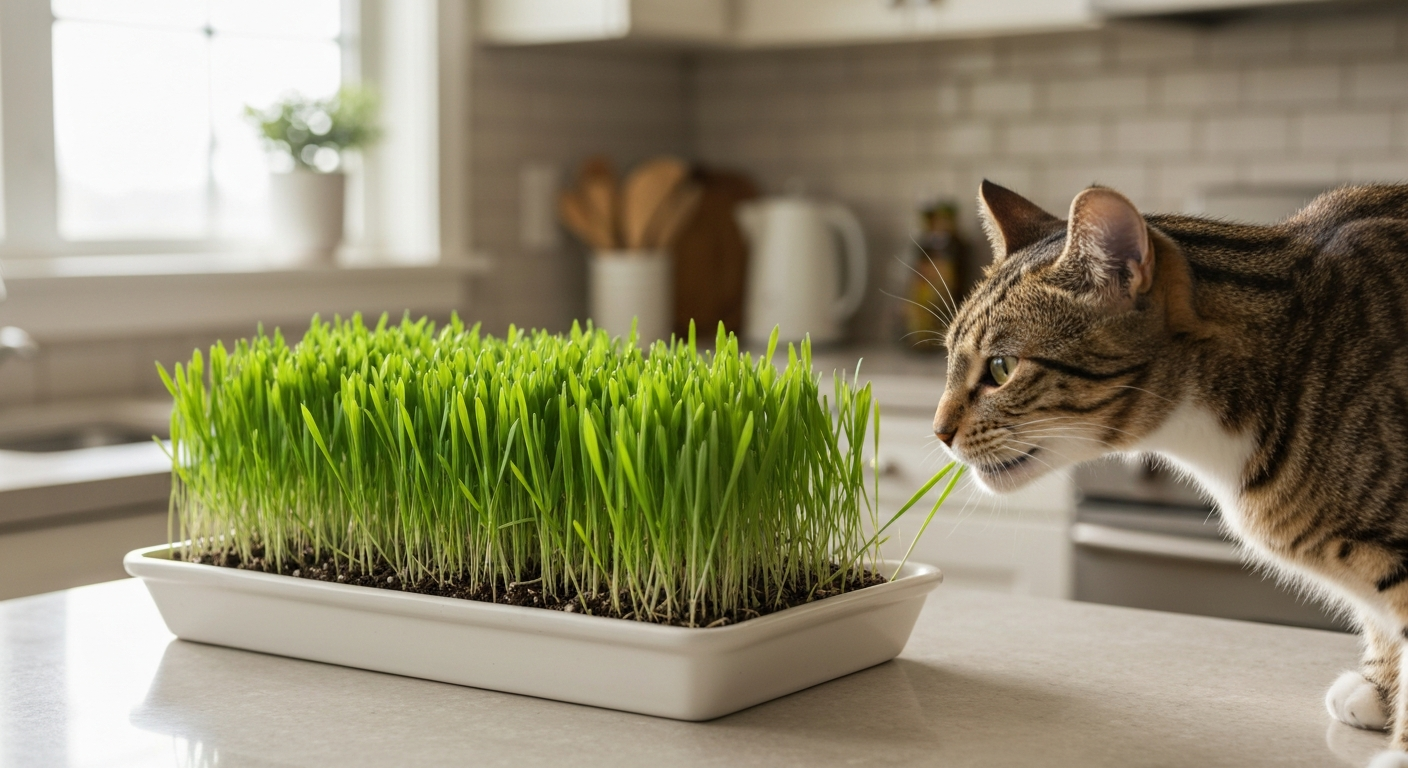
Why do people bother? Indoor cats are drawn to grass instinctively. It may help with digestion, hairball control, or simply satisfy a nibbling urge that would otherwise get directed at your houseplants, some of which are genuinely toxic. Having a dedicated tray of cat grass redirects that behavior and gives you peace of mind. From a lawn-grower's perspective, these cereal grasses behave nothing like the turf species you'd sow outdoors (bermuda, zoysia, fescue, ryegrass), but the underlying seed-biology is the same: temperature, moisture, and seed-to-soil contact are everything.
Which Seeds to Buy: Trixie Kits vs. Buying Your Own
The Trixie kit is convenient because the substrate is included, but it's not the only or even the cheapest route. You can buy untreated, food-grade barley, wheat, or oat seeds (sometimes labeled 'sprouting seeds' or 'wheatgrass seeds') from health food stores or online suppliers at a fraction of the cost per gram. The critical word is untreated: seeds sold for planting in agricultural fields are often coated with fungicides or pesticides, and those are absolutely not safe to grow food or edible pet greens from. Always confirm the bag says 'food grade,' 'sprouting grade,' or 'untreated' before buying.
- Trixie Cat Grass kit (~100 g): convenient all-in-one, substrate included, barley-based, good for beginners
- Food-grade sprouting barley seed: cheapest per gram, easy to find online, the closest match to what's in the Trixie kit
- Sprouting wheat (hard red or hard white): slightly faster germination (2 to 5 days), similar flavor, widely available
- Sprouting oats (hulled): softer texture, germinate in 3 to 10 days, cats often like the flavor
- Multi-grass cat grass mixes: combine wheat, oats, rye, and sometimes barley for variety — look for 'untreated/pesticide-free' labels
For most people, a 500 g bag of food-grade sprouting barley or wheat gives you enough seed for 5 to 10 trays at a much better price than buying individual Trixie kits repeatedly. The kit makes a nice first purchase to understand the process, but after that, sourcing your own seeds is the smarter long-term move.
Three Ways to Grow It: Soil, No-Dirt, and Hydroponics at a Glance
Before diving into the step-by-step, here's an honest comparison of the three methods so you can pick the one that fits your setup, tolerance for mess, and how much time you want to spend.
| Method | Setup difficulty | Time to harvest | Mold risk | Best for |
|---|---|---|---|---|
| Soil tray | Easy | 7 to 12 days | Low to medium (with good drainage) | Most beginners; longest-lasting canopy |
| Paper-towel / water-only | Very easy | 5 to 10 days for sprouts; 7 to 10 days for short canopy | Medium to high if not rinsed regularly | Quick batches, no soil mess |
| Simple hydroponics | Moderate | 7 to 12 days | Low if water is changed regularly | Growers wanting a cleaner, reusable system |
Soil is the most forgiving method and produces the densest, longest-lasting grass, which is why it's the default. Paper-towel and water-only methods are great for sprouting seeds quickly or when you don't have potting mix on hand, the main challenge is staying ahead of mold since there's no drainage. Hydroponics (even at the simple hobby scale) keeps things cleaner once you have the setup, but it has a slight learning curve around water changes and keeping the reservoir oxygenated.
Containers and Vessels: What to Use for Each Method
Container choice affects drainage, mold risk, and how comfortable your cat is nibbling from it. For soil growing, a shallow nursery flat (a standard 10x20 inch '1020 tray') works beautifully for a larger batch, while a 4 to 6 inch wide food-grade plastic or ceramic pot works for a smaller countertop tray. For guidance on suitable containers and materials, see what to grow cat grass in. The key spec is drainage: the grow tray must have holes in the bottom, and you place it inside a solid catch tray to hold water. Avoid containers deeper than about 3 inches for cat grass, you want roots to spread wide, not deep, and excess soil volume holds moisture and invites mold.
For no-dirt methods, any shallow dish or glass bowl works for the paper-towel step. When transitioning sprouts to a water-only grow tray, wide-mouth mason jars with mesh lids or purpose-made sprouting trays with drainage slats are the easiest to rinse and keep clean. For hydroponic setups, small net pots (2 inch is fine) in a shallow reservoir (a repurposed food-grade plastic container 2 to 4 inches deep) or a simple floating raft tray work well at hobby scale.
- Soil tray: 10x20 nursery flat with drainage holes + solid catch tray, or any 4 to 6 inch wide food-grade pot with drainage
- Paper-towel method: any shallow ceramic or glass dish, at least 4 inches wide
- Water-only sprout jars: wide-mouth mason jar with a sprouting mesh lid
- Hydroponic: small food-grade plastic tub (2 to 4 inches deep), 2-inch net pots, or a floating foam raft cut to fit
- All containers: use pet-safe food-grade plastic, ceramic, glass, or stainless steel — avoid galvanized metal which can leach zinc
Growing Media: What Goes in the Container
Soil and soilless mixes
For the soil method, you want a fine-textured, well-draining, sterile seed-starting mix. A good DIY blend is 50% peat moss or coconut coir plus 50% perlite or vermiculite. This gives you the airy, moisture-retentive structure that cereal grass roots love without holding so much water that you get fungal problems. Standard potting soil works in a pinch but often has larger particles and added fertilizer that can burn seedlings or encourage mold. Fill your tray to about 1 to 2 inches (2.5 to 5 cm) deep, that's genuinely all the root space barley and wheat need for a 7 to 12 day grow.
Paper towel and coffee filter (no-dirt)
For no-dirt sprouting, a double layer of plain, unbleached paper towels or a coffee filter is your growing medium. The fiber holds just enough moisture to germinate seeds without waterlogging them. Plain white paper towels work too, but unbleached is slightly less likely to introduce residues. The medium here is essentially a moisture delivery system, not a nutrient source. Seeds feed on their own stored energy during the sprout stage, so there's nothing else you need to add.
Hydroponic inert media
For hydroponics, you have a few options that work at home scale. Expanded clay pebbles (hydroton) placed in net pots anchor the seeds and roots while letting nutrient solution flow freely around them. Rockwool cubes are another popular choice and hold moisture well for germination, though you'll want to pre-soak them to lower their naturally high pH before use. Coir grow mats, jute mats, or hemp grow mats laid flat in a shallow flood tray are arguably the easiest hydroponic substrate for cat grass because you just wet the mat, scatter seeds, and keep the tray lightly flooded. For a short 7 to 12 day grow, plain water or a very dilute nutrient solution (EC around 0.5 to 1.5 dS/m, or roughly 350 to 1000 ppm) is all you need since the seeds carry most of their own nutrition.
Seed Preparation and Pre-Soak: Do This Before Anything Else
Whatever method you're using, a pre-soak dramatically speeds up germination and makes for a more even sprout. Measure out your seeds (about 2 to 3 tablespoons per 4x4 inch tray area is a good density), rinse them once in cool water, then cover them with roughly 2 to 3 times their volume of cool water (room temperature, not hot) and let them soak for 8 to 12 hours. Twelve hours is my go-to, it's easy to set up before bed and deal with in the morning. Barley, wheat, and oat seeds all respond well in this window. Beyond 24 hours you risk seeds sitting in low-oxygen water and going anaerobic, which smells bad and can kill germination.
After soaking, drain and rinse the seeds thoroughly under cool running water. At this point the seeds should be plump and some may already show tiny root tips (radicles). If you want an extra sanitation step to reduce mold and seed-borne bacteria, especially useful in warm, humid homes, you can do a brief seed rinse in a very dilute bleach solution (about 1 teaspoon of standard household bleach per quart of water, which is roughly 0.6% sodium hypochlorite). Swish the seeds for 1 to 2 minutes, then rinse thoroughly with clean drinking water at least 3 times before planting. This reduces microbial load but does not eliminate all pathogens, so it's an extra precaution, not a guarantee. If you'd rather skip chemicals (totally reasonable), just a thorough water rinse works fine for most home grows.
One important note on pet safety: if you use any seed disinfectant (bleach, hydrogen peroxide, or hypochlorous acid), rinse the seeds until there is no chemical smell remaining before they go anywhere near your cat's food. Residual bleach is harmful to cats. If in doubt, skip the disinfectant step and manage mold through airflow and watering habits instead.
Sowing and Setup: The Full Soil Method Step by Step
This is the method I recommend most for beginners because it's the most forgiving, produces the thickest canopy, and the grass lasts long enough for multiple sessions of nibbling before it needs replacing.
- Fill your tray with 1 to 2 inches of moist seed-starting mix. 'Moist' means it clumps when you squeeze it but doesn't drip water — like a wrung-out sponge. If the mix is dry, dampen it in a bowl before filling the tray.
- Scatter your pre-soaked seeds evenly and densely across the surface. For cat grass you want much higher seed density than you would for a lawn — aim for seeds touching or nearly touching, like a single loose layer with minimal gaps. About 2 to 3 tablespoons of pre-soaked seed per 4x4 inch area is a reasonable target.
- Press the seeds gently into the surface of the mix with your palm or the bottom of a cup so they make good contact with the medium. You don't want to bury them deep — barley and wheat germinate best with very shallow planting, just a light press into the surface or a very thin (1/4 inch) dusting of mix on top.
- Mist the surface lightly with a spray bottle. Don't drench it.
- Cover the tray loosely with a second solid tray placed upside down on top, or with a sheet of plastic wrap with a few holes poked in it. This creates a humid dome that speeds germination. Leave it in a warm spot: 18 to 20°C (65 to 68°F) is the sweet spot. A kitchen counter away from direct cold drafts works well.
- Check and mist once daily. Lift the cover briefly to let fresh air in — this is important for mold prevention. If you see condensation pooling on the cover, prop it up slightly.
- After 3 to 5 days you'll see shoots pushing up. Once shoots are about 1 inch tall, remove the cover entirely and move the tray to a bright spot — a windowsill with indirect light or under a grow light for 8 to 12 hours a day. Direct midday sun can scorch tender seedlings, so filtered or indirect light is better.
- Water by bottom-watering: pour a small amount of water into the catch tray below and let the mix absorb from the bottom. This keeps the surface drier and dramatically reduces mold risk compared to top-watering. Empty any standing water in the catch tray after 30 minutes.
- Harvest when the grass is 3 to 5 inches tall, which typically happens 7 to 12 days after sowing. Simply place the tray in front of your cat and let them nibble directly, or snip a small handful with scissors.
Temperature matters a lot here. At 18 to 20°C germination is quick and consistent, barley typically shows visible shoots in 3 to 7 days. Controlled germination tests at about 20°C typically record first counts and full germination for cereal seeds (oat, barley, wheat) within roughly 3–10 days (International Journal of Research in Agricultural Sciences, germination tests summary (oat/barley/wheat)) blank" rel="noopener noreferrer">International Journal of Research in Agricultural Sciences — germination tests summary (oat/barley/wheat). If your home is cooler (below 15°C / 59°F) germination will slow noticeably and you may wait 10 or more days to see shoots. Warmer than 25°C (77°F) and mold risk goes up fast. If your kitchen runs warm in summer, keep the tray away from sunny windows during germination.
No-Dirt Methods: Paper Towel and Water-Only Step by Step
These methods are fast, require zero soil, and are perfect for apartment growers or anyone who wants a quick batch without the mess. The main challenge is mold, without soil's drainage properties, moisture management has to be more deliberate.
Paper-towel method
- After your 8 to 12 hour soak and rinse, lay two layers of damp paper towel in a shallow ceramic or glass dish. Damp, not soaking — squeeze out excess water before laying the towels flat.
- Spread pre-soaked seeds in a single dense layer on the towel. Seeds can touch but try to avoid thick clumping piles, which trap moisture and become mold hotspots.
- Cover loosely with a second plate or plastic wrap with a few holes for airflow. Set it somewhere warm, 18 to 22°C (64 to 72°F).
- Twice a day, lift the cover and mist the seeds lightly. If the towel feels dry, add a few teaspoons of water. If it's dripping wet, blot some moisture away. This is the most critical step — the paper towel should stay consistently moist but never waterlogged.
- Rinse the seeds gently under cool water once per day if possible. For a paper-towel setup this means carefully tilting the dish and letting a thin stream of water run over the seeds, then draining it off. This flushes metabolic byproducts and dramatically reduces mold.
- In 1 to 3 days you'll see white radicles (root tips) emerging. By days 3 to 5 you'll have short sprouts with a pale yellow-green shoot.
- At this stage you have two options: (a) leave the sprouts on the towel and let them grow in indirect light until they're 2 to 3 inches tall for a short nibble-ready canopy (this works but mold risk increases past day 7), or (b) transfer the pre-sprouted seeds into a shallow soil tray at this point — press them lightly into moist mix and they'll take off fast, often reaching harvest height in just 4 to 6 more days because they're already germinated.
- Full harvest height of 3 to 5 inches in the no-dirt paper-towel setup typically takes 7 to 10 days total from sowing.
Water-only jar / sprouting method
- Place pre-soaked, rinsed seeds in a wide-mouth mason jar fitted with a sprouting mesh lid (or cheesecloth secured with a rubber band).
- Invert the jar at about a 45-degree angle in a bowl or dish rack so water drains freely. This position keeps seeds moist but not submerged and is the single most important thing you can do for the water-only method.
- Rinse 2 to 3 times daily by filling the jar with cool water, swirling gently, and draining through the mesh. Each rinse takes about 30 seconds.
- Keep the jar in indirect light at 18 to 22°C (64 to 72°F). Direct sun will overheat the jar and cook your seeds.
- Sprouts suitable for cats to nibble directly from a jar appear in about 3 to 5 days. If you want taller grass rather than short sprouts, transfer to a shallow soil tray or a flat grow mat at day 3 to 4 and continue in indirect light.
Mold reduction: specific steps for no-dirt methods
Mold is the number one failure point when growing cat grass without soil. Here's what actually works based on experience: rinse daily without fail, keep the cover slightly vented so air circulates, avoid growing in a room warmer than 24°C (75°F) if possible, and never let water pool under the seeds. If you see white fuzzy mold (as opposed to white root hairs, which are fine and fluffy), discard that batch, thoroughly wash the container with hot water and dish soap, rinse well, and start fresh. Don't try to save a moldy batch by picking out the bad seeds. The mold spores are already throughout the medium. Starting clean is faster than rescuing a compromised tray. If mold is a recurring problem in your home, switching to the soil method with bottom-watering is the most reliable fix. For step-by-step prevention tips, see our guide on how to grow cat grass without mold. You can also read more about dedicated mold-prevention strategies specifically for cat grass grows if this is a persistent challenge. For step-by-step instructions on how to grow grass indoors for cats, see our detailed guide. See our guide on how to grow cat grass without dirt for step-by-step no-dirt methods and mold-prevention tips.
Simple Hydroponics for Cat Grass
You don't need fancy equipment for this. For a step-by-step walkthrough on how to grow cat grass in water, see our detailed guide on how to grow cat grass in water. The simplest hydroponic setup for cat grass is a grow mat (coir, jute, or hemp) placed in a shallow food-grade tray with about a half inch of water in the bottom. Pre-soaked seeds go on the mat in a dense layer, the tray sits in indirect light at 18 to 22°C, and you top up the water daily to maintain that half-inch level. Change the water entirely every 2 to 3 days to prevent stagnation and algae. This is essentially a passive wick or flood system and it works well for a 7 to 12 day cat grass grow.
For nutrients, plain water is enough for a short grow. If you want to add a dilute solution, keep the EC between 0.5 and 1.5 dS/m (roughly 350 to 1000 ppm on a standard TDS meter). Going higher risks salt accumulation in edible seedlings. Since your cat is going to eat this, err on the side of plain or very lightly fertilized water. If you're curious about more involved hydroponic setups, the same principles used for growing cat grass hydroponically in more structured systems apply here. For step-by-step instructions and setup variations, see a dedicated guide on how to grow cat grass hydroponically.
Harvesting, Refreshing, and Knowing When to Replace
Harvest begins when the grass is 3 to 5 inches tall, typically 7 to 12 days after sowing depending on method and temperature. For soil trays, simply place the tray where your cat can reach it. Most cats will self-regulate nibbling, but if yours attacks it aggressively, bring the tray out for supervised sessions and return it to a counter between visits. After the grass is grazed down to an inch or less, you can try leaving it to regrow, barley and wheat will put up a second flush from the cut tips, though it's usually thinner and shorter-lived than the first growth. Most growers find it easier to compost the spent tray and start a fresh one rather than chasing a regrowth that often yellows within a few days.
Plan to have two trays going in rotation, started about 5 to 7 days apart, so your cat always has fresh grass available while you're waiting on the next batch to grow. This staggered rotation is the most practical long-term system once you get the hang of it.
Troubleshooting: Yellowing, Poor Germination, and Other Common Problems
| Problem | Likely cause | Fix |
|---|---|---|
| Seeds not germinating after 5+ days | Too cold (below 15°C), seeds too old, or seeds are treated/coated | Move to warmer spot; check seed source is food-grade and untreated; test seed viability with a wet paper towel first |
| Grass turns yellow fast | Insufficient light or overcrowded seeds suffocating roots | Move to brighter indirect light; thin seeds on next batch; switch to bottom-watering |
| White fuzzy growth on soil surface | Mold from overwatering or poor airflow | Remove cover sooner; switch to bottom-watering; add more perlite to mix for drainage; reduce watering frequency |
| Pale, leggy shoots leaning to one side | Not enough light; reaching toward light source | Rotate tray daily; move closer to window; supplement with a simple grow light |
| Roots and medium become slimy in no-dirt setup | Water sitting too long; not rinsing frequently enough | Rinse 2 to 3 times daily; drain seeds more completely between rinses; discard if already slimy and start fresh |
| Cat ignores the grass | Grass too tall, too dry, or unfamiliar smell from substrate | Offer grass at 3 to 4 inches height, freshly misted; try a different seed type (wheat vs. barley vs. oat) |
Pet Safety and Sanitation Basics
Keep it simple and safe. Use food-grade seeds, food-grade containers, and sterile potting mix. Don't use garden soil from outside, it can carry pathogens, pesticide residues, and parasites. Don't use fertilizers or pesticides on cat grass at any point. If you choose to do a seed disinfection rinse, make absolutely sure you rinse the seeds thoroughly until no chemical smell remains before sowing. Residual bleach or hydrogen peroxide on seeds can harm your cat if ingested. If you ever suspect your cat has been exposed to a cleaning chemical, call your vet or ASPCA Animal Poison Control (888-426-4435) immediately.
Wash your hands before handling seeds and trays, and wash containers with hot soapy water between batches. This is especially important for sprouting jars and paper-towel setups where mold and bacteria have more opportunity to take hold. A clean start on every batch is the most effective pest and contamination prevention you have.
How Cat Grass Differs from Lawn Grass (and When to Think About Both)
Barley, wheat, and oat grass grown for cats are annual cereal crops, not perennial turf grasses. They grow fast, live short, and are meant to be harvested and replaced, not maintained long-term the way you'd manage a bermuda, zoysia, fescue, or ryegrass lawn outdoors. The seed-biology parallels are interesting: the same principles of temperature, moisture, and seed-to-soil contact that govern outdoor lawn establishment apply here too, just compressed into a 7 to 12 day indoor window instead of a 3 to 6 week outdoor germination-to-establishment cycle.
If you also have outdoor lawn areas and pets, there's a meaningful crossover concern: lawns treated with herbicides, fungicides, or synthetic fertilizers are not safe grazing areas for cats. Cat grass grown indoors in a controlled environment gives your pets a clean, verifiable alternative. If you're working on establishing or repairing outdoor lawn areas, dealing with bare spots, clay soil, or shade, the same careful attention to seed sourcing and soil prep that applies to cat grass applies there too, just at a larger scale.
FAQ
What is 'Trixie cat grass' and which seeds are typical in these kits?
Trixie markets small 'cat grass' kits that are essentially barley/barley‑grass seed mixes sold for pet use; equivalent home kits often use wheat, barley, oats or rye. For indoor edible cat grass you want hulled or food‑grade cereal seeds (wheat/barley/oat) intended for sprouting/forage.
Exactly how do I grow Trixie-style cat grass in soil (step‑by‑step)?
1) Choose a food‑safe shallow tray or pot (e.g., 6–10 cm depth, a 10×20 in 1020 tray for larger batches). 2) Fill with 1–2 in (2.5–5 cm) of a sterile seed‑starting mix (peat or coco coir + perlite/vermiculite). 3) Pre‑soak seed 8–12 hours (wheat/oats/barley); drain. 4) Broadcast seed densely and evenly to form a close canopy (target 150–300 g per 10×20 tray depending on seed). Lightly press seed into the surface; do not bury more than 3 mm. 5) Cover with a thin layer of the same mix or a damp paper towel/cloth to keep humidity in for the first 48 hours. 6) Place in warm area 15–22 °C (59–72 °F). Keep medium evenly moist (mist or bottom‑water) — avoid standing water. 7) Within 2–7 days you’ll see shoots; allow canopy to reach 7–12 cm (3–5 in) before first harvest (typically 7–12 days).
What are the container and medium options for soil method?
Containers: food‑grade plastic trays, ceramic pots, or shallow nursery trays; ensure drainage. Mediums: sterile seed‑starting mix (50% peat or coco coir + 50% perlite/vermiculite) or a commercial soilless mix. For very small pots use a fine, light mix to avoid compaction and slow drying.
What exact temperature, light and watering targets should I aim for with soil-grown cat grass?
Temperature: optimal 15–22 °C (59–72 °F); germination will still occur cooler but slower. Light: bright indirect light or 12–16 h/day of grow light once shoots appear; during initial 48 h keep dark/high humidity if you covered seed. Watering: keep surface evenly moist but not saturated; bottom‑water or gentle misting 1–2×/day depending on tray size and indoor humidity. Avoid puddles.
How do I grow cat grass without dirt using paper‑towel or water‑only methods?
Paper‑towel/water‑only (sprout‑style): 1) Soak seed 8–12 h, drain. 2) Spread seeds in a single layer on a damp paper towel or cloth in a shallow dish or plate. 3) Cover with another damp towel or inverted dish to maintain humidity. 4) Keep at 18–22 °C (64–72 °F) and rinse/mist seeds 2–3× daily to prevent drying and reduce microbes. 5) After radicles/green shoots appear (2–4 days) either offer short sprouts to cats or transfer seedlings to a shallow tray with an absorbent grow mat (coir, hemp, jute) for continued growth to 7–12 days. Note: paper towel keeps roots confined and will not produce a lasting root mat—transfer if you want a lasting grass patch.
How do I grow cat grass hydroponically (simple, hobby methods)?
Floating‑tray or grow‑mat method: 1) Pre‑soak seed 8–12 h and drain. 2) Spread seeds on an absorbent food‑safe grow mat (coir, hemp, jute or non‑woven mat) inside a shallow tray. 3) Maintain mat moist by adding water to tray so mat wicks water but surface isn't ponded; alternatively use a low‑flow wick system. 4) Keep temperature 15–22 °C and bright indirect light once green. 5) For short cycles (7–12 days) you can use plain potable water; if growing longer or repeatedly, use a very low strength nutrient solution (start EC ~0.5 dS/m) and change solution every 3–5 days. 6) Harvest at 7–12 days when blades are 7–12 cm tall.
How to Grow Cat Grass Without Mold: Step-by-Step
Step-by-step cat grass method to prevent mold: seed choice, soaking, drainage, airflow, watering, sanitation, and fixes.