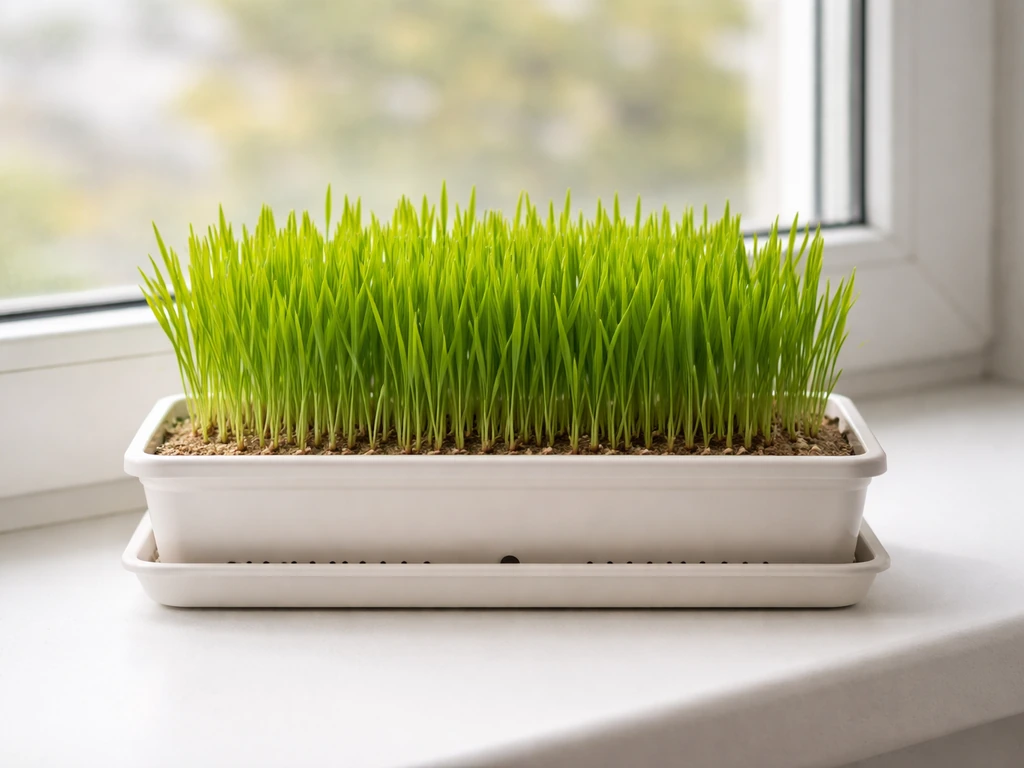
Mold on cat grass almost always comes down to too much moisture sitting in one place for too long, usually combined with poor airflow, low light, or a container that can't drain properly. Fix those three things and you'll grow clean, healthy grass your cat can eat in 10 to 14 days without the fuzzy white or black patches that make you wonder whether to toss the whole tray.
How to Grow Cat Grass Without Mold: Step-by-Step

Marcus Tillwell
8 Jul 2026
Why cat grass gets mold in the first place
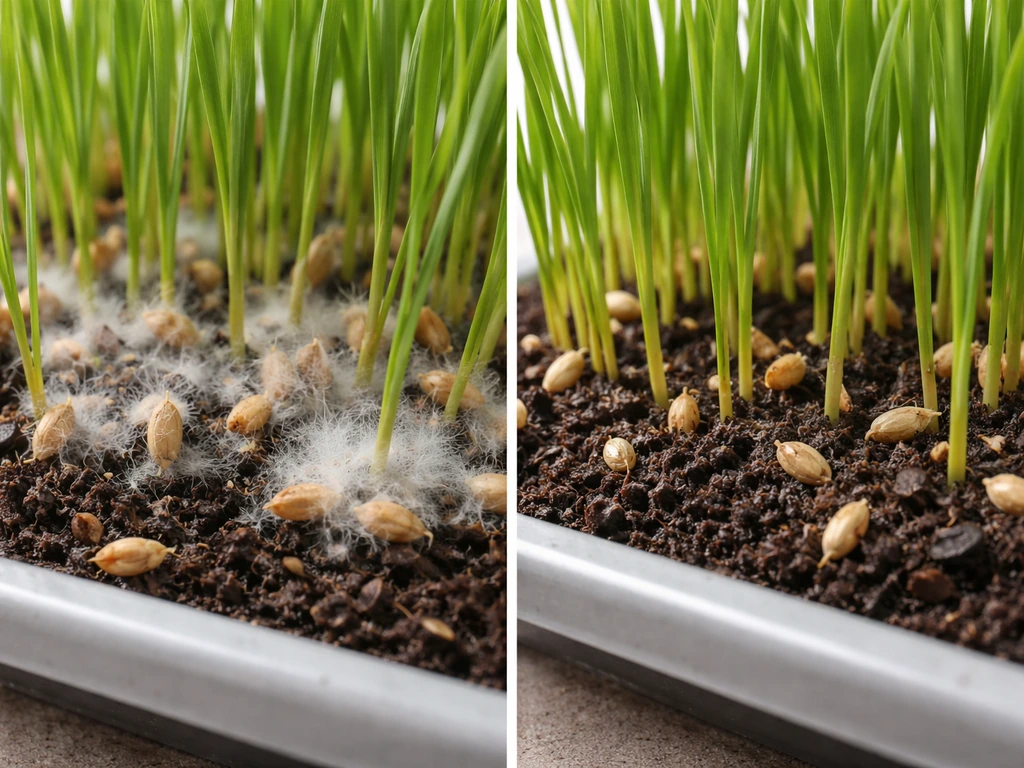
Mold on cat grass shows up in two main forms: white or gray fuzz, which appears early (often by day 3 or 4) and is usually surface mold on the seed husks or soil, and black mold, which arrives later and typically means the problem has gone deeper. Both thrive when conditions stay wet and still.
Here are the most common reasons it happens, and they tend to stack on each other. One mistake alone might not cause mold, but two or three together almost always will.
- Overwatering or pouring instead of misting during the germination stage, leaving seeds sitting in pooled water
- No drainage holes, or drainage holes that are blocked or too small to actually drain
- Poor airflow indoors, especially in summer when windows stay closed and AC is off
- Low light: dark corners or windowless rooms slow evaporation and keep the surface wet too long
- Old or low-quality seed, which can harbor mold spores before it ever hits soil
- Dirty or un-sanitized containers reused from a previous batch (mold spores linger in plastic)
- Soil or growing media that compacts and holds moisture instead of draining freely
- Soaking seeds too long before planting, or skipping the rinse step after soaking
One thing worth knowing: not every white fuzz is dangerous mold. Some of it is root hairs, which look similar but are fine translucent threads that appear right at the seed and move with the sprout as it grows. True mold is fluffy or powdery, often has a musty smell, and doesn't move with the plant. When in doubt, give the tray a sniff. If it smells earthy and clean, you're probably looking at root hairs. If it smells sour or musty, that's mold.
Start with the right seeds and materials
The seeds you choose matter more than most people realize. Cat grass can be grown from wheat, oat, barley, or rye seeds, and all of them work well. What matters is that you buy seeds labeled for sprouting or cat grass use, not field-grade agricultural seed. Field seed is often treated with fungicides or pesticides that aren't safe for cats to eat. Look for untreated, organic, food-grade seed from a pet store, health food store, or a reputable seed supplier.
Old seed is a real mold risk. If the seeds smell musty before you even plant them, or if they were stored in a warm, humid spot, toss them and start fresh. Fresh, clean-smelling seed is your first line of defense. Some kits like the TRIXIE cat grass kit come with a seed-substrate mix that's pre-portioned, which is convenient and usually means you're working with relatively fresh seed. Using the TRIXIE cat grass kit can be a helpful shortcut when you're learning how to grow Trixie cat grass at home.
For growing media, a fast-draining, sterile seed-starting mix is your best bet. Avoid heavy garden soil or compost-heavy mixes, which compact easily, hold too much water, and introduce outside organisms. Sterile mixes have been heat-treated to kill mold spores, which gives you a cleaner starting point. If you want to go soil-free entirely (which can reduce mold risk), growing cat grass in water or hydroponically are both valid options. If you're trying to grow cat grass without dirt, water-based or hydroponic setups are a great way to keep it clean and reduce mold soil-free entirely (which can reduce mold risk).
For containers, choose something shallow (2 to 3 inches deep is plenty), with multiple drainage holes in the bottom. If you're wondering what to grow cat grass in, the key is choosing a shallow container with drainage and using fresh, mold-safe growing media. A plain nursery tray, a small plastic pot, or even a dedicated cat grass planter all work fine as long as water can escape. Set it on a saucer so you can catch drainage without blocking the holes.
How to prep containers and media to prevent mold
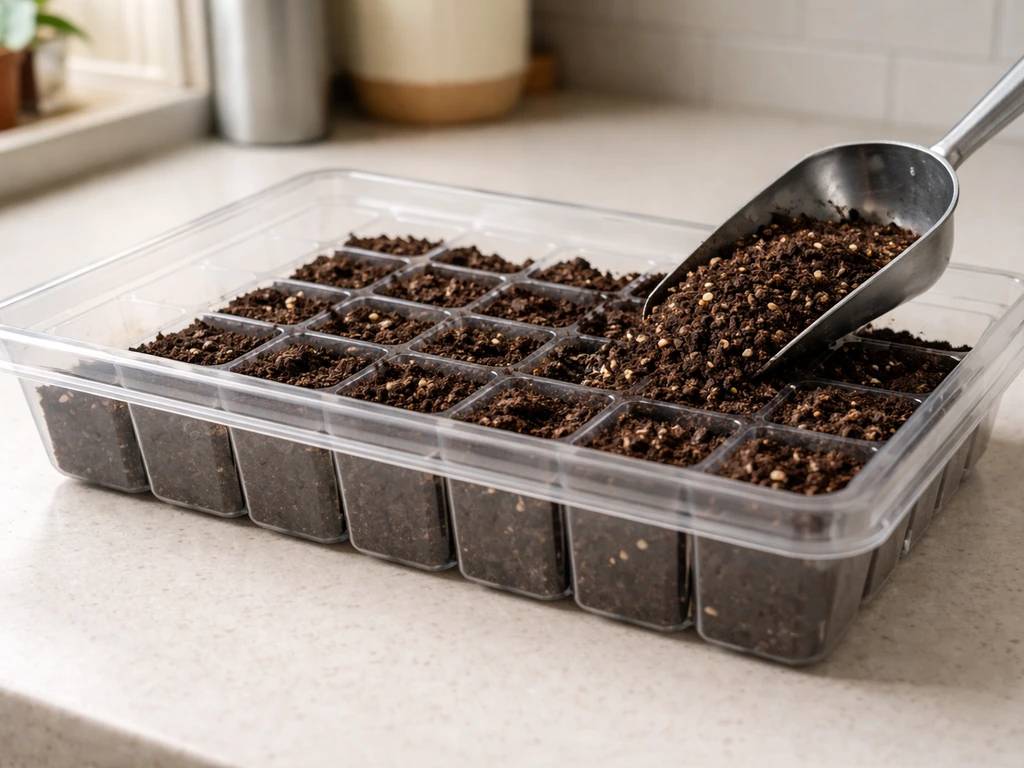
If you're starting a brand-new container, a quick rinse is enough. But if you're reusing a tray from a previous batch, you need to sanitize it properly. Mold spores stick to plastic and can survive a casual rinse. Skipping this step is one of the most common reasons mold returns on the second or third batch.
The process is simple. First, scrub the container with dish soap and hot water to remove any visible soil or debris. This is the cleaning step, and it matters because bleach doesn't penetrate dirt well. Then sanitize with a diluted bleach solution: about 1 tablespoon of household chlorine bleach per 1 gallon of water. Let the container soak or stay in contact with the solution for the contact time listed on your bleach bottle (usually 1 to 2 minutes for sanitizing). Rinse thoroughly with clean water afterward and let the container air dry completely before you add soil or seeds. Don't rush the drying step.
Do this sanitizing step for anything that touches your cat grass setup: the tray, the saucer, any scooping tools, even your spray bottle. Mold spores can build up in cleaning tools and re-contaminate a fresh batch before it ever gets started.
When you fill the container, leave a small gap (about half an inch) at the top. Overfilled trays tend to have soil that stays wet longer because there's less surface exposed to air. Fill loosely and don't pack the media down tightly.
Soaking, rinsing, and planting the mold-safe way
Whether to pre-soak your seeds is a common question, and the honest answer is: it helps germination speed, but it also increases mold risk if you do it wrong. A short soak (4 to 8 hours in clean water at room temperature) can speed up sprouting, but anything beyond 8 to 12 hours starts to push seeds toward anaerobic conditions where mold and bacteria thrive.
If you soak, here's how to do it without inviting mold along: Hydroponic cat grass follows the same moisture control and airflow principles, but the seeds grow in a nutrient-free water or specially formulated solution instead of soil.
- Use clean, cool water and a clean bowl or jar. Don't reuse containers that held previous batches without sanitizing them.
- Soak for no more than 6 to 8 hours. Overnight is okay if your house is cool, but skip soaking in summer if your kitchen is warm.
- After soaking, drain completely and rinse the seeds under cool running water for 30 to 60 seconds.
- Spread the rinsed seeds on a clean paper towel for a few minutes to remove surface moisture before planting.
- Plant immediately after this step. Don't let rinsed seeds sit in a wet pile.
If you'd rather skip the soak entirely, that's completely fine. Cat grass seeds germinate without pre-soaking, just slightly slower. For a first batch where you're still dialing in your setup, skipping the soak actually reduces your early mold risk.
When planting, scatter seeds densely across the surface of your pre-moistened media (not wet, just damp). Press them lightly into contact with the soil. Don't bury them deep. Add a thin layer of soil over the top, about a quarter inch, or just leave them on the surface if you're using a no-soil method. Then mist the surface lightly with a spray bottle and cover the tray loosely with plastic wrap or a humidity dome if you want to speed up germination, but leave a gap for air circulation, not a sealed cover.
Watering, airflow, and light: the real mold-prevention setup
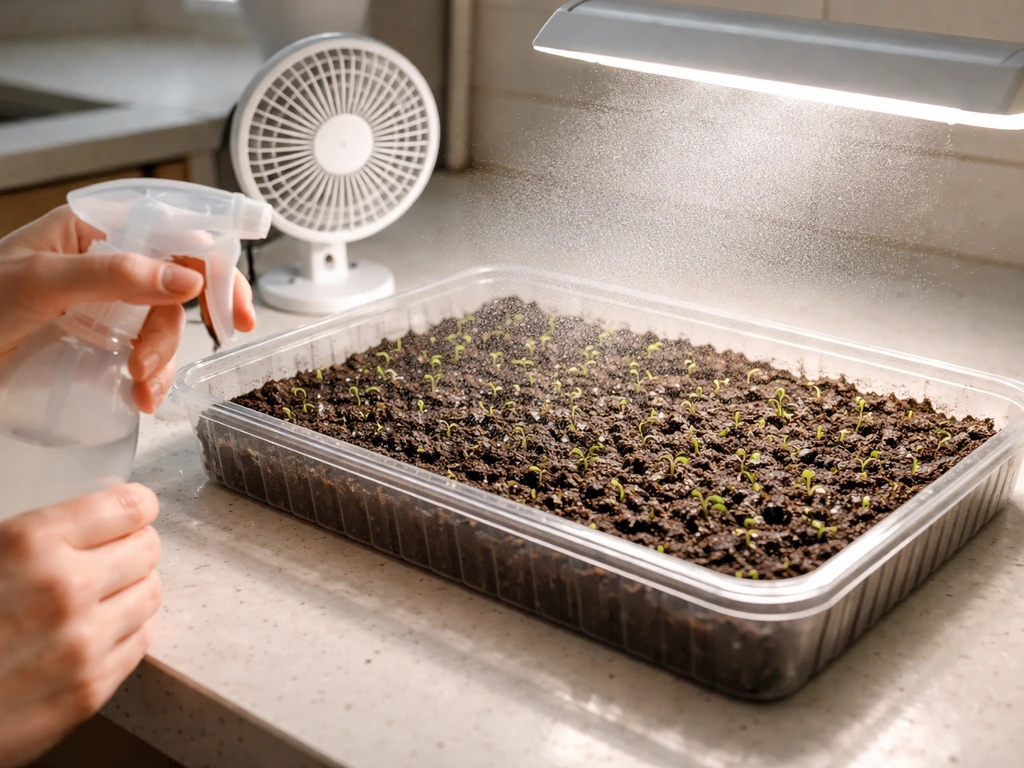
This is where most people go wrong. They pour water into the tray every day out of habit, the soil never fully dries between waterings, and by day 3 the surface is furry with mold. The fix is to water less, and smarter.
Watering during germination (days 1 to 5)
During the first few days, mist the surface with a spray bottle instead of pouring water. If you want to use water to grow cat grass, focus on using damp conditions rather than constantly soaking the roots. You want the top layer of soil to stay barely damp, not soggy. Before you water, press a fingertip into the soil. If it feels moist, skip the watering for that session. If it feels dry to the touch, mist lightly. This typically means misting once a day, sometimes less, depending on your indoor humidity and airflow.
The Catit planting guide calls for about 125 mL (half a cup) of water at the initial planting, then keeping seeds moist with a wet paper towel or spray bottle. That's a reasonable baseline. Adapted to real conditions: in a warm, dry house in winter, you might mist once a day. In a humid summer kitchen, every other day is probably enough.
Watering after sprouts emerge (days 5 to 14)
Once you see green sprouts, you can water a little more generously but still not heavily. A good baseline is about 125 mL every two days, adjusted up or down based on how quickly the soil dries. Always water at the base of the grass, not overhead, to keep the leaf surface dry. Wet leaves stay wet and are more vulnerable to mold than wet soil, which can drain and breathe.
Airflow and light
These two factors do more for mold prevention than almost anything else. Place your cat grass tray near a window with indirect light. If you want to grow grass indoors for cats successfully, this bright indirect-light setup is one of the biggest factors to get right. Direct afternoon sun can scorch tender grass, but bright indirect light keeps the surface drying between waterings and encourages healthy growth. A south or east-facing windowsill is ideal.
For airflow, avoid tucking the tray in a corner or inside a cabinet. Open air circulation, even passively, helps the surface dry out between waterings. If your home is still and humid (common in summer without AC), a small fan set to low and pointed near (not directly at) the tray can make a real difference. This is exactly the kind of environmental change that triggers mold: users have reported that simply turning off AC or moving a tray to a darker spot was enough to cause fuzzy growth within a day or two.
Once sprouts emerge (usually around day 3), move the tray to your lighted location if it wasn't already there. Light speeds up evaporation and keeps the surface healthier. Keep it out of completely dark rooms at all stages.
Troubleshooting mold: what to do right now
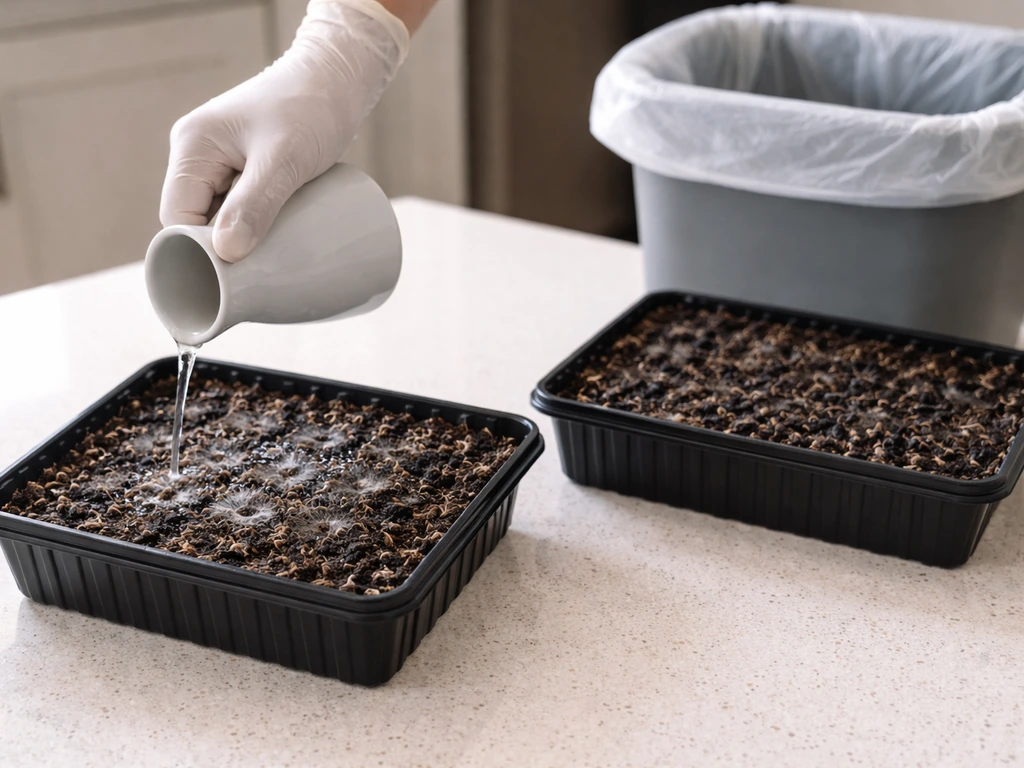
If you've already got mold showing up, here's how to figure out whether you can save the batch or need to start over.
White or gray fuzz on the surface (early stage)
This is the most salvageable situation. White or light gray mold on or near the soil surface, especially in the first few days, can often be addressed by rinsing the grass gently under cool tap water, then setting it in a well-lit, well-ventilated spot to air dry. Reduce watering immediately and don't add more moisture until the surface is genuinely dry. Move it to a brighter, more airy location. If the fuzz disappears and doesn't return within 24 to 48 hours, the batch is probably fine for your cat.
Black spots or black mold
Black mold means the problem has gone past the rinseable stage. Pet Greens instructs that if black mold appears and the situation is beyond a rinseable stage, you should replace or discard the product black mold means the problem has gone past the rinseable stage. At this point, discard the entire tray, soil and all. Don't try to cut around it or rinse it off. Sanitize the container before your next use (as described above) and start fresh. This isn't a failure, it's just part of the learning curve.
The tray smells sour or musty
A bad smell is a clear sign to discard. Whether you can see visible mold or not, a sour or musty odor means the batch has bacterial or fungal activity throughout the media. Don't let your cat eat from a batch that smells off. Toss it, sanitize the container, and start again.
Quick reference: salvage or discard?
| What you see or smell | What it likely is | Action |
|---|---|---|
| Fine white fuzz right at seed base, no smell | Probably root hairs | Watch and wait, no action needed |
| Fluffy white or gray surface mold, mild smell | Early surface mold | Rinse, air dry, reduce watering, move to brighter spot |
| Black spots anywhere on grass or soil | Advanced black mold | Discard the entire tray, sanitize container |
| Sour, musty, or rotten smell | Bacterial or widespread fungal activity | Discard immediately, do not let cat eat from it |
| Mold only on top layer of soil, grass looks healthy | Surface mold before grass is affected | Carefully remove top layer, rinse grass, increase airflow |
When in doubt, discard. Cat grass is inexpensive and fast to regrow. It's not worth the risk of letting your cat eat from a moldy batch, especially since some mold species can cause digestive issues.
Harvesting, storing, and setting up your next batch
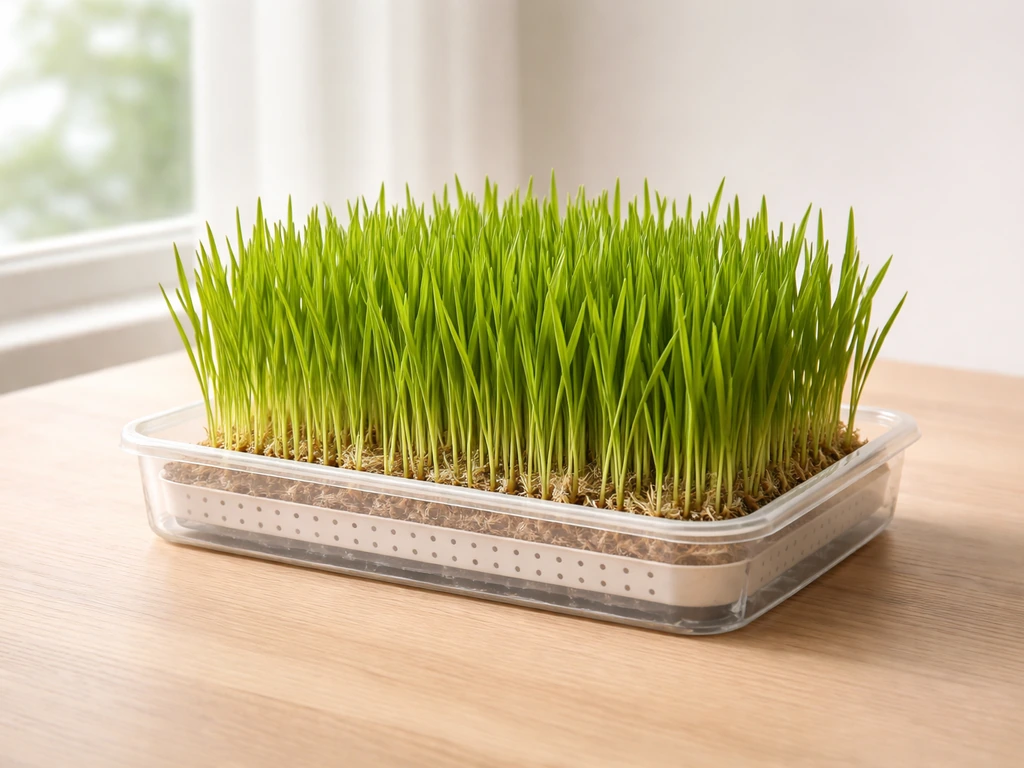
Cat grass is typically ready to eat once it reaches about 4 inches tall, which usually happens 10 to 14 days after sprouting. You don't need to cut it before offering it to your cat. Most cats will graze directly from the tray. If you want to harvest it for storage, cut what you need with clean scissors and keep it in an open container (not sealed) at room temperature, away from direct sun. Sealed storage traps moisture and encourages mold even on harvested grass.
A growing tray stays usable for about 1 to 3 weeks after it reaches full height, as long as you keep up daily misting and it stays in good light. Once the grass starts yellowing, lying flat, or smelling off, that batch is done. Compost the soil and grass, sanitize the tray, and start your next batch.
The best habit to develop is a staggered planting cycle. Start a new tray every 7 to 10 days so you always have a fresh batch coming up while the current one is being grazed. This way you're never scrambling after a batch goes bad, and you're always working with fresh media rather than reusing soil that's getting old and increasingly mold-prone.
Each time you start a new batch, do the full sanitize-rinse-dry routine on your container. Use fresh growing media every time, not leftover soil from the previous tray. Old soil can carry dormant mold spores from the previous batch even if the last round looked clean. Starting fresh each time is the single biggest thing you can do to prevent recurring mold problems.
Once you've got this process down, growing mold-free cat grass becomes genuinely easy. Once you know the basics, you can follow a simple routine to grow cat grass that stays fresh and mold-free growing mold-free cat grass. The learning curve is mostly about figuring out the right watering frequency for your specific home environment, since humidity and airflow vary a lot from house to house. Give yourself two or three batches to calibrate, and you'll have a reliable system that keeps your cat in fresh grass year-round.
FAQ
How can I tell root hairs from mold on my cat grass when I’m trying to grow cat grass without mold?
If you see fuzzy white growth that looks like threads attached to the sprouts and the pieces move or stretch as the grass grows, it is usually root hairs. True mold is more powdery or fluffy, clumps on the surface, and tends to keep spreading. Use a quick sniff test and, if needed, reduce moisture and increase light for 24 hours before deciding.
Can I cover the tray with plastic wrap to help germination without causing mold?
Yes, a sealed plastic wrap or dome can cause mold if it traps too much humidity. If you use a cover, keep it loose, leave a gap for air exchange, and switch to just airflow and light as soon as sprouts emerge (around day 3). Avoid placing the tray in a cold spot under the cover, because condensation will form on the surface.
What’s the best watering method to prevent mold, misting or pouring?
Misting is safer than pouring in early stages because it keeps the surface barely damp instead of constantly wet. Only water from the base after the soil surface has dried slightly, and press a fingertip into the media first. If it still feels moist, skip watering that session, even if it’s been “about a day” since the last misting.
Why does mold keep coming back even after I change the seeds?
If mold returns right after you start a new batch, the growing medium and tray are not the only suspects. Check for shared tools (scoops, spray bottles, saucers) that were not sanitized, and confirm the tray has real drainage holes. Also verify that your saucer is not overflowing, since standing water can wick back into the media and keep it wet.
Does the type of water (tap vs filtered) affect mold risk in cat grass?
Tap water is usually fine, but very hard water or water with high mineral content can leave residues that make it harder for the surface to dry evenly. If you notice persistent weird residue, try using filtered water for the next batch and keep misting lighter than you think you need. Always prioritize airflow and not overwatering over water type.
I live in a humid apartment, what should I do differently to grow cat grass without mold?
Start with drainage first. Place the tray where it can dry between mistings, and avoid corners or shelves where airflow is blocked. If your room is consistently humid, use a small fan on low pointed near the tray, not directly at it, and keep it running for part of the day so the surface cycles through drying.
If I can smell something off, but I don’t see much mold, should I still throw it out?
Don’t treat smell like a minor warning. If it is sour, musty, or unpleasant, discard immediately, even if you only see small patches of fuzz. Once odor appears, the issue likely extends through the media, and rinsing will not reliably remove the underlying fungal or bacterial activity.
How should I store harvested cat grass so it doesn’t get moldy?
For storage, avoid sealed containers. If you cut extra grass, store it in an open container at room temperature and keep it away from direct sun, you can lightly ventilate or loosely cover with a breathable cover. Sealed storage traps moisture and commonly leads to mold even after the tray was clean.
What should I do if my cat grass sprouts but then stalls and gets fuzzy?
If sprouts stop growing and the surface stays damp or develops heavy fuzz, it usually means the seeds were too wet for too long, the media is compacted, or the seeds are old. Replace the media with a fast-draining sterile mix, sanitize the tray, and mist lightly instead of pouring until the grass is established.
Can I grow cat grass without mold in water or hydroponics, and what extra precautions matter?
Yes, but only if the setup maintains cleanliness and controlled moisture. For water-based growing, use clean containers, rinse the base materials between batches if your system allows it, and ensure you are not leaving stagnant water. The same principles apply, keep conditions from staying wet and still for days.
Next Article
What to Grow Cat Grass In: Best Planter Setup
Learn what to grow cat grass in, best planter and soil, drainage, and step-by-step care for mold-free sprouts.