Cat grass is one of the easiest things you can grow at home, and your cat will thank you for it. The whole process from seed to snackable grass takes anywhere from 5 to 10 days indoors, costs almost nothing, and requires zero gardening experience. Whether you're growing a small tray on a windowsill or a patch outdoors, the method is straightforward once you know the few things that actually matter: seed choice, moisture control, and light. Everything else is flexible.
How to Grow Cat Grass From Seed Indoors and Outdoors
Marcus Tillwell
3 Apr 2026
Choosing the right cat grass seeds and where to grow it
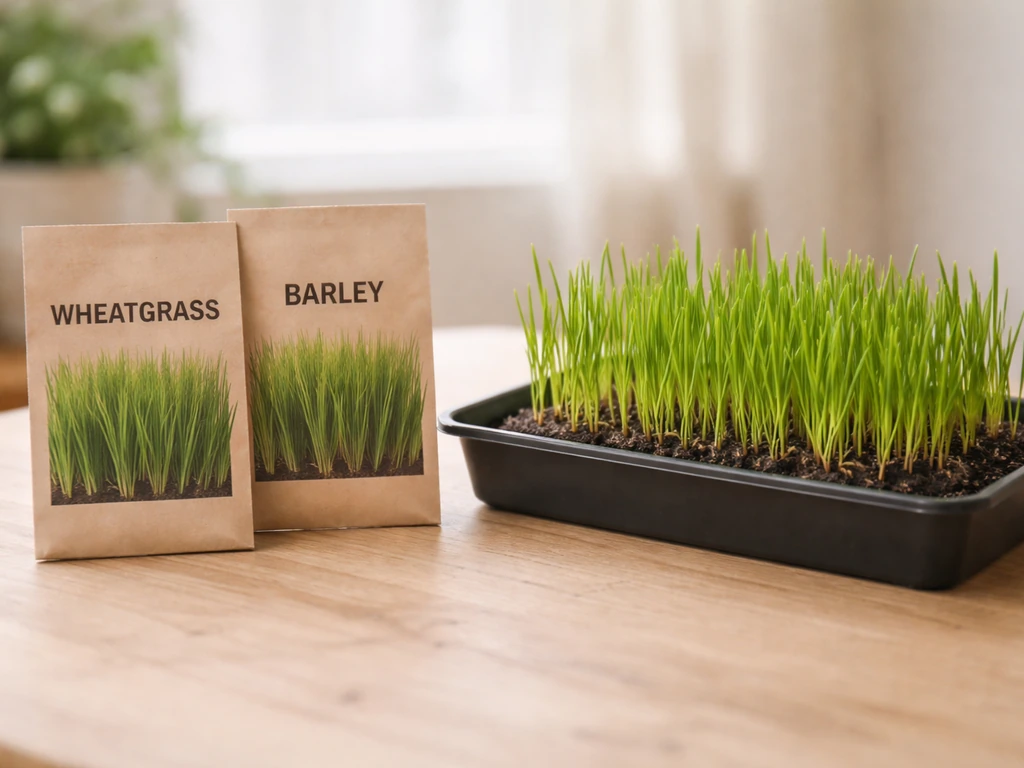
Cat grass isn't a single species. It's a catch-all term for fast-growing cereal grasses that are safe for cats to chew, including wheatgrass (Triticum aestivum), barley (Hordeum vulgare), oat grass (Avena sativa), and rye (Secale cereale). Most commercial blends contain more than one of these. Ivan's Cat Grass, for example, is an equal blend of all four. The Catit kit uses barley and wheat. Any of these work well, and blends tend to give you a fuller, more resilient tray.
If you've searched for how to grow catit grass or catit seeds specifically, the same principles here apply directly. You can apply the same approach to Trixie-style cat grass kits as long as you use untreated, pesticide-free cereal grass seeds how to grow catit grass. Catit, Ivan's, Pet Greens, and other branded products are all just packaged cereal grass seeds with slightly different blends. You're not locked into any particular kit. Bulk wheat or barley seeds from a feed store or online retailer work just as well and cost a fraction of the price. Just make sure they're untreated and pesticide-free.
When it comes to the container, the shape matters more than you'd think. Shallow trays with 1 to 2 inches of growing medium are ideal. Deep planters hold excess water at the root zone, which increases the risk of soggy roots and mold. A standard nursery flat, a plastic food container, or a simple terracotta saucer all work well. For people who want to experiment beyond regular soil, what to grow cat grass in covers a range of container and medium options worth considering.
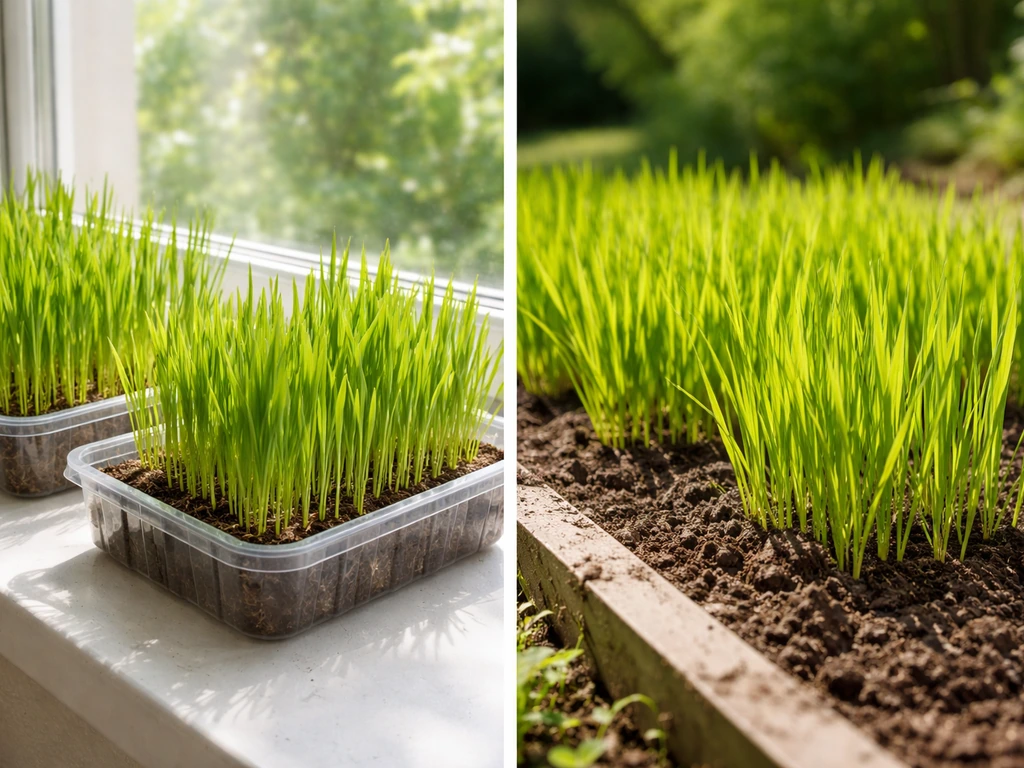
Best way to grow cat grass: indoor vs outdoor setup
Most people do best growing cat grass indoors in a tray, and that's the setup I'd recommend as your go-to. You control the conditions, the grass grows fast, and you can stagger multiple trays to keep a continuous supply going. Outdoors is possible and works in warm seasons, but you're at the mercy of rain, temperature swings, and pests. Here's how the two setups compare directly:
| Factor | Indoor Tray | Outdoor Soil Patch |
|---|---|---|
| Setup time | 5 minutes | 15–30 minutes (soil prep) |
| Germination time | 3–5 days | 5–10 days (weather dependent) |
| Ready to eat | 6–10 days | 10–14+ days |
| Mold risk | Moderate (manageable) | Lower (better airflow) |
| Pest risk | Very low | Higher (birds, insects) |
| Year-round use | Yes | No (seasonal) |
| Growing medium | Potting mix or coconut coir | Garden soil (well-draining) |
| Watering control | Easy | Harder in rain |
| Best for | Most cat owners | Outdoor/patio cats in warm climates |
Indoor trays win on speed, reliability, and convenience for most people. If you want to go deeper on how to grow grass indoors for cats, that article covers light setups and medium choices in more detail. For outdoor growing, the main advantage is natural airflow, which does reduce mold. But for consistent results year-round, stay indoors.
How to grow cat grass from seed (step-by-step)
This is the method I've found most reliable. It works with any cereal grass seed blend, any shallow tray, and either potting mix or coconut coir as your growing medium.
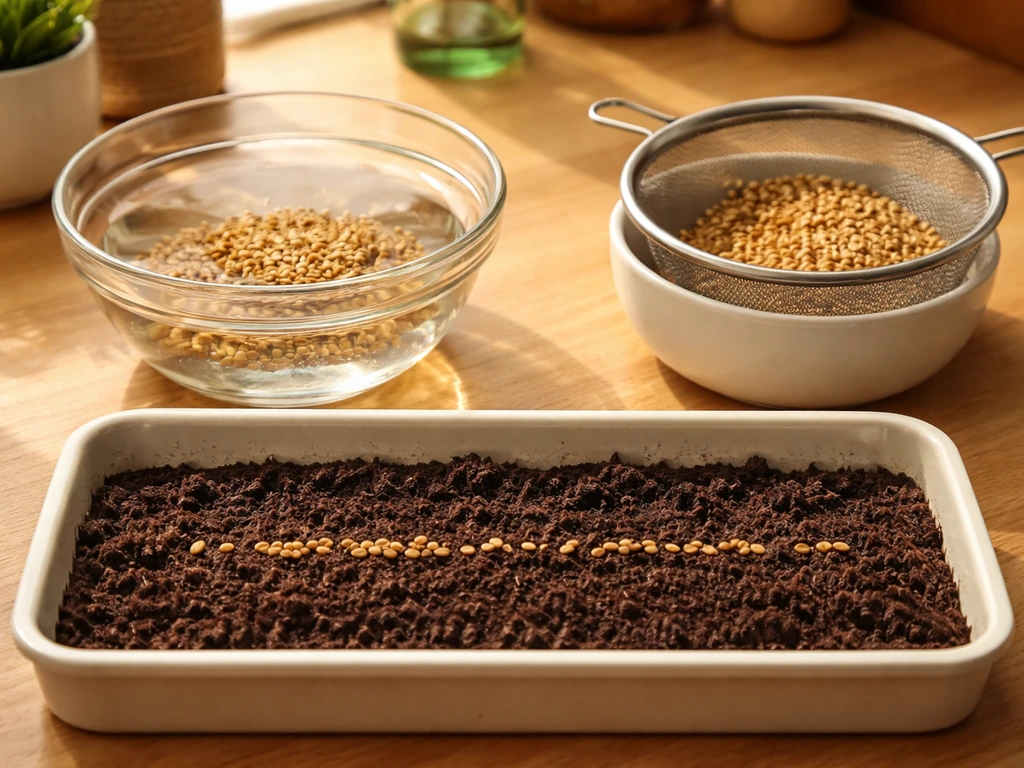
- Soak your seeds in cool, clean water for 6 to 12 hours before planting. This softens the seed coat and speeds up germination noticeably. Just cover the seeds in a bowl of water and leave them on the counter overnight.
- Fill your tray with 1 to 2 inches of pre-moistened potting mix or coconut coir. Coconut coir is a great choice indoors because it's sterile, drains well, and resists mold better than standard garden soil.
- Drain your soaked seeds and spread them across the surface of the tray in a dense, even layer. You want good coverage without piling seeds on top of each other in thick clumps, which traps moisture and promotes mold. Think of it like evenly covering a baking sheet.
- Press the seeds lightly into the surface so they make good contact with the medium. You don't need to bury them deeply — just enough that they're not rolling around.
- Mist the surface with a spray bottle until it's damp but not soaked. Then cover the tray with a lid, plastic wrap, or a damp paper towel to trap humidity during germination.
- Place the tray somewhere warm (around 70°F / 21°C is optimal) but out of direct sun for the first few days.
- Check daily. Mist lightly if the surface looks dry. You should see sprouts within 3 days.
- Once sprouts appear (usually day 3 to 5), remove the cover and move the tray to a spot with indirect light — a bright windowsill works perfectly.
- Continue misting or bottom-watering lightly. Your cat grass will be 3 inches tall and ready for grazing in about 5 to 7 days, or up to 10 days for a fuller, denser crop.
Indoor care: light, watering, temperature, and timing
Light is simpler than most people think. Cat grass doesn't need a grow lamp or a south-facing window. Indirect natural light works well, and artificial light (a standard desk lamp or fluorescent overhead) is fine too. What you want to avoid is harsh, direct sun beating down on the tray all day, which dries the soil out too fast and stresses young grass.
Temperature should stay in the range of 64 to 75°F (18 to 24°C) for the fastest, healthiest growth. Most indoor environments hit this naturally. If your home runs cool in winter, avoid placing the tray near a drafty window or on a cold tile floor. A countertop or shelf away from vents and drafts is ideal.
Watering is where most people go wrong. The goal is to keep the growing medium consistently moist, not wet. One method that works well is bottom-watering: set your tray in a plastic saucer or tray, pour about an inch of water into the outer tray, and let the soil absorb it for about an hour, then drain whatever's left. This keeps the roots moist without soaking the surface where mold loves to grow. Don't let the grass sit in standing water permanently. During the early sprouting phase specifically, use a spray bottle to mist rather than pour water directly, which reduces surface moisture and mold risk.
In terms of timing, most cat grass is ready to eat in 6 to 10 days from seed. Some sources quote as fast as 5 to 7 days when conditions are warm and seeds were pre-soaked. The grass will be about 3 inches tall at minimum snacking height, and ideal at 7 to 10 inches if you want a fuller harvest.
Outdoor care: planting in soil, sunlight, and weather adjustments
If you're growing cat grass outside, the same seed varieties work. Choose a spot with partial sun (about 4 to 6 hours of light daily). Full all-day sun in summer can dry out the soil too quickly and stress the young grass. Morning sun with afternoon shade is a great combination.
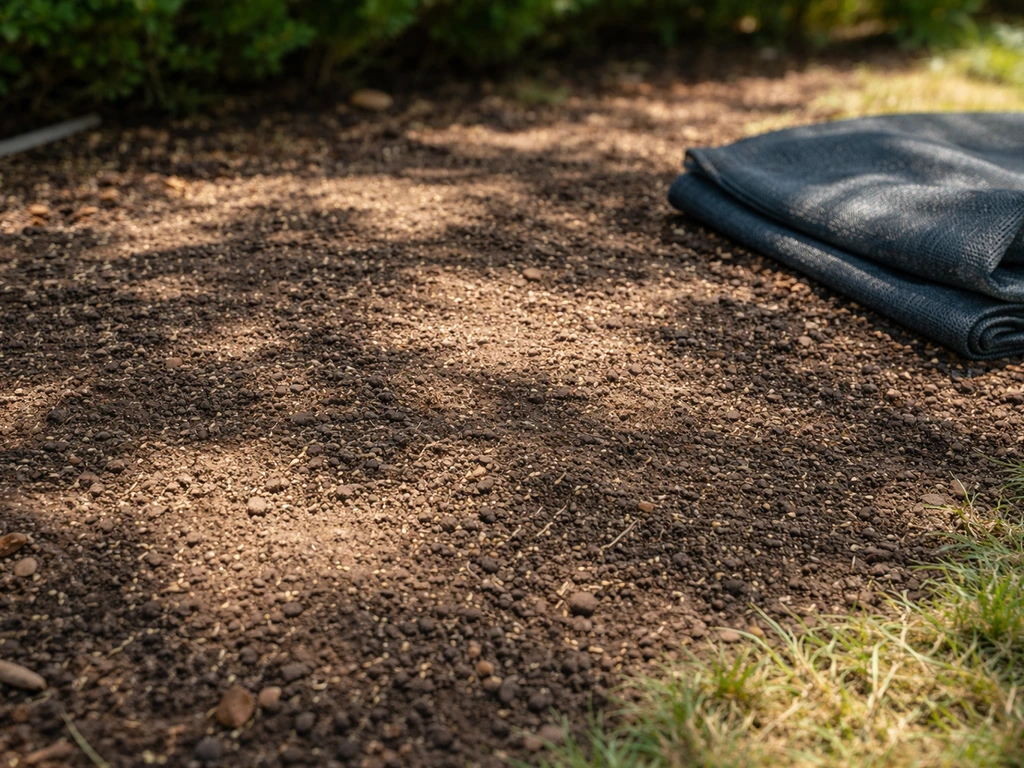
Outdoor soil should drain well. If you're planting in clay-heavy ground, work in some compost or coarse sand to improve drainage. Soggy roots outdoors are just as problematic as in a tray. Sow seeds densely on the surface and water in gently after planting. Keep the area moist during germination, which will take a few days longer outdoors than indoors because soil temperatures and conditions vary.
Rain is your biggest variable outdoors. A heavy rain right after sowing can wash seeds away or compact the soil surface. If rain is in the forecast after planting, cover the patch lightly with burlap or row cover fabric until sprouts establish. Once the grass is a couple of inches tall, it handles moderate rain fine. Outdoor growing works best in spring and early fall when temperatures are mild. Summer heat and winter cold both slow things down significantly.
Troubleshooting problems (no sprouting, slow growth, mold)
Seeds aren't sprouting
If nothing has sprouted after 5 to 6 days, the most common causes are old or treated seeds, a growing medium that's too dry, or temperatures that are too cold. Check the seed source first. Seeds from a feed store labeled for planting are usually fine, but seeds treated with fungicide or pesticide won't germinate properly in a cat grass tray. If the medium has dried out, re-moisten it and cover the tray again to trap humidity. If your home is below 65°F, move the tray somewhere warmer.
Slow or patchy growth
Patchy growth usually comes from uneven seed distribution at sowing. Dense, even coverage across the tray is what gives you that full, lush look. If you've got bare spots, you can spot-sow more seeds into those areas, though they'll be a few days behind the rest. Rotating the tray every day or two also helps ensure all sides get even light, which matters when you're working with a window as your only light source.
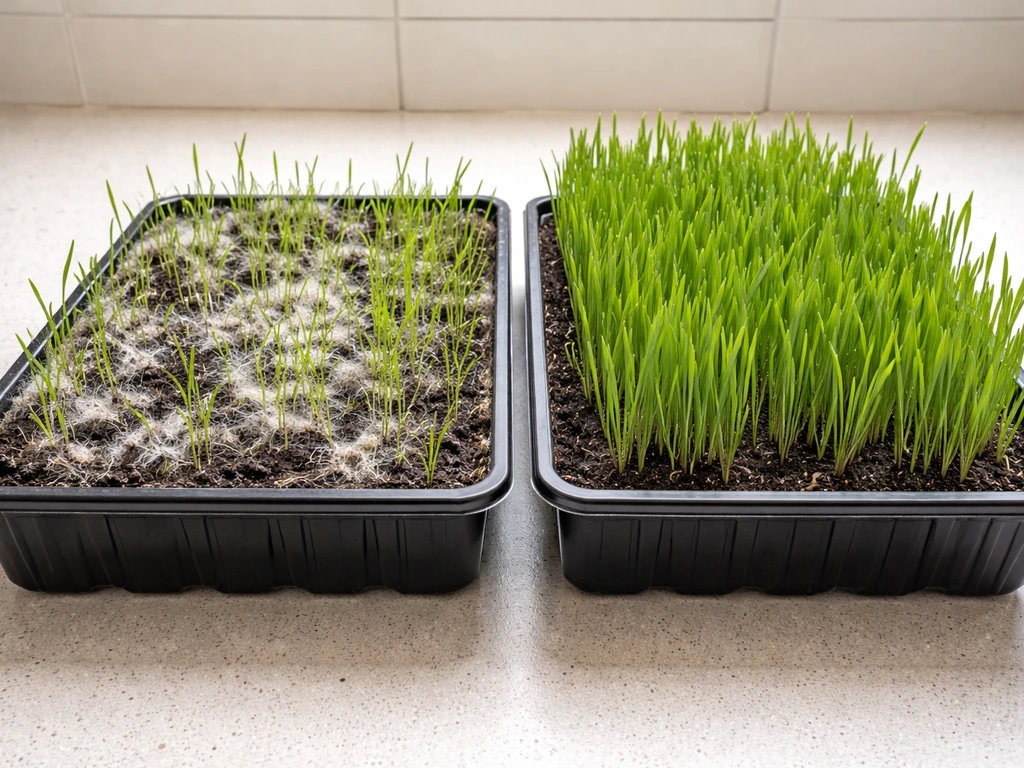
Mold on the surface
Mold is the most common problem with cat grass and it's almost always caused by too much moisture and too little airflow. If you spot white fuzzy mold on the soil surface or at the base of the grass, cut back watering immediately and improve air circulation around the tray. Move it to a spot with better airflow, run a small fan nearby, or just crack a window.
Avoid planting seeds too densely, since clumped seeds create a humid microclimate right at the surface. For ongoing mold prevention, how to grow cat grass without mold has a focused breakdown of the specific steps that actually work. Some people also have success growing without soil entirely to eliminate the mold medium altogether. If that sounds appealing, check out how to grow cat grass without dirt for a practical alternative method.
Overwatering symptoms
Yellowing, limp, or mushy grass at the base is usually overwatering. The fix is simple: stop adding water until the medium has a chance to partially dry out, then switch to the bottom-watering method described above. Iowa State University Extension also recommends using shallow, stable trays that hold a small amount of water to support bottom-watering while still allowing airflow around the sides. If you're checking the drip tray and water is still sitting there after 24 hours, that's a clear sign you're adding too much.
Harvesting, refreshing, and keeping a steady supply for cats
Cat grass is ready to harvest when it's about 3 to 4 inches tall for early snacking, or 7 to 10 inches if you want a bigger cut. To harvest, clip the grass about an inch above the soil line with scissors. This allows regrowth from the same tray, though each successive cut tends to be a bit less vigorous than the first. Most trays give you one to two good harvests before the grass starts to thin out and yellow.
If your cat prefers to graze directly from the tray rather than from cut clippings, that works fine too. Just rotate the tray occasionally so your cat doesn't chew one section down to nothing while the other side stays untouched. This keeps growth more even and extends the useful life of each tray.
The best way to maintain a steady supply is to stagger multiple trays, starting a new one every 5 to 7 days. By the time your cat finishes one tray, the next is just reaching the right height. Two or three small trays in rotation is all it takes. This is much more practical than trying to keep one large tray going indefinitely.
When a tray is spent, the old grass and growing medium can go straight into your compost or garden bed. Rinse the tray, let it dry, and start the cycle again. The whole process becomes quick and routine after the first couple of rounds.
If you want to take things in a different direction, there are some interesting alternatives to the standard soil tray method. How to grow cat grass in water covers a hydroponic-style approach that eliminates soil entirely, and how to grow cat grass hydroponically goes deeper on full hydroponic setups if you want a more permanent, soil-free system. Some people also like branded grow kits for the convenience factor, and if you've got one of those sitting in a drawer, how to grow trixie cat grass walks through using a kit-style setup with the same core principles applied.
The bottom line: cat grass is a low-effort, high-reward project. Soak your seeds, use a shallow tray, keep moisture in check, and you'll have fresh grass for your cat in under a week. Once you've done it once, you'll wonder why you waited.
FAQ
Do I need to soak cat grass seeds before planting to get faster results?
Soak just improves speed and uniformity, but it is not required. If you do soak, do it for about 4 to 8 hours (not overnight), then drain well before sowing. Also note that very old seed may rot faster in a soak, so if you are unsure about freshness, skip the soaking and focus on keeping the top surface consistently moist during germination.
How can I tell if the seeds I bought are safe and will germinate well?
Use treated seeds only for ornamental lawns, not cat grass. If the bag does not clearly state it is untreated and pesticide-free, do not use it. For feed-store bulk seed, look for labels that indicate no fungicide or pesticide coating, and if you are unsure, buy a seed intended for planting rather than general animal feed.
What if I accidentally overwater during the first few days, will my tray recover?
Yes, but you need to be careful about how you remove moisture. After sowing, misting helps, and once sprouts appear you can switch to bottom-watering in short cycles. A good rule is to keep the medium damp to the touch, not slick, and to drain any outer tray water after about an hour. If you see yellow or mushy growth at the base, reduce watering immediately.
Can I harvest multiple times from the same tray, and how do I get the best regrowth?
Trim only what you intend to offer, and avoid pulling the grass out by the roots. Cut about 1 inch above the soil line with clean scissors, then let it regrow. You will typically get best regrowth from the center first if the tray receives even light, so rotate the tray every day or two to keep all sections producing similarly.
My cat grass is uneven, what should I do about bare spots?
Patchiness is usually seed coverage, not a “bad batch” issue. For bare areas, spot-sow additional seeds right after the first sprouts show or during the first week, then mist lightly to re-wet only the top surface. Expect those spot-sown areas to lag a few days behind the rest.
What are the most common reasons no sprouts appear after 5 to 6 days?
If only a few seeds sprout or nothing appears, check seed age and storage first. Next, verify temperature, the most common indoor failure point in winter, and confirm the medium never fully dries out during germination. In cold rooms, move the tray to a warmer spot and keep moisture stable, then give it a few more days before declaring it a failure.
How do I tell normal sprouting growth from mold, and what is the immediate fix?
A white fuzzy film is usually mold, and it tends to spread when moisture is high and airflow is low. Reduce watering right away, improve ventilation (crack a window or add a small fan nearby), and avoid dense clumps where humidity stays trapped. If your tray becomes heavily moldy, it is usually cleaner to discard and start fresh rather than trying to salvage it.
If I don’t have a bright window, will a grow light or lamp change how I should water and manage the tray?
Indirect light is usually enough, but you still want brightness. If you only have a dim room, increase lighting with a desk lamp or overhead fluorescent on a timer instead of relying on a weak window. Keep the tray away from harsh direct sun because it can dry the surface fast and cause uneven growth.
What is the easiest way to ensure my cat always has fresh grass without running out?
For indoor trays, yes. Staggering every 5 to 7 days is practical because it keeps grass at different growth stages and reduces the chance you run out. With two or three trays, you can also harvest smaller amounts more frequently, which often keeps your cat interested and reduces the urge to let a tray overgrow.
My cat eats from the tray, how do I prevent it from being destroyed in one spot?
Most cats do fine grazing directly, but you can reduce “one-sided” chewing by rotating the tray daily and keeping the tray on a stable surface. If your cat consistently digs to the same side, you can also clip harvest from the worn section and leave the rest to regrow, which helps the tray last longer.
Next Article
How to Grow Grass in El Paso TX: Seed, Plant, and Care
Step-by-step guide to grow grass in El Paso: pick Bermuda, Zoysia or fescue, prepare soil, seed timing, watering, fixes.