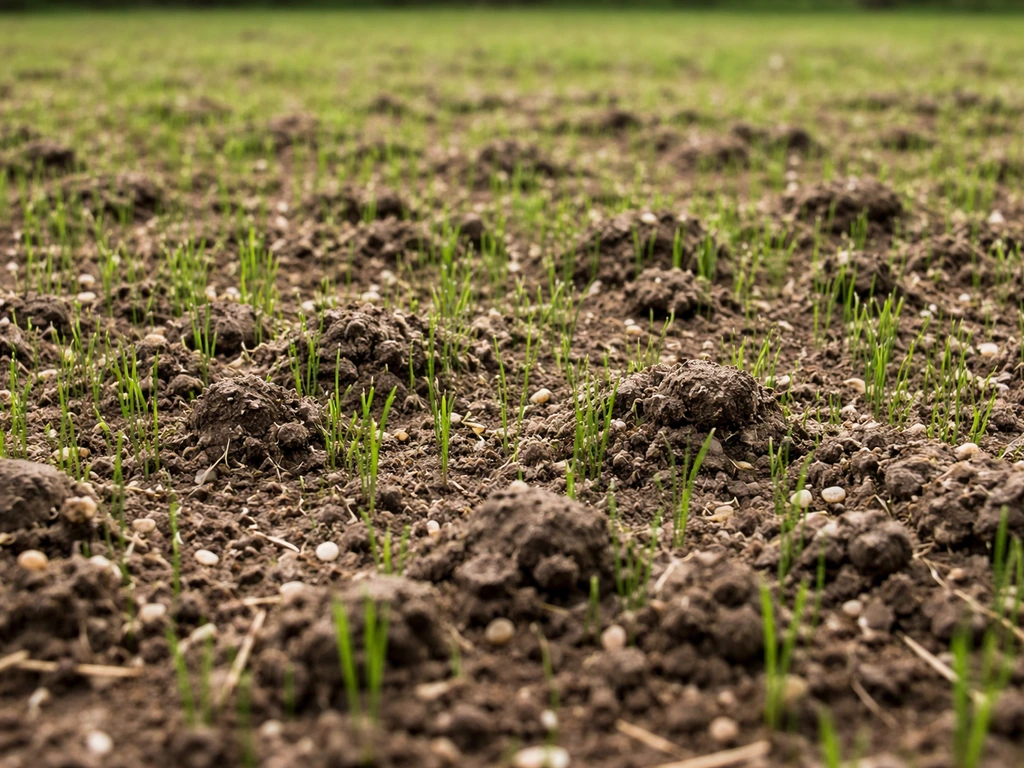
Yes, grass can grow in acidic soil, but whether it thrives depends on how acidic we're talking. Most common lawn grasses do fine at a pH between 5.5 and 7.0. Below 5.5, nutrient availability drops off fast, germination becomes patchy, and even tolerant varieties struggle to fill in. The fix is straightforward once you know your actual pH number: either raise it with lime, choose varieties that naturally handle lower pH, or do both. The step that most homeowners skip is getting a real soil test before buying a single bag of seed or lime.
How to Grow Grass in Acidic Soil: Practical Lawn Guide
Marcus Tillwell
25 Jul 2026
What soil pH actually does to your grass
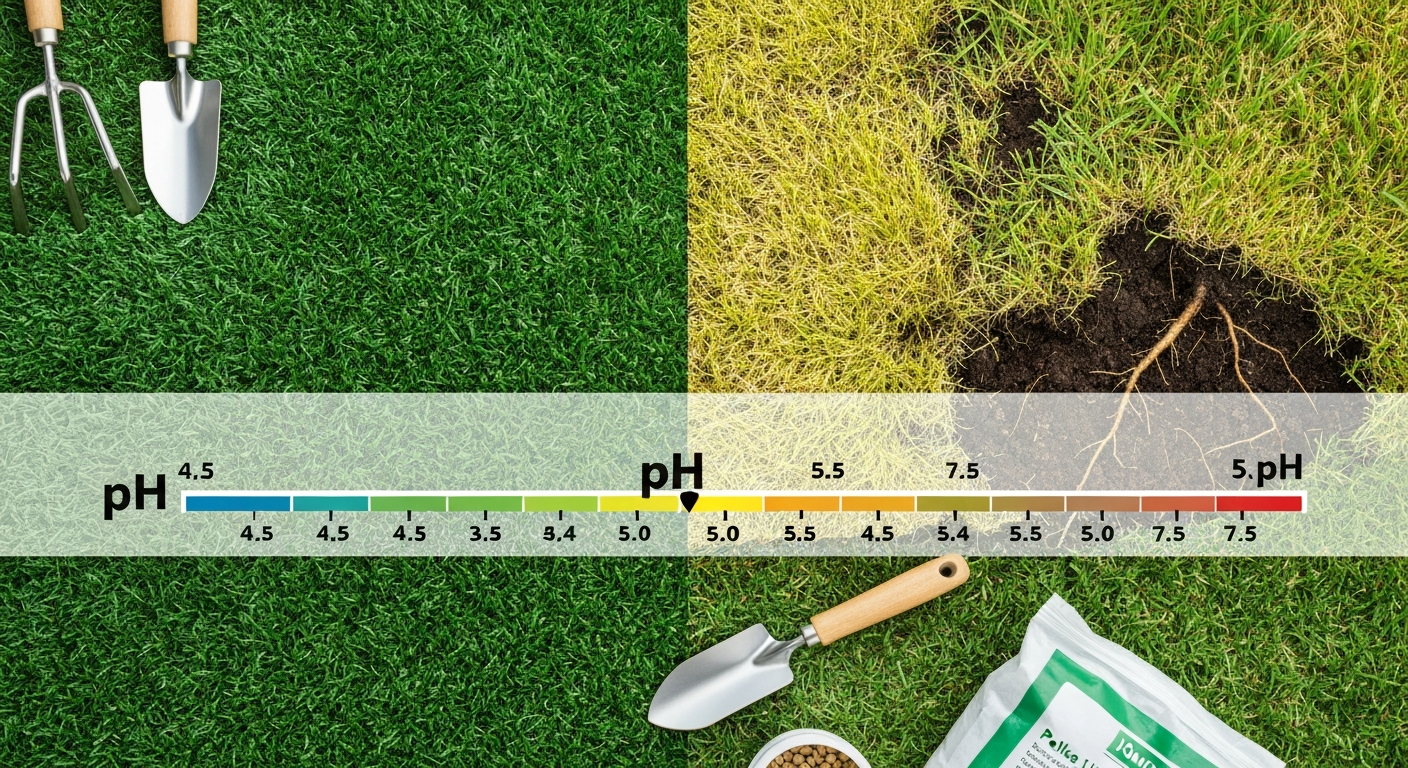
Soil pH is measured on a scale of 0 to 14, with 7.0 being neutral. Anything below 7.0 is acidic, anything above is alkaline. For grass, the pH number matters because it controls how available nutrients are in the soil. At a pH below 5.5, phosphorus becomes tied up in the soil and can't be absorbed even when it's present, aluminum and manganese become soluble at levels that are toxic to roots, and beneficial soil microbes that break down organic matter slow down dramatically. The result is thin, yellowing grass that doesn't respond well to fertilizer because the nutrients are locked out.
Cool-season grasses, the ones most common in the northern half of the country (tall fescue, fine fescue, perennial ryegrass, Kentucky bluegrass), generally perform best at pH 5.5 to 7.0. Warm-season grasses common in the South and transition zone (bermudagrass, zoysiagrass) prefer a slightly tighter window of pH 6.0 to 7.0. There are exceptions: centipedegrass actually prefers quite acidic soil, doing best at pH 5.0 to 6.0. St. Augustinegrass leans the other direction, preferring pH 6.5 to 7.5. Knowing which category your lawn grass falls into changes your target.
| Grass Species | Optimum pH Range | Season Type |
|---|---|---|
| Common/Hybrid Bermudagrass | 6.0–7.0 | Warm-season |
| Zoysiagrass | 6.0–7.0 | Warm-season |
| Centipedegrass | 5.0–6.0 | Warm-season |
| St. Augustinegrass | 6.5–7.5 | Warm-season |
| Tall Fescue | 5.5–6.5 (best at 6.0–7.0) | Cool-season |
| Fine Fescues (creeping red, chewings, hard) | 5.5–6.5 | Cool-season |
| Perennial Ryegrass | 5.5–7.0 | Cool-season |
| Annual Ryegrass | 5.5–7.0 | Cool-season |
For alkaline soils (pH above 7.5), iron and manganese become less available, which causes yellowing known as chlorosis. Lowering alkaline pH is harder and slower than raising acidic pH, and in regions with naturally alkaline soil (parts of the Southwest, Great Plains, and areas with limestone-based parent material), the most practical approach is often to choose grass varieties that tolerate higher pH rather than trying to permanently acidify the soil.
How to test your soil pH before you do anything else
I've watched homeowners dump lime on their lawns without testing first and end up with a pH that's too high for the grass they planted. Testing first is non-negotiable. You have two realistic options: a DIY kit or a professional lab test. Oregon State Extension's Living on the Land: Managing Soil pH notes the tradeoffs between quick DIY pH kits/meters and full lab tests, recommending labs when you plan to adjust pH or before major renovations Living on the Land: Managing Soil pH — Oregon State Extension. Here's the honest breakdown.
DIY pH kits and meters
Inexpensive liquid test kits (around $10–15) and digital pH meters ($15–40) give you a ballpark reading in minutes. They're useful for a quick check to see if you're in the right range or wildly off. The problem is accuracy: both types can be off by 0.5 to 1.0 pH units depending on calibration, soil moisture, and sampling technique. A 1.0 unit error is the difference between 'needs a little lime' and 'needs a lot of lime.' For simply confirming your lawn is in a reasonable range, they work. For calculating how much lime or sulfur to apply, they're not reliable enough.
Professional lab tests: what you actually need for liming decisions
A university extension or private soil lab test costs $15–30 and gives you pH, buffer pH (also called lime requirement), phosphorus, potassium, and often CEC (cation exchange capacity). The buffer pH is the critical number. Two soils can read the same active pH but require very different amounts of lime to reach your target. The reason is that clay-heavy soils and soils with high organic matter have greater buffering capacity, meaning they resist pH changes more than sandy soils. Without the buffer pH measurement, any lime rate recommendation is a guess. Missouri Extension and other land-grant universities are clear on this: use a lab test with a buffer pH result before applying lime to a lawn. See Soils, Plant Nutrition and Nutrient Management, MU Extension for guidance that buffer pH (lime requirement) tests are used to estimate the pounds of agricultural limestone required to reach a target pH, with soil texture and organic matter affecting lime requirement Soils, Plant Nutrition and Nutrient Management — MU Extension.
To collect a good sample: use a clean trowel or soil probe and pull 5 or more cores from across the area you're testing. For an established lawn, go 3 to 4 inches deep. If you're preparing a new lawn area, go 4 to 6 inches. Mix all the cores together in a clean plastic bucket, remove rocks and debris, and fill the sample bag the lab provides. Avoid sampling right after fertilizing or liming. Most university extension offices can point you to their state's soil testing lab, which is typically the most affordable and regionally calibrated option.
Choosing the right grass for your pH and climate
Before you decide whether to amend your soil or just pick a tolerant variety, you need to know your climate zone. Warm-season grasses (bermudagrass, zoysiagrass, centipedegrass, St. Augustine) grow actively in summer heat and go dormant in cool winters. They're suited for the South, transition zone, and warm coastal areas. Cool-season grasses (tall fescue, fine fescue, perennial ryegrass, Kentucky bluegrass) grow best in spring and fall, survive cold winters, and go semi-dormant in hot summers. They're the right choice for the Northern states, Pacific Northwest, and higher elevations.
Getting this wrong means even perfect soil pH won't save your lawn. A homeowner in Georgia trying to grow a perennial ryegrass lawn will fight it every summer. A homeowner in Minnesota trying to establish bermudagrass will lose it every winter. Match the grass to your climate first, then match it to your pH.
Bermudagrass and zoysiagrass: warm-season workhorses
Both bermudagrass and zoysiagrass have an optimum pH range of 6.0 to 7.0, according to Virginia Tech extension data. They don't perform well much below 6.0. If your soil tests in the 5.5 to 6.0 range, you can often get acceptable establishment, but you'll likely see reduced density and color over time. Below 5.5, liming before seeding is worth doing.
Bermudagrass is the most aggressive spreader of the two and recovers quickly from wear, which makes it excellent for pet damage and high-traffic lawns. It needs full sun (at least 6 hours) and goes dormant and brown below about 50°F. Common bermudagrass seed is available and affordable; hybrid bermudagrasses (like Tifway 419) are only available as sod or sprigs, not seed. Seeding rate for common bermudagrass is typically 1 to 2 pounds of hulled seed per 1,000 sq ft. Plant when soil temperatures are consistently above 65°F, which in most of the South means late spring to early summer.
Zoysiagrass germinates slowly from seed, often taking 2 to 3 weeks, and is slow to establish a full lawn. Many homeowners use sod or plugs for this reason. If you go the seed route, use about 1 to 2 pounds per 1,000 sq ft of a seeded zoysia variety, and plant after soil temperatures hit 70°F. Zoysiagrass tolerates shade better than bermudagrass and handles moderate traffic. It's also known for developing thatch over time, so budget for annual dethatching. University of Florida (UF/IFAS) cultivar trials are a useful resource if you want to compare named zoysiagrass and bermudagrass varieties for your specific region.
Establishment tips for both
- Test soil pH and lime to 6.0–6.5 if below 5.8, at least 3 months before seeding if possible.
- Till or loosen the top 4–6 inches and work in 1/2 inch of compost for sandy or degraded soils.
- Apply a starter fertilizer (high phosphorus, such as 10-18-10 or similar) at label rate at seeding.
- Seed with a drop or broadcast spreader, then rake lightly to ensure seed-to-soil contact.
- Water lightly 2–3 times per day to keep the surface moist until germination (10–21 days for bermuda; 14–21 days for zoysia).
- Reduce watering frequency once seedlings are 1 inch tall, and mow first time at 1.5–2 inches.
Tall fescue and fine fescue: the cool-season acid-tolerant options
Tall fescue is one of the most forgiving grasses for a range of soil conditions. It performs best at pH 6.0 to 7.0 but according to Penn State Extension, it can achieve adequate growth on soils with lower pH, making it a reasonable choice when you can't get soil pH corrected before planting season. It handles clay soils reasonably well, tolerates moderate shade, and recovers from drought better than Kentucky bluegrass. Seeding rates run about 6 to 8 pounds per 1,000 sq ft for a new lawn, 3 to 4 pounds for overseeding. Best planting window is late summer to early fall (late August through September in most of the North) when soil is still warm but air temperatures are cooling.
Fine fescues (creeping red, chewings, hard, sheep fescues) are the standout choice for challenging conditions. University of California ANR research documents their superior tolerance of shade, drought, and acidic soils compared to most other turf species. Hard fescue in particular handles pH as low as 5.0 to 5.5 better than almost any other widely available lawn grass. If your soil is acidic and your yard has significant shade, fine fescues are often the most practical answer without any pH correction. They're also low-maintenance and low-fertilizer grasses once established.
One practical note: fine fescues do poorly in high heat and humidity, which makes them poor choices for the Southeast or areas with hot, wet summers. They're best suited to the northern tier of the US, the Pacific Northwest, and higher elevation areas. Seeding rate for fine fescues is about 4 to 5 pounds per 1,000 sq ft in a pure stand, though they're commonly mixed with other cool-season grasses. Germination takes about 7 to 14 days under good conditions.
Getting fescue to germinate in acidic soil
If your pH is in the 5.5 to 6.0 range and you can't lime until after the growing season, starting with fine fescue or a fine fescue blend is a legitimate short-term solution. Apply lime in fall after seeding (it won't harm newly germinated seedlings) and plan to retest in 6 to 9 months. Keep starter fertilizer application modest on acidic soil since phosphorus uptake is restricted anyway until pH improves.
Perennial and annual ryegrass: fast germination, known pH tolerance
Perennial ryegrass is one of the fastest-germinating cool-season grasses available, typically sprouting in 5 to 10 days under good conditions. That speed makes it popular for overseeding bare spots and for quick cover when you need the lawn to look presentable fast. Its pH tolerance range is about 5.5 to 7.0, which puts it in the same comfortable zone as tall fescue. It doesn't tolerate pH below 5.5 well and performs best above 6.0.
Annual ryegrass germinates even faster (often 5 to 7 days) and is cheaper per pound, but it's a temporary solution. It dies out after one season and is commonly used as a cover crop or quick fill while a permanent lawn establishes. Some homeowners in warm climates use annual ryegrass for winter overseeding on dormant bermudagrass lawns to keep green color through winter. The pH tolerance is similar to perennial ryegrass, around 5.5 to 7.0.
Both ryegrasses are less drought-tolerant than fescues and require more consistent moisture once established. In clay soil situations (common alongside acidic conditions), ryegrass will do okay if drainage isn't severely restricted, but it won't mask a waterlogging problem. Penn State Extension recommends using perennial ryegrass in seed mixtures with Kentucky bluegrass or fine fescue for northern lawns rather than as a pure stand, since it can dominate the mix and crowd out the other species during early establishment.
Using ryegrass for bare spots and quick fixes
Perennial ryegrass is particularly useful for bare spots from pet damage, foot traffic, or thin areas from a previous renovation that didn't fully take. Scratch the soil surface, spread seed at 5 to 8 pounds per 1,000 sq ft for bare areas (or 2 to 3 pounds for overseeding into existing turf), press in with a roller or flat board, and water daily until germination. Because it germinates so fast, you can see results within a week in the right conditions.
Raising acidic soil pH with lime
Lime is the standard tool for raising soil pH. The two main types you'll find at garden centers are calcitic lime (calcium carbonate, CaCO3) and dolomitic lime (which contains both calcium and magnesium carbonate). If your soil test shows low magnesium alongside low pH, dolomitic lime handles both. If magnesium is fine, calcitic lime works. Do not use quick lime (calcium oxide) or slaked lime (calcium hydroxide) on lawns: they can burn turf and are a safety risk, as University of Maryland Extension clearly warns.
Lime comes in powdered and pelletized forms. Pelletized lime is easier to spread with a standard broadcast spreader and less dusty to work with. Powdered lime reacts slightly faster. For a homeowner applying lime to a lawn, pelletized is the practical choice. Oregon State University extension research notes that lime quality is measured by its Calcium Carbonate Equivalent (CCE) and fineness, with finer particles reacting faster. Most agricultural lime sold for lawn use has adequate fineness.
Here's the reality about timing: lime is not a fast fix. Oregon State University extension data shows that lime generally takes 3 to 9 months to produce measurable pH change in the tilled zone, depending on particle size, soil temperature, moisture, and buffering capacity. Clay soils take more lime to move pH and react more slowly than sandy soils. The standard advice is to apply lime in fall so winter moisture and freeze-thaw cycles help it work into the soil, then retest in spring. If you're seeding in fall, you can apply lime and seed at the same time without harm.
How much lime to apply depends entirely on your soil test results and the buffer pH measurement. Generic rates you'll see on lime bags (like '50 lbs per 1,000 sq ft') are starting points, not prescriptions. Your soil test report will give you a specific lb/1,000 sq ft rate to reach your target pH. Follow that number. If the pH is severely low (below 5.0), you may need to split applications across two seasons rather than applying a large single dose.
Lowering alkaline soil pH with sulfur
If your soil tests above 7.5 and you're growing grass that needs a lower pH, elemental sulfur is the primary tool. Soil bacteria convert elemental sulfur to sulfuric acid over time, which lowers pH. A commonly referenced homeowner broadcast rate is around 5 pounds of elemental sulfur per 1,000 sq ft, but like lime, the actual rate you need depends on your soil test, target pH, and buffering capacity. Apply it and retest 3 to 6 months later. Elemental sulfur works slowly: soil temperature needs to be above about 55°F for the bacteria to be active, so spring and early summer applications are more effective than fall applications in cold climates.
Ammonium sulfate fertilizer is an alternative that lowers pH more quickly via a nitrification reaction and also supplies nitrogen. It's useful when you want to both fertilize and gradually acidify, but because it adds nitrogen, you need to manage application rates carefully to avoid burning turf or pushing excessive growth. Aluminum sulfate and iron sulfate work faster than elemental sulfur but can cause localized toxicity to turf and are not recommended for broadcast lawn use. Stick with elemental sulfur or ammonium-based fertilizers for routine lawn pH adjustment.
Other soil improvements that matter alongside pH
Acidic soil often comes paired with other problems: compaction, poor drainage in clay soils, or low organic matter in sandy soils. For specific steps to recover turf and re-establish grass on scorched or burnt soil, see our guide on how to grow grass on burnt soil. For specific techniques on dealing with compacted or clay-heavy areas, see our guide on how to grow grass in hard soil. Fixing the pH alone won't give you a great lawn if the soil structure is working against you. For clay soils (which are also common in areas with acidic pH in the eastern US), compost is the most reliable amendment. For region-specific tips on establishing turf in heavy clay, see our guide on how to grow grass on clay soil Australia. For a practical, step-by-step guide on improving heavy red clay and establishing turf, see our article on how to grow grass on red clay soil. For detailed, step-by-step guidance on how to grow grass in clay soil, see our how to grow grass in clay soil resource. Michigan State and Virginia Tech extension guidance recommends topdressing established lawns with 1/8 to 1/4 inch of compost once or twice per year, ideally after aeration. For a new lawn, incorporate a larger volume: roughly 1/2 to 1 inch of compost worked into the top 4 to 6 inches before seeding makes a real difference in germination and early root development. For UK-specific steps on preparing clay soil and choosing suitable grass, see our guide on how to grow grass on clay soil in the UK. For step-by-step methods on improving difficult sites, see our guide on how to grow grass on poor soil which covers compost incorporation, drainage fixes, and species selection.
You may have seen gypsum (calcium sulfate) marketed as a soil amendment that 'fixes' clay or corrects pH. It does neither. According to Oklahoma State Extension and NRCS guidance, gypsum is effective only for sodic soils, where high exchangeable sodium is the specific problem disrupting soil structure. In that specific case, gypsum supplies soluble calcium to displace sodium, which then needs to be flushed out with irrigation. For a typical acidic lawn in the eastern US, gypsum won't change your pH and won't meaningfully improve clay structure unless sodicity is your diagnosed issue. Save the money and buy compost instead.
For shade areas with acidic soil, fine fescues are the practical first choice: they handle both low light and lower pH better than any other common lawn grass. For pet-damaged areas, perennial ryegrass or tall fescue blend repairs well because of fast germination and reasonable wear tolerance. Sandy soils in acidic regions benefit most from compost incorporation, which improves water retention and nutrient holding capacity at the same time it buffers against further acidification.
A timed planting workflow from prep to first mow
- Test soil pH (lab test with buffer pH) at least 6–8 weeks before your target seeding date. Ideally test in summer for a fall seeding, or late winter for a spring seeding.
- Apply lime or sulfur based on lab recommendations as soon as results are back. Work it into the top 4–6 inches if you're building a new lawn; broadcast and water in for established lawn renovation.
- Till or rough-grade the seedbed for new lawns. Incorporate 1/2–1 inch of compost if soil is clay, sandy, or low in organic matter.
- A week before seeding, apply a starter fertilizer (look for high phosphorus: products labeled for new seeding or with a middle number like 18–24 work well) at the package rate.
- Seed at the rate appropriate for your species (see rates in each grass section above). Use a drop spreader for precision or a broadcast spreader for large areas. Cross-hatch pattern: half the seed in one direction, half perpendicular.
- Rake lightly to work seed into the top 1/8 inch of soil, or use a lawn roller to press seed into contact with the soil surface.
- Water lightly 2–3 times per day to keep the top inch of soil consistently moist. Do not let the surface dry out during germination.
- Expect germination in 5–10 days for ryegrass, 7–14 days for fescues, 10–21 days for bermudagrass, 14–21 days for zoysiagrass.
- Once seedlings reach about 1/3 above the target mowing height, mow for the first time. For tall fescue that means first mow at about 3.5–4 inches (target 3 inches). For bermudagrass, first mow at about 2 inches.
- Shift to deep, less frequent watering after seedlings are 2 inches tall: water to a 4–6 inch depth every 2–3 days rather than light daily sprinkles.
Troubleshooting: patchy germination and persistent bare spots
If germination is uneven or bare spots persist two to three weeks after seeding, the most common causes are uneven seed-to-soil contact, surface drying between waterings, seeding into compacted or crusted soil, or soil pH that's still too far out of range for the species. Check your watering: the surface should stay consistently moist, not just get wet once a day. If you see a dry crust forming between waterings, increase frequency or use a light mulch (straw at about 1 bale per 1,000 sq ft works well to hold moisture without blocking light).
For areas that germinated thinly, overseed at half the original rate once the first flush of grass is about an inch tall. Don't wait too long or the established seedlings will shade out new germinants. If large sections simply never came up, check whether the seed label showed a germination rate above 85% (lower-quality seed can be the problem) and whether the area has a drainage issue. Standing water even briefly after rain will kill newly germinated seedlings.
Retest soil pH one year after liming to see how much the pH has moved. In heavy clay soils, don't be surprised if a single lime application moved pH by only 0.3 to 0.5 units. That's normal: clay buffers the change. Plan on a multi-season liming program if your starting pH was significantly low (below 5.5). Each fall application will move you incrementally closer to the target, and the grass will respond visibly to each improvement.
Amend the soil or just pick a tolerant variety? A practical decision guide
This is the core decision most homeowners face, and the right answer depends on three things: how far off your pH is, your timeline, and your budget. Here's how to think through it.
| Situation | Best Approach | Timeline | Approximate Cost |
|---|---|---|---|
| pH 6.0–6.5, cool-season lawn | No amendment needed; seed normally | Immediate | Seed only |
| pH 5.5–6.0, cool-season lawn | Fine fescue or tall fescue; apply lime this fall and retest in spring | Plant now, full correction in 6–9 months | Lime: $20–40 per 1,000 sq ft |
| pH below 5.5, any grass type | Lab test required; lime per test recommendation before or alongside seeding; use fine fescue as short-term cover | Full correction 1–2 seasons | Lab test + lime: $40–80 per 1,000 sq ft |
| pH 6.0–6.5, warm-season lawn | No amendment needed; seed bermudagrass or zoysia normally | Immediate | Seed only |
| pH below 6.0, warm-season lawn | Apply lime per lab test; delay bermuda/zoysia seeding until pH is above 6.0 if possible | Lime 3–6 months before seeding ideally | Lab test + lime: $40–60 per 1,000 sq ft |
| pH above 7.5, any lawn | Choose tolerant varieties; apply elemental sulfur per test; ammonium-based fertilizer as ongoing acidifier | Sulfur works over 3–6 months; ongoing maintenance | Sulfur: $20–40 per 1,000 sq ft |
If your pH is only slightly off (within about half a unit of the target), just seeding a tolerant variety and applying lime or sulfur at the same time is usually the right call. You don't need to wait for the pH to correct fully before seeding. If your pH is severely low (below 5.0) or severely high (above 8.0), trying to establish a full lawn before correcting it will likely mean wasted seed and frustration. In that case, invest the time in soil correction first, even if it means waiting a season.
Budget also matters honestly. If you're working a large area and lime rates are going to be high due to clay content, you may get a better return on investment from starting with fine fescues (which genuinely tolerate lower pH) and amending gradually over time, rather than trying to apply a large single-season dose of lime. Splitting the improvement across two to three years while growing a tolerant grass is often more practical and just as effective in the long run. The key is to not skip the soil test: it's the cheapest investment you can make before spending money on seed or amendments, and it's the only way to know which scenario you're actually in.
FAQ
Short answer: Can grass grow in acidic soil, and how does that compare to alkaline soil?
Yes — many turfgrasses will grow in mildly acidic soils, but species differ in tolerance. Fine fescues and some tall fescues tolerate lower pH better than most warm‑season grasses; centipedegrass also tolerates moderately acidic soils. Extremely acidic soils (pH < 5.0) reduce nutrient availability and root growth and should be corrected for sustained, high‑quality lawn. Alkaline soils (pH > 7.5) create different nutrient problems (iron, manganese availability) and also limit species choice. For homeowners, decide whether to change pH (lime to raise, sulfur/ammonium fertilizers to lower) or choose a pH‑tolerant species/mixture appropriate for your climate and site.
How should I test and interpret my lawn soil pH?
Collect 5–10 cores or shovel samples from the top 3–4 inches across the lawn (4–6 inches for new bed prep), mix them, air dry and send a subsample to a reputable lab. A lab test that reports both pH and a buffer/‘lime requirement’ will give the lime or sulfur rate needed to reach a target pH. DIY pH kits or meters are okay for quick checks but are less accurate; use a lab test before major renovation or applying lime/sulfur.
What pH ranges do common home lawn grasses prefer?
General optimum ranges (typical): bermudagrass and zoysiagrass: ~6.0–7.0; tall fescue group: ~5.5–7.0 (best near 6.0–7.0); fine fescues: tolerate more acidic soils (can perform at lower pH); centipedegrass: ~5.0–6.0; St. Augustine: ~6.5–7.5. Use these ranges as guidance; local climate and cultivar also matter when selecting seed or sod.
How do I choose seed by pH and climate?
First determine regional climate (cool‑season vs warm‑season) and soil pH. In cool climates/cool‑season lawns: prefer tall fescues, fine fescues, and perennial/annual ryegrass; choose more fine fescue in acidic, shaded, or low‑fertility sites. In warm climates/warm‑season lawns: use bermuda or zoysia if pH is near neutral; for naturally acidic soils consider centipedegrass or acid‑tolerant cultivars if available. When in doubt, favor a blend: for cool regions use a tall fescue + fine fescue mix for acid tolerance and shade; for transitional zones, tailor the mix to sun/shade and pH. Always match cultivar cold/heat tolerance to your USDA zone.
Should I amend soil pH or just plant tolerant varieties?
Decide based on goals and timelines. Short term or small areas: planting tolerant grasses or blends is faster and often adequate. Long‑term quality and broad species options: correct pH to the optimum range for desired species. Also consider whether the pH problem is widespread or localized (pet spots, tree islands) — treat localized spots with specific, small‑scale amendments or choose tolerant repair seed there.
How do I raise pH (apply lime)? What timing and expectations are realistic?
Use agricultural limestone (calcitic or dolomitic) to raise pH. Have a lab provide a lime requirement or buffer pH rate — never guess. Particle fineness and CCE (lime quality) affect speed; finer and pelletized products act faster. Lime should be applied at recommended rates and worked into the topsoil when possible (during renovation or before seeding). Expect measurable pH change to take months (often 3–9 months) depending on soil texture, organic matter and application method; fall is generally the best season to apply lime so it reacts before spring seeding.
Next Article
How to Grow Grass on Poor Soil: Step-by-Step Fixes
Fix poor soil step by step: test, amend, aerate, seed correctly, and troubleshoot thin, patchy grass fast.