You can grow grass in hard, compacted soil, but you have to fix the soil first. Dropping seed on concrete-like ground and watering it is almost always a waste of time and money. The soil needs to be loosened, amended, and prepped so roots can actually push through and water can reach the seed. Once you do that work, the right grass type will establish reliably, even in ground that felt completely hopeless before.
How to Grow Grass in Hard Soil Step by Step Guide
Marcus Tillwell
30 Apr 2026
Why hard soil stops grass from growing
Hard soil is compacted soil, and compaction is the enemy of grass establishment for a few specific reasons. When soil particles get pressed together, the large pores (macropores) collapse. Those pores are what allow water to move down to the root zone and oxygen to cycle between the soil and the atmosphere. When they're gone, water sits on the surface instead of soaking in, and roots hit a wall after just an inch or two of growth.
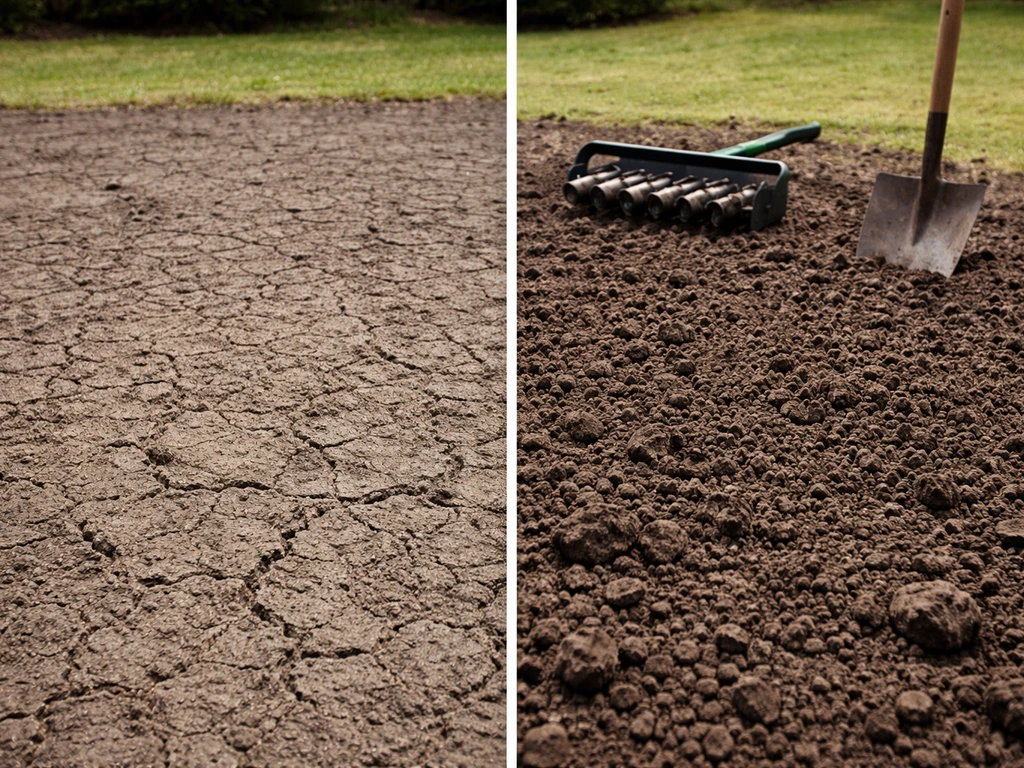
The frustrating thing is that a compacted layer as thin as a quarter to half an inch is enough to seriously block water infiltration, nutrient penetration, and gas exchange. So even if the top inch looks workable, there can be a dense layer just below that's strangling root development. Roots growing into compacted ground face reduced oxygen, which creates anaerobic conditions that further slow growth and impair the plant's ability to absorb phosphorus and other nutrients.
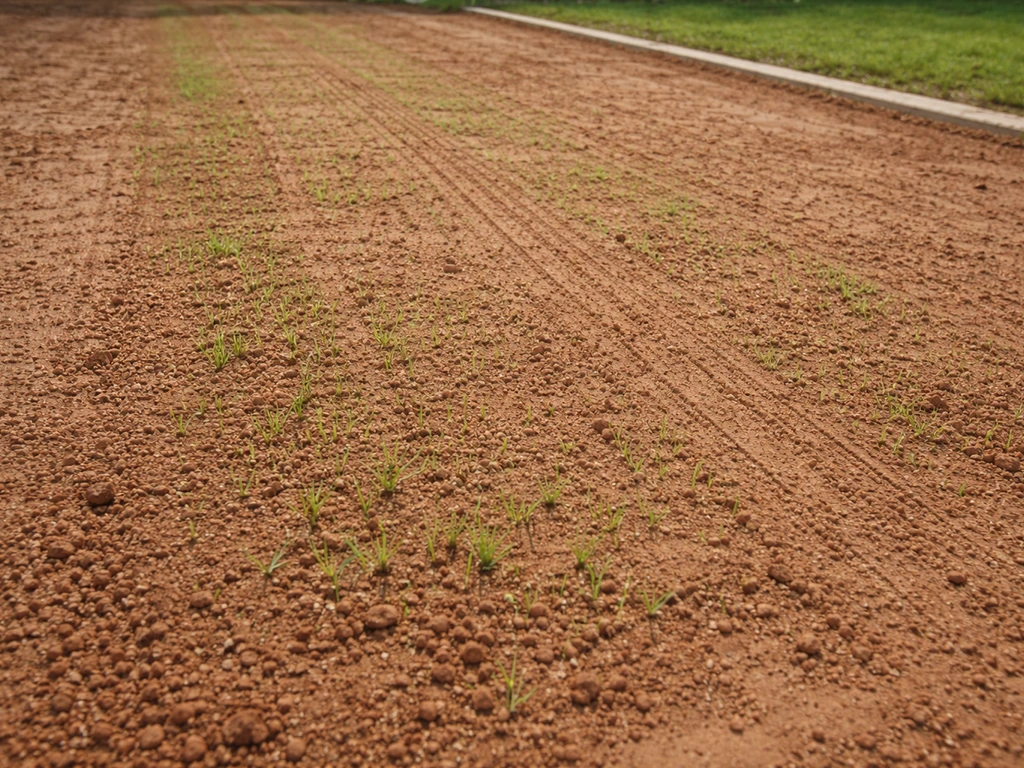
On top of all that, the soil surface on very hard ground often forms a crust after watering. That crust physically blocks seedlings from pushing through, and it causes irrigation water to run off laterally instead of soaking in, leaving the seed zone dry and uneven. This is why grass seeded on compacted ground tends to come up patchy, thin, or not at all.
Quick assessment: how hard is your soil and what it needs
Before you spend money on seed, take 10 minutes to actually diagnose what you're dealing with. The fixes are different depending on severity, and skipping this step is how people end up doing the wrong treatment.
The most accurate tool is a penetrometer (soil compaction tester), which you push into the ground to measure resistance at different depths. You can find basic ones online for under $30. But you can also do a rough test with a screwdriver or a piece of rebar: push it into the soil with hand pressure. If it slides in 6 inches without much effort, your compaction is mild. If it stops at 2 to 3 inches, you've got moderate compaction. If you can barely push it in at all, you're dealing with severe compaction that needs aggressive treatment before seed touches the ground.
Also do a water test: pour a cup of water on the surface and watch. If it soaks in within 30 seconds, infiltration is decent. If it pools for 2 to 3 minutes or runs off entirely, your infiltration rate is very poor, and surface prep is non-negotiable. You should also do a basic soil test through your county extension office if you haven't already, since hard soils often have pH and nutrient problems layered on top of the physical compaction issue.
| Compaction Level | Screwdriver Test Result | Water Pooling | Recommended Fix |
|---|---|---|---|
| Mild | Goes in 5-6 inches easily | Absorbs in under 1 minute | Core aerate + topdress with compost + seed |
| Moderate | Stops at 3-4 inches | Pools for 1-3 minutes | Core aerate twice + compost incorporation + seed |
| Severe | Barely penetrates 1-2 inches | Pools or runs off immediately | Rototill or deep aerate + compost amendment + starter fertilizer + seed |
| Extreme | Cannot push in at all | Complete runoff | Partial soil replacement or deep tillage + full soil rebuild before seeding |
Prepare the seedbed: loosening, compaction fixes, and soil improvement
This is the most important part of the whole process. Everything else (seed choice, watering, fertilizer) depends on getting this right. The goal is to create a seedbed that water can penetrate and roots can push through, ideally to a depth of 4 to 6 inches.
Start light: surface loosening and aeration
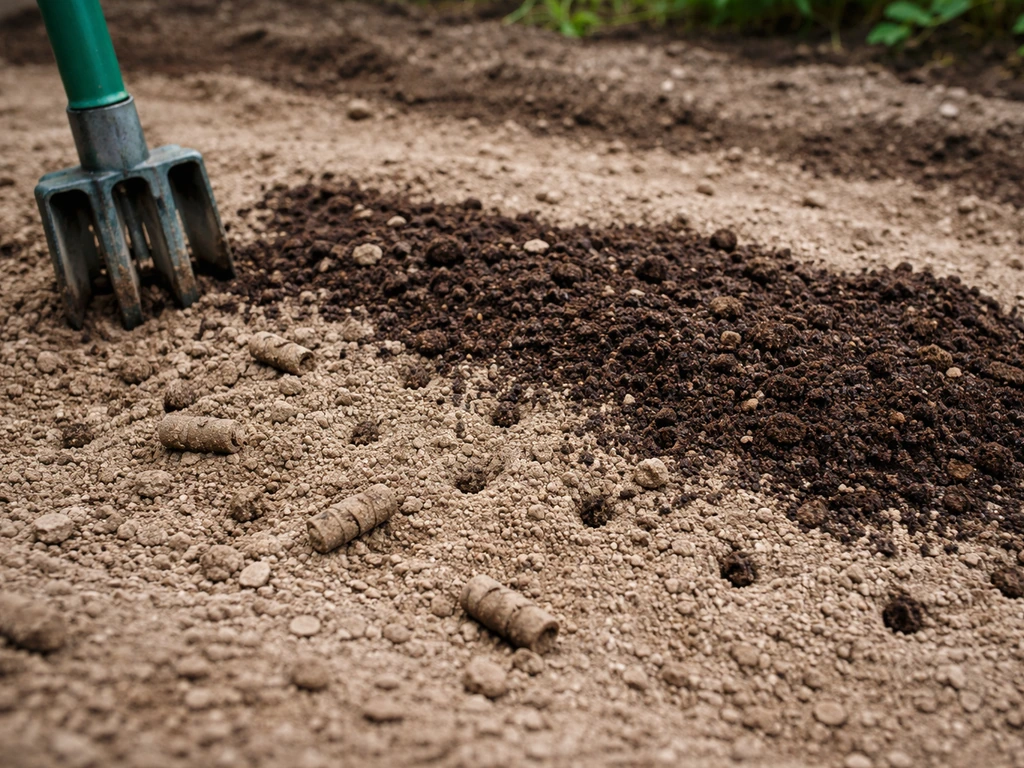
If your compaction is mild to moderate, start with core aeration. Core aeration mechanically pulls plugs of soil out of the ground, leaving holes and cavities that break up compaction and allow water, air, and nutrients to move deeper. Rent a core aerator from a hardware store for around $80 to $100 per day. Make two passes in perpendicular directions for serious compaction. The depth and effectiveness depend on the tine diameter, machine weight, and soil moisture, so water the area a day before if the ground is very dry and hard.
After aerating, topdress with a half inch of finished compost and drag or rake it across the surface so it fills the holes. Compost improves soil structure, adds organic matter that helps bind sandy or clay particles into better aggregates, and feeds the microbial activity that keeps soil loose over time. For mild compaction, this combination (aerate, topdress, seed) is often enough.
Step up: rototilling and compost incorporation for severe cases
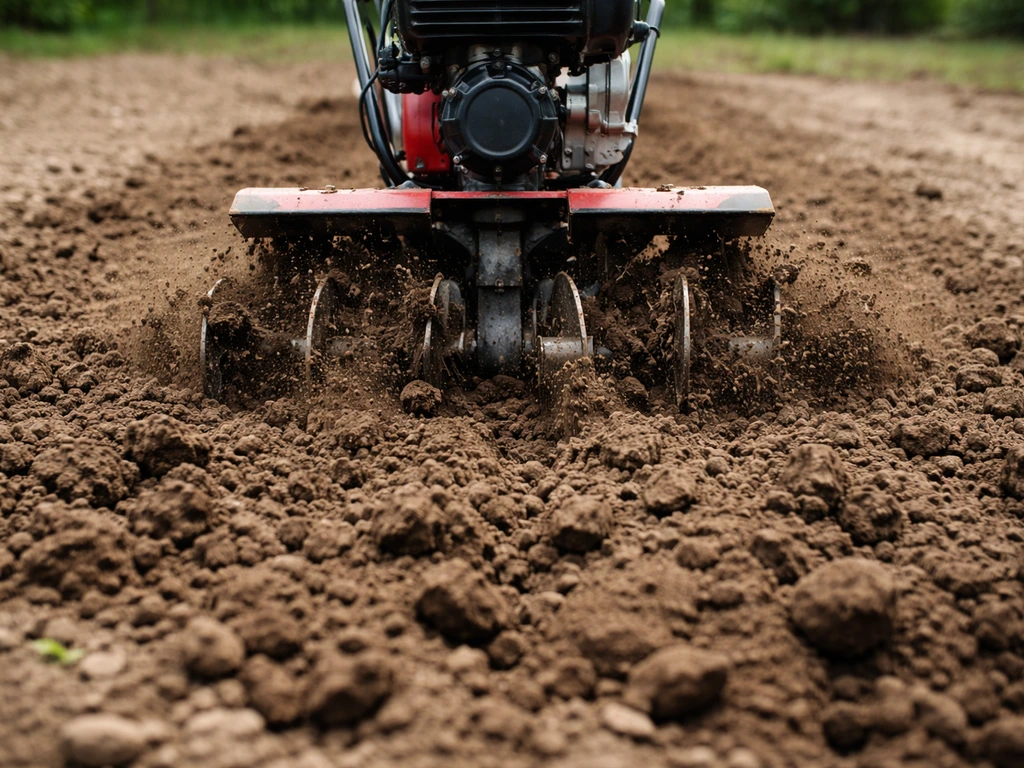
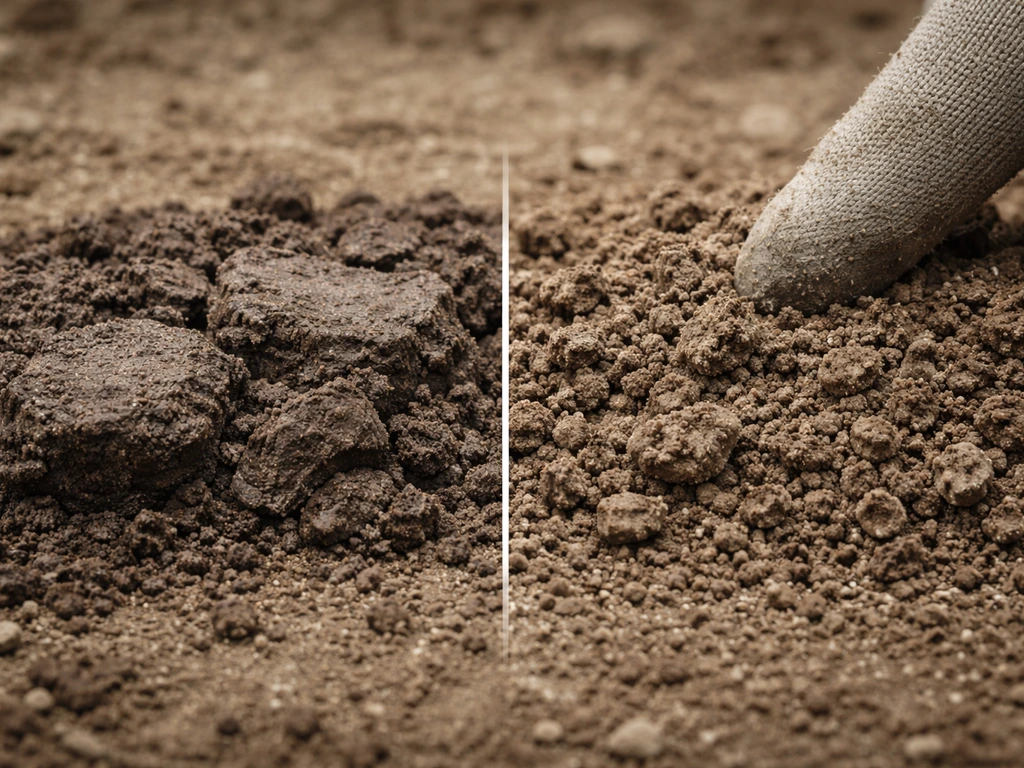
For severe compaction, surface aeration alone won't cut it. You need to break up the dense layer more aggressively. Rototilling to a depth of 4 to 6 inches loosens compacted soil and creates a rooting environment that gives new grass a real chance. If you're going this route, work in 2 to 4 inches of compost before tilling so it gets incorporated into the loosened zone rather than just sitting on top.
After tilling, grade the surface to a smooth, even finish. You want it uniformly settled, not loose and fluffy, because seed dropped into overly loose soil won't make good contact and the surface will settle unevenly later, creating ruts and bare patches. Lightly roll the area or walk it down so the surface is firm but not compacted. One practical tip: if you rake seed into the top quarter inch of soil, it dramatically improves seed-to-soil contact and germination rates.
When to consider partial soil replacement
If you've got ground that a rototiller barely dents, or if you're dealing with heavily contaminated fill soil or crushed stone just below the surface, you may need to bring in topsoil. A 4-inch layer of quality topsoil over the existing ground, graded smoothly and allowed to settle, gives you a proper seedbed without the battle of trying to rehabilitate soil that's fundamentally unsuitable. This is the most expensive option but also the most reliable for extreme cases. It's worth mentioning that hard clay soil situations (especially red clay common in the Southeast) often benefit from this approach.
Choose the right grass type for hard soil
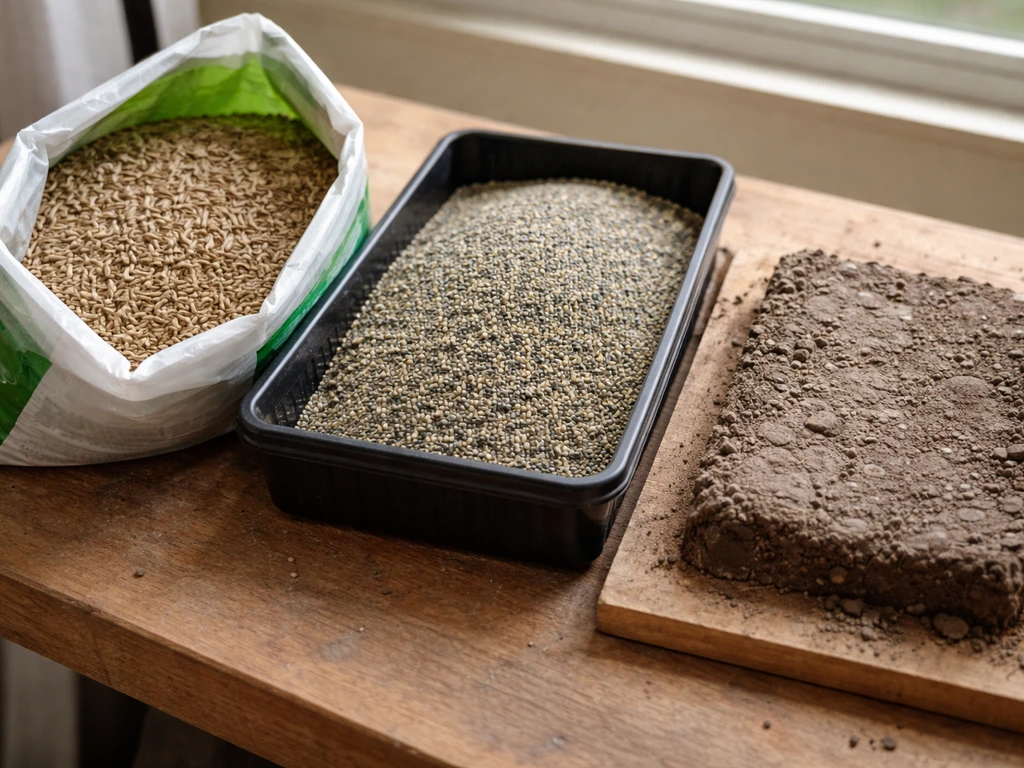
Not all grasses are equally forgiving of difficult soil conditions. Some have deeper, more aggressive root systems that push through resistance better. Some handle the wet-dry cycles of poor drainage better. Here's how to choose based on your climate and situation.
| Grass Type | Best Climate | Sun Needs | Hard Soil Tolerance | Seeding Rate (per 1,000 sq ft) |
|---|---|---|---|---|
| Tall Fescue | Cool-season / transition zone | Full sun to partial shade | Excellent: deep roots push through compaction well | 5-8 lbs |
| Bermudagrass | Warm-season / South | Full sun required | Good once established; needs warm soil (65°F+) to germinate | 1/4-1 lb (hulled) |
| Zoysiagrass | Warm-season / transition | Full sun to light shade | Good drought and compaction tolerance once rooted | 1/4-3 lbs |
| Perennial Ryegrass | Cool-season / mild winters | Full sun to light shade | Fast germination helps in crusting risk areas; shallow roots long-term | 6-9 lbs |
| Kentucky Bluegrass | Cool-season / North | Full sun | Slow to establish; struggles most in compacted ground | 1/2-2 lbs |
Tall fescue is the standout choice for hard or difficult soil in the cool-season and transition zones. Its deep, coarse root system is aggressive enough to push through resistance that would stop Kentucky bluegrass cold. If you're in the South, bermudagrass is the workhorse: once it's established, it's nearly indestructible. Zoysia is a slower option but holds up well under foot traffic and dry conditions, making it practical for lawns that get compacted from use. Ryegrass germinates in as little as 5 to 7 days, which is useful when you need quick ground cover to prevent erosion and crust formation while a slower grass fills in.
Seeding plan: timing, rates, and getting seed into the soil
Timing by grass type
Cool-season grasses (tall fescue, Kentucky bluegrass, perennial ryegrass) establish best when seeded in early fall (late August through October) or early spring. Fall is preferable because soil is warm from summer, air is cooling, and there's less weed competition. Warm-season grasses (bermuda, zoysia) need soil temperatures at or above 65°F to germinate reliably, which typically means late spring through early summer in most regions. Planting warm-season seed too early in cool soil is one of the most common reasons for failed germination on hard-soil lawns.
If you're aerating or tilling to address compaction, time your soil prep about 2 to 4 weeks before your target seeding date. This gives the loosened soil time to settle slightly so you're not seeding into a spongy surface that will shift under foot.
Seeding rates and seed-to-soil contact
Use the correct seeding rate for your grass type. Seeding too thin leaves gaps that weeds fill. Seeding too heavy creates crowding that weakens seedlings. The rates in the table above are good targets, but it's worth understanding the pure live seed (PLS) concept: your bag's actual effectiveness depends on the percent germination and percent purity listed on the label. If a bag shows 85% germination and 90% purity, you're only getting about 76% effective seed per pound. Increase your rate slightly to compensate if those numbers are low.
Seed-to-soil contact is critical and even more important in hard soil situations where the surface can crust. After spreading seed, either rake it gently into the top quarter inch of soil or go over the area with a lawn roller to press seed into the surface. If you are trying to grow grass on burnt soil too, make sure you still prioritize seed-to-soil contact after prepping the surface so germination is consistent. On slopes or areas at risk of washout, apply a thin straw mulch (one bale per 1,000 sq ft is usually right) or a seed germination blanket. This also helps retain moisture, which is your biggest challenge on compacted, crust-prone ground.
Watering and fertilizing for germination in compacted ground
The watering schedule that actually works
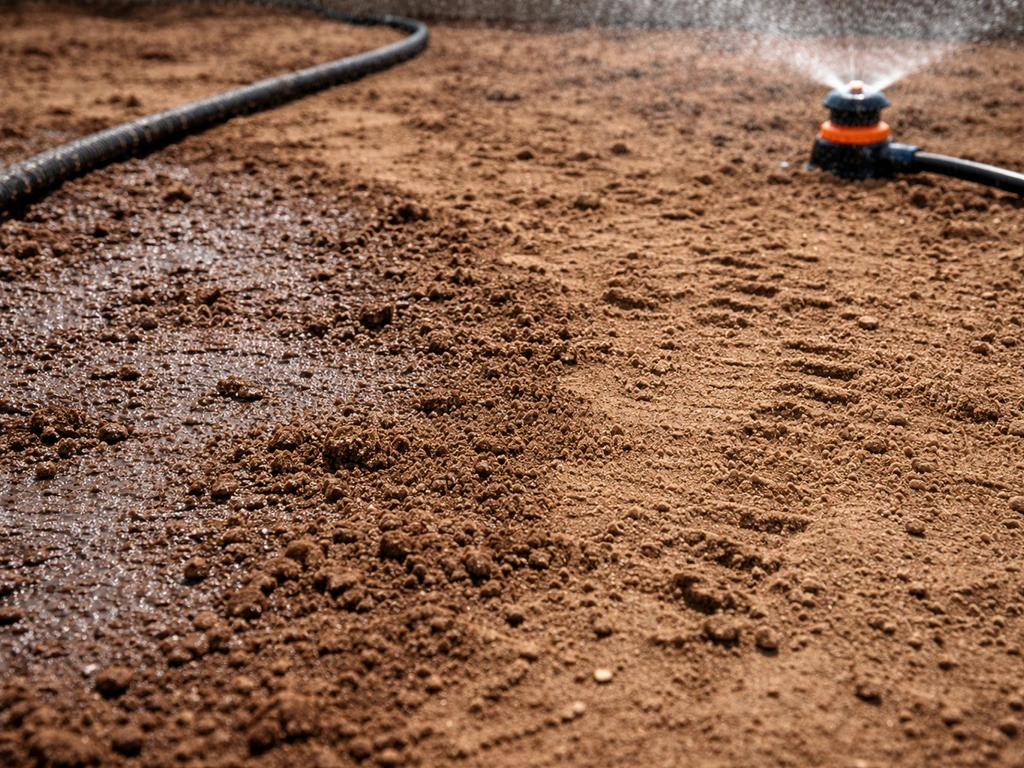
Germination requires consistently moist soil in the top inch. In hard or compacted soil, the challenge is that water doesn't infiltrate evenly: some spots absorb too fast if you've aerated, others barely absorb at all where compaction is still present. The goal is to water lightly and frequently rather than deeply and infrequently during the germination window.
For the first one to two weeks, aim to water two to three times per day in short cycles (about 5 to 10 minutes each), keeping the top inch of soil visibly moist but not saturated or pooling. If water is pooling or running off, that tells you the infiltration rate can't keep up, and you need to split your watering into even shorter cycles with rest periods in between. By about week four, most seedlings have enough root mass to handle deeper, less frequent watering: two times per week is a typical target, but adjust based on weather.
One important note: never let the surface dry out and crust over during the germination phase. That crust can physically block seedlings from emerging, and if seed has already started to imbibe water and begin germination, drying it out will kill it. Also, avoid watering in the evening if you can. Wet leaf blades overnight invite seedling diseases that can wipe out a new stand quickly.
Fertilizing: starter fertilizer and what comes after
Apply a starter fertilizer right before or just after seeding. Starter fertilizers are higher in phosphorus than standard lawn fertilizers because phosphorus supports root development, which is exactly what you need when establishing grass in difficult soil. A good target is a product with roughly equal or slightly higher phosphorus content compared to nitrogen, applied at the label rate. Don't exceed about 5 pounds of phosphate per 1,000 square feet in a single application.
Avoid heavy nitrogen fertilization during the germination phase. High nitrogen before the root system is established pushes blade growth faster than roots can support and can burn young seedlings. Once grass is mowed for the first two to three times (usually 4 to 8 weeks after germination), you can start a standard lawn fertilization schedule appropriate for your grass type.
Maintenance and troubleshooting for patchy or failed establishment
What to do once grass starts coming in
Don't mow too early. Wait until the grass reaches about 3 to 4 inches before the first mow, then cut to no lower than 2.5 to 3 inches (higher for tall fescue: keep it at 3.5 to 4 inches). Mowing too low too early is a stress event for seedlings in soil that isn't fully stabilized yet. Keep foot traffic off newly seeded areas for at least 4 to 6 weeks. Walking on a newly seeded lawn re-compacts the loosened soil before root systems have had a chance to bind the soil structure.
Diagnosing common failure modes
- Seed not germinating at all: Check soil temperature first (warm-season grasses need 65°F+). Then check moisture: if the top inch is dry even an hour after watering, your infiltration is still too poor. Consider slit-seeding directly into aeration holes or re-aerate the area before trying again.
- Patchy emergence with bare spots: Uneven compaction is the usual culprit. Dense spots are blocking water and root penetration. Go back and target-aerate the bare areas, then overseed those zones specifically.
- Water pooling or jetting to low spots: The seedbed isn't level or has areas of much lower infiltration. Break your irrigation into shorter cycles. For persistent pooling, you may need to add compost topdressing to low spots and re-grade slightly.
- Crust forming on the surface: Apply a very thin layer of compost or fine mulch over the seeded area and increase watering frequency. Crust is a sign of low organic matter in the soil surface, which you address with repeated light topdressing over time.
- Grass rooting poorly or looking stressed after establishment: This usually means compaction is still present below the depth you prepped. Core aerate after the lawn is established (for cool-season grasses, do this in early fall; for warm-season, late spring through summer). Repeat annually until soil structure improves.
- Seedling disease or damping off: Tan or brown patches in newly emerged grass, often with a collapsed stem at the soil line. Reduce evening watering, improve air circulation, and avoid overwatering. This is more common when seedlings stay wet overnight.
When to escalate and try again
If you've done surface prep, seeded correctly, and watered carefully but still have widespread failure, don't just overseed on top of it. Re-assess first. Pull a small section of the failed area and look at root depth: if roots barely went half an inch deep, compaction is still the limiting factor. Do a more aggressive aeration or partial till before you try again, and if your first attempt used cheap or old seed, check the germination percentage on the label before reusing it.
It's also worth noting that hard soil issues often overlap with other soil problems. Soils that are dense and hard are frequently also acidic, nutrient-poor, or high in clay, all of which compound the establishment challenge. If your soil is acidic, you may need to adjust soil pH with lime and choose amendments that help grass seedlings get nutrients. If you're dealing with heavy clay specifically, there are additional amendment strategies worth considering beyond what's covered here. If you are working with heavy clay in Australia, focus on improving drainage and soil structure so grass can take root and establish consistently how to grow grass on clay soil in Australia. For a clay-heavy lawn in the UK, you may need extra amendments and a seeding approach tuned to drainage and compaction heavy clay. Similarly, lawns on poor, depleted soils may need more substantial organic matter rebuilding before grass will establish reliably, which takes a different approach than compaction alone.
The honest reality is that most hard-soil lawn failures come down to skipping the prep work. The seed itself is almost never the problem. If you loosen the soil, add organic matter, time the seeding right, and keep moisture consistent through germination, you will get grass to grow, even in ground that looked completely impossible when you started.
FAQ
Can I just spread grass seed on hard soil and rely on watering to soften it?
No. Grass seed will not “grow down through” compacted layers reliably. Instead, the compaction has to be broken up (aeration, tilling, or adding topsoil) so roots can penetrate and water can reach the seed evenly.
How do I know when hard soil is wet enough to aerate or till, but not too wet?
Work the soil only when moisture is in the workable range. If it is bone dry, aerators and tillers do less, and you create clods that reseal. If it is muddy, compaction can worsen because you smear particles and close pore space again. A simple check is that the top few inches should crumble when pressed, not turn to powder or paste.
What should I do if my lawn is hard soil and also has runoff on a slope?
Yes, but only if you address both issues: compaction and drainage. On slopes or areas with runoff, grass seed can wash out before it germinates even if you aerate. Use a thin straw mulch or a germination blanket, and keep watering in short cycles until infiltration improves.
Why does my seeded hard-soil area crust over and fail even though I watered?
A thin crust is common, and it can kill seedlings even if they were already germinating. Avoid letting the top inch dry out, and after seeding you should watch infiltration. If you see crust forming, reduce the time between watering cycles, and consider another light raking step only if seed is still near the surface.
Do soil conditioners or seed-soil additives help with hard, compacted ground?
The short answer is: not reliably. Spraying seed activators or “soil softeners” cannot recreate macropores that collapsed under compaction. Organic matter and physical loosening are what rebuild pore space. If you are using amendments, apply them after aeration or incorporated during deeper prep, not as a substitute for it.
When is overseeding not the right next step after patchy emergence?
If you have severe compaction, overseeding on top usually makes the problem worse because roots stay shallow and seedlings compete with each other in a poor seedbed. Pull up a small section to check root depth, then do targeted aeration or partial tilling, and only then reseed.
Can foot traffic ruin a newly seeded hard-soil lawn even if I prepped it?
Yes. If you see footprints and tire tracks still holding shape after light watering, the soil is likely too loose from excessive tilling or too compacted from traffic. Keep traffic off for 4 to 6 weeks, and if you must access the area, use temporary boards to distribute weight.
Should I fertilize if my hard soil still pools water after watering?
If the ground stays wet on the surface and never absorbs water within a few minutes, fertilizer salts and nutrients are not moving into the root zone. In that situation, focus first on infiltration and soil structure (aeration, topdressing, correcting drainage), then apply starter fertilizer when the seedbed is functioning.
How important is timing for hard-soil lawns, and what goes wrong when I seed too early?
Most cool-season grasses are best seeded in early fall for fewer weeds and better soil warmth. Warm-season grasses need soil temperatures at least about 65°F for consistent germination. If you seed warm-season grass too early, you may get no germination even if you keep the top inch moist.
How long should it take to see results in hard soil, and when should I evaluate success?
Expect a change in coverage based on grass type and conditions. Ryegrass can show quick germination, while tall fescue and other cool-season grasses take longer to establish dense roots. Do not judge the job by day 7 or 10, wait until you can check root depth and look for steady improvement over several weeks.
Next Article
How to Grow Grass in Clay Soil: Seed, Prep, and Care
Step-by-step guide to grow and thicken grass from seed on clay soil, with prep, drainage, watering, and grass choice.