You can grow grass on poor soil, but you have to fix the soil first, not just throw seed at it and hope. Poor soil almost always fails grass for one of a handful of reasons: it's too compacted, drains too fast or too slow, has the wrong pH, or is just starved of nutrients. Once you know which problem you're dealing with, the fix is usually straightforward and affordable. This guide walks you through diagnosing the issue, prepping the ground properly, picking the right grass, and seeding in a way that actually sticks.
How to Grow Grass on Poor Soil: Step-by-Step Fixes
Marcus Tillwell
5 Jun 2026
What 'poor soil' actually means for grass
Poor soil isn't one thing. It's a catch-all term that can mean compacted ground where roots can't penetrate, sandy soil that dries out in hours, heavy clay that puddles and suffocates roots, low-fertility dirt that starves seedlings, or pH so far off that nutrients are locked out even when they're present. Before you spend a dollar on seed or amendments, figure out which of these you're fighting, because the fix is completely different for each one.
Diagnose your soil before you do anything else
You don't need a lab to get a usable diagnosis. Three simple at-home tests will tell you almost everything you need to know.
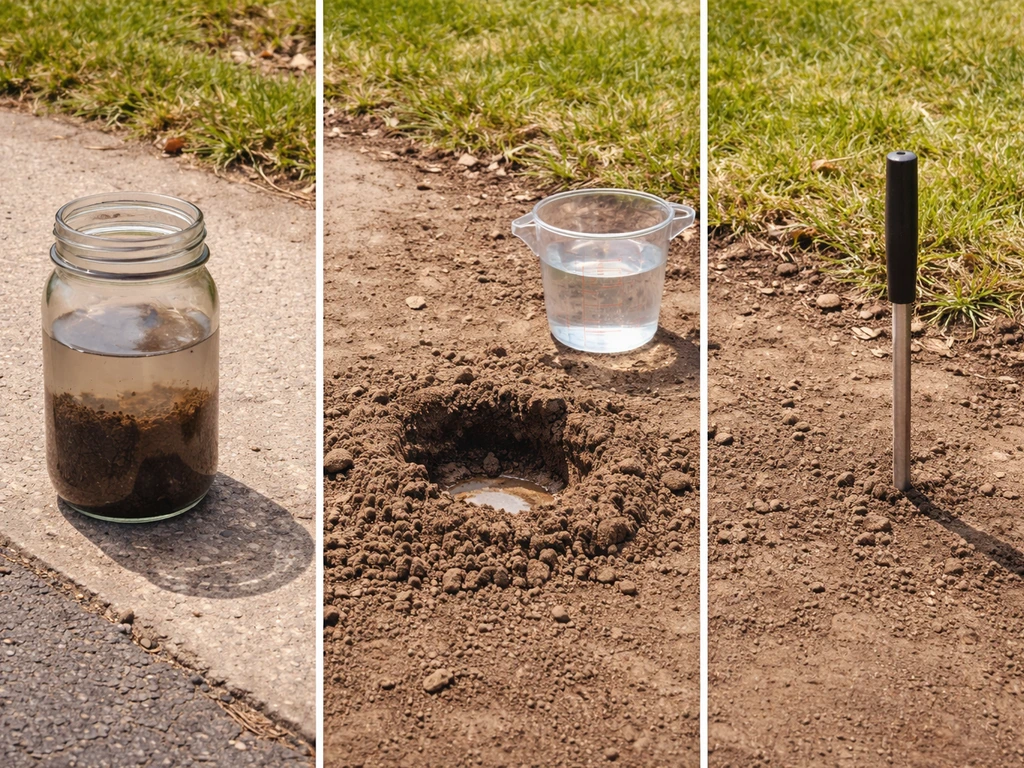
The jar test for soil texture
Fill a clear jar about one-third full with soil from your yard, top it up with water, shake it hard, and let it sit for 24 to 48 hours. The particles will settle in layers: sand sinks first to the bottom, silt settles on top of that, and clay forms the top layer (or stays cloudy). Eyeball the proportions. If more than half is sand, you've got a fast-draining, low-nutrient situation. If the clay layer dominates, expect compaction and drainage problems. This texture difference tells you whether you need to focus on water retention and fertility (sandy soil) or drainage and aeration (clay soil). Clay soil in particular has its own quirks, if that's your main issue, you'll find a much deeper dive in the guide dedicated to growing grass in clay soil. If you want the UK-focused approach, follow the steps in our guide to how to grow grass on clay soil in the UK growing grass in clay soil. If your yard has clay soil, use these same diagnostic steps and tailor your amendments and watering to improve drainage and aeration growing grass in clay soil.
The drainage test
Dig a hole about 12 inches deep and 12 inches wide, fill it with water, and check back in an hour. If water is still sitting there after an hour, you have a drainage problem serious enough to kill grass roots. Good soil drains roughly 1 to 2 inches per hour. This infiltration rate test is simple but revealing, slow drainage usually points to compaction, heavy clay, or a hardpan layer underneath.
The compaction check
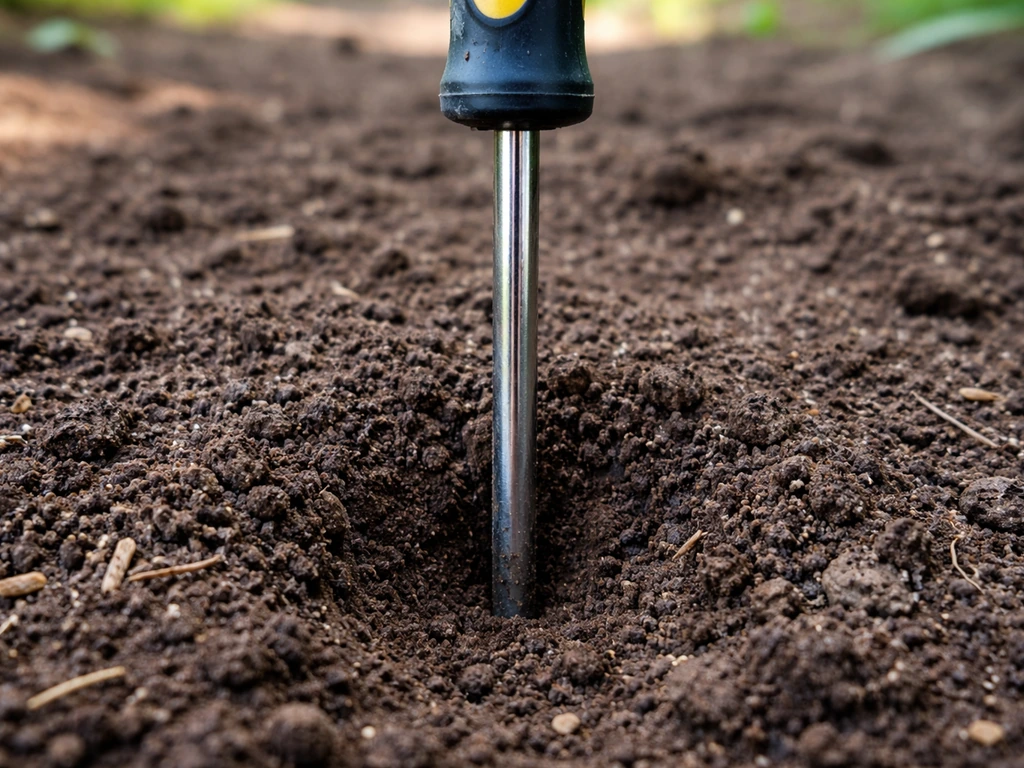
Push a screwdriver or a metal rod into the soil. If you can't push it in at least 6 inches with moderate hand pressure, the soil is compacted enough to prevent good root development. Compaction is especially common in high-traffic areas, in soils that have been wet and driven or walked on repeatedly, and in freshly graded soil after construction. A soil penetrometer gives you a more precise measurement, but the screwdriver test is accurate enough to get started.
pH check
Grab inexpensive pH test strips or a basic meter from a garden center. Both work reasonably well for a ballpark number, though a professional soil test from your local extension office is more accurate and usually inexpensive. Most cool-season grasses want a pH between 6.0 and 7.2, with Kentucky bluegrass preferring the higher end around 6.5 to 7.2. Warm-season grasses are a bit more tolerant of lower pH but still struggle below 5.5. If you're outside that range, nutrients are being locked out of the soil regardless of how much fertilizer you apply, fixing pH is non-negotiable.
Pick the right grass for your conditions
The single biggest mistake people make with poor soil is planting a grass that was never going to work in their conditions even with perfect soil. Matching grass to your climate and soil type gives you a massive head start. Here's how the main grass types stack up for tough soil situations:
| Grass Type | Climate Zone | Soil Tolerance | Best Use Case for Poor Soil |
|---|---|---|---|
| Tall Fescue | Cool/Transition | Tolerates clay, compaction, and moderate drought | Best all-around pick for tough soil in the transition zone and northern states |
| Bermudagrass | Warm | Tolerates sandy, low-fertility, and droughty soils well | Excellent for poor, dry soils in the South — aggressive enough to outcompete many problems |
| Perennial Ryegrass | Cool/Transition | Moderate tolerance — prefers well-drained soil | Good for quick cover; pair with fescue in mixed-seed situations on poor but drainable soil |
| Zoysiagrass | Warm/Transition | Strong drought and heat tolerance once established | Works in poor, sandy, or low-fertility soil but slow to establish from seed |
| Fine Fescue | Cool | Excellent tolerance of low-fertility, sandy, and shady soils | Best option for infertile, dry, or shaded poor soil in northern climates |
If you're in the transition zone, roughly the band from Kansas City to the mid-Atlantic, tall fescue is almost always the most forgiving option. It handles clay, moderate compaction, and moderate drought better than any other cool-season grass. In the South, bermudagrass is similarly bulletproof: it establishes aggressively in lean, sandy, or depleted soil and thickens up fast. Fine fescues are underrated for poor, low-fertility soils in northern climates, especially in shaded areas where other grasses fail completely.
Improve the soil before you seed
Here's what I've learned from watching people try to shortcut this step: soil prep is where the lawn is won or lost. Burnt soil is often just very low in organic matter and nutrients, so boosting it with compost and reseeding in the right season can help the grass get established grow grass on burnt soil. Seed is cheap. The hours you spend amending and loosening the soil are what determine whether you're reseeding bare spots again in 90 days or mowing a full lawn.
Fix pH first

If your pH is below 6.0, apply ground limestone to raise it. Your local extension office or garden center can advise on rate based on your soil test, but a typical starting rate is 50 lbs of pulverized limestone per 1,000 sq ft for moderately acidic soil. how to grow grass in acidic soil. If your pH is too high (alkaline, above 7.5), elemental sulfur or aluminum sulfate will bring it down. The OSU Extension fact sheet notes that elemental sulfur and aluminum sulfate are commonly recommended to lower soil pH, and it recommends monitoring and periodic retesting once the target pH is reached. Elemental sulfur works more slowly but is longer lasting. Apply in the fall if possible so it has time to work before spring seeding. Always retest after a few months to confirm you've hit your target range.
Break up compaction
For a new seeding area, rototill or deeply hand-till to at least 4 to 6 inches. If you're working with an existing lawn that's compacted, core aeration (pulling actual plugs out of the soil) is far more effective than spike aeration for improving air and water movement. For severely compacted or hard soil, it may take two rounds of aeration and amendment before the structure improves enough. If hard, compacted soil is your main issue, there's dedicated guidance on growing grass in hard soil that goes deeper into that specific scenario. If your soil is hard and compacted, focus on breaking up the ground and improving aeration before you seed so roots can establish growing grass in hard soil.
Amend with compost
Compost is the best all-purpose amendment for almost any poor soil. It improves drainage in clay, increases water retention in sand, feeds soil microbes, and adds gentle fertility. Apply 2 to 3 inches of compost across the area and till it into the top 4 to 6 inches. For new seeding areas, this is the minimum investment that makes a real difference. For existing lawns, topdress with 1/4 to 1/2 inch of compost after core aeration, the compost fills the aeration holes and slowly works into the soil profile.
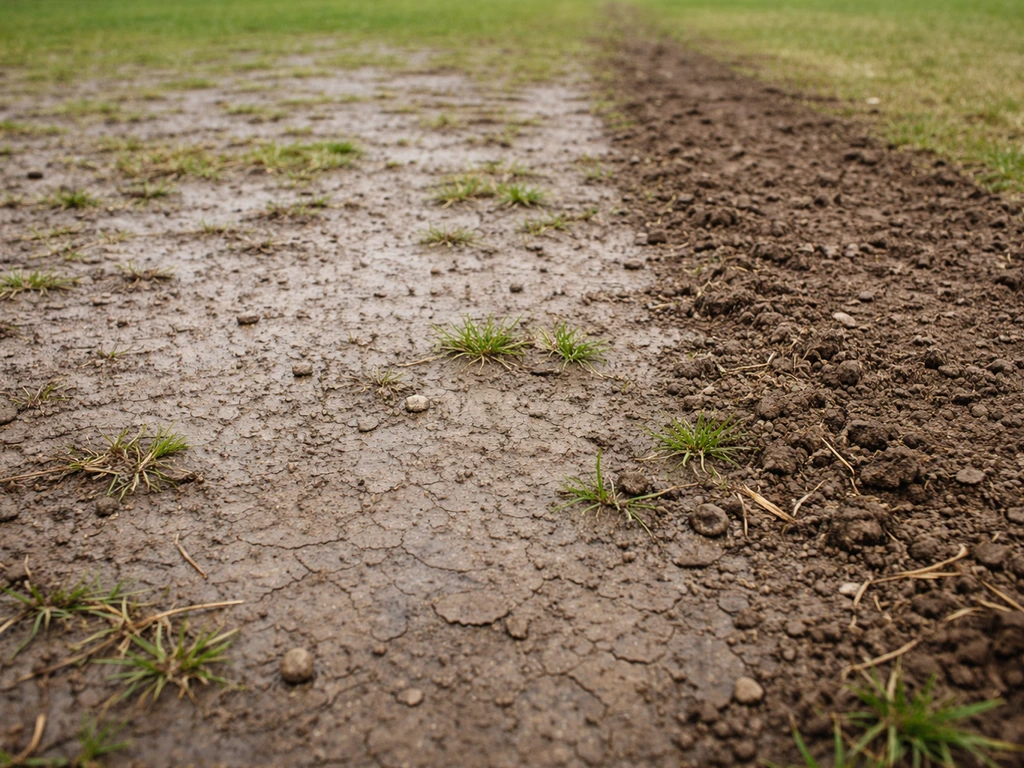
Improve drainage in chronically wet areas
If your drainage test showed standing water after an hour, you may need more than compost. A French drain or simple grading to redirect surface water can be the difference between a lawn that survives and one that rots. For large areas, consult a landscaper. For smaller spots, grading to create a gentle slope (even 1 to 2 percent away from structures) often solves the problem at no cost. Red clay soil presents its own drainage challenges, that's a situation worth reading about separately if you're dealing with it specifically. Red clay soil often needs targeted drainage fixes, so review the full guide on how to grow grass on red clay soil.
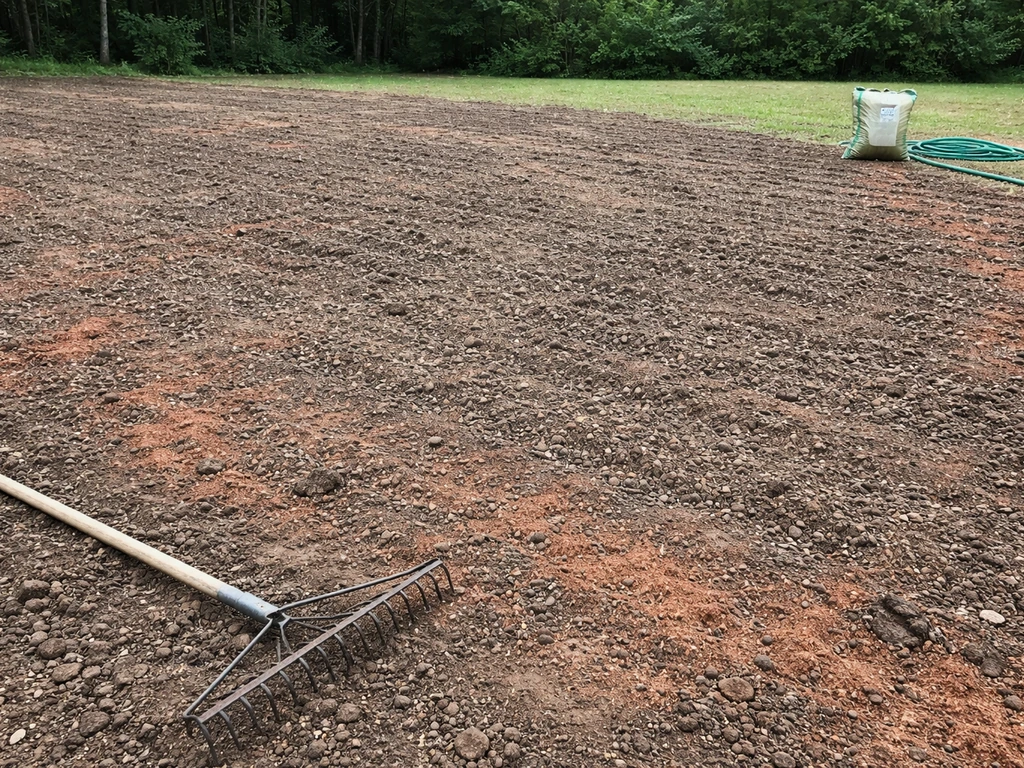
Build a seedbed that actually works
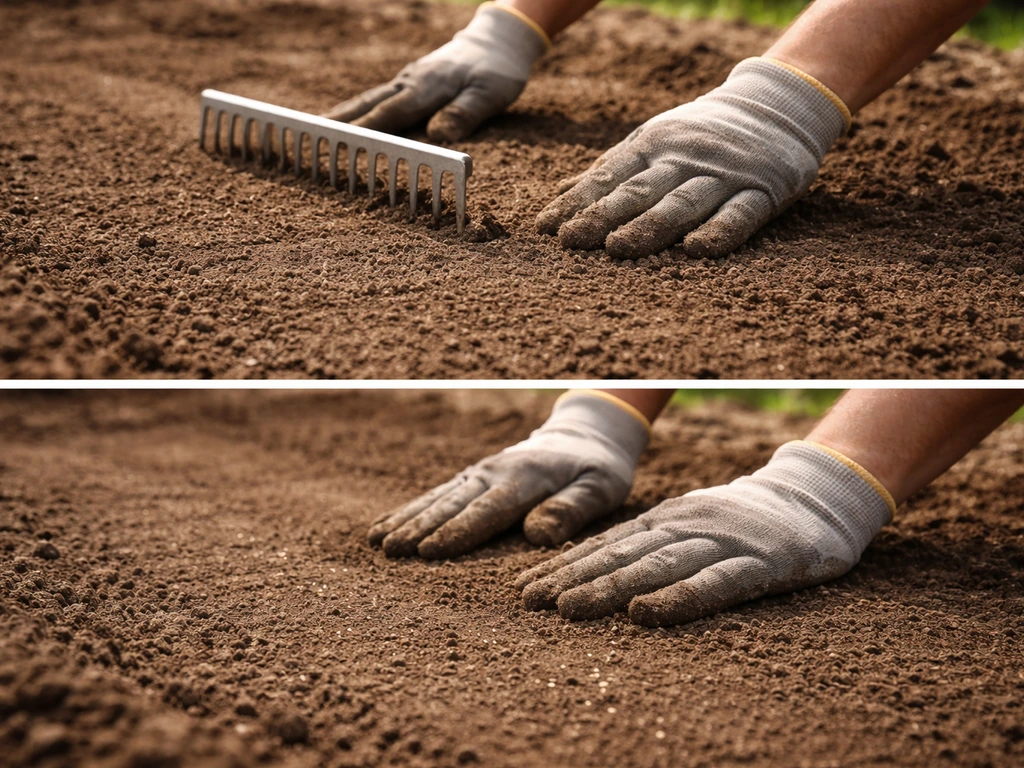
After amending, grade the area smooth by raking. You want an even surface without low spots that collect water or high ridges that dry out fast. The goal is firm but not hard, step on it and your foot should leave a slight impression but not sink in. If it's powdery or fluffy, tamp it lightly or roll it so the seed has firm soil to contact.
Seed-to-soil contact is critical. Seed sitting on top of loose, airy soil dries out and dies before it even germinates. Each seed needs to be pressed into or lightly covered by soil, about 1/4 inch to 3/8 inch deep is ideal for most grass types. After seeding, a light raking followed by tamping or rolling improves contact significantly. On slopes or bare areas prone to erosion, a thin layer of weed-free straw mulch (one bale per 1,000 sq ft) keeps moisture in and protects seed without blocking germination.
Seeding: timing, rates, and starter fertilizer
Timing is everything
Cool-season grasses (fescue, ryegrass, bluegrass) germinate best when soil temperatures are between 50 and 65 degrees Fahrenheit, that's fall in most of the country, roughly late August through October. Spring seeding works but is riskier because the window before summer heat is short and weeds are surging. Warm-season grasses (bermuda, zoysia) need soil temperatures above 65 degrees, ideally closer to 70 to 75 degrees, late spring to early summer. Planting outside the optimum window doesn't mean it won't work, but you'll need higher seeding rates and sharper water management to compensate, because germination rates drop and seedling stress increases.
Seeding rates for poor soil
Use the higher end of recommended seeding rates when working with poor soil or planting outside the ideal window. For perennial ryegrass and fine fescue mixes, a minimum of 5 lbs per 1,000 sq ft is a solid baseline for normal conditions, go to 6 to 8 lbs on poor soil or late-season plantings. Tall fescue typically calls for 6 to 8 lbs per 1,000 sq ft under normal conditions; push toward 8 to 10 lbs on degraded ground. The goal is roughly 1,000 to 2,000 healthy seedlings per square foot, and poor soil means lower germination rates, so more seed compensates.
Starter fertilizer basics
Apply a starter fertilizer at or just before seeding and incorporate it into the top 2 to 4 inches of soil. Starter fertilizers are high in phosphorus, which drives early root development, look for an N-P-K ratio like 18-24-12 or similar where the middle number is highest. A general rate is about 1 to 1.5 lbs of nitrogen per 1,000 sq ft at planting, with at least 1 lb of phosphorus per 1,000 sq ft. Don't skip this step on poor soil, seedlings in lean, degraded ground need every nutritional advantage they can get in the first few weeks.
Watering schedule for new grass on poor soil
Water management is where most home seeding projects fail. The rules change depending on whether the seed has germinated yet, and poor soil makes precision even more important.
Before seeding
Water the prepared seedbed thoroughly before you sow. You want the top 4 to 6 inches moist before seed ever touches the ground. This is especially important in sandy soil that dries out fast or in clay soil where you want the surface to be workable, not bone dry and crusty.
Germination phase: first 2 to 3 weeks
Keep the top 1 inch of soil consistently moist, not soaked, just never dry. That usually means light watering two to three times a day in hot or windy weather, or once a day in cooler conditions. The goal is to prevent the surface from drying out and crusting over, which kills germinating seeds before they can push through. On clay soil specifically, a 1 to 1.5-inch application is often needed to wet the root zone to 6 inches without runoff, apply in short cycles with breaks to let water absorb rather than running off.
After germination: transition to deeper watering
Once you see consistent green coverage and seedlings are 1 to 2 inches tall, start transitioning to deeper, less frequent watering. Reduce to once or twice per week, applying enough to moisten the soil 4 to 6 inches deep. This encourages roots to chase water downward instead of staying shallow and vulnerable. Stick a screwdriver or your finger in the soil after watering to confirm it's penetrating far enough. The 1 inch per week rule of thumb for established turf applies here, but check actual soil depth, not just run times.
When grass still won't grow: common failures and fixes
If you've done everything above and still have bare spots or weak germination, one of these is usually the culprit:
- Surface crusting: Heavy rain or overwatering on clay soil can seal the surface and prevent seedlings from emerging. Scratch the surface very gently with a rake if you see a crust forming — just 1/8 inch is enough to block grass.
- Seed washing out: On slopes or compacted ground that sheds water, seed gets moved before it can germinate. Fix: apply straw mulch, use erosion-control blankets, or seed in smaller batches with gentler, more frequent watering.
- Thin germination from wrong timing: If you seeded cool-season grass in summer heat or warm-season grass in cool fall soil, germination will be sparse. Add more seed at the correct time rather than continuing to water and hope.
- Weed takeover: Poor soil and bare ground are weed magnets. Hand-pull aggressive weeds rather than using pre-emergent herbicides, which will also kill grass seedlings. Stay patient — your grass will compete better as it thickens.
- Persistent pH problem: If germination is patchy and weak across the whole area despite good conditions, retest your pH. Soil that's too acidic or alkaline is one of the most common hidden causes of establishment failure. Even good seed won't root well when pH is off.
- Compaction you didn't fully fix: If grass comes up thin and then stalls without thickening, especially in high-traffic zones, the soil may still be too compacted for roots to expand. Core aerate again and topdress.
- Wrong grass for the site: If you're seeding in deep shade, hot dry clay, or a constantly wet area, even good prep won't save an ill-suited variety. Revisit the grass selection section above and consider switching to a better-adapted type.
Penn State extension research lists drought, heavy shade, extreme soil pH, weed pressure, thatch buildup, improper mowing, and poor species adaptation as the most common establishment failure causes, and honestly, that list matches what I see people run into most. The fixes are all in this guide, but you have to correctly identify which one is your problem before you can solve it.
Realistic expectations and what comes next
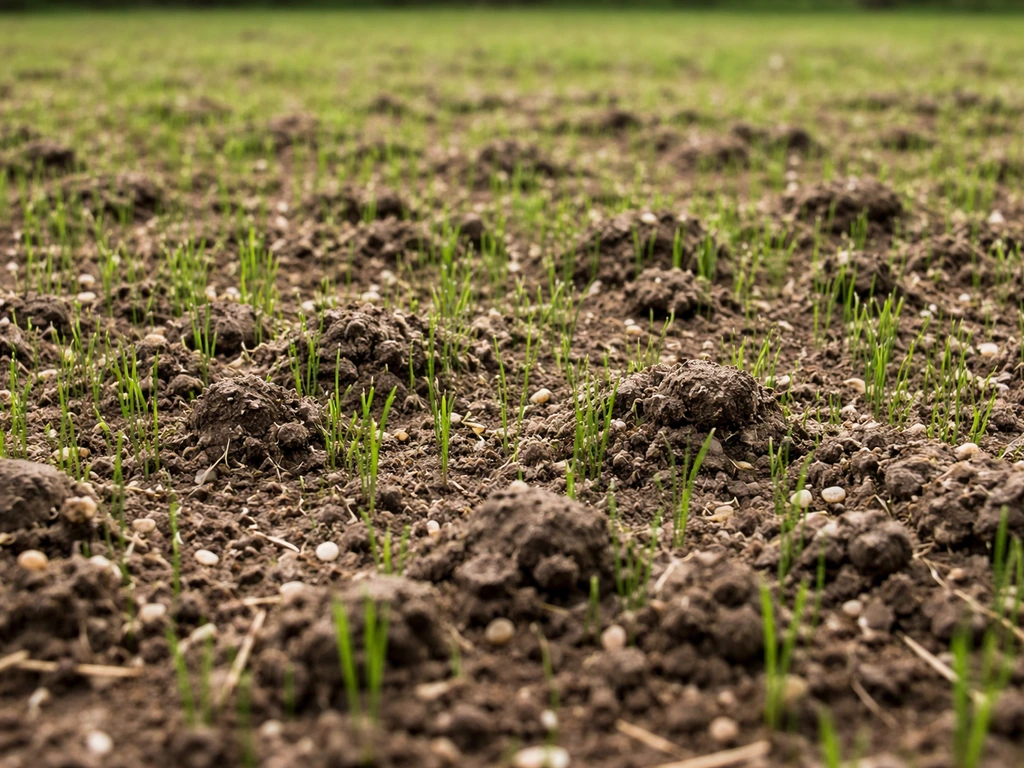
Poor soil lawns take longer to fill in, that's just reality. On properly amended soil, cool-season grasses typically germinate in 7 to 21 days and reach mowing height (about 3 inches for fescue) in 6 to 8 weeks. Warm-season grasses from seed take longer, sometimes 2 to 4 weeks to germinate and a full season to fill in. On poor soil that you've amended but not fully transformed, add 20 to 30 percent to those timelines and plan for a follow-up overseeding in the next ideal planting window to fill bare patches.
First mowing matters more than most people think. Wait until grass reaches at least 3 to 3.5 inches before mowing, and never cut more than one-third of the blade height at once. Cutting too early or too short stresses young root systems that are already working hard in compromised soil. Keep foot traffic off the new lawn for the first 4 to 6 weeks.
Soil improvement is a multi-season project on seriously degraded ground. One round of compost and aeration is a great start, but plan to topdress again after the second growing season, retest pH annually until it stabilizes, and continue building organic matter. Every season the soil improves, your grass will need less babysitting. The goal isn't just to get seed to germinate this year, it's to build a soil that keeps grass healthy year after year without constant intervention.
FAQ
Can I just overseed poor soil without doing the soil tests and prep?
Yes, but only after you fix the limiting factor first. If the main issue is compaction, aerate and loosen the top 4 to 6 inches before seeding. If it is pH, apply the correct amendment and retest after a few months, because fertilizer alone will not help when nutrients are locked out. If drainage is the problem, address standing water or grade first, otherwise the seed may germinate and then fail as roots rot.
What’s different about seeding poor soil that is mostly sand?
Sandy lawns often need a more frequent, lighter watering approach than clay lawns. For germination, keep the top 1 inch consistently moist, then transition to deeper watering once you see stable coverage. Also, compost helps sandy soil hold water, but you still need firm seed-to-soil contact so moisture reaches the seed.
Is spike aeration enough for compacted poor soil?
Avoid using spike aeration as your primary fix for poor soil that won’t drain well or is hard to penetrate. Core aeration removes plugs, creating pathways for air and water movement. If your area is extremely compacted, plan on repeating aeration after amendments have had time to loosen the soil structure.
How long should I wait after adjusting pH before seeding?
Don’t apply limestone or sulfur as a guess. Use test results, because over-correcting pH can cause new nutrient problems. When you do correct pH, recheck after a few months and delay major seeding or fertilizing plans until the soil is closer to your target range.
Why do weeds show up faster than my grass on poor soil?
If you see heavy weed emergence, you usually have one or more of these issues: wrong grass species for the conditions, seed depth that is too shallow or too deep, or watering that dries out the surface and lets weeds establish first. For bare spots, overseed at the correct season and consider a thin mulch layer to protect seed while you get consistent moisture.
How do I know my watering is reaching deep enough on clay or sandy poor soil?
Look at the soil level and water behavior, not just the clock. After watering, push a screwdriver or similar tool into the ground to confirm penetration depth, aiming for moist soil down to about 4 to 6 inches once seedlings are established. If water runs off, split applications into shorter cycles to let it soak in.
Should I use mulch when seeding poor soil, and how much is too much?
Yes. If the area is sloped or prone to erosion, use a thin layer of weed-free straw mulch and keep it from burying seed too deeply. Mulch protects moisture and seed placement, but it can delay emergence if piled too thick or if it smothers the surface.
What’s the safest compost depth when improving poor soil before seeding?
Don’t start with a thick compost layer that you can’t till or incorporate. The guide recommends compost amounts that match the soil and your method, and then mixing it into the top several inches. Too thick an amendment layer can create a soggy top zone on some clays or a loose, dry layer if it is not blended.
My lawn looks thin after a month, is that normal on poor soil?
If grass is slow to fill in, check whether you chose a species that matches your sun and climate, and confirm pH and drainage are within the workable range. On poor soil, it is normal to add 20 to 30 percent more time for establishment, and a planned overseeding in the next ideal window often fixes persistent thin areas.
When should I mow new grass on poor soil, and how short can I cut it?
The first mowing should happen after blades reach about 3 to 3.5 inches, and you should remove no more than one-third of the height. Mowing early or scalping can weaken seedlings, especially in degraded soil. Also reduce foot traffic, because young roots are not yet robust.
Do I need to keep amending after the grass fills in, or is one round enough?
Plan on treating soil improvement as ongoing, not a one-time fix. Topdress after the second growing season, retest pH annually until it stabilizes, and keep building organic matter. If you stop after one amendment and your underlying limit is still present, bare patches or thin turf are more likely to return.
What should I do if I struggle to poke holes in the soil?
If you can’t push a screwdriver in about 6 inches with moderate pressure, compaction is likely a major constraint. In that case, focus on aeration and soil loosening before seeding, because fertilizer and seed alone will not overcome restricted root penetration.
How can I tell if drainage is the real problem instead of poor nutrients?
If you see fungus-like issues or persistent weak spots, it can be environmental and not just soil, but poor drainage is a common trigger. Standing water after an hour is a strong sign you need drainage solutions or grading before expecting steady establishment.
Next Article
How to Grow Grass on Red Clay Soil: Step-by-Step Guide
Step-by-step plan to grow grass on red clay soil: prep, amend, seed, water, fertilize, and choose the right grass types.