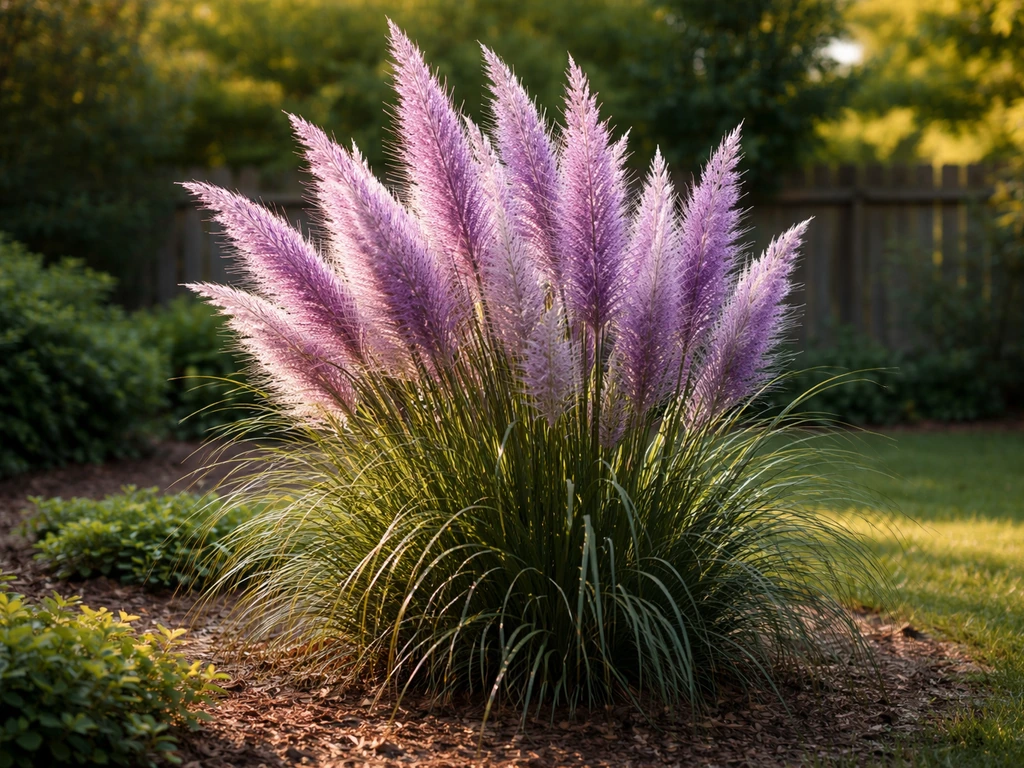
Prairie grass grows best when you match the right species to your region, prepare a firm and weed-free seedbed, and plant during the correct soil temperature window. For native prairie, that means dormant seeding in fall (roughly November 15 through April 1 in most of the Midwest and Plains) or spring seeding for warm-season species once soil hits 55°F. For turf-type lawns leaning on grasses like tall fescue, bermudagrass, or zoysia, the timing and process shift considerably. This guide covers both tracks clearly so you can pick the right one for your yard.
How to Grow Prairie Grass: Complete Guide for Lawns & Sites
Marcus Tillwell
10 Aug 2026
What 'prairie grass' actually means, and why it matters for your lawn
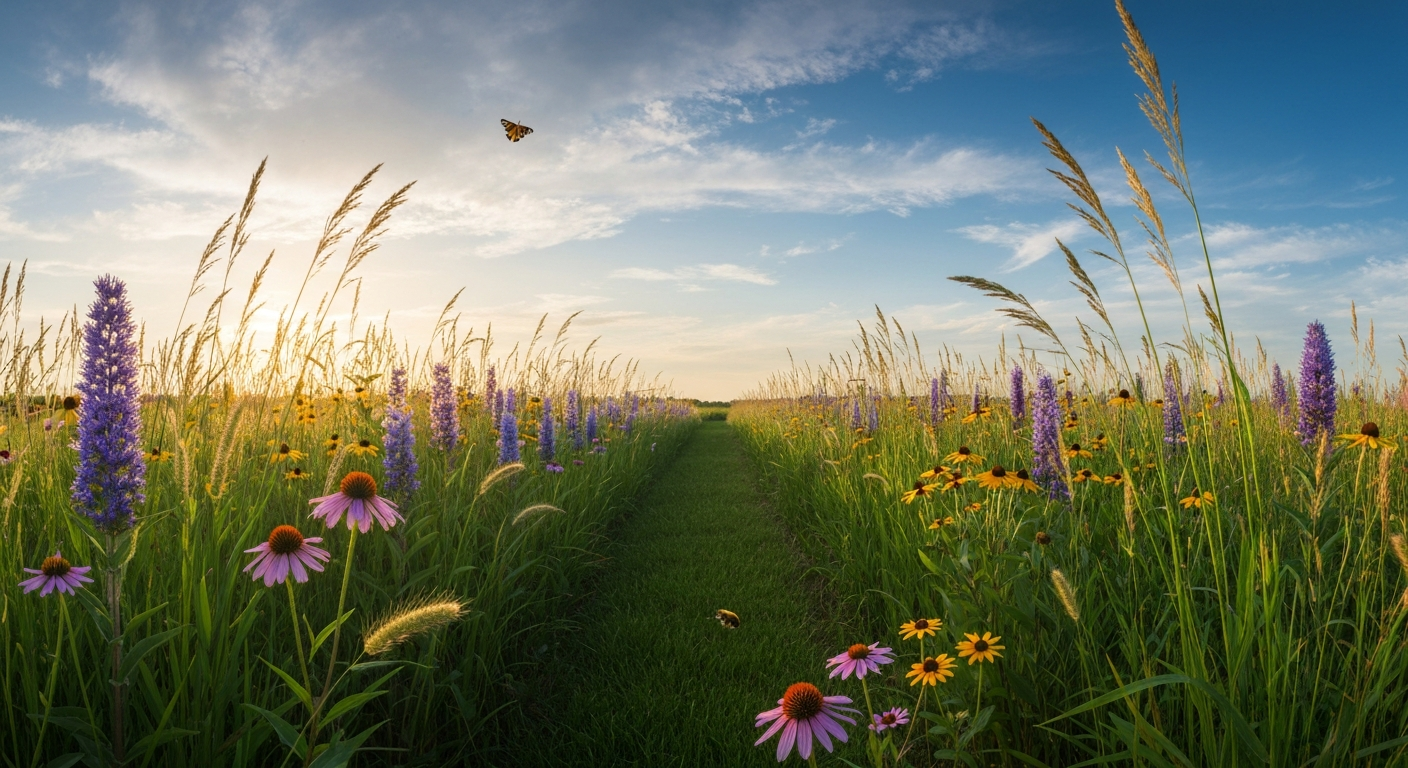
People use the term 'prairie grass' in a few different ways, and getting clear on what you mean will save you a lot of frustration. In the strictest sense, prairie grass refers to native warm- and cool-season grass species that historically blanketed the American Midwest and Great Plains: big bluestem, switchgrass, Indiangrass, sideoats grama, prairie dropseed, and others. These plants evolved together with native forbs (flowering plants) to form a rich, deep-rooted ecosystem.
In everyday conversation, though, homeowners often use 'prairie grass' loosely to describe any low-maintenance, naturalistic lawn or meadow planting. That sometimes includes turf-type grasses like tall fescue, which can be managed with minimal input and tolerate neglect. This guide addresses both interpretations: if you want a true native prairie, you'll follow one set of steps; if you want a durable, low-fuss lawn that borrows the prairie aesthetic, your path is different.
It's also worth separating this from ornamental and tropical grasses. Pampas grass, purple pampas grass, and Napier grass (sometimes called super Napier grass) are grown very differently from native prairie species and require their own propagation approaches, including seed stratification and division techniques that fall outside a standard lawn-establishment workflow. Similarly, gold coin grass and penny grass are ornamental plants with specific growing needs. If those are what you're after, you'll want a dedicated guide for each one rather than applying prairie-planting advice to them.
Warm-season vs. cool-season: choosing the right grass for where you live
The single most important decision you'll make is matching your grass to your climate zone. Plant a warm-season grass in Minnesota and it'll sulk or die; plant tall fescue in Alabama and it'll struggle through summer heat and disease. Get this right first.
Cool-season grasses (Zones 4–7, transition zone)
Cool-season grasses grow actively in spring and fall when soil temperatures are between 50°F and 65°F. They go semi-dormant in summer heat and green back up in September. If you're in the northern half of the country, the Pacific Northwest, or the upper transition zone (think Missouri, Kansas, Virginia), these are your workhorses. Tall fescue, fine fescue, and perennial ryegrass are the main players for lawns.
Warm-season grasses (Zones 7–10)
Warm-season grasses thrive when soil temperatures stay above 65–70°F and go dormant (and brown) in winter. Bermudagrass and zoysia dominate lawns in the Southeast, Gulf Coast, and Southwest. For native prairie purposes, big bluestem, switchgrass, and Indiangrass fall into this category as well and require soil temps consistently above 50–55°F before you plant.
Matching your grass to your lawn's purpose
Beyond climate, think about what you're actually doing with the space. A backyard where kids and pets play hard needs a tough, wear-tolerant grass like bermudagrass or tall fescue. A low-maintenance naturalistic area along a fence line might be perfect for a native prairie mix with minimal mowing. A shaded side yard narrows your options considerably toward fine fescues. Be honest about how much time and money you'll spend on maintenance before choosing.
- High-traffic play areas: bermudagrass (warm), tall fescue (cool), or perennial ryegrass (cool)
- Low-maintenance lawns: zoysia (warm), fine fescue (cool), or native warm-season grass mixes
- Native prairie/pollinator habitat: species-diverse native mixes with 25–50% grasses and 50–75% forbs
- Shaded areas: fine fescue blends (creeping red, chewings, hard fescue)
- Erosion-prone slopes: tall fescue or native warm-season grasses with deep fibrous roots
- Pet-heavy yards: bermudagrass or tall fescue for fast recovery from wear
Grass profiles: what each species actually does well
Here's what you need to know about the four main turf-type grasses before you buy a single bag of seed. Each has a sweet spot and a weak spot.
| Grass Type | Season | Best Climate | Seeding Rate | Germination Time | Strengths | Limitations |
|---|---|---|---|---|---|---|
| Bermudagrass | Warm | Zones 7–10 | 1–2 lb hulled seed/1,000 ft² | 7–14 days (warm soil) | Excellent traffic tolerance, fast spread, drought-tolerant once established | Goes dormant/brown in winter, invasive in gardens, needs full sun |
| Zoysiagrass | Warm | Zones 6–10 | Plugs: 12"×12" spacing; seed is slow | 14–21+ days; plugs take a full season | Dense, weed-suppressing, low water needs once established | Very slow to establish from seed, expensive from sod/plugs |
| Tall Fescue | Cool | Zones 4–7 (transition) | 8–12 lb/1,000 ft² new lawn | 7–14 days | Heat and drought tolerant for a cool-season grass, deep roots, handles clay | Clumpy appearance if not seeded densely; no lateral spread |
| Fine Fescue | Cool | Zones 3–7 (shade) | 4–6 lb/1,000 ft² | 10–14 days | Best shade performance, low fertilizer needs, soft texture | Poor wear tolerance, thins in hot humid summers |
| Perennial Ryegrass | Cool | Zones 5–7 | 5–8 lb/1,000 ft² | 5–10 days (fastest of all) | Fast establishment, excellent wear tolerance, germinates in cool soils | Struggles in extreme heat or cold, can crowd out slower grasses in mixes |
A note on native prairie species
If you're going the native prairie route, big bluestem is typically seeded at around 7 lb pure live seed (PLS) per acre, with similar rates for switchgrass and Indiangrass. These aren't interchangeable with turf-style seeding rates. Native prairie mixes from quality suppliers often come pre-calculated at roughly 31–33 lb per acre as-sold (not PLS), which accounts for seed fill and germination percentage. For smaller residential areas, that works out to roughly 0.25–0.33 lb per 1,000 ft² for pollinator-focused mixes, though this varies significantly by species composition.
Seed, plugs, sod, or hydroseeding: picking the right establishment method
How you establish grass matters almost as much as which grass you choose. Each method has real trade-offs in cost, timing, and effort.
| Method | Best For | Approximate Cost | Time to Usable Lawn | DIY-Friendly? |
|---|---|---|---|---|
| Broadcast seeding | Large areas, native prairie, cool-season turf | Low | 6–12 weeks for turf; 1–3 years for native prairie | Yes |
| Slit-seeding (slice seeding) | Lawn renovation, overseeding thin turf | Low–medium (rental equipment) | 4–8 weeks | Yes with rented machine |
| Drill seeding | Large native prairie plots, accurate seed placement | Medium (contractor or rental) | Varies widely by species | Possible with rangeland drill rental |
| Plugs/sprigs | Bermudagrass, zoysia | Medium–high | One full growing season to fill in | Yes |
| Sod | Instant results, erosion-prone slopes, impatient homeowners | High | 2–4 weeks to root | Yes but labor-intensive |
| Hydroseeding | Large slopes, erosion control, commercial projects | Medium–high (contractor) | 4–8 weeks | Usually contractor |
For most homeowners doing a new lawn or prairie patch, broadcast seeding with a follow-up roller or cultipacker pass is the most practical and affordable approach. Slit-seeding beats broadcast seeding for renovations where existing turf or thatch is present because it cuts seed directly into the soil and dramatically improves seed-to-soil contact. Plugs make the most sense for zoysia and bermuda where you want to spend less on seed but have patience: a 12-inch by 12-inch plug spacing will fill in over one growing season in warm climates.
Hydroseeding is worth considering on slopes steeper than 3:1 where erosion is a real concern during establishment. For native prairie seedings on erosive sites, NRCS guidance suggests pairing the seed with a temporary sterile nurse crop (oats work well) for immediate cover while the perennial natives slowly establish. See Pollinators and Roadsides, BMPs (FHWA) for guidance on using a sterile nurse crop (e.g., oats) or temporary cover for immediate erosion control while native perennials establish, and on managing short‑term nurse crops to avoid competition with target natives Pollinators and Roadsides — BMPs (FHWA). Just manage the nurse crop carefully so it doesn't outcompete your target species.
How to evaluate seed, plugs, and sod before you buy
Cheap seed is one of the most reliable ways to fail. I've watched homeowners sow bargain-bin bags that were 30% weed seed and wonder why their lawn looked terrible by July. Spend the money on quality and you won't regret it.
Reading a seed label
Every seed bag sold commercially must carry a label with specific information. You're looking for four numbers: pure live seed (PLS) percentage, germination rate, weed seed percentage, and crop seed percentage. A quality turf seed should show a germination rate of 85% or higher. Weed seed content should be below 0.5%, and ideally you want zero 'noxious weeds' listed. For native prairie seed, ask suppliers specifically for PLS-adjusted rates and ecotype sourcing documentation, especially if you're planting near natural remnants.
- Germination rate: aim for 85% or higher on the label
- Weed seed: below 0.5% total; zero noxious weeds listed
- Crop seed: low or zero (crop seed = contaminating plants, not your target grass)
- Pure live seed (PLS): used to calculate true coverage; critical for native species pricing and rates
- Cultivar name: named cultivars (like 'Kentucky 31' tall fescue or 'Blackjack' bermuda) have documented performance data; generic or unlabeled is a red flag
- Test date: seed tested within the past 9–12 months; older test dates mean the germination rate may no longer be accurate
Evaluating plugs and sod
For plugs, check that the root system is firm and white or light tan, not brown and mushy. A healthy plug will resist falling apart when you pull it from its tray. Ask the supplier what cultivar you're getting, not just 'bermuda plugs.' For sod, it should be uniform in color, roughly 1 to 1.5 inches thick including roots, and have no visible disease lesions or yellowing. Lift a corner: the sod should hold together but not be so root-bound that it's sitting in a mat of dead thatch. Install sod within 24 hours of delivery; leaving it rolled up in summer heat kills it fast.
Soil testing and amendments: do this before anything else
Skipping the soil test is the number one mistake I see. You can't fix a pH or nutrient problem you don't know about, and both will tank germination or slow establishment regardless of how well you do everything else. A basic soil test costs $15–$25 from your state's land-grant university extension service and is worth every cent.
Step-by-step soil testing process
- Collect 8–10 small soil cores from across the planting area, taken 3–4 inches deep for turf, or 0–6 inches for native prairie
- Mix the cores together in a clean bucket and allow to air-dry if wet
- Fill the sample bag or box provided by your extension service with roughly 1 cup of mixed soil
- Submit with a form indicating your intended use (lawn, native prairie, vegetable garden) so the lab calibrates recommendations correctly
- Wait 1–2 weeks for results, which will include pH, phosphorus, potassium, and often organic matter percentage
- Apply amendments at the rates specified on the report, not from a generic chart
Interpreting results and choosing amendments
Most turf grasses perform best at a soil pH between 6.0 and 7.0. If your pH is below 6.0, apply ground agricultural lime at the rate your soil test specifies, typically 50–100 lb per 1,000 ft² for moderate acidification, incorporated before seeding. If your soil is above 7.5 (alkaline), elemental sulfur can lower it, though this takes months to work. Gypsum (calcium sulfate) is useful for breaking up compacted clay without significantly changing pH and can improve water infiltration. For sandy soils, adding organic matter in the form of 2–3 inches of compost tilled 4–6 inches deep dramatically improves water and nutrient retention.
One important exception: if you're establishing a native prairie, do not apply nitrogen fertilizer before or during seeding. NRCS guidance is explicit on this. Fertilizer gives a massive advantage to weeds and annual grasses, which will outcompete your slow-establishing native prairie species. Let the soil's natural fertility do the work.
Amendment timing
Apply and incorporate lime, gypsum, sulfur, and compost at least 2–4 weeks before seeding so amendments have time to begin reacting with the soil. For major pH corrections (moving more than 1.5 pH units), apply the first round the season before planting and retest. Starter fertilizer for turf-type grasses (high in phosphorus, like a 10-20-10) goes down at seeding time, worked lightly into the top inch of soil or applied as a broadcast before final raking.
Preparing the site: clearing, grading, and building your seedbed
Good seedbed preparation is what separates a successful planting from one that produces patchy results. The goal is a firm, fine, level surface with no competition for your new seedlings.
Clearing and weed control
If you're starting from scratch on an area with existing grass or weeds, you have two main options. Smother and kill the existing vegetation with a non-selective herbicide like glyphosate (two applications 10–14 days apart for heavy infestations), or smother it by covering with black plastic or cardboard for 4–6 weeks in summer. Wait at least 7–10 days after the final herbicide application before seeding, following the label exactly. For native prairie sites, the NRCS approach often involves a year of site prep using herbicide rotations to exhaust the weed seed bank before you plant, which makes a huge difference in long-term success.
Grading and drainage
Slope the soil gently away from any structures (at least 1–2% grade, meaning about 1–2 inches of drop per 10 feet) to prevent water pooling. Fill low spots with topsoil and rake smooth. You don't need perfect laser grading for a home lawn, but avoid creating bowls that will collect standing water. Established grass roots rot in prolonged standing water.
Thatch control and debris removal
Remove dead plant debris, rocks, and sticks. If you're renovating an existing lawn with thatch buildup over half an inch, dethatch with a power rake or vertical mower rental before doing anything else. Thatch blocks seed from reaching soil and creates an environment where seeds dry out and die. Rake out the debris after dethatching.
Erosion control during establishment
On slopes, apply a biodegradable erosion control blanket pinned to the surface after seeding. Straw mulch applied at 1–2 bales per 1,000 ft² also works for flatter areas and slows drying. For major slopes being hydroseeded, the mulch in the hydroseed slurry (typically 1,000–4,500 lb per acre depending on slope severity) handles erosion control as part of the application.
Final seedbed preparation
The target is a firm, fine surface where a light footstep leaves only about a quarter-inch impression. Loose, fluffy soil causes seeds to bury too deep or dry out too fast. Till or rototill the top 4–6 inches, incorporate your amendments, then firm the surface with a lawn roller or cultipacker. One roller pass before seeding and one after is the standard practice for both native prairie and turf seedings, and it genuinely makes a measurable difference in germination uniformity.
Planting methods: seeding step by step
There are three main seeding approaches for lawns and prairie: broadcast, slit-seeding, and drill seeding. Each suits a different situation. All three share the same underlying goal: getting seed in firm, consistent contact with the soil at the right depth.
Timing windows by grass type
| Grass Type | Best Planting Window | Soil Temp Target | Notes |
|---|---|---|---|
| Cool-season turf (fescue, ryegrass) | Late August to mid-October | 50–65°F | Fall seeding avoids summer weed competition and benefits from fall rains |
| Warm-season turf (bermuda, zoysia) | Late spring to early summer | 65–70°F+ | Typically May–June depending on region; soil must be consistently warm |
| Native warm-season prairie grasses | April–May (spring) or dormant seeding Nov 15–Apr 1 | 55°F+ for spring; dormant = frost-killed seed overwinters | Dormant seeding relies on natural stratification through winter freeze-thaw cycles |
| Native cool-season prairie species | Early fall or dormant seeding | 50–60°F | Similar to cool-season turf timing |
Broadcast seeding
Broadcast seeding works well for new areas where you have full control of the seedbed surface. Divide your seed quantity in half and apply two passes at 90-degree angles to each other for even coverage. For turf-type grasses, lightly rake or drag the surface after broadcasting to work seed into the top quarter-inch of soil. Follow immediately with a lawn roller. For native prairie, NRCS recommends seeding forbs at the surface to one-eighth inch depth and grasses at about one-quarter inch. Rolling or cultipacking after broadcast seeding is critical for prairie species, many of which have irregular shapes that prevent good soil contact without mechanical firming.
Slit-seeding (slice seeding)
Slit-seeding uses a machine with rotating vertical blades that cut furrows into the soil and drop seed directly into them. It's the best method for overseeding an existing thin lawn because it gets seed past thatch and into soil without full tillage. Mow the existing grass as short as possible before slit-seeding. Run the machine in two directions for the best coverage. Seeding rates for slit-seeding can be reduced slightly from new-seeding rates (roughly 4–6 lb per 1,000 ft² for tall fescue renovation versus 8–12 lb for bare ground) because placement efficiency is higher. Water thoroughly the same day.
Drill seeding
Drill seeding is used most often for large native prairie plots and agricultural-scale native grass plantings. A rangeland or native-grass drill meters seed at a precise rate and plants it at exact depth, which is particularly important for native warm-season grasses. Many native prairie species have awns, beards, or fluffy appendages that jam standard grain drills, so a grass drill with picker wheels or a Brillion seeder is necessary for non-debearded seed. For specific guidance on debearding, drill types (rangeland drills with picker wheels), and broadcasting non‑debearded seed, see For a Successful Native Grass and Forb Establishment (technical bulletin). If you're working with a contractor on a large restoration project, confirm they have the right equipment for your seed mix. Drill seeding native warm-season grasses like big bluestem at approximately 7 lb PLS per acre to a depth of one-quarter inch in fine soils, up to three-quarters inch in coarse sands.
After you plant: the critical first watering
Water gently and immediately after seeding. Use a fine spray setting to avoid washing seed off the surface. The first irrigation should wet the top 1–2 inches of soil. From that point through germination, the surface must never fully dry out. For turf grasses in summer heat, that often means two short watering sessions per day (morning and early afternoon) of 5–10 minutes each. Once seedlings are 1 inch tall, shift to less frequent but deeper watering to encourage downward root growth.
What to expect after planting: germination and establishment timeline
Patience is genuinely required here, especially for native prairie. Turf-type lawns move faster, but they still need 6–12 weeks before they can handle regular foot traffic or mowing.
| Grass Type | First Sprouts Visible | Ready for First Mow | Fully Established |
|---|---|---|---|
| Perennial ryegrass | 5–10 days | 3–4 weeks (at 3–4 inches tall) | 8–10 weeks |
| Tall fescue | 7–14 days | 4–5 weeks | 10–12 weeks |
| Bermudagrass (seeded) | 7–14 days (needs warm soil) | 5–6 weeks | Full season |
| Zoysiagrass (plugs) | Visible spread in 4–6 weeks | Mow when it exceeds 2 inches | One full growing season to fill in |
| Native warm-season prairie grasses | Varies widely: 2–6 weeks for initial sprouts | Do not mow first year | Year 2–3 for full establishment |
| Native prairie forb mix | 2–8 weeks for first sprouts | Mow to 8–10 inches in year 1 to suppress weeds | Year 2–4 for mature stand |
The most confusing part of native prairie establishment is the 'ugly duckling' phase in year one. Your prairie will look like a weedy mess. That's normal. The native species are investing in root systems that can reach 10–15 feet deep, and they show almost nothing above ground for the first season. Fight the urge to mow it flat or add fertilizer. A single mow to 8–10 inches in late summer of year one helps control annual weeds without damaging the natives.
Watering and mowing schedules during establishment
Watering by phase
| Phase | Frequency | Duration/Amount | Goal |
|---|---|---|---|
| Pre-germination (days 1–14) | 2x daily in hot/dry weather; 1x daily in mild weather | 5–10 min each session | Keep top 1 inch consistently moist |
| Early germination (days 14–28) | Once daily, early morning | 10–15 min | Maintain moisture in top 2 inches |
| Seedling establishment (weeks 4–8) | Every 2–3 days | 20–30 min (deeper soak) | Encourage roots to grow 3–4 inches deep |
| Post-establishment (beyond 8 weeks) | Weekly or as needed based on rainfall | 30–45 min per zone (1 inch/week total) | Sustain established root system |
First mow and ongoing cutting heights
Wait to mow until your new grass reaches one-third higher than its target height. For tall fescue (target 3–4 inches), that means mowing for the first time when it reaches about 4.5–5 inches. For bermudagrass (target 1–1.5 inches), mow when it hits about 2 inches. Use a sharp blade and never remove more than one-third of the blade height at a single cutting. The first mow is also a stress test: if seedlings pull out of the ground when you mow, the roots aren't established enough and you've mowed too soon.
Solving common problems: bare spots, clay, sandy soil, shade, and pets
Bare spots
Persistent bare spots usually come from one of three causes: soil compaction, shade, or dog urine damage. For compaction, loosen the area with a garden fork or aerator, amend with compost, and reseed. For shaded bare spots, switch to a fine fescue blend rated for shade. For dog urine spots, water the area heavily to dilute the nitrogen salts, replace the top inch of soil if severely damaged, and reseed. You can also designate a mulched area for the dog to redirect the habit.
Clay soil
Clay holds water and nutrients well but compacts easily, drains poorly, and crusts over in dry periods, which physically blocks seedling emergence. Break up clay with a tiller, incorporate 2–3 inches of compost, and apply gypsum at the rate recommended on the bag (typically 20–40 lb per 1,000 ft²). Gypsum improves clay structure without affecting pH. After seeding, don't overwater clay: the goal is moist, not saturated. If the surface crusts before germination, gently break it with a light raking pass.
Sandy soil
Sandy soil drains so fast that seeds dry out between waterings. Incorporate 3 inches of compost tilled 6 inches deep before seeding, which improves both water retention and nutrient availability. You'll need to water more frequently in sandy conditions, potentially three times per day in hot weather during the pre-germination phase. Consider using a hydromulch or straw mulch covering after seeding to slow surface evaporation.
Shaded areas
No grass thrives in deep shade (less than 2–3 hours of direct sun per day). Fine fescue blends, specifically creeping red fescue and hard fescue, are your best bet in partial shade with 3–6 hours of sun. Thin tree canopies where possible by removing lower limbs to let in more light. Don't fight the shade with dense grass plantings: at some point, groundcover or mulch under trees is more honest than a perpetual losing battle with grass.
High-pet-traffic lawns
Bermudagrass is the most durable option for warm climates where pets are constantly running and digging. Its aggressive rhizome and stolon network means it fills in damage quickly. In cool climates, tall fescue's deep root system handles pet wear better than Kentucky bluegrass, which spreads via rhizomes but recovers slowly in summer heat. Keep a bag of the same seed blend on hand for spot repairs throughout the season.
Troubleshooting: when things don't go as planned
| Problem | Likely Cause | Fix |
|---|---|---|
| Seed hasn't germinated after 3 weeks | Soil too cold, too dry, or seed buried too deep | Check soil temperature (must be >50°F for cool-season, >65°F for warm-season); water more frequently; reseed at correct depth |
| Patchy, uneven germination | Uneven seed distribution or variable soil moisture | Overseed thin areas; improve irrigation coverage; roll surface for better contact |
| Crabgrass or annual weeds overwhelming seedlings | Weed seed in soil germinating faster than turf | Use a pre-emergent next season; for native prairie, mow to 8–10 inches to reduce weed dominance in year 1; do not fertilize |
| Seedlings emerge then die back | Damping-off fungal disease or overwatering | Improve drainage; reduce watering frequency; ensure morning watering so surface dries by evening |
| Lawn is thin and slow to fill in | Low seeding rate, poor seed-to-soil contact, or low soil fertility | Overseed at proper rate; verify soil fertility with test; aerate and reseed compacted areas |
| Moles or birds disturbing seed | Fresh seed attracting wildlife | Cover with erosion blanket or straw mulch immediately after seeding; remove mulch once grass reaches 2 inches |
| Yellow patches in new turf | Soil pH imbalance or nitrogen deficiency | Test soil pH; apply starter fertilizer or lime as needed based on test results |
| Sod not rooting after 3–4 weeks | Inadequate moisture, air pockets, or poor soil-to-sod contact | Water deeply once per day; roll sod after installation to eliminate air pockets; check for dry soil underneath |
| Native prairie looks like a weed patch at month 6 | This is normal; natives invest in roots first | Resist mowing below 8 inches; one light mow in late summer of year 1 is sufficient; do not fertilize |
Regional timing cheat sheet
Where you live determines almost everything about timing. Here's a simplified breakdown by region for the most common scenarios.
| Region | Cool-Season Turf Seeding | Warm-Season Turf Seeding | Native Prairie (Dormant) | Native Prairie (Spring) |
|---|---|---|---|---|
| Pacific Northwest | Sept–Oct | Not recommended | Nov–March | April–May |
| Northern Plains / Upper Midwest | Aug 15–Sept 30 | Not recommended | Nov 15–Mar 1 | May–June |
| Transition Zone (MO, KS, VA, NC) | Sept 1–Oct 15 | May–June | Nov 15–Mar 15 | April–May |
| Southeast / Gulf Coast | Oct–Nov (limited) | April–June | Dec–Feb | March–April |
| Southwest (arid) | Oct–Nov | April–May | Nov–Jan | March–April |
A quick word on ornamental grasses: they're a different animal
If someone pointed you here while researching pampas grass or purple pampas grass, know that the establishment method for those ornamentals is quite different from prairie grass. For detailed instructions on how to grow purple pampas grass, consult a dedicated guide on how to grow purple pampas grass. For detailed steps on starting pampas from seed, see how to grow pampas grass seeds. For step-by-step instructions, consult a dedicated guide to pampas grass how to grow. For step-by-step instructions on growing pampas grass, see how do you grow pampas grass. Pampas grass is typically grown from division of established clumps or from seed that requires stratification, and it takes 2–3 years to reach ornamental size. Napier grass and super Napier grass are tropical, fast-growing forage grasses established primarily from stem cuttings rather than seed. Gold coin grass and penny grass are low-growing ornamentals with their own site requirements. None of these should be planted using the seeding rates or methods described in this guide.
Full planting checklist before you start
- Confirm your grass type and climate zone match
- Check the planting window against current soil temperatures
- Collect and submit a soil test (allow 2 weeks for results)
- Apply and incorporate amendments (lime, compost, gypsum) 2–4 weeks before seeding
- Kill existing weeds and vegetation; wait the required interval after herbicide
- Grade the site for positive drainage away from structures
- Till and firm the seedbed; test firmness with a foot impression (~1/4 inch depth)
- Verify seed bag germination rate (85%+), weed seed content (<0.5%), and cultivar label
- Calculate seed quantity needed based on area and correct seeding rate
- Broadcast, slit-seed, or drill at the correct rate and depth
- Roll or cultipack after seeding for firm seed-to-soil contact
- Apply straw mulch or erosion blanket on slopes or hot sites
- Water gently and immediately; maintain consistent moisture until germination
- Set expectations: turf in 6–12 weeks, native prairie in 1–3 years
FAQ
What primary research questions must I answer to create a practical, regionally accurate how‑to guide for establishing prairie and turf grasses?
Identify climate/zone-specific planting windows, soil temperature thresholds, and frost dates; target species and cultivar selection for region and intended use (native prairie vs turf species: bermuda, zoysia, fescue, ryegrass); seed or PLS seeding rates by species and mix composition; appropriate seedbed preparation and soil amendment protocols (including when to add lime, fertilizer, or organic matter); exact planting methods (drill, broadcast + roll, plugs/sprigs, sod, hydroseeding) and equipment considerations; depth and handling needs for specific seed types (awns, chaff, debearding); irrigation schedules for germination and establishment (daily/weekly amounts and duration); mowing thresholds and timing for establishment; repair/renovation methods for bare spots and high‑traffic zones; special prescriptions for soil textures (clay, sand), compaction, and shaded areas; pest, disease, and weed diagnosis + integrated management and thresholds; use and management of nurse crops and erosion control methods; sourcing/ecotype and quality assurance (PLS testing, origin) and diversity targets for native mixes; regulatory/permit considerations for large erosion control/hydroseed jobs; and how prairie restoration establishment differs from ornamental/tropical grass propagation (seed vs division) and where to find specialist propagation guides.
Which federal and national authoritative sources should be consulted first for native prairie planting guidance and seeding windows?
USDA Natural Resources Conservation Service (NRCS) technical guides and Planting Native Prairie resources (planting windows, seed depths, rolling recommendations, mix composition). Federal Highway Administration (FHWA) roadside revegetation/hydroseeding specs and BMPs for erosion control and temporary covers. Xerces Society resources for pollinator‑friendly seed mixes and recommended seeding‑rate ranges. Peer‑reviewed research summaries such as the STRIPS prairie‑strips publications (PNAS/Science/PMC) for ecosystem benefits context.
Which land‑grant extension and university publications are essential for species‑specific turf and native grass establishment data?
State land‑grant extension publications (e.g., Oregon State EC‑1550; University of Missouri turf and native grass guides; Utah State Intermountain Planting Guide) for species germination windows, seed rates, soil temp thresholds, irrigation and mowing schedules, and equipment recommendations. Use the extension bulletin from the state where the project is located for regionally adjusted recommendations.
What commercial and industry sources are useful and what limitations should I note?
Commercial seed product spec sheets and vendor mix displays (e.g., Native Connections, regional seed companies) provide as‑sold seed rates and composition useful for practical calculations. Limitation: product specs may not use PLS adjustments, may contain non‑local ecotypes, and can promote proprietary mixes—always cross‑check with extension/NRCS guidance and request PLS/origin data from vendors.
What seed‑rate, purity and PLS questions must be verified with suppliers or lab tests?
Ask suppliers for Percent Pure Live Seed (PLS) for each component and calculate PLS‑adjusted seeding rates; confirm seed origin/ecotype, year of harvest, and cleaning/debearding status (especially for warm‑season grasses with awns); request germination test results and lot tags; for native mixes request species list by weight and seeds per pound where available.
What soil testing and amendment protocols should the guide recommend and which sources back them?
Recommend comprehensive soil test (pH, buffer pH, texture, organic matter, available P, K, micronutrients) from an accredited lab. Use land‑grant extension and NRCS guidance for lime and fertilizer recommendations: lime to target species‑appropriate pH, defer high phosphorus applications for native prairie reconstructions (NRCS warns fertilizers favor weeds), and amend with compost for very sandy soils. Reference extension bulletins and NRCS conservation practice standards for rates and timing.
Next Article
How to Grow Purple Pampas Grass From Seed Step by Step
Step-by-step guide to grow purple pampas grass from seed, including timing, soil prep, germination, and care plus troubl