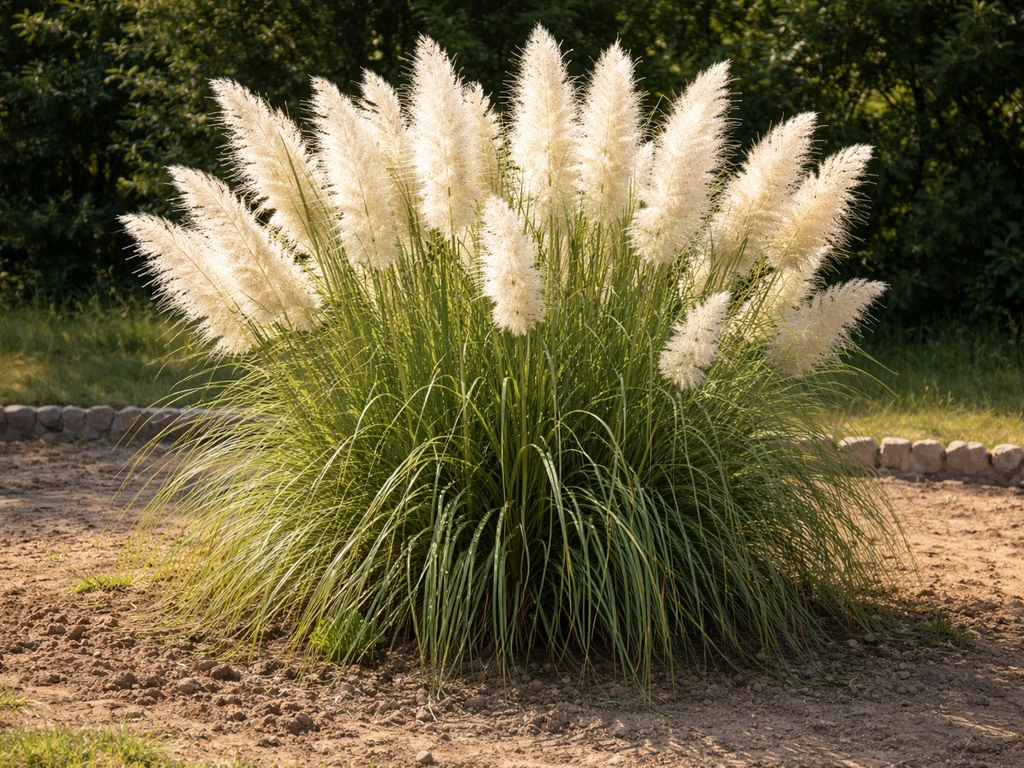
Yes, you can absolutely grow pampas grass from seed, and while it is not the fastest project you will ever take on, it is genuinely doable for a home gardener with basic supplies. Homes & Gardens also advises that if you grow pampas grass from seed by sowing indoors from February through April, seed-started plants won’t flower for at least two years seed-started pampas won’t flower for at least two years. The process is straightforward once you understand two non-negotiable rules: the seeds need light to germinate (never bury them), and they need consistently moist soil from day one. Get those two things right, and you will have seedlings in your hands within two to four weeks.
How to Grow Pampas Grass Seeds Step by Step Guide
Marcus Tillwell
10 Apr 2026
Can you grow pampas grass from seed (and is it hard)?

Growing pampas grass from seed is not hard, but it does require patience. This is not a grass you sow and see in a week. Germination typically takes somewhere between 10 days and 30 days depending on your conditions, and the plants will not flower until two to three years after germination. That timeline surprises a lot of people, so it is worth setting the expectation now: if you want blooms this fall, seed-starting is not your path. But if you are building a landscape feature for next year and beyond, starting from seed is one of the most affordable ways to do it.
From a germination standpoint, the science is actually encouraging. A 2025 peer-reviewed study on Cortaderia selloana found germination rates of roughly 71 to 79 percent under controlled conditions, which is a solid rate for an ornamental grass. The seed is not fragile or finicky in the way that some perennials are. It just needs the right surface conditions, which we will cover in detail below. If you have already been wondering how do you grow pampas grass in general, seed-starting is one of two main approaches alongside buying nursery plants, and this guide focuses entirely on doing it from seed.
Seed-starting setup: what you need before you sow
Containers and trays
A 72-cell plug tray works well for starting pampas grass seeds at home, and it mirrors the commercial plug production approach used by professional growers. If you only have a handful of seeds, small individual pots or a standard seed tray with drainage holes work just as well. The key is drainage: whatever container you use needs to drain freely. If water sits at the bottom of your tray, you are setting yourself up for damping off before the seedlings even get established.
Growing medium
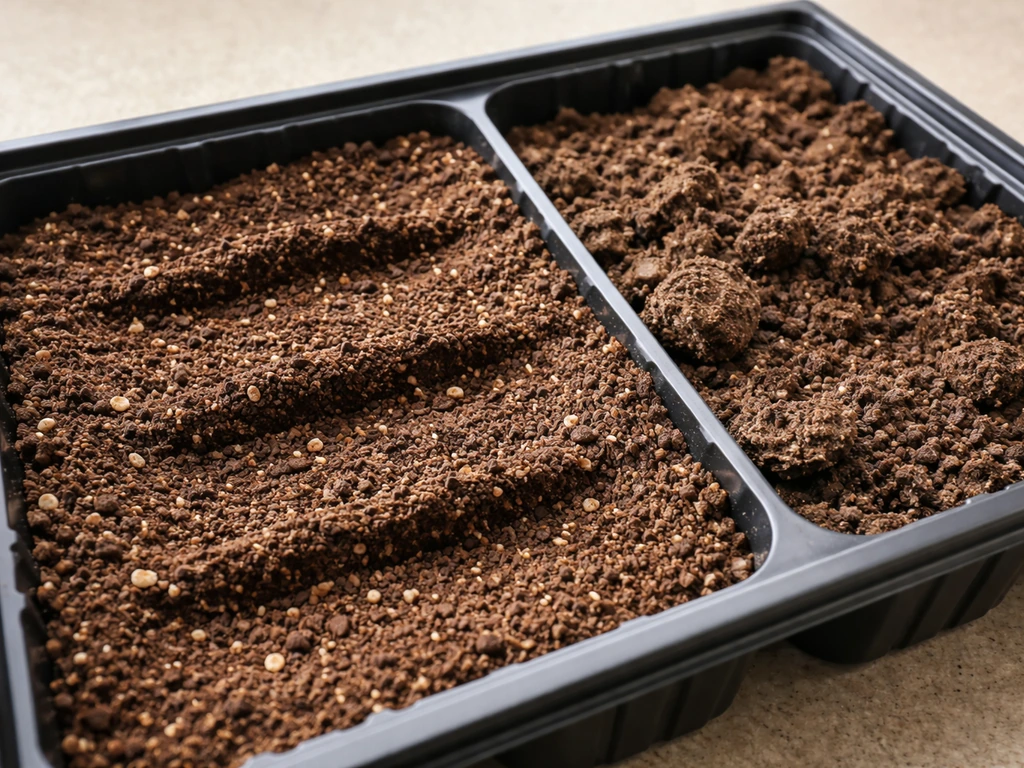
Use a well-draining commercial seed-starting mix or a fine potting media, not garden soil from your yard. Garden soil compacts in trays and can carry pathogens that will kill seedlings fast. Professional Cortaderia production uses well-draining commercial media with a controlled fertility level, roughly an EC of 1.8 to 2.2. For home use, a standard seed-starting mix from any garden center is fine. If it feels dense or heavy, cut it with a little perlite to improve drainage.
Timing your seed start
Start seeds indoors 8 to 10 weeks before your planned outdoor planting date. In practice, that means starting in late January through April in most regions, with February being the sweet spot for a lot of gardeners. If your last frost falls in late May or early June, start seeds in early February to give them a full 12 to 14 weeks of indoor growth before they go outside. This timing is explored in more depth in the climate section below, but the short version is: earlier is almost always better than later for seed starting.
How to sow pampas grass seeds
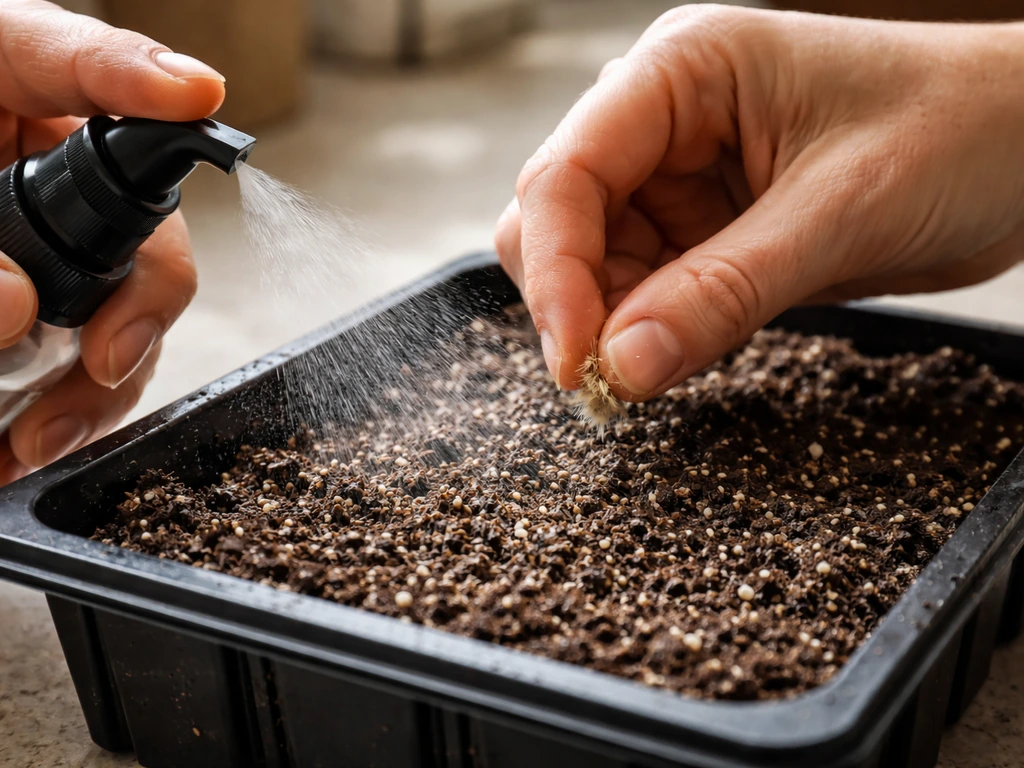
Surface sowing is the single most important technique to get right. Do not bury these seeds. Pampas grass seeds require light to germinate, which means they need to sit on top of the growing medium, not under it. Every major seed supplier that handles Cortaderia selloana agrees on this point: West Coast Seeds says to avoid covering the seeds entirely, Ferri Seeds instructs to surface sow because light aids germination, and Sheffield's Seed Company specifies surface sow with a gentle tamp to press the seed into contact with the soil without burying it.
Here is the exact process to follow:
- Fill your tray or pots with pre-moistened seed-starting mix. The medium should feel damp throughout but not soggy.
- Lightly firm the surface with your fingers or the bottom of a flat container so there are no air pockets.
- Place seeds on the surface, one per cell if using a plug tray. Do not press them down more than a light tamp to make contact with the soil.
- Do not cover with more mix. Leave the seeds fully exposed to light.
- Mist the surface gently with a spray bottle to seat the seeds without washing them around.
- Cover the tray loosely with a clear plastic dome or plastic wrap to hold humidity. Lift it daily for a few minutes to prevent fungal buildup.
- Place the tray in a location with good light and a temperature of 68 to 75°F (20 to 24°C).
Moisture is the other critical variable. The seed surface must stay consistently moist, not wet, from the moment you sow until germination. Allowing the surface to dry out even once during the germination window can stall or kill the process. Mist lightly once or twice a day rather than watering heavily, and always check that the medium has not dried out before going to bed. Think of it as keeping the surface of the mix looking slightly darkened with moisture at all times.
Germination and early seedling care
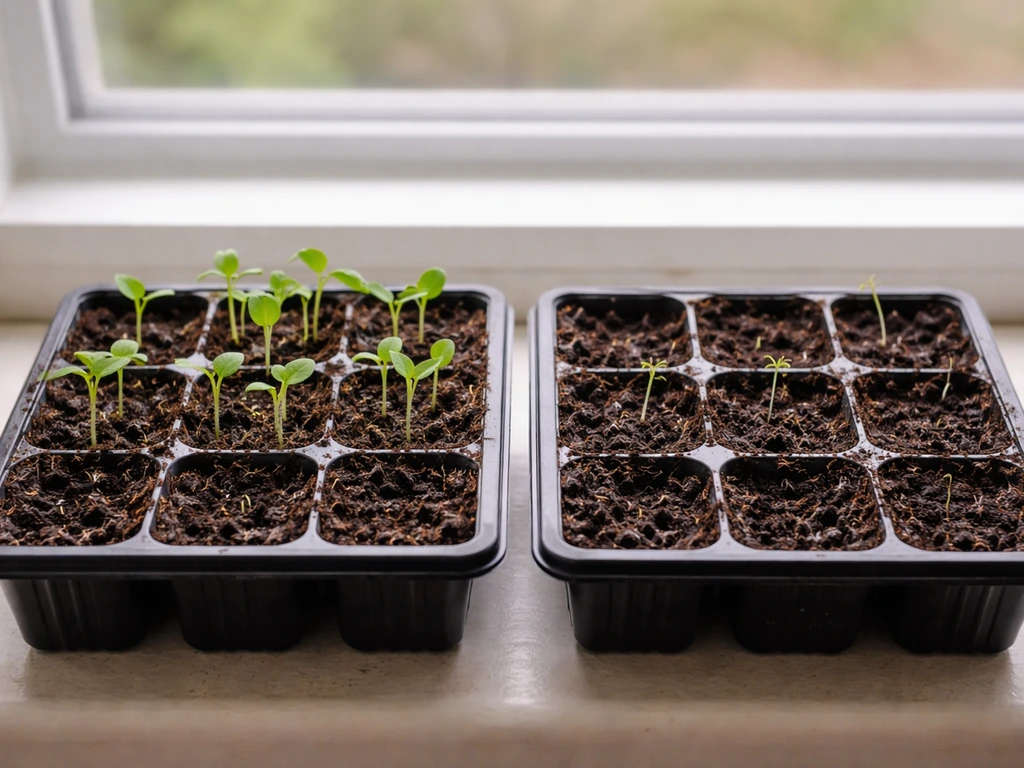
Under good conditions, at 22 to 24°C (71 to 75°F), you should see germination in under two weeks. The Cortaderia selloana monograph also notes that temperature strongly affects germination, with minimum temperatures needed for seeds to sprout Lázaro. In cooler or less consistent conditions, it can stretch to 20 to 30 days. If you hit the 30-day mark with no sprouts, do not throw the tray away. Try moving it somewhere warmer, or try a warm/cold cycle: give the tray a few days at room temperature, then a few days somewhere cooler (around 50 to 55°F), then back to warmth. This cycling can sometimes restart stalled germination.
After the seedlings emerge
Once you see sprouts, remove the plastic cover during the day to improve air circulation. Keep the seedlings under bright light, a south-facing window works if you have good natural light, but a simple grow light set 2 to 4 inches above the tray will produce stockier, healthier seedlings. Weak, leggy seedlings are almost always a light problem, not a watering problem.
Water slightly more generously once seedlings are up, but always let the top of the medium approach dryness between waterings rather than keeping it constantly wet. Damping off (where seedlings collapse at the stem) is caused by overwatering and poor air circulation, and it is the most common way to lose a whole tray of young pampas grass. If you see it happening, reduce watering immediately and improve airflow.
When seedlings are about 2 to 3 inches tall and have developed a few true leaves, thin to one plant per cell if you sowed multiple seeds. If you are growing in a community flat, pot on individually into small 3 to 4-inch pots filled with general-purpose potting mix. This gives each plant room to develop its root system before going outside. You can also explore the full range of pampas grass growing methods to see how seed-grown plants compare with division or nursery stock at this stage.
Transplanting seedlings outdoors
Hardening off first
Before any seedling goes into the ground, it needs to be hardened off, and this step is not optional. Plants raised indoors are not used to direct sun, wind, or temperature swings. Skip hardening off and you will watch your seedlings sunscorch or wilt within a day or two of transplanting. Harden off by placing pots outside in a sheltered, partly shaded spot for a few hours on day one, then gradually increasing outdoor exposure over 7 to 10 days until they are spending full days outside. Only then should you plant them in the ground.
Sun and soil requirements
Pampas grass is not fussy about soil type. It tolerates clay, sand, loam, acidic, and alkaline conditions, which makes it easier to place than many ornamentals. The one thing it will not forgive is poor drainage. Root rot from waterlogged soil is a real failure mode, so avoid low spots that hold standing water. Choose a location with full sun (it will grow in light shade but flowers better in full sun) and well-drained to medium-moist soil. Good air circulation around each plant also matters for long-term health, so do not crowd it against a fence or other plants.
Spacing
Give each plant room to become the large, dramatic clump it will eventually be. Standard guidance puts spacing at 36 to 60 inches between plants for most landscape settings. If you are planting as a hedge or privacy screen, spacing of at least 6 feet between plants allows each clump to fill out properly without strangling its neighbors. Tight spacing might look intentional when plants are small seedlings, but pampas grass matures into a very large plant and overcrowding leads to reduced airflow and increased disease pressure.
Watering after transplant
Water transplants well on planting day, then keep the soil consistently moist for the first two to four weeks while the root system establishes. After that, pampas grass is quite drought-tolerant and does not need regular irrigation once established. The establishment phase is the window where most seedling losses happen, so do not walk away from watering too soon.
Climate-based timing and planning
Where you live changes when you start seeds and when you plant out, but it does not change the core technique. Here is how to adapt the timeline by region:
| Region | Start Seeds Indoors | Transplant Outdoors | Notes |
|---|---|---|---|
| Warm climates (USDA zones 8-11, e.g. Texas, Florida, Southern California) | January to February | March to April | Long growing season allows earlier starts; pampas tolerates frost but seedlings establish better in warm soil |
| Moderate climates (zones 6-7, e.g. mid-Atlantic, Pacific Northwest, transitional South) | February to March | April to May after last frost | Start 8-10 weeks before last frost; confirm last frost date for your zip code |
| Cooler climates (zones 4-5, e.g. upper Midwest, New England) | March to April | Late May to early June | Pampas grass tolerates winter frost once established but young seedlings need frost-free ground to get started |
| UK and Northern Europe | February to April indoors | May to June after risk of frost | Homes & Gardens UK recommends this exact window; prioritize a sheltered outdoor spot for first-year plants |
Pampas grass tolerates winter frost once it is established, which is good news for gardeners in colder zones. The challenge is getting young seedlings through their first season. In zones 4 and 5, plant out after the last frost date and give the plant a full growing season to develop a strong root system before its first winter. A light mulch around the crown in the first autumn will help protect it. If you are also interested in other dramatic ornamental grasses worth starting from seed, the approach for how to grow prairie grass follows a similar principle of surface sowing with consistent early moisture.
Troubleshooting low germination and weak growth
If your seeds are not germinating or your seedlings are struggling, the cause is almost always one of the following:
- Seeds were buried: This is the most common mistake. If you covered the seeds even lightly with soil, germination will be poor or nonexistent. Start over with a fresh sowing on top of the medium.
- Temperature too low: Germination at temperatures below 65°F will be slow and patchy. If your seed tray is sitting on a cold surface or in a cool room, move it somewhere warmer or put it on a heat mat set to 70 to 75°F.
- Surface dried out: If the medium surface dried out for even a day during the germination window, surface-sown seeds can fail. Keep the dome on and mist consistently.
- Germination stalled past 30 days: Try a warm/cold cycle. Move the tray to a cooler location (around 50°F) for three to five days, then bring it back to 70 to 75°F warmth. This temperature shift can trigger germination in stubborn seeds.
- Leggy, pale seedlings: Not enough light. Move the tray closer to a window or lower your grow light. Pale yellow seedlings are a light deficiency, not a soil or water issue.
- Seedlings collapsing at the base (damping off): This is a fungal problem caused by overwatering and poor airflow. Remove affected seedlings immediately, cut back watering, and increase ventilation. There is no cure once damping off sets in, only prevention.
- Slow overall growth after transplant: Pampas grass grows slowly in its first year regardless. If it looks healthy but small, that is normal. Feed lightly with a balanced slow-release fertilizer in spring to encourage establishment without pushing excessive soft growth.
One thing worth knowing: even with excellent technique, some seed batches will underperform. Seed age matters, and older pampas grass seed can have lower viability. If you bought seeds from a reputable supplier and followed the steps above but still got poor germination, the seed itself may be the issue rather than your process. Buy fresh seed for your next attempt.
If you are interested in other ornamental seed projects that follow a similar careful surface-sowing approach, how to grow penny grass offers another interesting comparison for small-scale seed starting. And if you have had success with pampas and want to try a striking color variant next, how to grow purple pampas grass walks through the specific considerations for that cultivar, which follows much the same germination process but with a few nuances worth knowing.
For gardeners who enjoy high-yield ornamental grass projects and want something with a faster payoff to grow alongside their pampas, how to grow super napier grass is worth a look as a fast-establishing contrast plant. And if you want a broader picture of what companion ground cover options look like in an ornamental or low-maintenance yard, how to grow gold coin grass covers a compact, spreading option that fills in nicely around statement plants like pampas.
The bottom line on growing pampas grass from seed is this: surface sow, keep it moist, give it light and warmth, and be patient. The germination window is real, the seedlings are manageable, and the payoff of a plant you grew from scratch is worth the wait. Start your seeds in late winter, plan your transplant date around your last frost, and give your plants a full season to establish before their first winter. You will have a mature, flowering pampas grass clump before you know it.
FAQ
My pampas grass seeds are not germinating after 30 days. What should I try next?
If you keep the mix uniformly moist but still see nothing after about 30 days, first confirm the tray was never buried and the seeds were receiving light. Then try bottom-watering once or twice to rehydrate without disturbing the surface (pour water into the tray and let it wick up), and consider moving to a slightly warmer spot (around 22 to 24°C). If it still fails, the next attempt should start with newer seed, since low viability is a common cause even when technique is right.
Is it okay to use a heat mat or warmer location when trying to germinate pampas grass seeds?
Yes. Heat can actually reduce germination consistency, especially if the surface dries out quickly. Aim for stable warmth, not hot. Using a thermostat-controlled heat mat under the tray can help, but keep the surface conditions consistent and avoid letting the top of the medium dry between checks.
How should I water so I do not bury the seeds?
Misting is usually better than heavy watering because these seeds must stay on the surface. If you water from the top, do it very gently so you do not wash seeds sideways or deeper into the mix. If you notice seeds collecting in one spot or sinking, switch to light wicking (bottom water) so the medium stays evenly moist without burying the seed.
What do leggy or weak pampas grass seedlings mean, and how do I correct it?
If seedlings look pale or leggy, the fix is almost always more light, not more fertilizer or more water. Increase light intensity by moving the grow light closer (within the 2 to 4 inch range mentioned in the guide) and extend daily exposure (many gardeners use 12 to 16 hours per day). Once seedlings are thicker, start using a diluted, general-purpose seedling fertilizer very lightly if you see persistent yellowing, not immediately.
Can I start pampas grass seeds in any potting mix, or does the texture matter?
Yes, and it can matter. Very fine, light potting media tends to wick and rewet more evenly than dense mixes, but either way the mix must drain and not form a soggy crust on top. If your chosen medium dries too fast, you may need more frequent misting, and if it stays wet, you will increase damping off risk. The goal is a surface that stays consistently moist while the container drains freely.
If I start seeds in a flat instead of individual cells, when should I thin or pot up?
Community flats can work, but pampas seedlings do not like being cramped for long. Thin early to avoid competition, and pot up as soon as you can handle the seedlings without tearing roots. If you wait too long after roots tangle, transplant shock increases and establishment outdoors becomes slower.
What is the best way to harden off pampas grass seedlings without losing them to sunscorch?
Harden off begins with short, sheltered exposure, then increases. A practical safeguard is to do the first couple of days in the brightest shade you can manage and avoid direct harsh sun and strong wind. If night temperatures are still near freezing, keep plants inside or in a protected area overnight until they handle consistent conditions.
When should I fertilize pampas grass seedlings, if at all?
Germination and early growth do not require fertilizer, because the seed provides what it needs at first. Once seedlings are established and you are transitioning to brighter, more stable growth (after potting or after the first true leaf set), you can use a very diluted fertilizer if they are pale or slow. Over-fertilizing in crowded trays can worsen damping off by keeping the surface too wet or encouraging overly soft growth.
Can I plant pampas grass seedlings outdoors before the last frost if I protect them?
In general, plant when you can provide stable outdoor conditions and the seedlings are sturdy enough to tolerate moving. Many gardeners wait until after last frost and then transplant only after hardening off. If spring weather flips cold suddenly, delay planting a bit, or keep the pots outdoors in a protected spot until soil temps are more consistent.
Why is pampas grass spacing so important, and what goes wrong if I crowd them?
Spacing rules are not just about mature size, they are also about airflow. Crowded plants create a humid microclimate that raises disease risk and slows drying after rain. If you are creating a privacy screen, a common mistake is planting too close for an effect that only lasts a year, then you end up needing to thin later or accept reduced vigor.
In cold zones, how should I protect seed-grown pampas grass in winter without causing rot?
Yes, but only in the sense of protecting the crown during the plant's first winter, not keeping it indoors. For the first season, a light mulch around the crown can reduce freeze-thaw stress in colder zones, but avoid thick piling that traps moisture against the crown. For established plants, heavy winter wetness is usually riskier than cold.
Next Article
Pampas Grass How to Grow: Step-by-Step Planting Guide
Step-by-step pampas grass how to grow guide: site prep, light, soil drainage, planting time, watering, and failure fixes