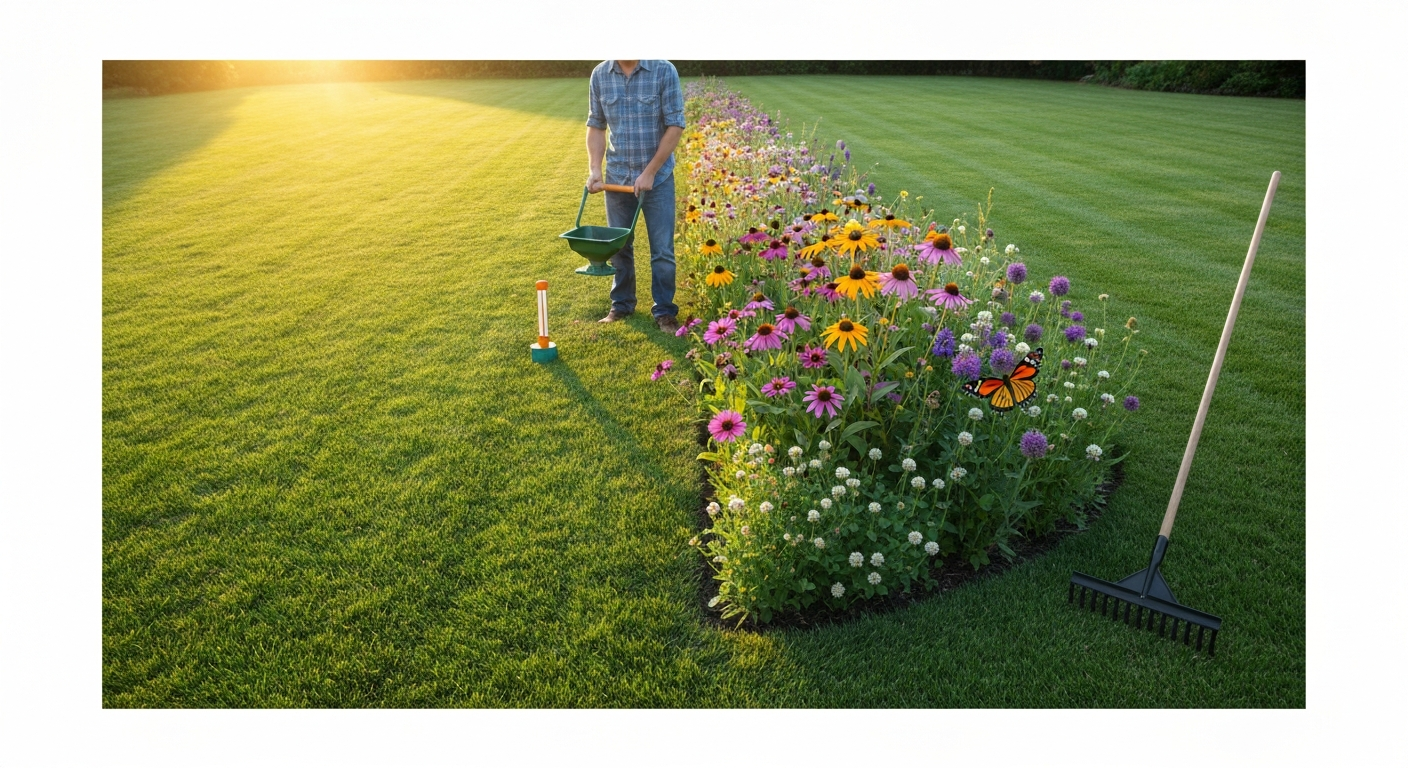
Mini leaf grass is a dense, fine-bladed lawn made from dwarf or ultra-fine cultivars of grasses like bermudagrass, zoysiagrass, and fine fescues, where individual blade widths measure roughly 1–2 mm. You grow it the same way you grow any lawn from seed, sod, or plugs, but the cultivar choice and a few key details around soil prep, watering frequency, and mowing height make or break the result. Get those right and you end up with a carpet-like surface that looks and feels genuinely different from a standard coarse-bladed lawn.
how to grow mini leaf grass: complete homeowner's guide
Marcus Tillwell
28 Jul 2026
What is mini leaf grass exactly?
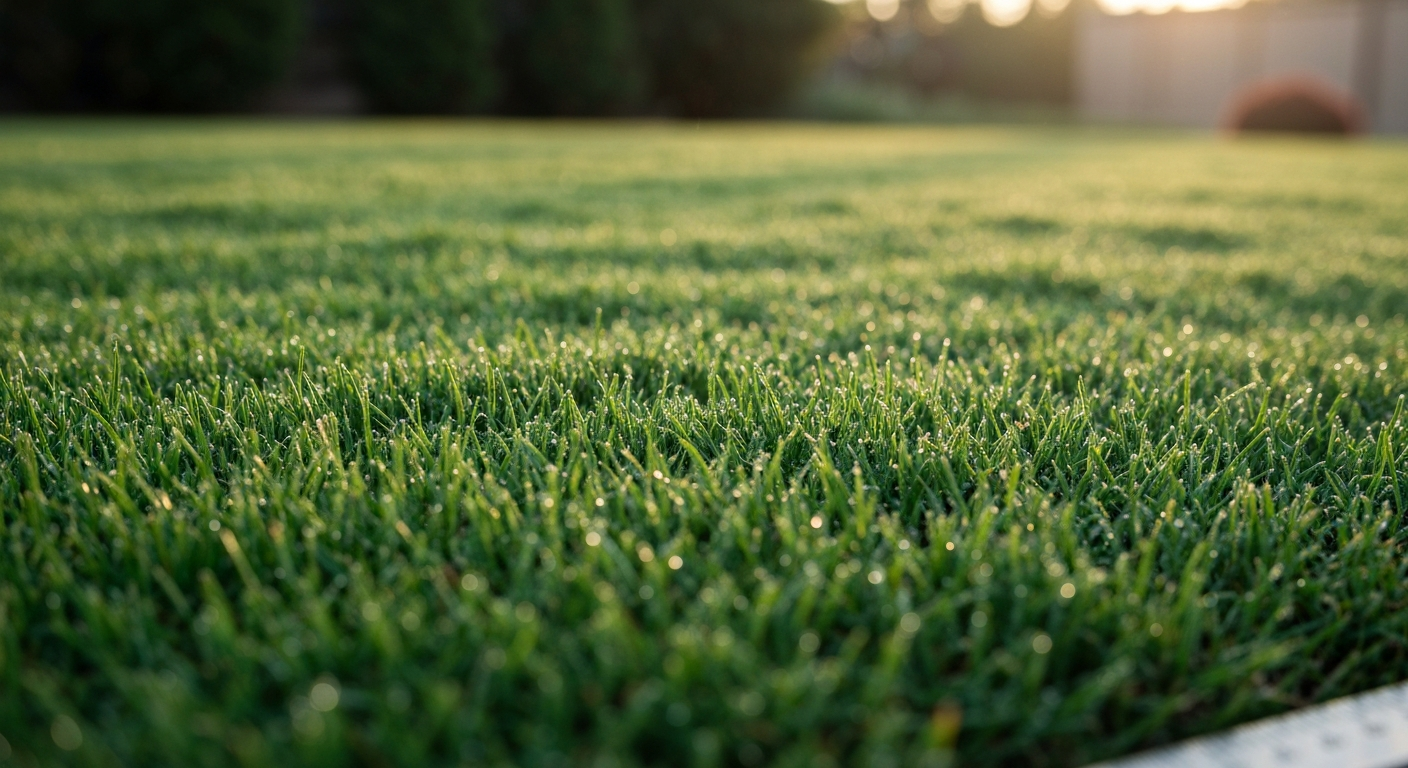
The term 'mini leaf grass' is not a single species. It describes a look and a blade texture achieved by choosing low-growing, fine-leaved cultivars within several grass families. When lawn enthusiasts talk about a mini leaf lawn, they mean turf where the individual blades are noticeably narrow and short, the canopy sits low and dense, and the overall appearance reads almost like a living mat rather than a cluster of individual plants.
The grasses that reliably deliver this look fall into a few categories. Fine fescues (chewings, creeping red, hard, and sheep fescue) produce blades around 1–2 mm wide and have a naturally soft, thread-like appearance. Dwarf and ultra-fine bermudagrass cultivars like TifEagle, Tifdwarf, and TifTuf produce a noticeably finer and lower canopy than common bermuda. Ultra-fine zoysiagrass cultivars like Emerald and Zeon have dense, dark-green, narrow blades that rival fine fescue in texture. Together these form the main toolkit for a mini leaf lawn.
Visually, a well-established mini leaf lawn has a few distinctive traits: it holds a low profile even between mows, it feels springy underfoot because of the density, and fine-leaved types like hard fescue or Emerald zoysia tend to stay green without heavy feeding. The trade-off is that some of these grasses (ultra-fine bermudagrass putting-green types, for instance) need more precise care than a typical homeowner lawn. Knowing which type you are growing is everything.
Real benefits, honest trade-offs
The appeal is genuine. A fine-bladed lawn mows cleaner, feels softer on bare feet, and, in the case of fine fescues, requires significantly less fertilizer and irrigation than conventional turf. Fine fescues can get by on as little as 0.5–1 lb of nitrogen per 1,000 sq ft per year, which saves money and reduces runoff. Warm-season fine types like Zeon zoysia are extremely drought-tolerant once established and handle light foot traffic well without looking beaten up.
The trade-offs are real, though. Ultra-fine bermudagrass putting-green cultivars (TifEagle, Tifdwarf) were bred for golf course conditions and have weaker freeze tolerance than standard turf-type bermudas. They struggle in the upper transition zone and most cool-season regions. Many of the best-looking zoysiagrass cultivars (Emerald, Zeon) are only available as sod or plugs, not seed, which raises upfront cost and extends the establishment timeline. And fine fescues, while low-maintenance in cool-season regions, don't survive hot, humid summers in the South.
A mini leaf lawn is a great fit if you want low chemical input in a cool or transitional climate, a lush-looking front lawn that doesn't need constant mowing, or a premium-texture backyard for bare feet and kids. It is probably not worth the extra effort if you have heavy dog traffic year-round, if your yard gets deep shade for more than half the day (most warm-season fine grasses won't tolerate it), or if your budget is very tight and you need quick, inexpensive coverage.
Is a mini leaf lawn right for your yard?
Before you buy a single bag of seed or roll of sod, answer these questions honestly. They will save you time, money, and frustration.
- How much direct sun does your yard receive per day? Most fine-bladed warm-season grasses (bermuda, zoysia) need at least 6 hours of full sun. Fine fescues tolerate moderate shade (4+ hours) but fail in deep shade.
- What is your climate region? Cool-season fine fescues belong in USDA zones 3–7. Warm-season fine bermuda and zoysia thrive in zones 7–10. The transition zone (roughly zone 7) gives you options in both directions but requires a careful cultivar pick.
- What is your foot traffic level? Light to moderate traffic suits fine fescues and fine zoysia well. Heavy daily dog runs or kids playing every afternoon will thin these grasses faster than coarser types.
- Do you have pets that dig or urinate frequently? Urine burn and bare spots from digging are harder to repair in a dense fine-leaf stand, though it is doable with overseeding patches.
- What is your soil like? Clay soil, sandy soil, and compacted subsoil all need different prep before seeding or sodding — skipping that step is the number one reason mini leaf lawns fail in year one.
- What is your budget and timeline? Seed is cheapest but slowest. Sod costs more and gives instant coverage. Plugs sit in the middle. Seeded fine fescue is the most affordable mini leaf option overall; vegetative zoysia sod is the most expensive but fastest for warm climates.
If you are drawn to low-mow, low-chemical lawn alternatives, it is also worth considering whether a mini meadow or wild grass planting might actually suit your lifestyle better. For step-by-step guidance on planning, planting, and maintaining a low‑mow, pollinator-friendly mini meadow, see our guide on how to grow a wildflower meadow. Those approaches require even less maintenance and pair well with naturalistic garden designs, though they give a wilder look rather than the carpet aesthetic of a fine-bladed lawn.
Choosing your cultivar: fine bermuda, zoysia, and fescue compared
The biggest decision you will make is which grass to grow. Here is a practical comparison of the main mini leaf options across the factors that matter most to a homeowner.
| Grass | Blade width | Best climate zones | Establishment method | Mowing height | Nitrogen need (lb N/1,000 ft²/yr) | Shade tolerance | Notes |
|---|---|---|---|---|---|---|---|
| Fine fescue (mix of chewings, hard, creeping red, sheep) | 1–2 mm | Zones 3–7 (cool-season) | Seed: 4–5 lb/1,000 ft² | 2.5–4 in | 0.5–2 | Moderate (4+ hrs sun) | Lowest input of all options; not for hot, humid South |
| TifTuf bermudagrass | ~1.5 mm | Zones 7–10 | Sod or seed (hulled) | 1.0–1.5 in | 3–5+ | Poor (needs full sun) | Better drought tolerance than older Tifton types; good freeze tolerance for a fine bermuda |
| TifEagle / Tifdwarf bermudagrass | Ultra-fine (<1.5 mm) | Zones 8–10 (golf-grade) | Sod or sprigs only | 0.5–1.0 in (reel mower required) | 5–8+ | Very poor | Golf putting-green standard; overkill for most home lawns; weaker cold tolerance |
| Emerald zoysiagrass | ~1.5–2 mm | Zones 6–10 | Sod or plugs (no reliable seed) | 0.5–1.5 in | 2–4 | Moderate | Exceptional texture and color; slow to establish from plugs |
| Zeon zoysiagrass | ~1.5–2 mm | Zones 7–10 | Sod only | 0.5–1.5 in | 2–4 | Moderate | Dense, dark green; excellent traffic tolerance once established |
| Zenith zoysiagrass (seeded) | ~2 mm | Zones 6–9 | Seed or plugs | 1–2 in | 2–4 | Moderate | One of few seeded zoysia options; slow germination, 3–4 months to coverage |
| Perennial ryegrass (fine-leaf cultivars) | ~2–3 mm | Zones 5–7 (cool-season) | Seed: 4–6 lb/1,000 ft² | 1.5–2.5 in | 3–5 | Moderate | Fast germination (5–7 days); great for overseeding warm-season lawns in winter |
My honest recommendation: if you are in a cool-season region and want the least maintenance, go with a fine fescue blend. If you are in the South or transition zone and want a premium carpet lawn, Emerald or Zeon zoysia sod is the most satisfying result, even though the upfront cost stings. Seeded TifTuf or Zenith are solid budget-middle options if you have time and patience.
Regional climate and zone guide: warm vs cool season choices
Picking a grass outside its climate zone is one of the most common and costly mistakes. Warm-season grasses go dormant and turn brown in winter below roughly zone 7. Cool-season fine fescues thin out, bleach, and die in a hot, humid Southern summer. Zone matching is non-negotiable.
Cool-season regions (zones 3–6, northern US and Canada)
Fine fescue blends are the go-to for a mini leaf look here. Chewings fescue tends to be the finest in texture; hard fescue handles poor, dry soils better; creeping red fescue works well in shadier spots. Sow in late summer to early fall (late August through mid-September) when soil temperatures are cooling toward 50–65°F. This is the best germination window. Spring seeding works but competes with weed pressure. Expect germination in 7–14 days and a usable stand in 6–8 weeks from fall seeding.
Transition zone (zones 6b–7, mid-Atlantic, mid-South, lower Midwest)
This is the most complicated region because no grass is perfectly happy here year-round. Your best options are: Zeon or Emerald zoysia (survive mild winters, dormant but green again by late spring), TifTuf bermudagrass for full-sun lawns, or a fine fescue that you accept will struggle in July and August heat. Many transition-zone homeowners use fine tall fescue as a compromise (not as fine-bladed as the other options, but more heat-tolerant than fine fescue species). Seeded options in the transition zone should go in when soil temps are stable: bermuda and zoysia seed in late spring (soil at 65–75°F), fine fescue in early fall.
Warm-season regions (zones 8–10, Deep South, Texas, Gulf Coast, Southwest)
Bermudagrass and zoysiagrass own this territory. For a true mini leaf look, TifTuf bermudagrass sod or seed gives a fine texture with better drought tolerance than older Tifton types. If you want the very finest texture and your area rarely freezes, TifEagle or Tifdwarf sod is a stunning lawn, but you need a reel mower and more fertilizer. Seed bermudagrass (hulled seed) when soil temperatures hit at least 65°F consistently, usually April through June depending on your location. Germination takes 7–14 days in good conditions.
Assess your site before you spend a dollar
Walk your yard and take honest stock of what you are working with. A 30-minute site assessment saves weeks of frustration later.
- Sunlight: Track sun coverage at 9 am, noon, and 3 pm for a couple of days. Most fine-bladed warm-season grasses need 6+ hours of direct sun. Fine fescues can manage with 4–5 hours. Anything less and you need to consider shade-tolerant alternatives or tree trimming.
- Shade sources: Nearby trees do not just block light — their roots compete directly with grass roots for water and nutrients, and leaf litter can smother a fine-textured lawn. Note overhanging branches.
- Slope and drainage: Steep slopes erode during establishment, especially before seeds germinate. You may need erosion blanket or a sod approach for slopes above 15%. Standing water after rain indicates drainage problems that must be addressed before seeding.
- Soil type: Squeeze a moist handful. Does it ribbon out smoothly (clay)? Fall apart and feel gritty (sand)? Crumble easily into small pieces (loam)? Each needs a different prep approach.
- Traffic patterns: Where do kids and pets run? Where do you walk to reach the gate, the shed, the driveway? High-traffic corridors need tougher selections (zoysia handles traffic better than fine fescue once established) or hardscaping rather than fine grass.
- Existing lawn condition: If you have 50% or more decent grass already, overseeding may be your route. Less than 50%? A full renovation starting from scratch usually delivers better results.
Soil testing: what to test, how to read it, and what to do next
A soil test is the single most useful $15–$25 you will spend on your lawn. Do it before you add anything to the soil. Most people skip this step and end up correcting problems they caused themselves by adding lime or fertilizer their soil did not need.
What to test for
- pH (water pH and buffered pH): Target range for most turfgrasses is 6.0–7.0. The buffered pH (sometimes called buffer pH or SMP buffer) is what your lab uses to calculate exactly how much lime you need — do not try to estimate lime rates without this number.
- Organic matter percentage: Healthy lawn topsoil targets 3–5% organic matter. Below 2% tells you the soil needs compost amendment. Above 6% in a sandy soil can indicate thatch risk.
- Available phosphorus (P) and potassium (K): Low P before establishment? Add it as part of your starter fertilizer. Persistent low K? Address it as part of your ongoing fertility program.
- Calcium (Ca) and magnesium (Mg): These are usually fine if pH is corrected, but it is good to confirm.
- Micronutrients (iron, manganese, zinc): Worth testing if you see unexplained yellowing after establishment, particularly in high-pH soils.
- Salinity (EC): Relevant if you use reclaimed water for irrigation or if you are near a coast.
Reading your results and acting on them
Your county extension office or land-grant university lab will include a recommendation section with your results. Follow it. This matters most for lime: do not apply lime without a buffered pH reading telling you exactly how many pounds per 1,000 sq ft you need. Too much lime raises pH above 7.5, which locks out iron and manganese and causes yellowing that is expensive and slow to fix. Similarly, if your pH is already at 6.5 and someone tells you to add sulfur to acidify it, do the test first. Soil-applied sulfur works slowly (weeks to months), so apply amendments well ahead of seeding, ideally 4–8 weeks before if you can plan that far ahead.
If your results show low organic matter (under 3%), plan to work 2–3 inches of compost into the top 4–6 inches of soil before seeding. If nutrients are low, apply a starter fertilizer at seeding: a 10-10-10 or 16-8-8 formula at a rate that delivers roughly 0.5–1.0 lb of actual nitrogen per 1,000 sq ft is a standard starting point from most extension programs.
Soil preparation step by step: loam, clay, and sandy soils
How you prepare the soil depends more on what type of soil you have than anything else. Here are the exact steps for each common scenario.
Loam soil (the ideal case)
- Collect a soil test 4–8 weeks before seeding and apply lime or sulfur per the lab recommendation. Give it time to react before seed goes down.
- Mow or scalp any existing vegetation as short as possible. Rake off clippings and debris.
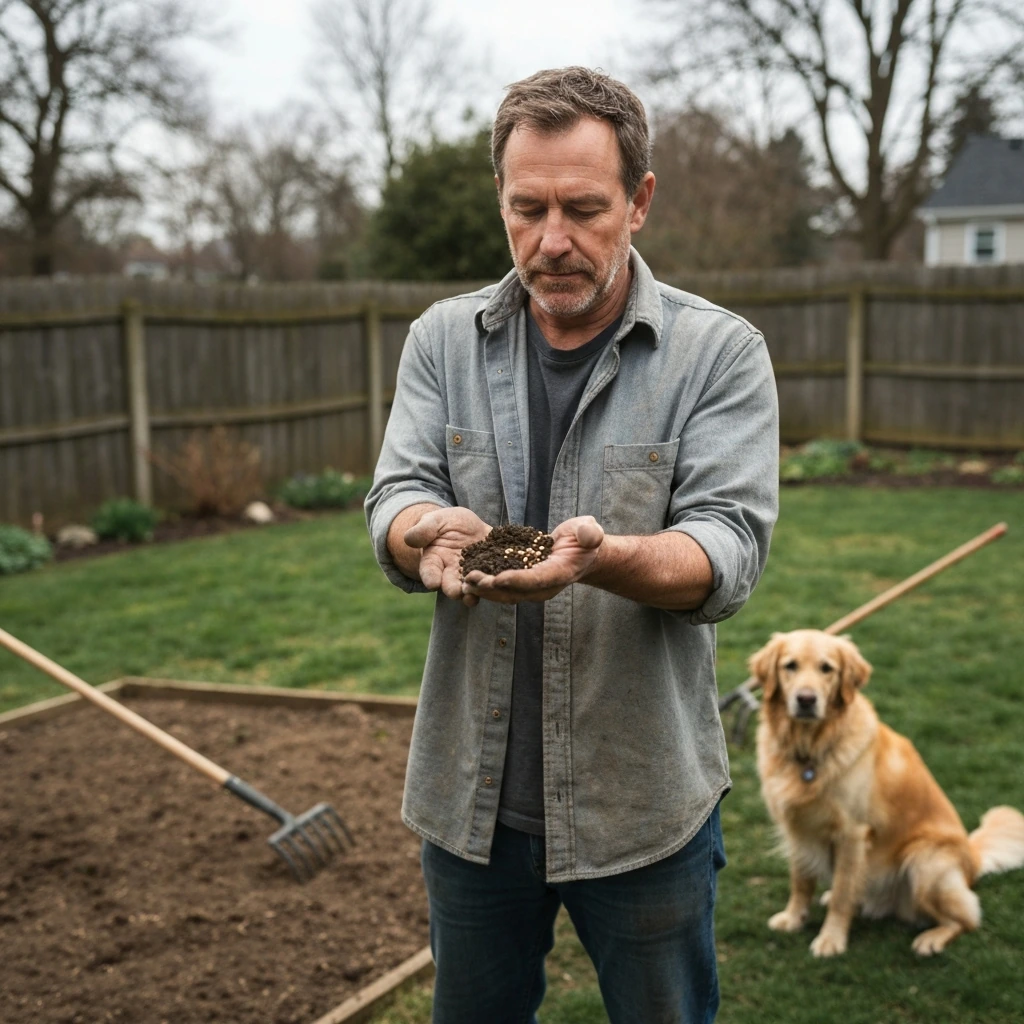
- Till or loosen the top 4–6 inches using a rototiller, garden fork, or aerator. For small areas, a garden fork turned twice works fine.
- Spread 1–2 inches of finished compost and work it into the loosened layer. This improves moisture retention and microbial activity without dramatically changing drainage.
- Rake the surface level, breaking up clods. Your goal is a smooth, firmed (not fluffy) seedbed. Footsteps should leave slight impressions but not sink deeply.
- Apply starter fertilizer (such as 10-10-10) per label rate to deliver roughly 0.5–1.0 lb N/1,000 sq ft. Rake lightly into the surface.
- Seed, sod, or plug as described below.
Clay soil
I have to be direct about one thing here: do not try to fix clay soil by adding a few inches of sand. This is a well-documented mistake. Small additions of coarse sand to heavy clay produce a material that is actually denser and more compacted than the clay alone because the sand particles lock into the clay matrix. The only sand amendment that works is a complete rootzone replacement using well-graded sand at 90% or more of the mix by volume, which is essentially a USGA-spec athletic field construction. For most homeowners, that is not practical.
- Run your soil test. Clay soils are often naturally higher in pH and nutrients, so do not assume you need to add lime.
- Core aerate the area two or three passes in different directions. This is especially important in compacted clay. Rent a core aerator if you do not own one — the hollow-tine type that pulls out plugs is worth it over a spike aerator.
- Apply 2–3 inches of compost and work it into the aeration holes and the top few inches of soil. Compost improves clay structure over time and does not carry the risks that sand does.
- If drainage is severely poor (water stands for more than 24 hours after heavy rain), you may need to address grading or install a simple French drain before investing in a premium lawn. No grass thrives in waterlogged soil.
- Repeat the compost-and-aeration cycle each fall for 2–3 years to progressively improve clay soil. Results are gradual but real.
- Prep the surface, apply starter fertilizer, and seed/sod as for loam above.
Sandy soil
- Run your soil test. Sandy soils are often low in pH, nutrients, and organic matter. Nutrient leaching is common.
- Apply lime if the buffered pH test calls for it — sandy soils often need a bump toward 6.0.
- Incorporate 3–4 inches of compost into the top 6 inches of soil. This is the highest compost rate of any soil type because sand is so low in organic matter and water-holding capacity. Do not skip this step.
- Consider a slow-release starter fertilizer rather than a fast-release product, since nutrients move through sandy soil quickly and fast-release nitrogen can leach before seedlings can use it.
- After establishment, plan to water more frequently and fertilize in smaller, more frequent doses than you would on loam. Sandy lawns also benefit from topdressing with a thin layer of compost each year to maintain organic matter levels.
- Prep the surface, firm it lightly, and seed or sod.
Seeding, sodding, and plugging: exact protocols
Seeding
Seeding is the most affordable establishment method and works well for fine fescues, perennial ryegrass, TifTuf bermudagrass (hulled seed), and Zenith zoysiagrass. Use these rates as your guide:
| Grass type | New lawn seed rate | Overseeding/repair rate | Typical germination time | Time to usable lawn |
|---|---|---|---|---|
| Fine fescue (any species) | 4–5 lb/1,000 ft² | 3–4 lb/1,000 ft² | 7–14 days | 6–8 weeks (fall sowing) |
| Perennial ryegrass (fine-leaf cultivars) | 4–6 lb/1,000 ft² | 3–4 lb/1,000 ft² | 5–7 days | 4–6 weeks |
| Seeded bermudagrass (hulled) | 1–2 lb/1,000 ft² | 0.5–1 lb/1,000 ft² | 7–14 days (soil must be 65°F+) | 8–12 weeks (full sun, warm season) |
| Zenith zoysiagrass (seeded) | 1–2 lb/1,000 ft² | 1 lb/1,000 ft² | 14–21+ days | 3–4 months to substantial coverage |
Spread seed with a broadcast spreader in two passes at 90 degrees to each other for even coverage. Rake very lightly to just barely cover seed with 1/8 to 1/4 inch of soil or topdressing. Do not bury seed deeper than this or germination rates drop sharply. Apply a light mulch of straw (not hay, which carries weed seeds) at about 1 bale per 1,000 sq ft to retain moisture and protect against erosion.
Watering during germination
This is where most people fail. During germination, the surface must stay consistently moist but not saturated. For cool-season seeds, this typically means watering 1–2 times per day in light, short bursts. For warm-season grasses (bermuda, zoysia), you need to be more aggressive: water 2–3 times per day in hot weather to keep the top 1/4 inch of soil moist at all times. Once seedlings are up and the first true leaves appear, back off to once per day, then transition to deeper, less frequent irrigation over the following weeks.
Sodding
Sod gives you immediate coverage and becomes firmly rooted in 2–3 weeks with proper watering. It is the best option for Emerald and Zeon zoysia, TifTuf bermudagrass, and any situation where you need results fast or are worried about erosion on a slope. Lay sod on prepared, moist soil immediately after delivery, never let sod sit rolled up in the sun. Stagger the seams like brick coursing, press edges tightly together, and roll the surface to eliminate air pockets. Water daily for the first two weeks, then back off gradually. Do not mow until you tug a corner and feel resistance from roots anchoring to the soil.
Plugging (zoysia and bermuda)
Plugs are 2–4 inch diameter cores of established grass, planted at 6–12 inch spacing into a prepared area. This is the budget path for zoysia when sod prices are high. At 6-inch spacing, expect one full growing season (roughly 6–12 months) to reach full coverage. At 12-inch spacing, add several more months. Keep plugs watered daily for the first 2–3 weeks until they root in. After that, treat them like an established lawn. The waiting is the hardest part, but the cost savings are real.
Mowing: heights, frequency, and the reel mower question
Mowing height is not just about appearances for fine-leaf grasses, it directly affects density, drought tolerance, and rooting depth. Here are the targets by grass type, along with honest advice about whether you actually need a reel mower.
| Grass | Recommended mowing height (home lawn) | Reel vs rotary | Frequency notes |
|---|---|---|---|
| Fine fescue blend | 2.5–4 in | Rotary is fine at this height | Every 10–14 days in active growth; very low in summer heat |
| Fine-leaf perennial ryegrass | 1.5–2.5 in | Rotary acceptable; reel gives cleaner cut | Every 7–10 days in spring/fall growth flushes |
| TifTuf bermudagrass (home lawn) | 1.0–1.5 in | Reel preferred but sharp rotary acceptable | Every 5–7 days in summer peak growth |
| TifEagle / Tifdwarf bermudagrass | 0.5–1.0 in | Reel mower required | Every 3–5 days at active growth — this is a golf-course grass |
| Emerald / Zeon zoysiagrass | 0.5–1.5 in | Reel preferred at lower end; rotary at 1.5 in acceptable | Every 7–10 days in summer; growth slows in cooler months |
For most homeowners, a sharp rotary mower set at the right height is perfectly adequate for fine fescues and home-lawn bermudagrass. Recommended mowing heights: dwarf/seeded bermudagrass 1.0–1.5 in (home lawns); zoysiagrass cultivars vary from about 0.5–2.0 in depending on cultivar; fine fescues 2.5–4.0 in for home lawns to promote drought/shade tolerance; reel mowers give the cleanest cut for very fine‑leaf turf, though many zoysias perform acceptably with rotary mowers at higher settings Recommended mowing heights: dwarf/seeded bermudagrass 1.0–1.5 in (home lawns); zoysiagrass cultivars vary from about 0.5–2.0 in depending on cultivar; fine fescues 2.5–4.0 in for home lawns to promote drought/shade tolerance; reel mowers give the cleanest cut for very fine‑leaf turf, though many zoysias perform acceptably with rotary mowers at higher settings.. If you go with TifEagle or Tifdwarf, understand that you are committing to a reel mower, these grasses genuinely cannot be maintained properly at 0.5–0.75 inches with a rotary blade, and the torn edges from a rotary at that height invite disease. For Emerald zoysia maintained at 1 inch or lower, a reel mower gives a noticeably nicer result, but at 1.5 inches a sharp rotary works fine.
Never remove more than one-third of the blade height in a single mow. Scalping stresses the grass, opens space for weeds, and can set back an establishing lawn by weeks.
Fertilizing without overdoing it
One of the underrated advantages of a fine fescue mini leaf lawn is how little fertilizer it needs. Fine fescues genuinely thrive on 0.5–2 lb of nitrogen per 1,000 sq ft per year. Over-fertilizing fine fescues triggers lush, weak growth, increases disease pressure, and can actually thin the stand. Bermudagrass and zoysiagrass are on the other end of the scale: warm-season fine grasses typically need 3–8+ lb of nitrogen per 1,000 sq ft per year to stay dense and green.
The practical rule for any application is to never apply more than about 0.7–1.0 lb of water-soluble nitrogen per 1,000 sq ft at one time. Exceeding this risks burning the turf and pushing growth so fast that the grass weakens. Split your annual fertilizer budget into 2–4 applications through the active growing season. For cool-season lawns, the most important fertilizer applications are in early fall (when turf is building roots before winter) and again in late spring. For warm-season lawns, fertilize from late spring through early summer, with follow-up applications as needed through midsummer.
| Grass type | Annual N target (lb/1,000 ft²/yr) | Best application timing | Single application max |
|---|---|---|---|
| Fine fescue blend | 0.5–2 | Early fall (primary), late spring (light) | 0.5 lb N/1,000 ft² |
| Fine-leaf perennial ryegrass | 3–5 | Early fall, mid-fall, early spring | 0.75 lb N/1,000 ft² |
| TifTuf bermudagrass | 3–5 | Late spring through early fall | 1.0 lb N/1,000 ft² |
| Emerald / Zeon zoysiagrass | 2–4 | Late spring, midsummer, early fall | 0.75 lb N/1,000 ft² |
| TifEagle / Tifdwarf bermudagrass | 5–8+ | Growing season (frequent small apps) | 0.75 lb N/1,000 ft² |
Pest, weed, and pet-safe care
Weeds are most aggressive during establishment before grass fills in. Avoid pre-emergent herbicides on newly seeded areas because they prevent grass seed from germinating too, not just weed seeds. Wait until the lawn has been mowed at least 2–3 times before applying any pre-emergent. Hand-pull broadleaf weeds in the establishment period rather than spraying. Once the lawn is dense, a well-managed fine-leaf stand is naturally competitive against most weeds because the canopy closes tightly.
For households with dogs, the two main issues are urine spots and digging. Urine burn spots appear as small circles of dead or yellow grass (often with a green ring around the edge from the diluted nitrogen at the margins). There is no magic fix besides diluting the damage by watering the spot immediately after your dog urinates, or designating a specific area of the yard for your dog. Repair small urine spots by raking out dead material, loosening the soil, and reseeding with a matching grass. With Zeon or Emerald zoysia, cut plugs from a less visible area and transplant into the damaged spot for a color-matched repair.
For a pet-safe fertilizer approach, let any fertilizer dry into the soil or water it in thoroughly before allowing pets back on the lawn. Most granular fertilizers are safe once fully watered in and dry on the surface. Avoid weed-and-feed combination products on newly established areas.
Overseeding, bare spot repair, and lawn renovation
Bare spots happen in every lawn. The approach to fixing them depends on how large they are and what caused them.
- Spots smaller than 1 sq ft: Rough up the surface with a garden fork or stiff rake to break the soil crust. Scratch in a pinch of starter fertilizer, then seed at the full new-lawn rate for your grass type. Cover with a thin layer of peat moss or compost to retain moisture. Water once or twice daily until germination.
- Spots 1–10 sq ft: Same approach but consider cutting a sod plug or salvaging plugs from an inconspicuous area for an exact color and texture match. This is especially useful with fine zoysiagrass, which can look patchy when overseeded with seed that differs in texture or shade of green.
- Large bare areas or overall thinning (>30% of lawn area): Scalp the existing lawn, core aerate multiple passes, apply compost, and overseed at full new-lawn rates. Time this for fall (cool-season) or late spring (warm-season) for best results.
- Full renovation: If the lawn is less than 50% desirable grass, kill everything with a non-selective herbicide (follow label; allow adequate time per label before seeding — often 1–2 weeks), remove debris, till and prepare soil from scratch, and start over. Sometimes starting fresh is genuinely the more efficient path.
For overseeding cool-season lawns with fine fescue, use 3–4 lb per 1,000 sq ft. For warm-season grasses that cannot be seeded (Emerald, Zeon), overseeding is not an option, use plugs or sod patches for repair.
What to do when things go wrong
Even when you do everything right, problems come up. Here are the most common ones and what they actually mean.
| Problem | Most likely cause | Fix |
|---|---|---|
| Seed not germinating after 3 weeks | Soil temperature too low (warm-season) or too cold (cool-season), or surface dried out during critical germination window | Check soil temp with a cheap probe thermometer; increase watering frequency to 3x daily if soil surface is drying between irrigations |
| Patchy germination (some spots thick, some bare) | Uneven seed distribution or uneven soil contact | Re-seed thin areas at half the full rate; firm soil better before next seeding attempt |
| Yellowing after establishment | Nitrogen deficiency, high pH locking out iron, or over-watering causing shallow roots | Soil test to distinguish; apply iron sulfate for rapid iron deficiency response; reduce irrigation frequency to encourage deeper rooting |
| Sod not rooting (lifts easily after 3 weeks) | Insufficient irrigation, poor soil contact, or air pockets under sod | Water deeply daily; roll sod again to press out air pockets; check that you did not install sod on dry, unprepared soil |
| Plugs not spreading after one season | Too much shade, soil compaction, or drought stress | Aerate around plugs; fertilize lightly in growing season; if shade is the issue, it may be a wrong cultivar choice |
| Fine fescue thinning in summer | Normal behavior in hot, humid climates; or soil is waterlogged in summer | Fine fescue is a cool-season grass — summer thin-out in zones 7+ is expected; consider overseeding in fall or switching to shade-tolerant zoysia for southern locations |
When a mini meadow makes more sense than a mini leaf lawn
A true fine-bladed lawn is a satisfying thing, but it is not always the right answer for every yard or lifestyle. If your site has significant shade, poor soil, irregular slopes, or you simply want to reduce maintenance to the absolute minimum, a mini meadow planting or wild grass approach deserves honest consideration. For practical steps on planting and maintaining a naturalized area, see how to grow wildflowers in lawn for species selection, timing, and low-maintenance care. If you want practical steps for establishing and managing that kind of naturalistic turf, see our guide on how to grow a wild lawn. If you're interested in a step-by-step planting and maintenance guide, read more about how to grow a mini meadow for practical instructions and plant recommendations. These alternatives require much less mowing (sometimes just once or twice a year), no irrigation once established, and minimal fertilizer. They also support pollinators in a way that a managed turfgrass lawn does not. If you want step-by-step guidance on establishing a low-maintenance wild planting, see how to grow wild grass.
The trade-off is aesthetic: a meadow-style planting looks deliberately naturalistic rather than manicured. If your neighborhood has HOA restrictions or your own preference runs toward a clean, even carpet, a mini meadow will frustrate you. But if you have a low-traffic side yard, a difficult slope, or simply want to reduce weekend labor, it is worth exploring alongside your mini leaf lawn decision.
Quick-reference checklist: mini leaf lawn from start to finish
- Confirm your USDA hardiness zone and choose a cultivar that matches (cool-season: fine fescue; warm-season: TifTuf bermuda, Emerald/Zeon zoysia).
- Assess site sun, slope, drainage, soil type, and traffic level before buying anything.
- Collect a soil test from a county extension or university lab. Apply lime, sulfur, or compost per the recommendations at least 4–6 weeks before seeding.
- Prepare soil: loosen 4–6 inches, incorporate 2–3 inches of compost, level and firm the surface.
- Apply starter fertilizer at 0.5–1.0 lb N/1,000 sq ft before seeding.
- Seed at correct rate for your grass type (fine fescue: 4–5 lb/1,000 ft²; bermuda hulled seed: 1–2 lb/1,000 ft²; Zenith zoysia: 1–2 lb/1,000 ft²). Sod or plug for Emerald/Zeon zoysia.
- Mulch lightly with straw. Water 2–3 times daily to keep soil surface moist until germination.
- After germination, reduce to once daily for 2 weeks, then transition to deeper, less frequent irrigation (target about 1 inch per week for cool-season, 0.5–1.25 inches for warm-season).
- Wait for 3 mowing cycles before applying pre-emergent herbicides.
- Mow at the correct height for your grass type. Never remove more than one-third of blade height per mow.
- Fertilize according to your soil test and grass type's annual N target. Never exceed 1.0 lb water-soluble N per 1,000 sq ft in a single application.
- Repair bare spots promptly with matching seed or plugs to prevent weed takeover.
- Aerate and overseed (cool-season) or top-dress with compost (warm-season) annually to maintain soil health.
FAQ
What exactly is “mini leaf” grass and which species produce that fine, dense texture?
“Mini leaf” describes very fine‑bladed, dense turf used for a formal, carpet‑like lawn. Common species/cultivars: fine fescues (chewings, creeping red, hard, sheep) for cool, low‑input sites; dwarf/ultra‑fine Bermudagrass cultivars (TifEagle, Tifgreen/Tifdwarf, TifTuf variants) for warm regions; fine Zoysiagrass cultivars (Emerald, Zeon, Zenith and newer fine types) for warm‑to‑transition zones. Choice depends on climate (cool vs warm season), shade tolerance and desired maintenance (mowing frequency, fertilization).
How do I pick the right mini‑leaf cultivar for my region and site conditions?
Match grass functional type to your climate: cool‑season (northern/cooler areas) → fine fescues, tall or fine fescue mixes, perennial ryegrass blends; warm‑season (southern/heat) → dwarf Bermudagrass or fine Zoysia. For shade choose fine fescues (best shade tolerance among fine lawns). For high wear/active yards select dwarf Bermudas with better recuperative ability. For moderate cold tolerance in transition zones prefer Meyer zoysia or cold‑tolerant Bermudas; avoid ultradwarfs in very cold climates. Use soil drainage, irrigation water quality and sun exposure to refine cultivar choice.
What soil tests should I run before establishing a mini‑leaf lawn and what targets should I aim for?
Order a full turf soil test from your county/land‑grant lab: pH (and buffer pH for lime recommendations), texture, organic matter %, plant‑available P and K, Ca, Mg, micronutrients (Fe, Mn, Zn) and EC/salinity if irrigation is a concern. Targets: pH ≈6.0–7.0 for most turfgrasses; organic matter ~3–5% desirable; follow the lab’s lime or sulfur recommendation (do not lime blindly). Use test results to set fertilizer starter rates and correct nutrient deficiencies before seeding/sodding.
How should I prepare the seedbed (step‑by‑step) for seeded mini‑leaf lawns?
1) Remove vegetation and debris; solarize or herbicide kill perennial weeds if needed and wait label interval. 2) Grade for drainage and final contours. 3) Till top 3–4 in of existing soil; incorporate compost sparingly (topdressing or 5–10% mix) if organic matter is low. 4) Amend per soil test (lime/sulfur and P/K as recommended). 5) Rake to a firm, smooth, slightly compacted seedbed — avoid loose powdery surface. 6) Apply starter fertilizer providing ~0.5–1.0 lb N/1,000 ft². 7) Measure and sow seed uniformly; press or roll lightly to ensure good seed–soil contact, and mulch with straw or a light tackified mulch if needed to retain moisture.
What are the recommended seeding rates and germination timelines for common mini‑leaf species?
Typical seeding rates per 1,000 ft²: fine fescues 4–5 lb (new lawn) and ~3–4 lb for overseeding; perennial ryegrass 4–6 lb; tall fescue 6–8 lb; Kentucky bluegrass 2–3 lb (often in blends). Seeded Bermudagrass requires warm soils (≥65°F) and typically germinates in ~7–14 days; zoysiagrass seed germinates slowly and may require weeks to months for substantial coverage. Expect visible turf for cool‑season mixes within 7–21 days (species dependent) and gradual thickening over months.
How do I water newly seeded or sodded mini‑leaf lawns (exact schedule)?
Seed: keep the surface consistently moist until germination — light, frequent irrigations multiple times per day to maintain the top 1/4–1/2 in of soil moist; after germination reduce frequency and increase depth to encourage roots. Sod: water thoroughly immediately (soaking to wet the rootzone), then daily for first 2 weeks (or more frequent light waterings in hot dry weather) to keep sod and root zone moist; after 2–3 weeks reduce to deeper, less frequent irrigations to promote rooting. Once established, cool‑season lawns: ~1 in/week (including rain) applied in 1–3 events; warm‑season lawns: ~0.5–1.25 in/week in peak season, adjusted for ET and soil texture.
Next Article
How to Grow Wildflowers in Lawn: Interseed, Renovate & Tips!
Step-by-step guide to grow wildflowers in lawns: timing, mixes, seed rates, and upkeep.