Growing grass indoors for your dog is genuinely easy once you pick the right seed, use a well-draining container, and keep the setup in decent light. Wheat grass and rye grass are the two most reliable choices for most people: both germinate fast (5 to 10 days), stay manageable in a shallow tray, and are non-toxic to dogs according to the ASPCA's plant database. Avoid any pre-treated seed mixes or fertilizer-laced potting blends, because pesticide-contaminated grass can poison dogs even in small amounts. Get that part right, and you have a safe, renewable chew station your dog can enjoy year-round without touching your actual lawn.
How to Grow Grass Indoors for Dogs: Step-by-Step Guide
Marcus Tillwell
11 Jun 2026
Is indoor grass safe for dogs (and what to actually avoid)

Most common lawn and forage grasses are non-toxic to dogs. The ASPCA classifies wheat grass, rye grass, orchard grass, and bluegrass as non-toxic to dogs, cats, and horses, which makes them fine for a chew tray. Dogs eat grass naturally outdoors, and giving them a clean indoor patch mostly just keeps them from ripping up your yard or chewing on your houseplants.
The real dangers are not the grass itself but what's on it or in it. Here's what to watch out for:
- Treated seed: Many grass seeds sold for lawns are coated with fungicide, pesticide, or fertilizer. PetMD specifically warns that pesticide-treated grass can poison dogs. Always buy untreated seed, ideally labeled 'food grade' or 'sprouting grade,' especially for wheat grass.
- Synthetic fertilizers mixed into potting soil: Some bagged potting mixes contain slow-release fertilizer pellets. These aren't meant to be ingested. Use plain potting mix or a seed-starting mix with no added nutrients.
- Mold: Damp trays in low airflow environments grow mold quickly, and moldy grass can cause GI upset in dogs. This is the most common real-world problem with indoor grass trays.
- Unknown pet grass kits: Some pre-packaged 'pet grass' kits sold at big-box stores don't disclose the seed variety or whether the growing medium has additives. Check the label before buying.
If your dog eats something and develops vomiting, diarrhea, or seems lethargic, contact your vet or the ASPCA Poison Control Center. If diarrhea is black or tarry, combined with vomiting, or doesn't clear up in 48 to 72 hours, Cornell's Canine Health Center recommends seeking veterinary care promptly rather than waiting it out.
Best indoor grass types for dogs and why
Not every grass that works beautifully in an outdoor lawn translates well to a pot on a windowsill. Indoor conditions mean limited light, lower airflow, and no natural rainfall. The grasses that thrive indoors for pet use are the ones that germinate fast, tolerate lower light reasonably well, and stay soft enough for a dog to chew comfortably.
| Grass Type | Germination Time | Light Needs | Dog-Safe? | Best For |
|---|---|---|---|---|
| Wheat grass | 5–7 days | Moderate (bright indirect or a grow light) | Yes (use food-grade seed) | Chewing, nutrients, quick turnaround |
| Annual ryegrass | 5–10 days | Moderate to bright | Yes | Soft texture, fast coverage, familiar lawn feel |
| Perennial ryegrass | 7–10 days | Moderate to bright | Yes | Longer-lasting tray, slightly finer texture |
| Tall fescue | 10–14 days | Moderate | Yes | Cooler indoor spaces, tolerates lower light better than rye |
| Bermuda grass | 10–21 days | High (needs direct sun or strong grow light) | Yes | Not ideal indoors without strong lighting |
| Zoysia grass | 14–21 days | High | Yes | Too slow-growing for indoor trays; not recommended |
Wheat grass is the go-to for most people because the seed is cheap and widely available in food-grade form at health food stores, which guarantees no pesticide coating. Ryegrass (annual or perennial) is the best choice if you want something that looks and feels more like real lawn grass, which matters if the goal is giving your dog a familiar surface to play on rather than just a nibble patch. Tall fescue is worth considering if your indoor setup runs cool (below 65°F) or has limited natural light. Skip bermuda and zoysia indoors unless you have a dedicated grow-light setup: both are warm-season grasses that need intense light and warm soil to germinate reliably, and they'll just sit there and rot in a dim apartment.
Indoor setup: containers, drainage, soil, and light
Containers and drainage
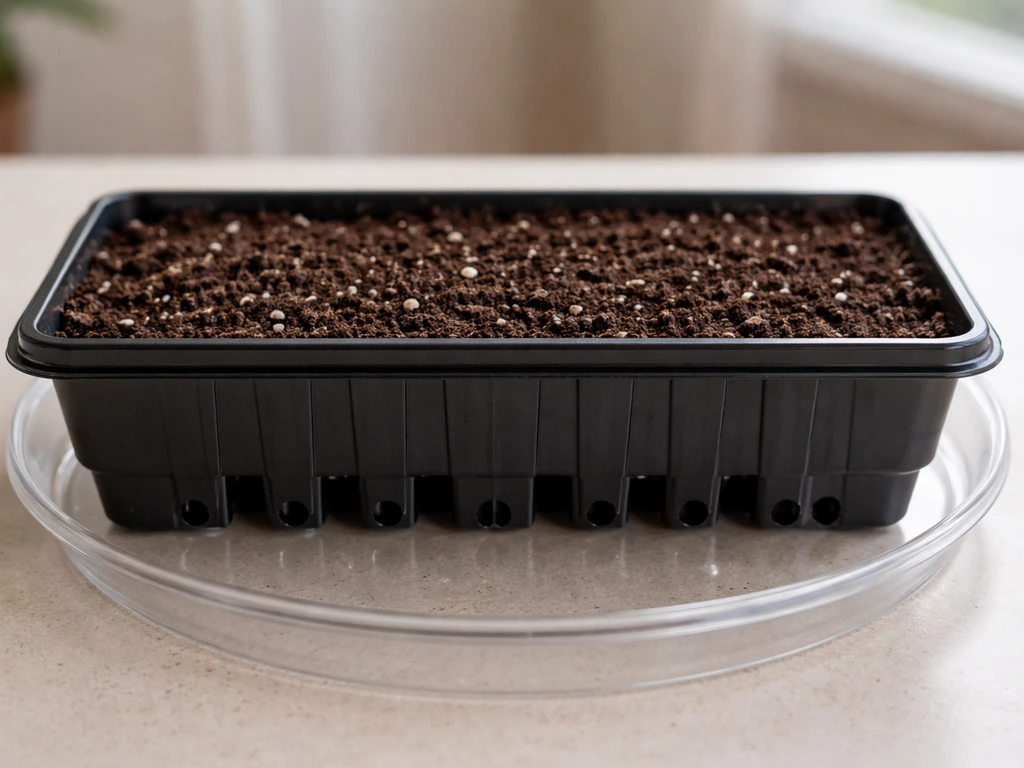
Use a shallow tray or container with drainage holes, at least 2 to 3 inches deep. Drainage is non-negotiable: standing water at the root zone is the fastest route to mold and root rot. Nursery flats, plastic seed trays (the kind with drainage holes, not solid-bottom humidity domes), or simple terracotta trays all work well. Size the container to your dog: a 12 x 18 inch tray gives a medium dog enough room to nose around and chew without knocking the whole thing over. If your dog is a digger, a heavier ceramic or terracotta container is worth the extra cost.
Place the tray on a waterproof saucer or cookie sheet to protect your floors, but empty that saucer after every watering so the tray isn't sitting in pooled water.
Growing medium

A plain seed-starting mix or unfertilized potting mix works best. You want something light enough to drain well but hold enough moisture to support germination. If the bag lists any fertilizer or plant food in the ingredients, don't use it for a dog chew tray. A 50/50 blend of plain potting mix and coarse perlite improves drainage significantly and reduces mold risk, especially in a humid indoor environment. Fill the container to about half an inch below the rim so you have room to water without overflow.
Light
Grass needs at least 6 hours of light per day to grow well indoors. A south-facing windowsill usually delivers enough in summer. In winter, or in a room without a strong south or west window, a simple LED grow light placed 4 to 6 inches above the tray for 14 to 16 hours a day makes up the difference. You don't need anything expensive: a basic T5 or LED bar light in the 5000 to 6500K color temperature range costs around $20 to $40 and works fine for a grass tray. Without enough light, grass grows tall and spindly (called etiolation), flops over, and dies quickly. This is the most common reason indoor grass fails.
Step-by-step: how to grow grass from seed indoors
- Choose your seed: Pick untreated wheat grass seed (food-grade), annual ryegrass, or tall fescue. Buy enough to seed your tray at roughly twice the rate you'd use outdoors (about 1 ounce per square foot for wheat grass, or follow the label for ryegrass and fescue). Denser seeding fills in faster and leaves fewer gaps where mold can start on bare soil.
- Optional pre-soak (wheat grass only): Soak wheat grass seeds in cool water for 8 to 12 hours before sowing. This speeds germination. Rye and fescue don't need pre-soaking.
- Fill your container: Add your growing medium to about half an inch below the rim. Lightly tamp it down so there are no large air pockets, then water until the soil is evenly moist but not soggy.
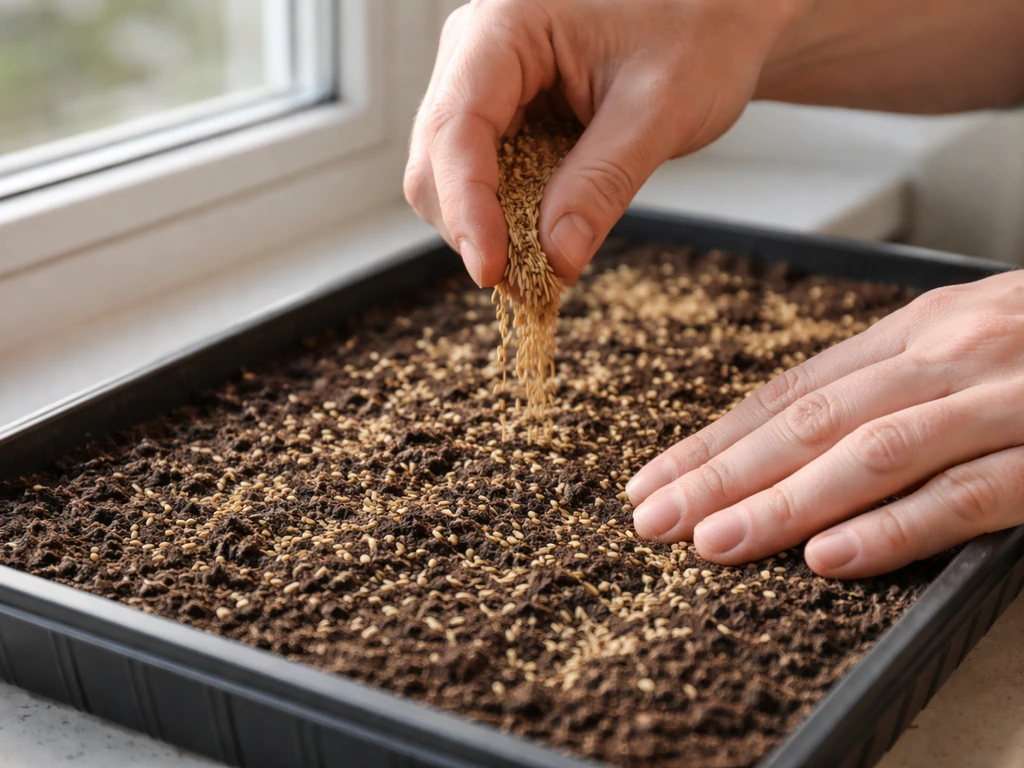
- Sow the seed: Scatter seed evenly across the surface. For wheat grass, seed densely so seeds are nearly touching. For ryegrass or fescue, aim for even coverage without huge clumps. Gently press the seed into contact with the soil surface using your palm or a flat piece of cardboard.
- Cover lightly: Sprinkle a thin layer of growing medium (about 1/8 inch) over the seeds, just enough to barely cover them. This helps retain moisture during germination and improves seed-to-soil contact.
- Place in a warm spot to germinate: Grass seed germinates best between 60°F and 75°F. During the germination phase (the first 5 to 10 days), the tray doesn't need to be in bright light yet. A warm kitchen counter, the top of the refrigerator, or near a heat vent works well. Cover loosely with plastic wrap or a humidity dome to retain moisture, but leave a small gap for airflow.
- Move to light once sprouts appear: As soon as you see green sprouts (usually day 5 to 7 for wheat grass, day 7 to 10 for rye), remove the cover and move the tray to your brightest window or under your grow light.
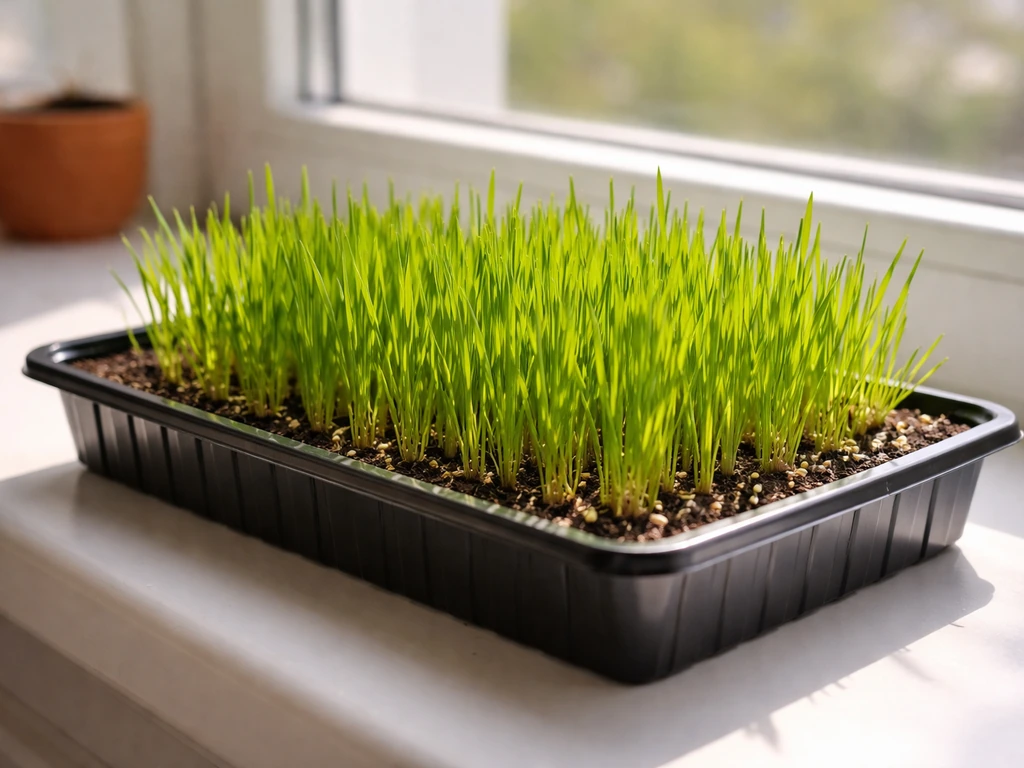
- Let it grow to 3 to 4 inches before introducing your dog: Grass that's too short gets pulled out by the roots rather than just being chewed at the blade. Give it time to develop a stronger root system first.
Watering and germination: schedules, humidity, and troubleshooting
During germination, the goal is to keep the soil surface consistently moist without waterlogging the roots. Mist the surface lightly once or twice a day using a spray bottle. If the top layer of soil looks dry and is pulling away from the edges of the container, it needs water. If it looks dark and damp, leave it alone. Once sprouts emerge and you remove the humidity cover, switch to watering from the base if possible: set the tray in about half an inch of water for 10 to 15 minutes, let it absorb from the bottom, then remove it. Bottom watering keeps the soil evenly moist and keeps the grass blades dry, which drastically reduces mold.
After germination, water when the top half-inch of soil feels dry to the touch. In most indoor conditions, that's every 1 to 2 days. In winter with forced-air heat drying out the room, you may need to water daily. In summer with high humidity, you might water every 2 to 3 days.
Common germination problems and quick fixes
- Seeds not sprouting after 10 days: Check soil temperature. If the room is below 55°F, germination stalls. Move the tray somewhere warmer, or use a seedling heat mat set to 68°F.
- Leggy, flopping seedlings: Not enough light. Move closer to the window or drop the grow light to within 4 inches of the tray.
- Seeds sprouting unevenly or just in patches: Uneven seed-to-soil contact. Next time, press seeds more firmly into the surface before covering.
- Soil surface forming a hard crust that's blocking sprouts: Too much dry heat near the tray. Lightly mist the crust to soften it, and shield the tray from direct heating vents.
- Mold appearing on the soil surface before sprouts emerge: Reduce humidity, improve airflow (remove the cover earlier), and back off on misting. Scrape off visible mold with a spoon and let the surface dry slightly before the next watering.
Ongoing care: trimming, pests, and keeping mold under control
Once the grass reaches 3 to 4 inches, your dog can start using the tray. At that point, maintenance is simple but consistent care matters more than in an outdoor lawn because the enclosed environment in a container is less forgiving.
Trimming and lifespan
Wheat grass is essentially a one-and-done crop indoors: harvest the blades by cutting them with scissors down to about an inch above the soil, and the tray will produce a second (slightly thinner) flush. After that, the roots exhaust the growing medium and the tray goes downhill. Plan to start a new tray every 2 to 3 weeks so you always have a fresh one ready. Ryegrass and fescue last longer in a tray but benefit from occasional trimming with scissors to prevent the blades from becoming too coarse for comfortable chewing. Trimming to 2 to 3 inches encourages denser, softer regrowth.
Mold prevention
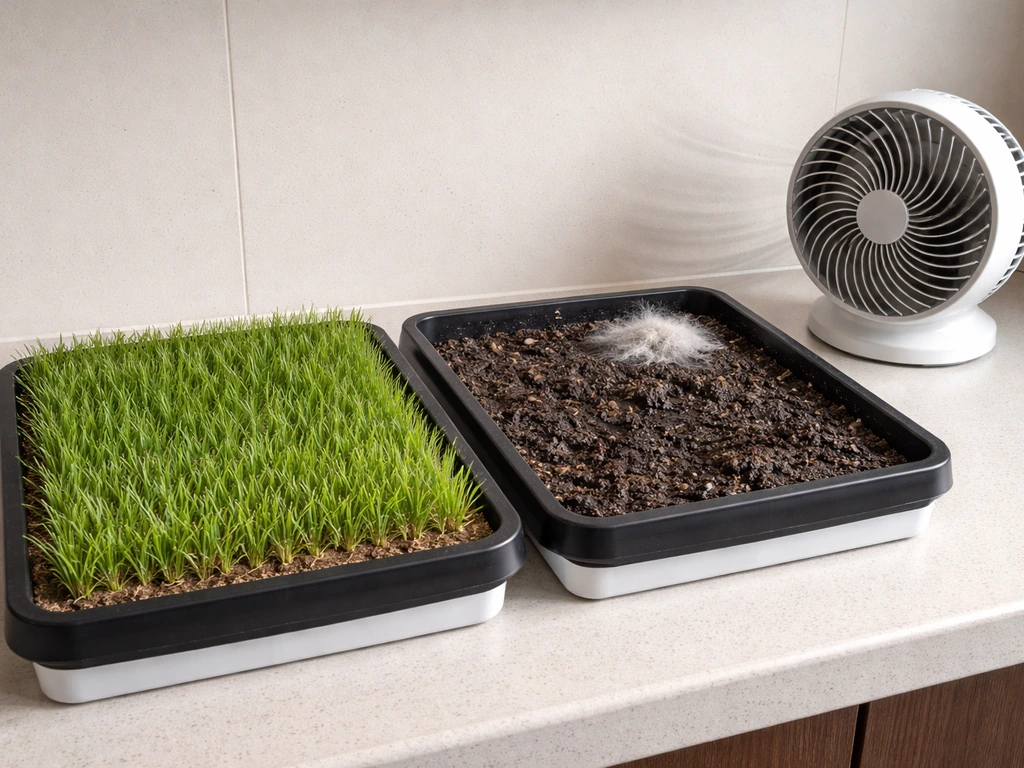
Mold is the biggest ongoing problem with indoor grass for dogs, and most of the time it comes down to poor drainage, overwatering, or not enough airflow. Keep a small fan running near the tray on low, or crack a window nearby. Avoid placing the tray in an enclosed cabinet or closet even if there's a grow light in there. If you see white fuzz at the soil line or on the lower blades, increase airflow immediately, let the surface dry out slightly between waterings, and trim any affected blades. A cinnamon dusting on the soil surface works as a mild natural antifungal without being harmful to dogs. If the mold is heavy, it's faster and safer to toss the tray, sanitize the container with diluted white vinegar, and start fresh.
Pests
Indoor grass trays occasionally attract fungus gnats, whose larvae live in moist soil. Let the top inch of soil dry out more between waterings (the larvae need consistently moist soil to survive), and yellow sticky traps placed near the tray catch the adult gnats. Don't use pesticide sprays or soil drenches on a tray your dog chews from. If gnats become a serious infestation, start a new tray with fresh growing medium and a container that was sanitized with white vinegar and rinsed thoroughly.
Introducing it safely and knowing when to stop
Most dogs take to indoor grass immediately, especially if they're already outdoor grass-eaters. Let your dog sniff and explore the tray on their own terms before actively encouraging them to use it. Some dogs chew; some just like to paw at it or roll their face in it. All of that is normal.
For the first couple of sessions, watch for GI signs: vomiting shortly after chewing, diarrhea, or excessive drooling. A small amount of grass-induced vomiting is common in dogs (it's basically what they do outdoors), but repeated vomiting or diarrhea that lasts more than 24 to 48 hours is worth a call to your vet. If your dog has a known sensitive stomach or food allergy history, start with just a small exposure and watch carefully before letting them go to town on a full tray.
Set some boundaries from the beginning: keep the tray in one consistent location and don't encourage your dog to dig or eat the roots and growing medium. The grass blades are the safe part. Dogs that dig into the soil can ingest growing medium in significant quantities, which can cause digestive upset even from a plain potting mix. A heavier container or one that sits in a slightly raised frame helps prevent digging.
Stop offering the tray if you notice it has visible mold throughout, if the grass has been sitting for more than three weeks and looks yellow or slimy, or if your dog consistently vomits after using it. Toss it, sanitize the container, and start fresh. The whole process from seed to a ready tray takes less than two weeks, so a fresh restart is genuinely low effort.
Your starting checklist for today
If you want to get a tray going today, here's exactly what to grab and do:
- Buy: untreated wheat grass seed (food-grade, from a health food store or online) or annual ryegrass seed (untreated, check the label), a shallow tray with drainage holes (12 x 18 inches works well), plain seed-starting mix (no added fertilizer), perlite (optional but helpful), and a spray bottle if you don't have one.
- Today: Fill the tray with your growing mix, water until evenly moist, sow the seed densely, press into the surface, and cover with a thin layer of mix.
- Days 1 to 7: Mist lightly once or twice a day. Keep the tray covered loosely with plastic wrap in a warm spot (65 to 75°F). Check daily for sprouts.
- Days 7 to 14: Move to bright light or a grow light once sprouts appear. Remove the humidity cover. Switch to bottom watering. Run a small fan nearby.
- Day 14 to 21: Grass should be 3 to 4 inches tall and ready for your dog. Introduce slowly and watch for any GI reaction.
- Ongoing: Start a second tray about a week after the first so you always have a fresh one coming. Toss and restart each tray every 2 to 3 weeks.
If you're interested in expanding from here, the same principles of choosing the right grass type and managing germination conditions apply whether you're growing pet grass hydroponically, tackling an outdoor lawn with dogs around, or working through specific challenges like shade or cool indoor temperatures in winter. Hydroponic grass for dogs follows many of the same safety and light principles, but you grow the grass in water rather than soil grow pet grass hydroponically. If you want the best results, follow a dedicated plan for how to grow pet grass step by step, from seeding to watering. If you specifically want to grow grass inside, focus on choosing a dog-safe seed and giving it enough light and drainage. This guide is also useful when you want to learn how to grow grass in an outdoor lawn with dogs around. The indoor tray is actually a great low-stakes way to get comfortable with grass seed before you tackle a bigger outdoor project. If you're wondering how to grow grass underground, the same attention to drainage, moisture balance, and light planning is key. You can also follow this indoor approach with hydroponic setups if you want an even more controlled way to grow pet grass.
FAQ
Can I use pet grass seed labeled “for cats” or “for birds” for dogs too?
Usually yes, as long as it is plain seed (no fertilizer coating, pesticide treatment, or “pre-enriched” blend) and the listed species are non-toxic to dogs. The safest choice is wheat grass or ryegrass sold in a food-grade or seed-starting form, not a soil or turf blend.
How do I tell the difference between safe, normal wet soil and a problem that could cause mold?
Normal soil should look evenly dark and damp, not muddy or waterlogged. If the surface stays wet for long periods, smells sour, or you see white fuzz at the soil line, switch to lighter bottom watering (or water less often) and increase airflow immediately.
Should I add a humidity dome or plastic cover during germination?
You can, but remove it as soon as sprouts emerge to reduce trapped moisture. If you keep it on too long, it increases condensation, which accelerates mold even with decent drainage.
What’s the safest watering schedule if my indoor air is very dry or very humid?
Very dry homes often need daily checks, and watering when the top 1/2 inch dries out helps prevent under-watering stress. Very humid rooms often need less frequent watering plus stronger airflow and letting the surface dry slightly between waterings to slow mold.
Is bottom watering always better than misting?
Misting works for the earliest germination stage to keep the top surface moist. Once you see sprouts, bottom watering is usually better because it keeps blades drier and reduces mold risk, especially if your room has low airflow.
How can I prevent my dog from eating the roots or soil mixture?
Use a heavier container (ceramic or terracotta) or a raised frame so it’s harder to dig. Keep the tray in a consistent spot and discourage digging, because growing medium can cause digestive upset even if the grass itself is safe.
My dog throws up right after chewing once or twice, is it automatically a problem?
One-off vomiting shortly after first exposure can happen, similar to outdoor grass eating. If vomiting or diarrhea repeats, lasts longer than 24 to 48 hours, or comes with lethargy, contact your vet promptly rather than continuing to offer the tray.
Can I rotate trays to reduce mold risk and keep grass available longer?
Yes, and it helps. Having a second tray growing at the same time lets you discard a moldy tray quickly without leaving your dog without a chewing option. It also lets you maintain consistent light and watering routines without rushing decisions.
What should I do if mold appears on only a few blades?
Increase airflow and trim the affected lower blades right away. Let the surface dry slightly before the next watering. If mold spreads beyond a few spots or returns quickly after trimming, it is safer to toss the tray and sanitize the container.
Will fungus gnats harm my dog?
The gnats themselves are not the main concern, the larvae live in consistently moist soil. Avoid pesticide products that could be ingested through chewing, let the top inch dry more between waterings, and use sticky traps for adults while you manage moisture.
Can I feed grass to a dog with diabetes, kidney disease, or other conditions?
Grass chew trays are generally low-risk, but any medical condition can change what “extra GI upset” means. Start with a tiny amount first, monitor stools, and if your dog is on a prescription diet or has a history of sensitive digestion, ask your vet before making grass a regular supplement.
How long can I keep a tray before replacing it?
Plan for a fresh start every 2 to 3 weeks so the grass stays tender and you reduce the chance of ongoing mold or slimy, yellow growth. Wheat grass is typically one-and-done, while ryegrass and fescue can last longer with occasional trimming, but still benefit from periodic replacement.
Where should I place the tray indoors to reduce problems with mold and airflow?
Put it near a window or where you can run a small fan on low, avoid closets or enclosed cabinets, and keep it off carpet if possible. Also protect your floors with a saucer, but never leave pooled water in the saucer after watering.
Next Article
How to Grow Grass Inside: Step-by-Step from Seed
Learn how to grow grass inside from seed with the right grass type, medium, lighting, watering, and troubleshooting time
