Yes, grass can grow indoors, and it works better than most people expect. The catch is that indoor grass thrives best as a small contained patch or tray setup rather than a full lawn, and your success depends almost entirely on getting light and temperature right. Ryegrass and fescue are your best bets because they germinate fast (sometimes within 5 to 10 days), tolerate cooler indoor temps, and don't demand the intense heat that bermuda or zoysia need. Set up a bright spot or a basic grow light, sow into a shallow tray with decent potting mix, keep the soil consistently moist but not soggy, and you can have green grass indoors within two weeks.
How to Grow Grass Inside: Step-by-Step from Seed
Marcus Tillwell
6 May 2026

Can you actually grow grass indoors (and what to expect)
Growing grass indoors is genuinely doable, but it helps to go in with realistic expectations. This isn't going to look like your backyard lawn in the living room. What you're really creating is more like a living tray of grass, similar to what you'd see at a farmers market or a pet store selling cat or dog grass. That said, the same establishment principles that apply to any lawn from seed apply here: seed contact with soil, consistent moisture, the right temperature, and enough light to drive photosynthesis.
The biggest limit indoors is light. Grass is a sun-hungry plant, and most interior spaces don't deliver what it needs. A south-facing window in summer gets you close, but many rooms fall short, which causes the seedlings to grow tall and weak (what's called etiolation, or getting leggy) as they stretch toward the light. That's fixable with a basic LED grow light. Temperature is the other factor: most common lawn grasses want soil temps between 60 and 86°F to germinate well, which is right in the range of most homes. So indoor temps are rarely the problem they are outdoors.
If you're growing grass indoors specifically for a dog or cat to graze on, the process is nearly identical to what's described here. Just know that pet grass setups have some extra considerations worth looking into separately. If you are growing pet grass instead of just trying to grow indoor lawn grass for yourself, the same light and watering basics apply, but you will want to factor in pet-safety and a smaller tray-friendly setup.
Indoor requirements: light, temperature, watering, and airflow
Light
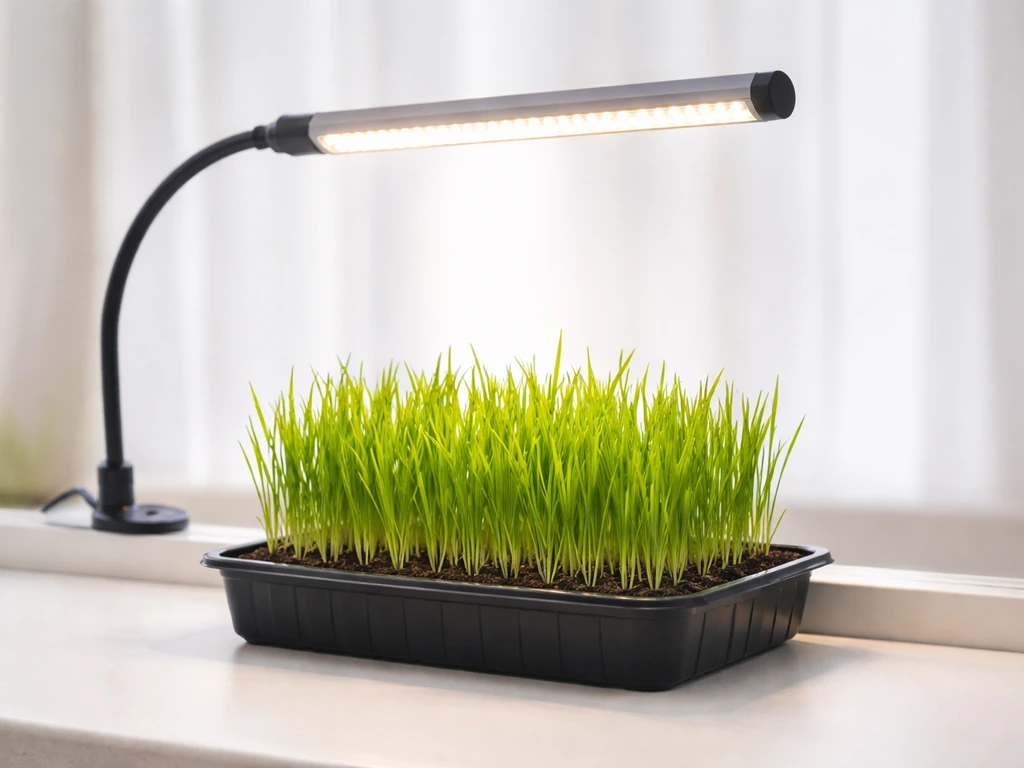
This is where most indoor grass attempts fail. Grass needs a minimum of 6 hours of direct or near-direct light to stay healthy, and that's on the low end. A south-facing window in late spring or summer can work. East or west windows are marginal. North-facing windows will not cut it. If your home doesn't have ideal light, a full-spectrum LED grow light placed 4 to 6 inches above the tray for 14 to 16 hours a day is a reliable fix and doesn't have to be expensive. Basic grow light strips cost $20 to $40 and will make the difference between healthy upright blades and sad, pale seedlings flopping over.
Temperature
Cool-season grasses like ryegrass and fescue prefer soil temperatures in the 60 to 75°F range, which is comfortable room temperature for most people. Purdue University's turfgrass research puts perennial ryegrass germination optimum at 68 to 86°F. Most homes run right in that window, so you're not fighting the clock the way you would with spring outdoor seeding when soil is still cold. Avoid placing trays near heating vents or cold drafts from windows, both of which can swing the soil temperature out of the ideal range.
Watering
Indoors, overwatering is a bigger threat than underwatering. The soil can't drain into an infinite ground reservoir the way it does outside. Water lightly and consistently, keeping the top inch of soil moist but never waterlogged. A spray bottle works well for seedlings in the first week so you don't disturb the seeds or flatten tiny sprouts. Once the grass is an inch or two tall, you can switch to a gentle pour. Lift the tray: if it feels heavy, hold off. If it feels light, water slowly until it drips from the drainage holes.
Airflow
Still, stagnant air is the primary cause of mold in indoor grass trays. A small fan set on low nearby for a few hours a day is all you need. It also has a secondary benefit: gentle air movement strengthens young grass stems. Don't skip this step, especially if you're growing in a humid bathroom or a basement where air doesn't move much.
Choosing the right grass type for indoor conditions
Not every grass variety is suitable for growing indoors. Warm-season grasses like bermuda and zoysia need intense heat and sunlight that almost no indoor setup can realistically provide. Even in a sunny south window, they'll struggle. Stick with cool-season grasses, which are better adapted to the light levels and temperatures inside most homes.
| Grass Type | Germination Time (Days) | Ideal Soil Temp (°F) | Indoor Viability |
|---|---|---|---|
| Annual Ryegrass | 5–10 | 68–86 | Excellent — fastest germination, very forgiving |
| Perennial Ryegrass | 5–10 | 68–86 | Excellent — slightly finer texture, same speed |
| Hard Fescue | 7–14 | 60–75 | Good — handles lower light better than ryegrass |
| Tall Fescue | 7–14 | 60–75 | Good — coarser blades, durable and adaptable |
| Bermuda | 10–30 | 75–95 | Poor — needs intense heat and direct sun |
| Zoysia | 14–21 | 70–95 | Poor — very slow, needs high heat and light |
Perennial ryegrass is the top pick for most indoor setups. It sprouts in 5 to 10 days under good conditions, grows upright and uniform, and handles typical indoor temperatures well. Hard fescue is worth considering if your light situation is on the weaker side, since fescues are more shade-tolerant by nature. If you're starting fresh with no preferences, grab a bag of straight perennial ryegrass or a cool-season blend with ryegrass and fescue listed on the label.
Growing grass from seed indoors: soil prep and sowing

Outdoor lawn establishment starts with soil preparation, and the same logic applies indoors. You want a growing medium that holds moisture without staying waterlogged, drains freely, and gives seeds something to grip. Standard potting mix works fine, but avoid mixes with too much perlite (which makes seeds float and shift when watered) or heavy moisture-retention gels. A mix of potting soil and a small amount of coarse sand or seed-starting mix is ideal. If you have bagged topsoil from a lawn project sitting around, you can use it as part of the blend, but don't fill the tray with dense garden soil alone as it compacts and drains poorly in containers.
- Fill your tray or container to about 1 inch below the rim with your soil mix. Press it down lightly so there are no air pockets, but don't pack it hard.
- Dampen the soil before sowing. It should feel like a wrung-out sponge: moist throughout but not dripping.
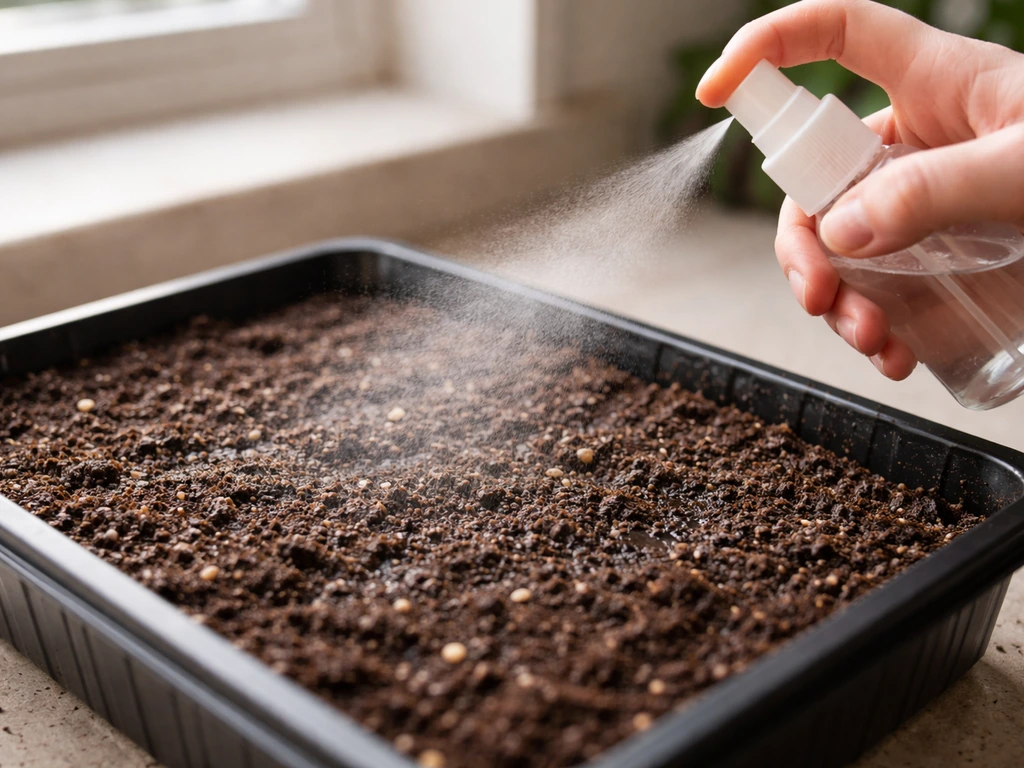
- Spread seeds evenly and densely across the surface. For indoor grass, you can go slightly heavier than outdoor lawn rates since you want quick, full coverage — aim for seeds about half an inch apart on average.
- Press seeds gently into the soil surface with your hand or a flat board. Seeds need contact with soil to germinate, not air pockets underneath them.
- Mist the surface lightly with a spray bottle to settle seeds without moving them.
- Cover loosely with a single layer of plastic wrap or a humidity dome (a clear lid that comes with many seed trays) to hold moisture during germination. Remove or prop it open once you see sprouts, usually within 5 to 10 days for ryegrass.
How to set up a small indoor patch: containers, drainage, and layout
The container you choose matters more than most people realize. Whatever you use has to have drainage holes. This is non-negotiable. Without drainage, water pools at the bottom, roots suffocate, and mold moves in fast. Standard nursery trays with drainage holes work great. So do repurposed plastic storage bins with holes drilled in the bottom, window boxes, or even wooden crates lined with landscape fabric. Put a saucer or tray underneath to catch drainage so your floors don't get wet.
For a patch-of-lawn feel, go with a shallow but wide container rather than a deep one. Grass roots don't go deep the way trees or shrubs do, especially indoors. A tray that's 3 to 4 inches deep is plenty. Wider is better if you want that lush, lawn-like look. A standard 1020 nursery flat (roughly 10 by 20 inches) is a great starting size and fits easily on a windowsill or under a grow light.
If you want multiple trays or a larger visual patch, line several trays side by side under the grow light. This is also how many people set up rolling grass trays for dogs, which is a slightly different use case but uses the same basic container and drainage setup.
If you are setting up grass for a pet instead of just learning how to grow grass indoors in general, follow the specific rolling grass tray approach first, since it uses the same drainage principles but has slightly different setup goals rolling grass trays for dogs. If your goal is specifically how to grow grass with dogs, the same indoor tray setup principles apply, but you will want to plan for pet-safe maintenance and cleanup.
For dogs, the same indoors setup can work as a dedicated grass patch, as long as you keep the drainage and watering consistent rolling grass trays for dogs.
Add a thin layer of coarse gravel or small stones at the very bottom of the container before adding soil. This improves drainage from the bottom up and helps prevent roots from sitting in any water that doesn't immediately exit through the holes.
Germination timeline and troubleshooting
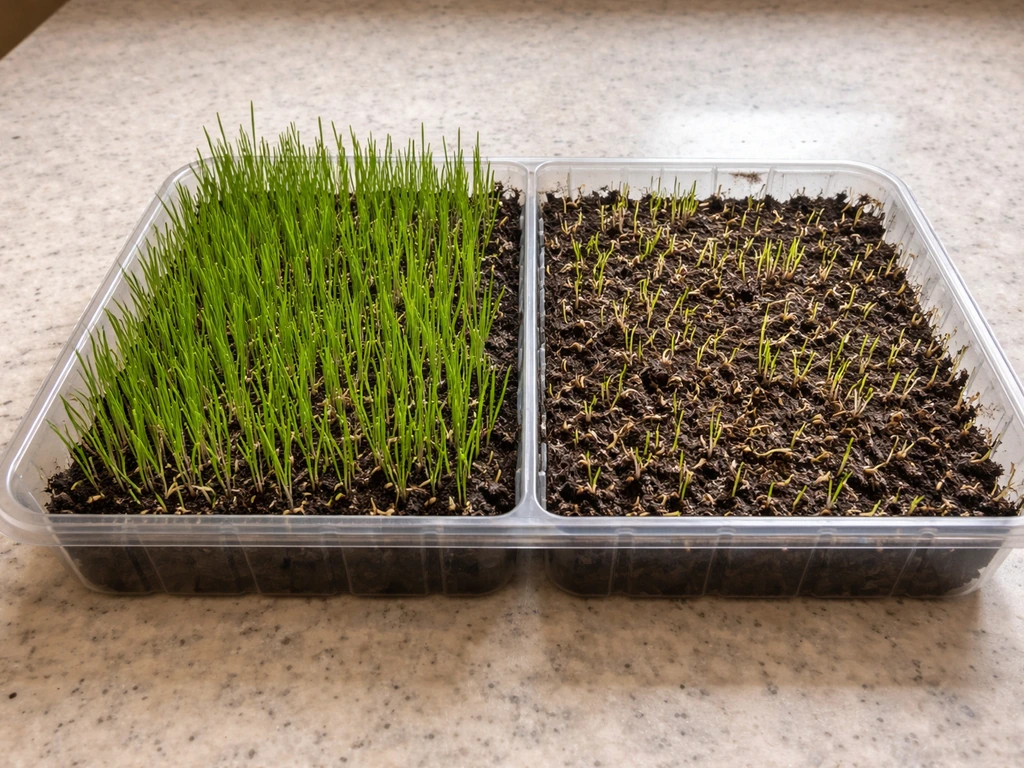
What to expect week by week
- Days 1 to 3: Nothing visible yet. The seed is absorbing moisture and activating. Keep the soil consistently moist and the cover on.
- Days 4 to 7: With ryegrass, you'll usually see tiny white sprout tips breaking the surface. This is a good sign — keep the humidity dome on but prop it open slightly to start airflow.
- Days 7 to 10: Sprouts are becoming visible blades, pale yellow-green at first. Remove the dome fully. Start the fan. Move into or under the light now if you haven't already.
- Days 10 to 14: Grass should be 1 to 2 inches tall and turning a healthier green as photosynthesis kicks in.
- Day 21 and beyond: Grass reaches 3 to 4 inches, ready for its first trim if you're maintaining it as a patch.
When things go wrong
Slow or no germination is almost always caused by one of three things: the soil dried out during the critical germination window, the temperature dropped below 60°F consistently (check near windows in winter), or the seeds were old and had low viability. Fix it by checking your soil moisture more frequently, moving the tray somewhere warmer, and always starting with fresh seed from the current or previous season.
White fuzzy mold on the soil surface usually means the soil stayed wet with poor airflow. Remove the humidity dome immediately, introduce the fan, and ease back on watering. In most cases the grass will outgrow the mold and you won't lose the whole tray. If mold is heavy and spreading fast, scrape off the top layer, let it dry slightly, and restart the airflow regimen.
Leggy, pale, flopping grass means insufficient light. The seedlings are stretching desperately toward any light source and burning through their energy reserves. Move the tray closer to a window or drop the grow light to 4 inches above the tips of the blades. This is the most common mistake in indoor grass growing and also the easiest to fix once you identify it.
Patchy germination usually means some spots dried out while others stayed moist, or seed coverage was uneven. Mist the bare patches and press a small pinch of fresh seed into those spots. Don't overwater the rest of the tray trying to compensate.
Keeping it alive: mowing, maintenance, and transplanting
Once your indoor grass reaches 3 to 4 inches, give it its first trim with a clean pair of scissors or small shears. Never cut more than one-third of the blade height at once, the same rule that applies to outdoor lawn mowing. Keeping it at 2 to 3 inches encourages lateral density and prevents the grass from getting so tall it starts to flop over from its own weight.
After the first few weeks, indoor grass will start to slow down and eventually thin out if you don't fertilize. A diluted liquid fertilizer (half the recommended strength of any balanced lawn fertilizer) applied every three to four weeks is enough to keep things going. More than that in a contained tray can burn roots fast, so go light.
Realistically, most indoor grass trays stay looking good for four to eight weeks before they start declining. The roots fill the container, the plant runs out of nutrients, and the grass begins to yellow at the base. At that point you have two options: replace the tray entirely with fresh soil and seed (which takes another two weeks to establish), or transplant your grass patch outdoors.
Transplanting works well if your goal was to start grass indoors before outdoor conditions were right, like in late winter or early spring. Once outdoor soil temps are consistently above 50°F and nighttime temps stay above 40°F, you can lay the grass tray into a prepared outdoor bed, press the root mass into the soil, and water it in. It will go through a brief adjustment period of a few days, then continue growing as if it had been seeded outdoors. This is essentially an indoor head-start method that lets you have established grass weeks earlier than direct seeding outdoors would allow.
Your next steps, starting today
- Buy a bag of perennial ryegrass seed (or a cool-season blend with ryegrass and fescue). Check the label for this year's or last year's test date — fresh seed matters.
- Get a shallow tray with drainage holes (a standard 1020 nursery flat works great) and pick up a small bag of potting mix.
- Assess your light: stand at your window at noon and be honest about how much direct sun hits that spot. If it's less than 5 to 6 hours, grab a basic LED grow light strip.
- Mix your soil, dampen it, sow densely, press seeds down, and mist the surface. Cover with plastic wrap or a clear dome.
- Set a reminder to check moisture every morning and evening for the first 10 days.
- Once sprouts appear, remove the cover, set up a small fan nearby, and get that light close (4 to 6 inches above the blades).
- By day 14 to 21, you'll have a real patch of grass growing indoors. Trim it, maintain it, or plan your transplant window for outdoor establishment.
FAQ
Can I use a humidity dome or plastic cover to help seeds sprout faster when I grow grass inside?
Yes, but treat it as a short-term setup. If you must cover the tray for humidity, remove the cover as soon as you see seedlings, then run gentle airflow with a fan to prevent persistent mold on the surface.
My grass seedlings look tall and weak, how do I fix leggy growth indoors?
Start with a stronger light than you think, then adjust. Many indoor growers place the LED strip too high or run it fewer hours, which leads to leggy blades, so plan on 14 to 16 hours daily at about 4 to 6 inches above the tray tips and tweak after you see seedling posture.
When should I start fertilizing my indoor grass, and how often?
You generally do not need fertilizer until the grass is established and actively growing, typically around 3 to 4 inches. Use diluted liquid fertilizer at about half strength every 3 to 4 weeks, because a contained tray can burn roots if you feed too early or too concentrated.
How do I know I am watering correctly for indoor grass without causing mold?
Water depth should be shallow and frequent rather than heavy. Keep the top inch moist, then stop once you see runoff from drainage holes, empty the catch saucer, and avoid letting the bottom sit wet for long periods.
What is the best way to reseed bald spots in my indoor grass tray?
Yes, but timing and coverage matter. When reseeding patchy areas, press the seed lightly into the surface and mist to settle it. Avoid burying too deep, and do not flood the rest of the tray to compensate, since uneven soaking often repeats the problem.
Why did my indoor grass fail to germinate, even though the room feels warm?
Check the temperature where the tray actually sits, not the room thermostat. If the tray is near a cold window or drafty area in winter, move it to a warmer spot or insulate under the tray to keep the soil consistently above the germination range.
Is hard fescue a better choice than ryegrass if my indoor grass setup has weaker light?
Hard fescue can help when light is weaker, but expect slower, denser growth than perennial ryegrass. If your setup uses a window with limited hours, choose hard fescue or a ryegrass-fescue blend, and rely on consistent artificial light rather than occasional bright days.
How long will indoor grass stay healthy before it needs to be replaced?
Often, you should treat it like a container lawn with turnover. If the grass yellows at the base and thins after several weeks, replace the tray with fresh soil and seed, because compacted, depleted potting mix and accumulated salts are hard to fix fully in a small tray.
What should I do if my indoor grass soil develops white buildup or crusting?
In most homes, avoid a thick layer of fertilizer residues by watering thoroughly for runoff and then emptying the saucer. If you see crusty white deposits on soil or container edges, pause feeding and flush gently with clean water until runoff clears.
If I grow grass indoors for a pet, how do I prevent the patch from thinning quickly?
Switch to a sharper regimen. Indoor grass does best with a consistent light schedule and stable moisture, and pets can speed up thinning if they graze aggressively, so rotate trays or plan more frequent reseeding to keep coverage even.
Next Article
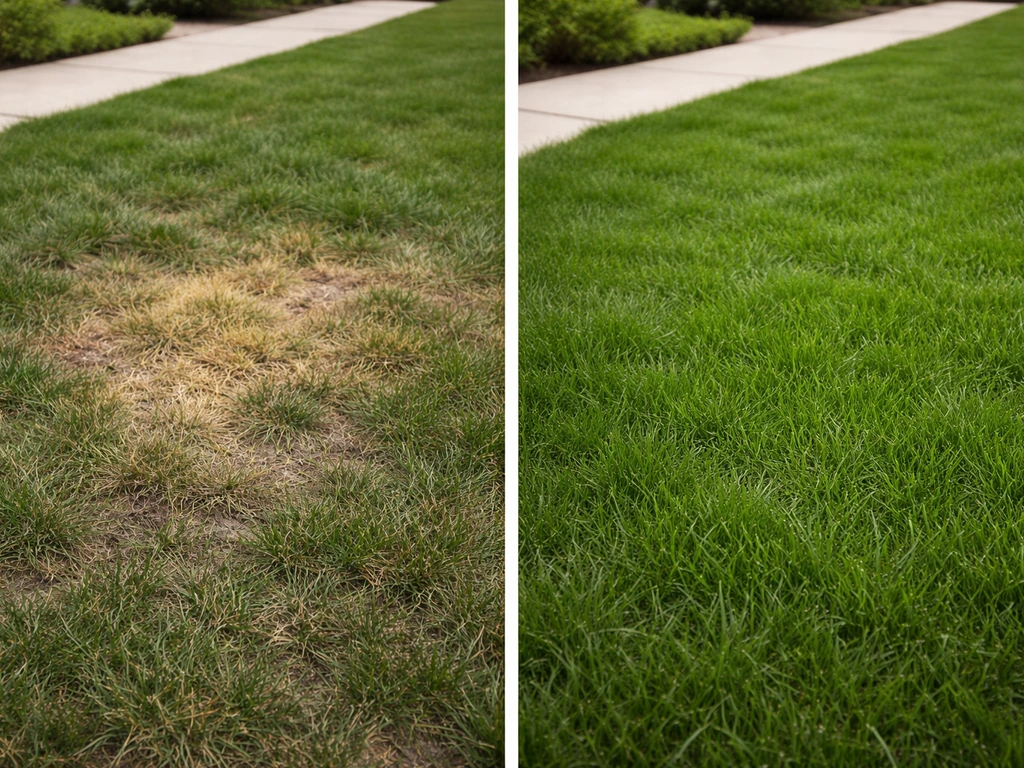
How to Grow Grass With Dogs: Fix Burns and Bare Spots
Step-by-step tips to regrow dog-damaged grass, fix burns and bare spots, choose seed, prep soil, and prevent re-damage.