Yes, you can absolutely grow grass in a cup, and it works surprisingly well as a way to watch germination happen up close, test a seed variety, or get seedlings started before transplanting them into a bare spot in your yard. Fill a cup with a loose, well-draining growing mix, sow your seeds on top, keep them consistently moist, set the cup somewhere warm and bright, and you can see sprouts in as little as 5 days with the right variety. The catch is knowing whether you want a quick germination experiment or a mini living grass patch, because that choice changes which seed you pick and how you manage things after sprouting.
How to Grow Grass in a Cup: Step-by-Step Guide
Marcus Tillwell
3 Jun 2026
First, decide what you actually want from this cup
There are two very different goals that fall under 'growing grass in a cup,' and they require slightly different approaches. The first is a sprouting or germination demo, where you just want to watch seeds sprout fast, maybe with kids, or to test whether a bag of seed is still viable before you spread it across your lawn.
The second is starting a mini grass patch that you plan to either keep in the cup for a while or eventually transplant outdoors into a bare spot or thin area. Both work, but if you're thinking transplant, you need to plan for that from the beginning: deeper cup, more soil, and a grass variety that actually thrives in your yard's conditions.
If you're just sprouting for fun or testing seed viability, almost any variety will do and your setup can be pretty minimal. This is similar in spirit to growing grass seed in trays or a planter box, but a cup gives you a single, manageable unit that's easy to monitor day by day.
If you are wondering can you grow grass in a planter box, the approach is very similar, just scale the depth, drainage, and sowing rate to fit the container.
Pick the right grass seed for your cup and your goal
Not all grass seed germinates at the same speed or under the same indoor conditions. For a cup setup, you want a seed that sprouts reliably in the temperature range of a typical home. Here's how the common varieties stack up:
| Grass Type | Germination Time | Best Cup Goal | Notes |
|---|---|---|---|
| Perennial Ryegrass | 5–10 days | Sprouting demo or transplant starter | Fastest of the common types; germinates best at 68–86°F; great for quick results |
| Annual Ryegrass | 5–10 days | Sprouting demo | Very fast but short-lived; not ideal if you plan to transplant into a permanent lawn |
| Hard or Fine Fescue | 7–14 days | Transplant starter for shade areas | Reliable germination indoors; optimum around 59–77°F; good for shaded yard spots |
| Tall Fescue | 7–14 days | Transplant starter | Tolerates more heat and stress than fine fescue; solid all-around choice |
| Bermuda | 10–30 days | Warm outdoor cup or sunny windowsill only | Needs warm soil (ideally 65–70°F+); slow and unreliable indoors in cool conditions |
| Zoysia | 14–30+ days | Not recommended for cup setups | Seed germination is notoriously slow and inconsistent; better started from plugs or sod |
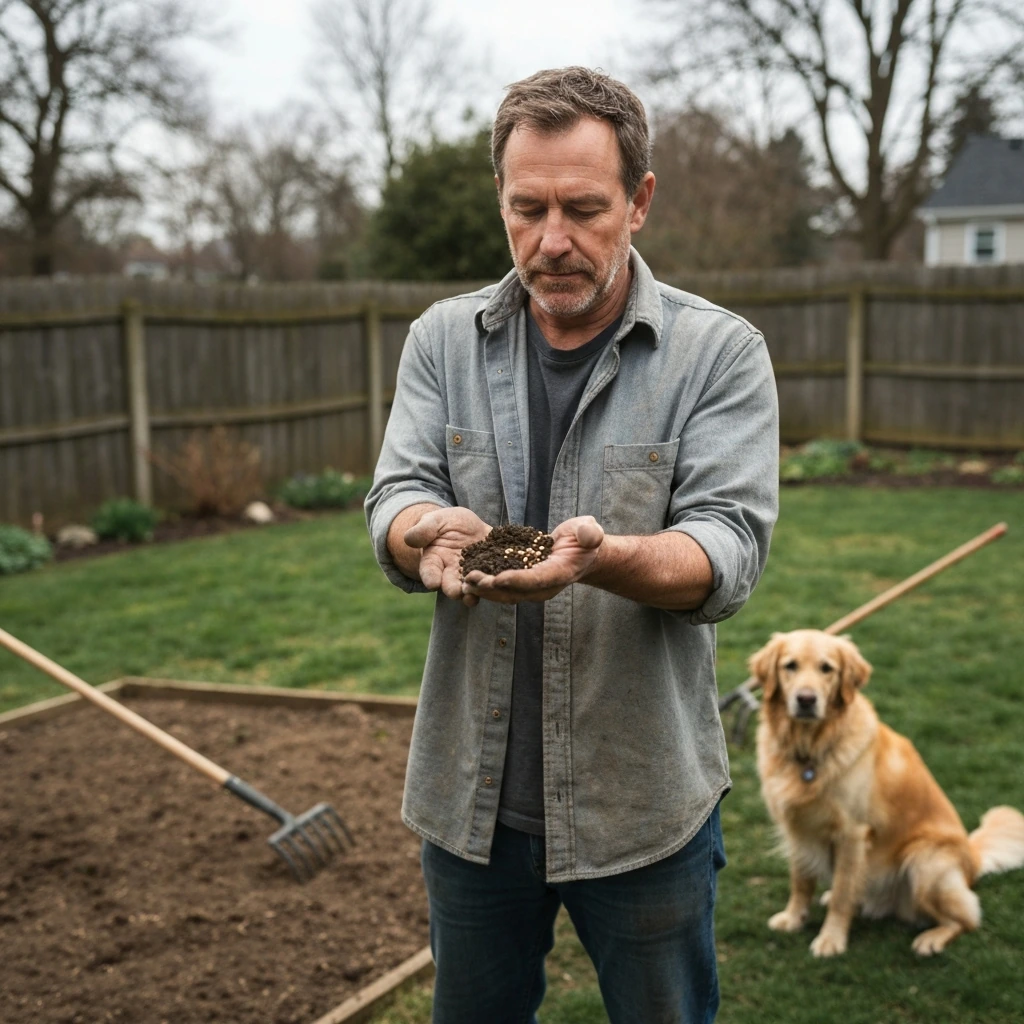
For most people doing this at home, perennial ryegrass is the winner for a fast, satisfying sprout. If you're specifically starting seedlings to fill in a shady bare spot in your yard, reach for a fine or hard fescue instead. Skip bermuda and zoysia for indoor cup germination unless you can guarantee consistently warm soil temperatures, because the slow, uneven germination of warm-season grasses is frustrating in a small container. One practical tip: before you sow anything, check the seed bag for the germination test date (it should be within the last 9 months) and the germination percentage (aim for at least 80%). Old or low-quality seed wastes your time no matter what setup you use.
Set up your cup the right way
Choose the cup
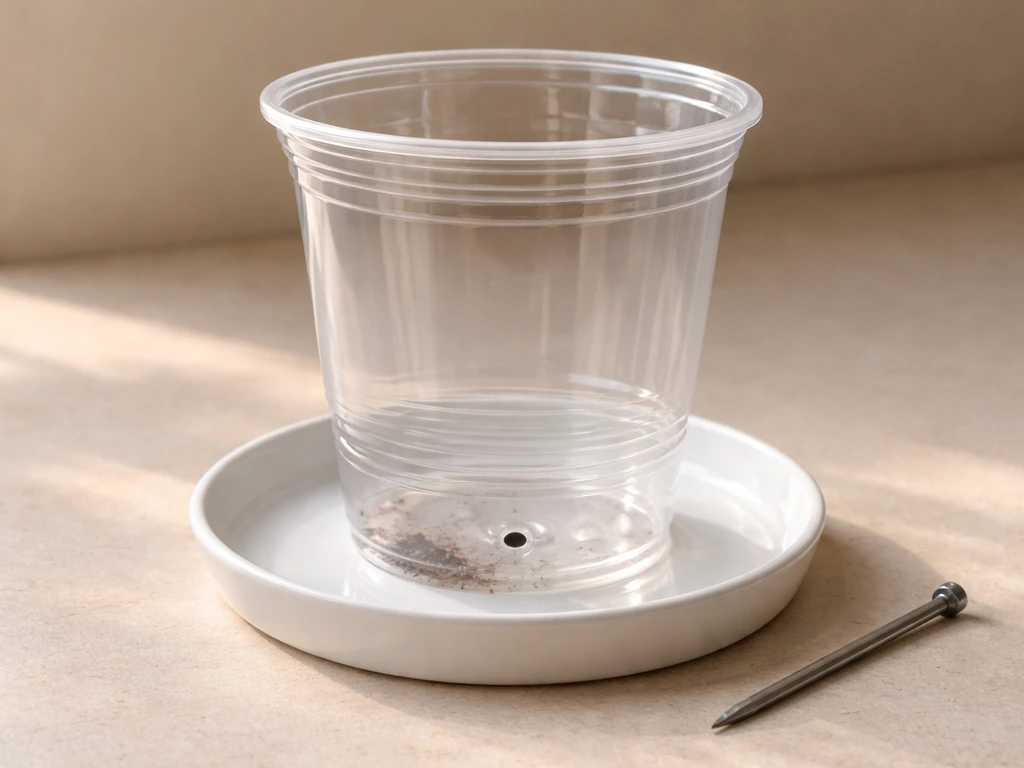
Any cup or small container works, but drainage matters more than the container material. A plastic cup, paper cup, or even a clean yogurt container all do the job. Use a nail, skewer, or scissors to poke 3 to 5 small holes in the bottom before you add any soil. Without drainage, water pools at the bottom and creates exactly the wet, stagnant conditions that cause mold and seed rot.
If you want to keep things tidy, set the cup on a small saucer or inside a second cup with no holes. Aim for a cup that's at least 3 to 4 inches deep, especially if you plan to transplant. Shallow cups dry out too fast and don't give roots anywhere to go.
Choose your growing medium
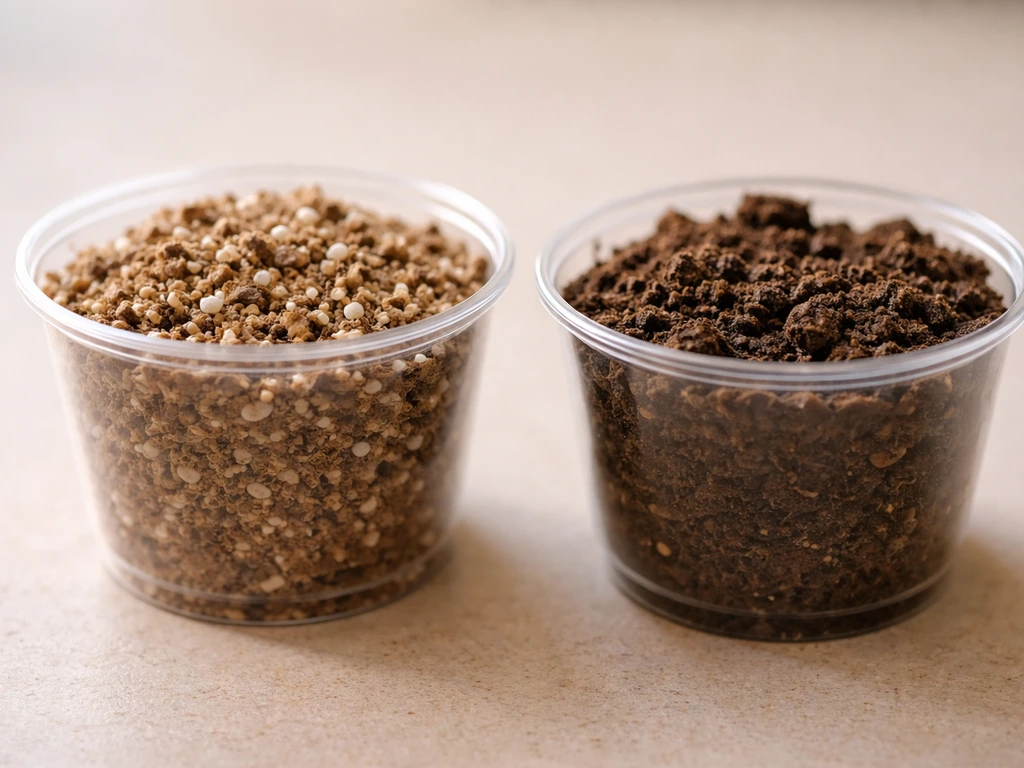
Skip heavy garden soil from your backyard. It compacts in a small cup, drains poorly, and often carries weed seeds or fungal spores. Instead, use a light seed-starting mix or a 50/50 blend of potting mix and coarse sand or perlite. This keeps things loose, drains well, and gives young roots an easy path downward.
Fill the cup to about half an inch from the rim. That gap matters because you'll be misting frequently and you don't want water running off before it soaks in. If you want to reuse cups or trays from a previous growing project, scrub them and soak them in a 10% bleach solution first to kill off any lingering pathogens that could cause damping-off in your new seedlings.
Sow, water, and get the light and temperature right
Sowing

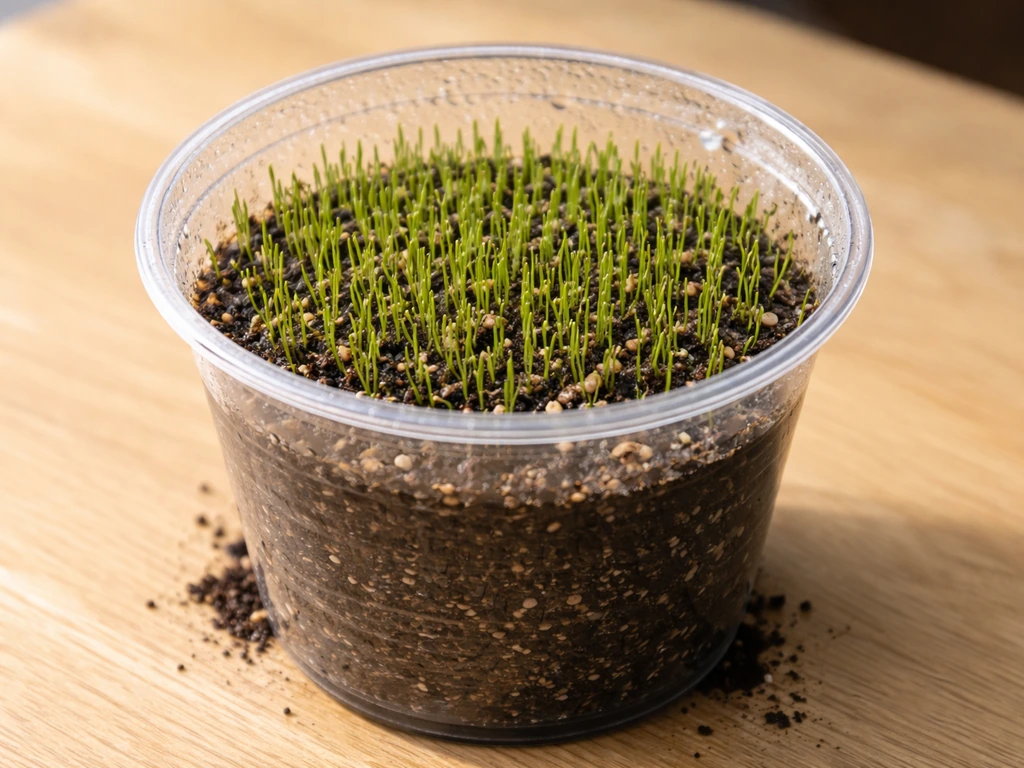
Moisten the growing mix before you sow, not after. Wet the soil until it's evenly damp throughout but not dripping, then let it settle for a few minutes. Scatter seed across the surface fairly evenly. You don't need to cover grass seed with soil, but a light dusting (about 1/8 inch) of your growing mix over the top helps hold moisture around the seed and improves contact. Don't bury the seed deeper than that. Grass seed germination is surface-level work, and covering it too deeply slows things down considerably. For a cup, a small pinch of seed spread across the surface is plenty. Overcrowding leads to competition, poor air circulation, and mold problems.
Watering
The goal during germination is consistent moisture, not constant wetness. Use a spray bottle to mist the surface once or twice a day. You want the top inch of mix to stay evenly moist, never bone dry and never waterlogged. A good check: press a finger lightly into the surface. If it feels damp but not muddy, you're in good shape. If water is pooling or the mix feels soggy, you're overwatering and risking mold and damping-off. Frequent small doses of water are far better than one heavy watering per day. Once seedlings are a half inch tall, you can ease off slightly and let the surface dry just a little between waterings.
Light and temperature
Grass seed doesn't need light to germinate, but warmth matters a lot. The sweet spot for most cool-season grasses (ryegrass, fescue) is 59 to 86°F.
A warm windowsill or a spot near a heat vent works well. Once sprouts appear, light becomes critical. Move the cup to your brightest south-facing window, or set a simple grow light 2 to 4 inches above the cup and run it for 14 to 16 hours a day. Without enough light, seedlings go leggy fast, stretching upward and becoming weak.
If your home tends to run cool (below 60°F), germination will be slower and patchier, so consider placing the cup on top of a refrigerator or using a seedling heat mat to bump up the soil temperature.
What to expect during germination and early growth
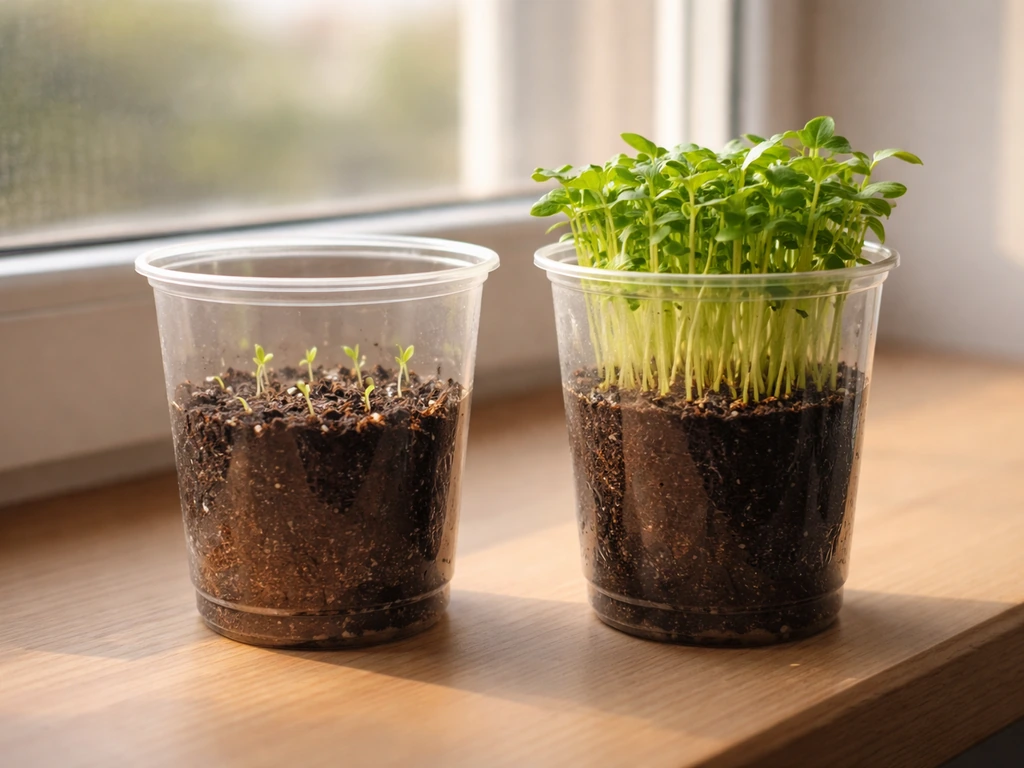
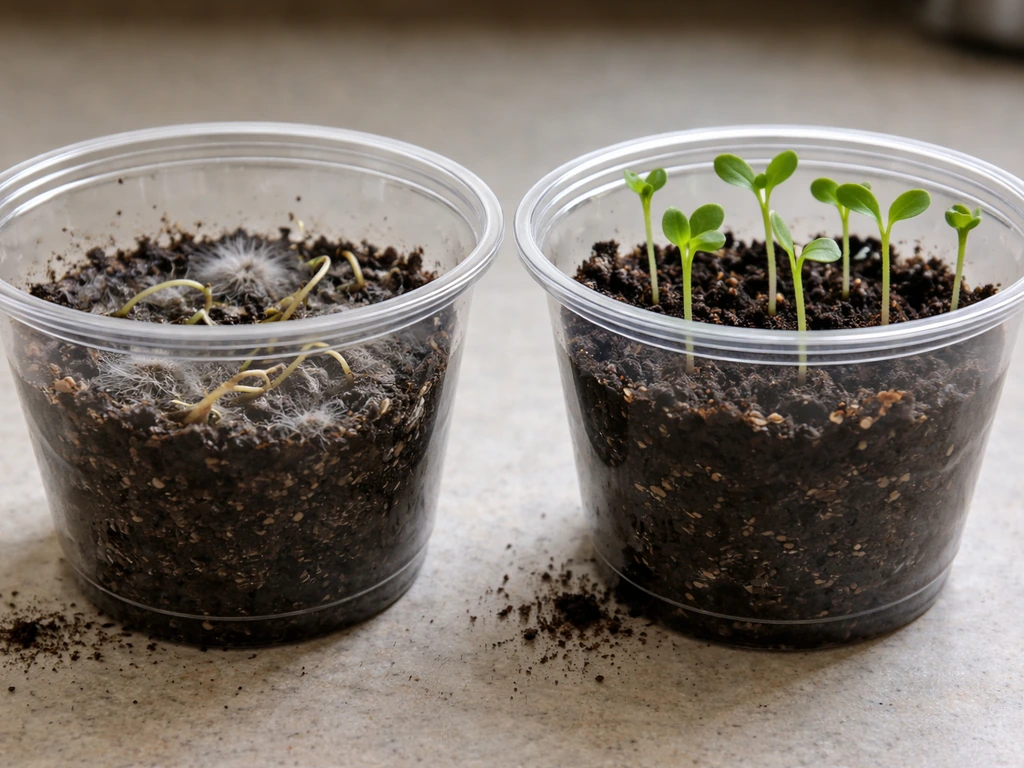
With perennial ryegrass, expect to see the first thin green shoots poking through within 5 to 7 days under good conditions. Fine and hard fescue typically take 7 to 14 days. The full range across all varieties is roughly 5 to 30 days, so if nothing is showing by day 10, reassess your moisture and temperature before assuming the seed is bad. In the first few days after sprouting, the seedlings will look like tiny green threads. Don't panic if growth looks uneven at first. Some seeds sprout a day or two behind others and often catch up.
Once seedlings are about an inch tall, thin them if they're overcrowded. You can use small scissors to snip extra seedlings at the base rather than pulling them out (pulling disturbs nearby roots). The goal is seedlings spaced enough that air can circulate between them. This is the single most underrated step for preventing mold in a cup setup. Overcrowded seedlings trap moisture and humidity at the base, which is exactly what fungal problems thrive on.
Troubleshooting when things go wrong
Seeds aren't sprouting
Check three things: moisture, temperature, and seed quality. If the surface dries out even once during germination, seeds can stall or die. If your room is below 60°F, germination slows dramatically. And if the seed is old or had a low germination rate on the label, you might just have bad seed. Try pressing a few seeds between two damp paper towels and keeping them warm for 5 days. If you don't see any sprouting, the seed is the problem, not your setup.
Mold on the surface or seedlings collapsing
This is damping-off, caused by water molds like Pythium that thrive in saturated, low-airflow conditions. Symptoms include seedling stems that look water-soaked, soft, or grayish-brown at the base, sometimes with white fuzzy growth on the soil surface. Seedlings that looked healthy one day can collapse the next. The fix is to immediately back off on watering, improve airflow by uncovering the cup or running a small fan nearby, and thin overcrowded seedlings. The key prevention strategy is simple: never let the growing mix stay soggy, and don't pack seedlings too densely. If damping-off hits a section of the cup, use small scissors to remove affected seedlings and allow the area to dry slightly before resuming normal misting.
Leggy, pale, or floppy seedlings
Almost always a light problem. Grass seedlings stretch toward any available light source when they're not getting enough. Move the cup closer to a bright window or drop a grow light closer (2 to 3 inches above the seedling tips). Pale color usually means both low light and possibly nitrogen deficiency, but at the cup stage, light is the first thing to fix. Don't fertilize a cup full of seedlings at this stage; it's unnecessary and can burn them.
Sparse or patchy coverage
Some seeds in the cup simply didn't germinate, which is normal. Overseed the bare patches with a few more seeds, mist gently, and give them another week. If patchiness is widespread, you may have had uneven moisture distribution during germination (one side of the cup dried out more than the other) or genuinely low seed quality. Ryegrass tends to fill in more evenly than fescue in a cup just because of its faster, more uniform germination.
Moving your cup grass outdoors: hardening off and transplanting
If your goal was always to transplant those seedlings into your lawn, this final step is where most people get tripped up. Grass seedlings grown indoors are not ready to go straight outside into full sun and wind. If you want the full steps beyond the cup, follow a dedicated guide on how to grow grass in a box. The transition needs to be gradual, a process called hardening off, and skipping it usually means scorched, stressed seedlings that struggle to establish.
Start hardening off once seedlings are about 2 inches tall. Set the cup outside in a shaded, protected spot for 1 to 2 hours on the first day, then bring it back inside. Over 7 to 10 days, gradually increase outdoor exposure: more hours, more sun, and eventually leaving it out overnight when temperatures stay above 50°F. Transplant on a cloudy day or in the late afternoon to avoid heat stress. Water the transplant site well before and after moving the seedlings. Dig or loosen the soil in the target area so roots can spread easily.
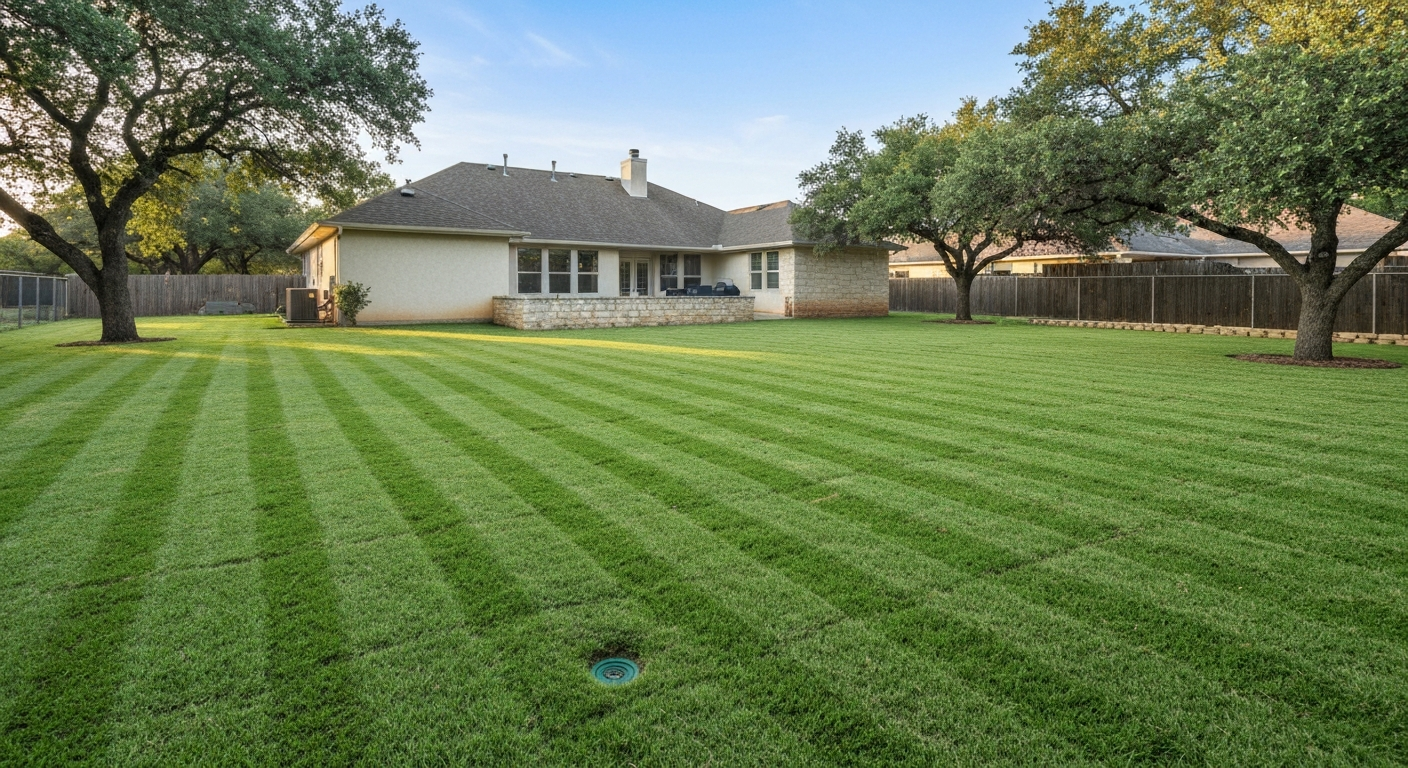
Match your seedling to your site conditions. If you grew fine fescue for a shady spot, transplant into that shady spot. If you started ryegrass for a sunny bare patch, transplant into full sun. Clay soil benefits from a bit of compost worked into the top couple of inches before transplanting to improve drainage and give roots a better start. Sandy soil dries out fast after transplanting, so water more frequently in the first two weeks. If you have pets, keep the transplant area blocked off or covered loosely with burlap for the first couple of weeks while roots establish, because foot traffic and digging can wreck young grass before it gets a foothold.
The cup method is genuinely useful as a stepping stone to a healthier lawn. If you’re wondering can you grow turf in a tray, the basics are similar: use a well-draining medium, keep it evenly moist, and give the seedlings enough warmth and light. It lets you test a variety's germination rate, time the planting to match outdoor conditions, and give seeds a safe, controlled start before facing the harsher outdoor environment.
The same principles that make a cup setup work, good drainage, consistent moisture, enough warmth and light, and careful thinning, are exactly the principles that make outdoor grass establishment succeed when you scale things up. You can also use cardboard as a mulch layer to help create a workable growing surface for grass, especially when you’re building up a bare area principles that make outdoor grass establishment succeed.
If you want the same results at a larger scale, apply these same steps to how to grow grass in a box too. These same steps can also help you answer can you grow grass in a raised bed and get a strong stand to take hold. You can also use these same ideas for a raised bed by filling it with a well-draining growing mix and keeping the surface evenly moist until the grass takes hold can you grow grass in a raised bed.
FAQ
Do I need to soak grass seed before putting it in a cup?
Usually no. For most cool-season grasses, sowing dry seed on a lightly covered surface is enough, as long as the top inch stays evenly moist. If your seed is very old or germination is slow, you can pre-soak for 4 to 8 hours in room-temperature water, then sow immediately to avoid mold-prone delays.
Should I cover the cup with plastic wrap to keep humidity high?
You can briefly use a clear cover during the first 2 to 3 days to slow moisture loss, but remove it once you see sprouting. Otherwise, trapped humidity can encourage damping-off, because seedlings need airflow even while the surface stays moist.
How often should I check moisture, and what if the cup dries out for a day?
Check at least once daily by pressing a finger into the top mix. If it dries to the point it feels light and crumbly, re-moisten gradually with misting so you don’t swing from bone-dry to waterlogged overnight, and expect some slowdown in germination rather than instant failure.
What’s the right way to water, misting only vs pouring water in the cup?
Misting the surface is safer because it keeps moisture where the seed sits. If you must add water, pour in small amounts until the top is damp, then stop. Don’t let water collect at the bottom tray, standing water raises the risk of mold and root rot.
Can I grow warm-season grass in a cup, like bermuda or zoysia?
It’s possible, but your success depends heavily on soil temperature and consistency. If your home stays cool or the soil drops below the mid-70s°F range for extended periods, germination will be slow and uneven. If you want the simplest results, use cool-season ryegrass or fescue indoors.
Why are my seedlings pale or yellow even though they’re growing?
At the cup stage, pale color usually signals insufficient light, not a fertilizer shortage. Give more light first, either a brighter window or a grow light held closer (about 2 to 3 inches). Avoid adding fertilizer before the seedlings are ready for outdoor transition because young roots can burn.
How do I prevent mold in a cup if I’m misting daily?
Focus on three controls: drainage (holes plus no standing water), spacing (thin once they reach about an inch tall), and airflow (don’t keep a sealed cover on). Also remove any visible fuzzy mold immediately and let that area dry slightly before resuming misting.
Should I fertilize grass seedlings while they’re still in the cup?
Generally no. Most seed mixes and the tiny seed reserves are enough for early growth. Fertilizing too early can create salt buildup and damage tender seedlings. If you plan to transplant soon, wait until after hardening off, then use a light, balanced fertilizer only if your lawn routine calls for it.
What soil depth is best if I’m definitely transplanting?
Aim for a cup that’s at least 3 to 4 inches deep so roots have room to grow before transplanting. Also fill high enough so seedlings are stable, but keep a small rim gap so misting doesn’t spill off and wash seeds away.
When should I transplant if seedlings are ready but the weather isn’t?
If seedlings are large but outdoor temperatures are still below about 50°F at night, keep them brighter indoors and avoid overwatering. You can also thin a bit more to reduce competition and reduce moisture buildup, then transplant once the forecast supports gradual exposure during hardening off.
Can I reuse the cup after a failed germination attempt?
Yes, but clean thoroughly. Scrub the container, then disinfect (for example, with a bleach solution), and let it dry completely before adding new soil. Also discard any soil that stayed soggy for long periods, because damping-off organisms can persist.
Next Article
How to Grow Grass in San Antonio Texas: Step-by-Step Guide
How to grow grass in San Antonio: best turf choices, planting windows, soil prep, watering schedules and troubleshooting