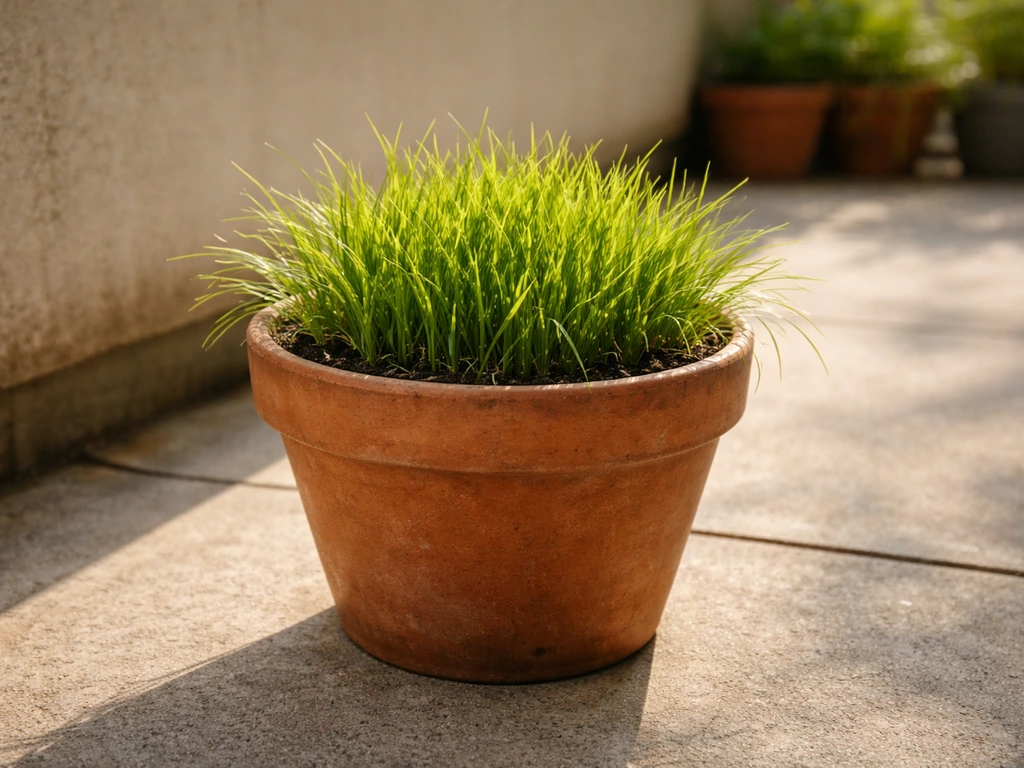
Yes, you can grow grass in a pot, and it works surprisingly well when you match the right grass variety to your climate, use a container with proper drainage, and keep the soil consistently moist during germination. The catch is that pots dry out much faster than the ground, so your biggest job is staying on top of watering in those first two weeks. Get that right, and you can have a lush, living patch of grass in a container in as little as 10 days for ryegrass or 2 to 3 weeks for fescue.
How to Grow Grass in Pot: Step-by-Step Container Guide
Marcus Tillwell
10 Jul 2026
Picking the right grass for your climate and pot
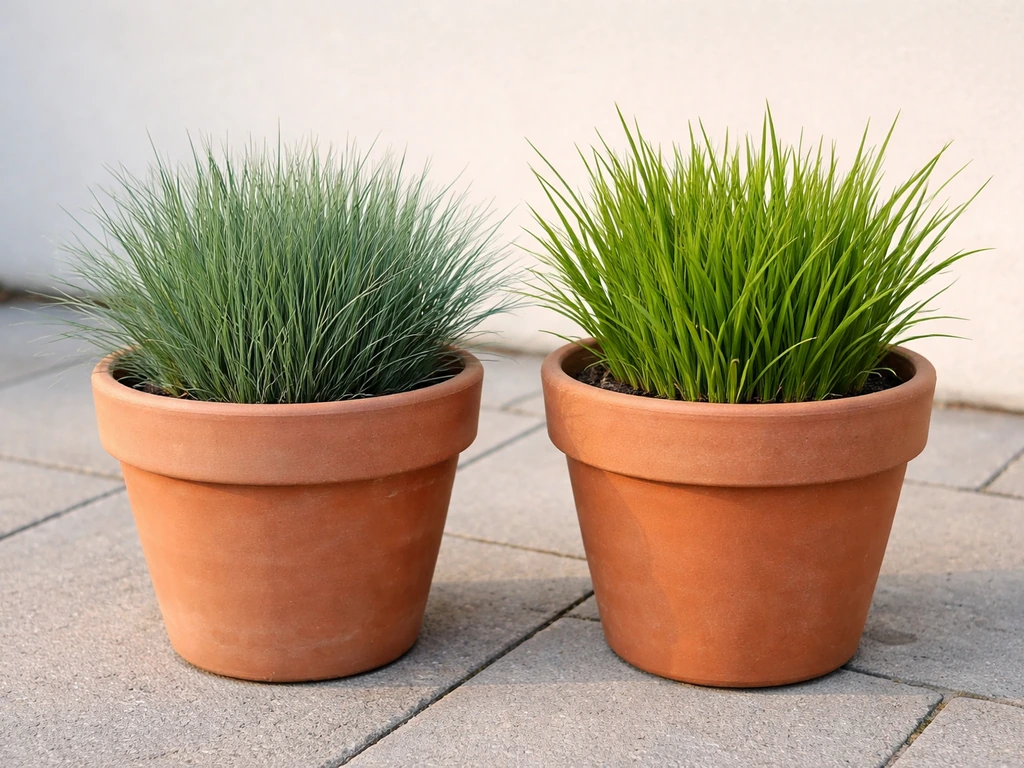
The grass variety you choose matters more in a pot than in the ground, because containers limit root depth and amplify heat. If you want to grow turf in a tray, these same container principles apply: choose a grass that matches your climate and plan around the way pots limit root depth. Start with what grows well in your region, then narrow it down to what tolerates container conditions.
If you're in the South or anywhere with hot summers, warm-season grasses are your default: bermudagrass and zoysiagrass. Bermuda is aggressive, tolerates full sun and heat well, and germinates once soil temperatures hit about 65°F. It handles dry spells better than most, which is useful because pots dry out fast. Zoysia is slower to establish but stays dense and handles light shade better than bermuda. The downside to both is that they go dormant and brown in winter, so if you want year-round green, you'll need to plan for that or overseed with ryegrass come fall.
In cooler climates (the Pacific Northwest, Midwest, Northeast, and mountain regions), cool-season grasses are the right call. Tall fescue is one of the best for pots because it has deep roots for a cool-season grass, tolerates heat reasonably well, and holds up in both sun and partial shade. Perennial ryegrass is your fastest option, germinating in as little as 5 to 10 days, making it ideal if you need quick results or are patching something in a hurry. Kentucky bluegrass looks beautiful but germinates slowly and doesn't love container restrictions as much. If you're growing grass in a pot for a shaded spot on the patio, go with a fine fescue mix or a shade-tolerant tall fescue blend.
| Grass Type | Climate | Germination Time | Best For Pots |
|---|---|---|---|
| Perennial Ryegrass | Cool-season | 5–10 days | Fast results, temporary displays, overseeding |
| Tall Fescue | Cool-season | 7–14 days | Durable containers, sun or partial shade |
| Fine Fescue | Cool-season | 7–14 days | Shaded spots, low-traffic pots |
| Bermudagrass | Warm-season | 10–30 days | Hot climates, full sun, heat-tolerant displays |
| Zoysiagrass | Warm-season | 14–21 days | Warm climates, light shade tolerance |
One honest note: if you have pets, skip the fine ornamental grasses and stick with tough varieties like tall fescue or bermuda. Pet traffic and digging wear out any container grass quickly, so go with the most resilient option and plan to reseed occasionally.
Choosing a pot, drainage, and container-friendly soil mix
The container itself sets the ceiling on how well your grass grows. If you want the best results, follow the same approach for growing grass in a box: choose the right grass for your climate, then match the pot, soil mix, and watering schedule how to grow grass in a box. Get this part wrong and no amount of good seed or careful watering will save you.
What makes a good pot for grass
Wider and shallower is better than tall and narrow. Grass roots spread horizontally, not deep, so a wide, low container like a planter box, a shallow wooden crate, or even a window box gives roots more room to run. If you want it to work well in a planter box, use drainage holes and keep the soil consistently moist until the grass is established. Aim for at least 6 to 8 inches of depth for cool-season grasses, and 4 to 6 inches is workable for quick-grow displays with ryegrass. Drainage holes are non-negotiable. Standing water kills grass roots fast. If your container doesn't have holes, drill them or pick a different pot.
Material matters in warm weather. Dark plastic and metal containers sitting in direct sun can get extremely hot on the sides, cooking roots near the edges. Terra cotta, wood, and light-colored containers stay cooler and breathe better. If you only have a dark plastic pot, keep it in a spot where it gets morning sun but some shade in the hottest afternoon hours.
Getting the soil mix right
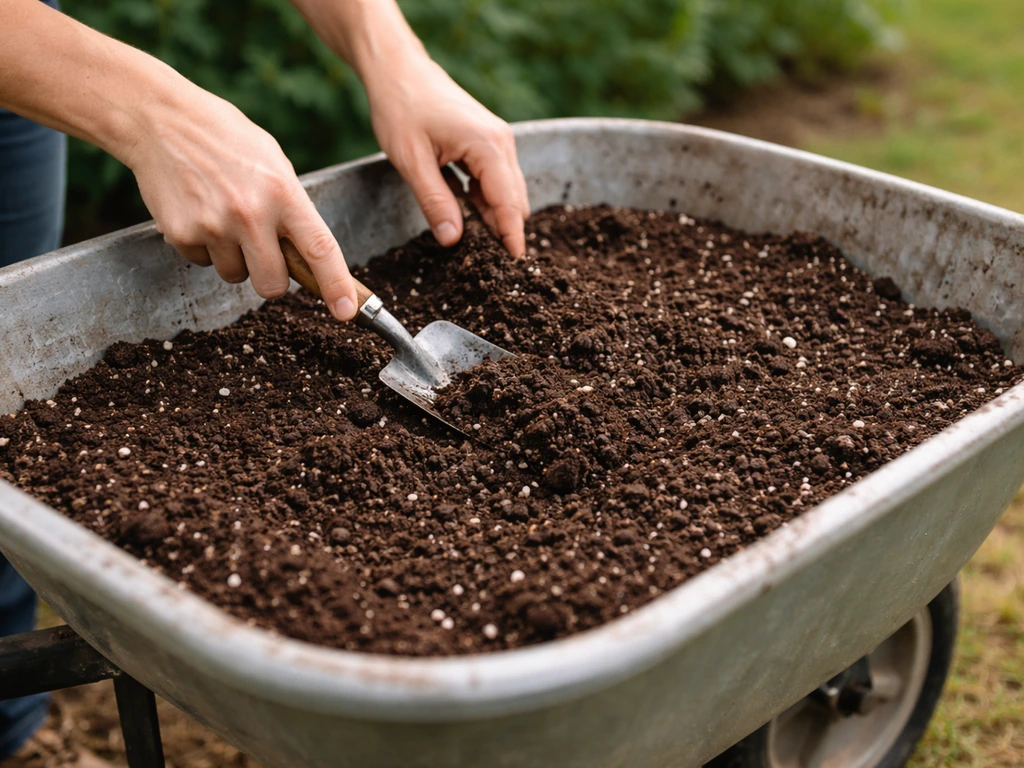
Do not fill a pot with straight topsoil or backyard dirt. It compacts, drains poorly, and in a container becomes almost cement-like over time. You want a mix that holds enough moisture for germination without staying waterlogged, because too much water actually depletes the oxygen grass roots need to survive. Too much water can deplete soil oxygen, which can cause deterioration of turfgrass roots and reduce cool-season seed germination quality too much water depletes soil oxygen.
A simple mix that works well: 60% quality potting mix (not garden soil), 30% coarse sand or perlite, and 10% compost. This gives you drainage, some structure, and a little nutrition. If your potting mix already feels very light and dries out in hours (common with peat-heavy mixes), add a bit more compost or a small amount of coir fiber to improve water retention. If your mix feels heavy and clumps together when wet, add more perlite. The goal is a mix that stays moist but crumbles slightly when you squeeze a handful.
Before you fill the pot, place a thin layer of gravel or broken pot pieces over the drainage holes to prevent the mix from washing out without blocking drainage. Fill to about 1 inch below the rim so you have room to water without everything spilling over.
When to plant grass seed in pots (timing by season and climate)
Timing matters just as much in a pot as it does in the ground. Grass needs soil temperatures in the right range to germinate, and pots actually warm up and cool down faster than the ground, which can work for or against you depending on the season.
For cool-season grasses (fescue, ryegrass, bluegrass), late summer to early fall is the best window, typically late August through mid-October across most of the country. Soil temperatures are coming down from summer peaks but still warm enough to trigger germination, and cooler air temperatures mean less stress on new seedlings. In much of the mid-Atlantic and Southeast, that window is roughly September through mid-October. Virginia Cooperative Extension notes that fall seeding of cool-season lawns can have establishment potential optimized roughly September through mid-October across much of Virginia establishment potential is optimized roughly September through mid-October. Spring (March through April) works as a secondary option, though summer heat often cuts short first-year growth.
For warm-season grasses (bermuda, zoysia), plant after your last frost and once soil temperatures consistently stay above 65°F. In most warm climates, that's late April through June. Because pots warm up faster than ground soil, you can sometimes start a week or two earlier than your neighbors planting in beds. Avoid planting warm-season grass in a pot in late summer if you're in a climate with an early fall, since it won't have time to establish before dormancy.
In year-round warm climates (Florida, coastal Texas, Southern California, Hawaii), timing is more flexible. You can plant warm-season grass almost any month, though the hottest part of summer (July and August) can stress young seedlings in containers. Early fall or late winter plantings often give you the cleanest establishment.
Step-by-step: sowing grass seed in a pot
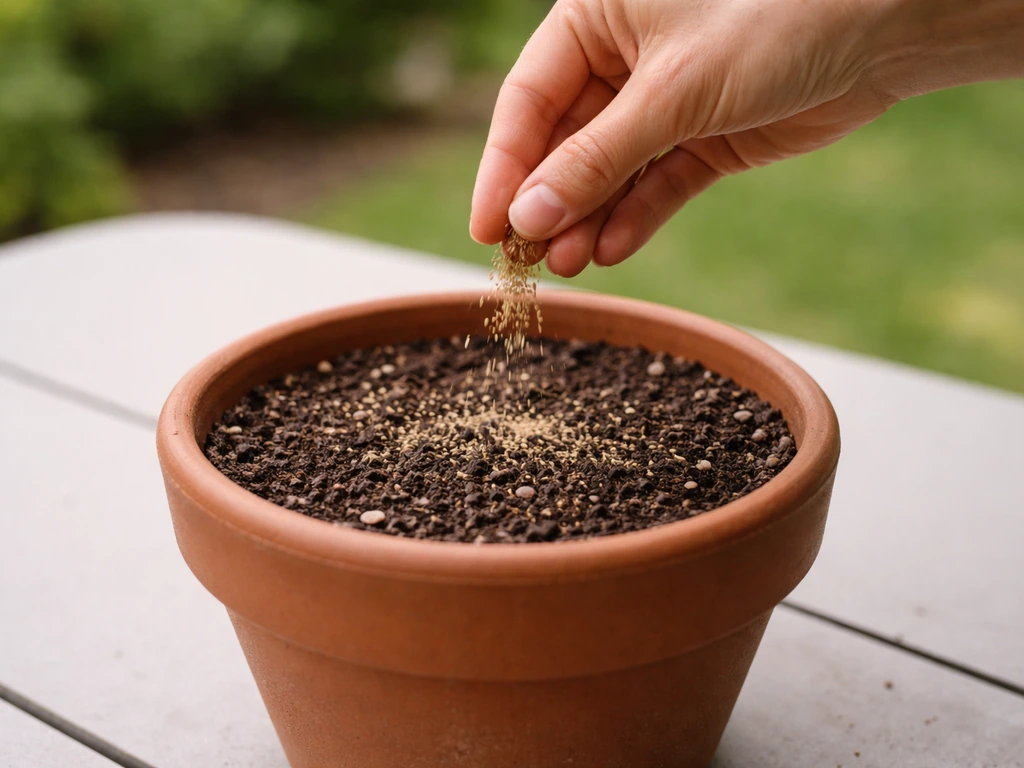
- Fill your pot with the prepared soil mix to about 1 inch below the rim. Firm it down lightly with your hand so there are no large air pockets, but don't pack it hard.
- Water the mix thoroughly before seeding. You want it moist all the way through, not just on top. Let it drain for 30 minutes so you're working with evenly moist (not soggy) soil.
- Scatter seed evenly across the surface. For most grasses, aim for a light but complete coverage with no large bare gaps. A good visual target is roughly 15 to 20 seeds per square inch for ryegrass or fescue. Bermuda seed is tiny, so it looks like a light dusting.
- Press the seed gently into the soil. Use a flat piece of wood, a small board, or just your palm to press firmly across the entire surface. You want seed-to-soil contact. Seed sitting on top without contact is seed that won't germinate well.
- Cover lightly with a thin layer of fine soil or compost, no more than 1/8 to 1/4 inch deep. Too deep and the seedlings struggle to push through. Some grasses (bermuda especially) prefer very little to no cover.
- Water gently. Use a watering can with a rose head or a spray bottle for small pots. The goal is to moisten without washing seed to the edges of the pot or creating puddles. This is the mistake most people make: blasting with a hose and ending up with all the seed piled at one end.
- Place the pot in its intended location and cover loosely with plastic wrap or a clear plastic bag to retain moisture if you're in a dry environment. Remove the cover once you see the first sprouts, usually within 5 to 10 days for ryegrass.
Watering, light, and germination care week-by-week
This is the phase where most people either succeed or fail. Container grass during germination needs one thing above everything else: consistently moist soil. If you want a simple, step-by-step approach to growing grass seed in trays, use the same timing, moisture control, and germination care principles consistently moist soil. Not soaked, not dried out. Just reliably damp.
Days 1 through 7
Water lightly at least twice a day in warm weather, once in the morning and once in the afternoon. In hot summer conditions with a pot sitting in direct sun, you may need a third pass. The top half inch of soil should never dry out completely during this window. Stick your finger in every few hours until you get a feel for how fast your specific pot and mix dry out. Small pots in full sun on a hot day can dry out completely in 3 to 4 hours.
Keep the pot where it will get the right light for your grass type. Cool-season grasses can handle some afternoon shade, which also helps keep the pot from drying too fast. Warm-season grasses want full sun (6 or more hours), but in the first week before germination, a little afternoon shade won't hurt and will make your watering job easier.
Days 7 through 14
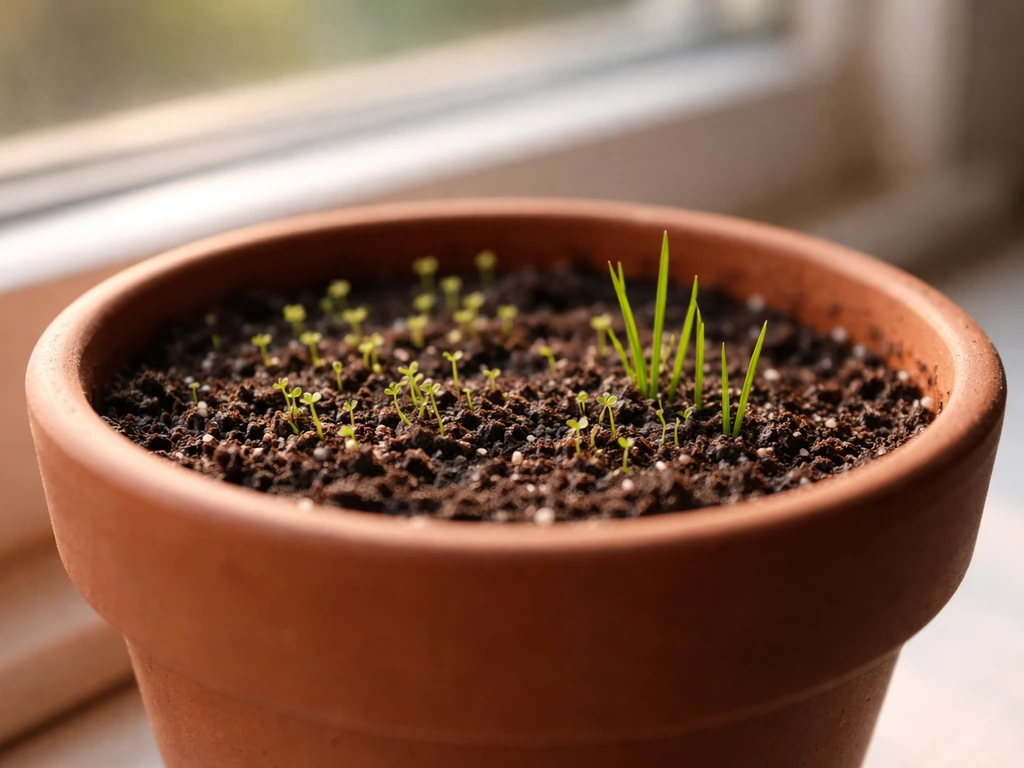
Perennial ryegrass and hard fescue typically show their first green shoots somewhere in this window, often as early as day 5 for ryegrass in warm conditions. Bermuda can take 10 to 30 days, so don't panic if you're past day 10 with nothing showing. Once you see sprouts, keep watering at the same frequency but you can start to let the very top layer dry slightly between waterings. The roots are starting to grow down and the seedlings need oxygen as much as water now.
Weeks 2 through 4
The grass should be visibly filling in. You can reduce watering to once daily, or even every other day if your pot holds moisture well, but always check before skipping. A pot that feels light when you pick it up is usually dry. Water deeply enough that it runs out the drainage holes, then don't water again until the top inch is dry. This encourages roots to grow down rather than staying shallow.
Feeding and mowing for container grass
Container grass needs feeding more often than grass in the ground because nutrients wash out with every watering. Start light and build up gradually.
Fertilizing in pots
Wait until the grass has germinated and is at least 1 inch tall before applying any fertilizer. Feeding too early can burn seedlings and actually slow things down. Once you hit that 1-inch mark, a diluted liquid fertilizer (half the recommended dose) every 2 to 3 weeks works well for container grass. A balanced fertilizer like a 10-10-10 or a lawn-specific starter fertilizer higher in phosphorus works best in those first few months. After the first growing season, switch to a slow-release granular fertilizer applied lightly every 6 to 8 weeks.
Mowing container grass
Yes, you should mow container grass. Let it reach about 3 to 4 inches before the first cut, then keep it trimmed to 2 to 3 inches for cool-season grasses or 1 to 2 inches for warm-season grasses like bermuda. In a small pot, scissors or handheld shears work perfectly. For larger containers or planter boxes, a small battery-powered trimmer makes quick work of it. Mowing keeps the grass tillering (spreading and thickening) rather than going to seed and getting thin. Letting it get too tall in a pot also increases the risk of it flopping over and smothering itself.
Troubleshooting common pot problems
Soil drying out too fast
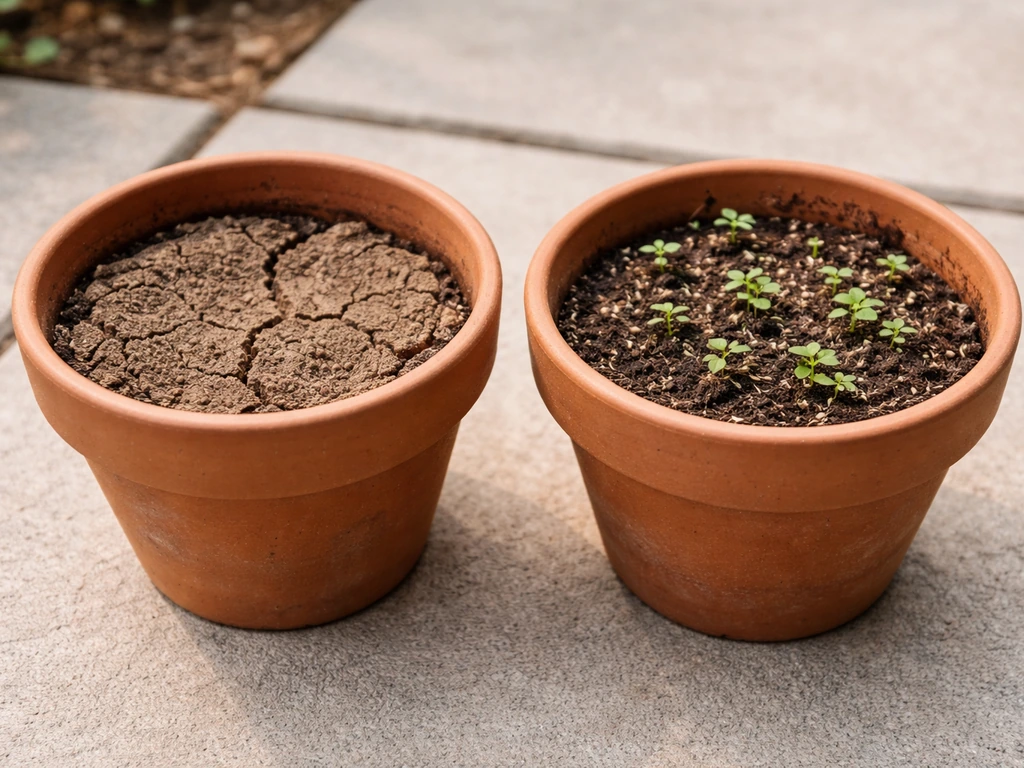
This is the number one issue with container grass. If your pot is drying out within a couple of hours even after a good watering, you have a few options: move the pot somewhere with afternoon shade to reduce evaporation, add a layer of fine mulch or coir over the surface (a thin layer around seedlings won't hurt once they're 1 inch tall), or switch to a pot with thicker walls or a moisture-retaining liner. If your cup or small container keeps drying out too fast, the same strategies in how to grow grass in a cup can help you dial in light, watering, and pot choice. Small pots in hot climates on a sunny patio can be genuinely difficult to keep moist, so consider going up in pot size if you're fighting a constant losing battle.
Patchy or poor germination
If you've got sprouts on one side but bare patches on the other, it usually comes down to uneven moisture, poor seed-to-soil contact, or seed that got washed to one side during watering. Press more seed into the bare spots and keep the pressure of your watering gentle and even. If nothing has sprouted at all after 3 weeks for a cool-season grass, check two things: soil temperature and seed freshness. Old seed from a bag that was stored in a hot garage over summer can have dramatically reduced germination rates. When in doubt, buy fresh seed.
Weeds taking over
Weeds in a pot usually mean you used soil with weed seeds in it, or seeds blew in from outside. Using a quality potting mix rather than topsoil or garden soil reduces this a lot. If weeds do appear, pull them by hand early before they establish. Don't use any pre-emergent herbicide in a container where grass is germinating or recently established, as it will affect your grass seed too.
Yellowing grass
Yellow grass in a pot almost always means one of three things: overwatering (roots sitting in soggy soil lose oxygen and can't take up nutrients), nutrient deficiency (common in containers because of how often you're watering and leaching nutrients out), or a soil pH problem. Check drainage first. If the pot drains freely and the soil isn't waterlogged, try a diluted liquid fertilizer. If yellow patches persist, a soil pH test from a garden center can tell you if your mix is too acidic or alkaline for the grass to absorb nutrients properly.
Ongoing care and success milestones
Knowing what success looks like helps you stay on track and catch problems early before they become full failures.
- Days 5 to 10: First green shoots appear (ryegrass and fescue). If you're growing bermuda, expect to wait up to 2 to 3 weeks.
- Week 2: A visible fuzz of green covers most of the pot surface. Bare spots smaller than a coin will usually fill in on their own. Larger bare areas should be reseeded.
- Week 3 to 4: Grass is 1 to 2 inches tall. This is when you apply your first diluted fertilizer and prepare for the first trim.
- Week 4 to 6: The pot looks and feels like a real patch of grass. The surface should feel dense, not sparse, and the grass should stand upright without flopping.
- Month 2 onwards: You're in maintenance mode. Water deeply but less frequently, fertilize every 6 to 8 weeks, and mow regularly to keep the grass thick.
One thing that catches people off guard: container grass doesn't last forever without some intervention. After one to two growing seasons, the roots fill the pot completely and growth slows. When that happens, you have two options: repot into a larger container with fresh soil, or dump out the pot, refresh the soil mix, and reseed. Think of it less like a permanent lawn and more like a living plant that needs occasional refreshing.
If you enjoy the container grass concept, it's worth exploring variations on the same idea: growing grass seed in trays works on the same principles and gives you a moveable patch you can swap out seasonally. Raised beds and planter boxes offer more root depth and stability if you want something more permanent. You can also grow grass in a raised bed by using a container-friendly soil mix, ensuring drainage, and keeping the surface consistently moist until it germinates. The skills you build with a single pot transfer directly to all of those formats.
Start small: pick one pot, one grass variety matched to your climate, and nail the watering routine in the first two weeks. Once you've done it once successfully, scaling up or trying different varieties becomes much easier.
FAQ
Can I grow grass in a pot using only grass seed and no sod?
Yes, but only if the pot stays consistently damp, not waterlogged. The fastest approach is to sow seed right after you prepare the mix, then cover lightly with the thinnest dusting of mix (or nothing if the seed package says it needs light). In containers, you still need drainage holes, and you should be ready to water 2 to 3 times daily for the first week if the surface dries quickly.
What pot depth is “enough” for grass to actually survive in the long term?
Don’t assume a specific inch count will always work. A shallow pot can still work for ryegrass displays (quick establishment), but tall fescue generally needs more room than a tiny planter to avoid heat stress and premature decline. As a rule of thumb, if the pot is under about 6 inches deep for cool-season grass, expect more frequent watering and earlier thinning.
How do I know if I’m overwatering or underwatering container grass?
Check for dryness and oxygen, not just “water frequency.” Water deeply until you see runoff from the drainage holes, then wait until the top inch is dry before watering again. If the pot stays heavy, smells sour, or the grass turns yellow while the soil feels wet, cut back and confirm drainage is not blocked (gravel layers can sometimes compact if drainage holes are small).
Should I cover the seeds or add mulch while germinating grass in a pot?
Yes, cover can help, but it must not trap too much moisture for too long. If you use a light mulch layer or seed cover, keep it thin and remove or thin it once sprouts appear. For pots that dry out fast, a thin coir or fine mulch layer on top can reduce evaporation, but avoid thicker covers that prevent seedlings from pushing through.
My grass sprouted in one area but not the rest, what should I adjust?
Pots often dry out unevenly, especially on patios where one side faces wind or full sun. Rotate the pot every few days so moisture and temperature are more even, and water gently to avoid washing seed to one side. If bare strips show up repeatedly on the same side, shading that side temporarily is usually more effective than adding extra seed everywhere.
When can I fertilize container grass, and how do I prevent fertilizer burn?
In most cases, fertilizer should wait until seedlings are established to about 1 inch tall, because early feeding can burn tender roots. Once you start fertilizing, use diluted liquid at first (half strength), then switch to light slow-release later. Also, if you see yellowing after switching fertilizers, flush the pot with a small amount of water to reduce salt buildup.
How can I keep container grass green year-round?
Pick one: either overseed for color and density during dormancy or accept seasonal browning. For example, warm-season grasses like bermuda and zoysia often brown in winter, so fall overseeding with a cool-season grass can keep the look more consistently green. In containers, overseeding works best when you don’t let the pot fully dry out, because new seedlings are less drought tolerant.
Can I use weed killer in a pot after I sow grass seed?
Yes, but be careful with herbicide timing. Don’t use pre-emergent products in the container during germination or right after seeding, since they can inhibit grass seed. If you have weeds, hand-pull them early, and only consider chemical options after the grass is well established and you confirm the product is safe for your grass type.
Why does my pot grass keep drying out even when I water?
It can be, especially in high-heat sun or if the mix is peat-heavy. If the pot dries within a few hours even after deep watering, try morning sun with afternoon shade, increase pot size, or use a moisture-retaining liner. Surface mulching can help, but if the pot walls are very thin, the real fix is usually more volume or a different container.
How long will grass in a pot last before I need to replant?
Yes, and it’s often the best way to solve root-bound slowdown. After one to two growing seasons, when growth slows and the pot feels full and dense, repot into a larger container with fresh mix or refresh by removing some old soil and reseeding. New mix improves drainage and nutrient availability, which container grass needs because watering leaches nutrients quickly.
Next Article
Can You Grow Grass on Cardboard? Yes How To
Can you grow grass on cardboard? Step-by-step weed barrier method, seeding tips, timing, and troubleshooting for success