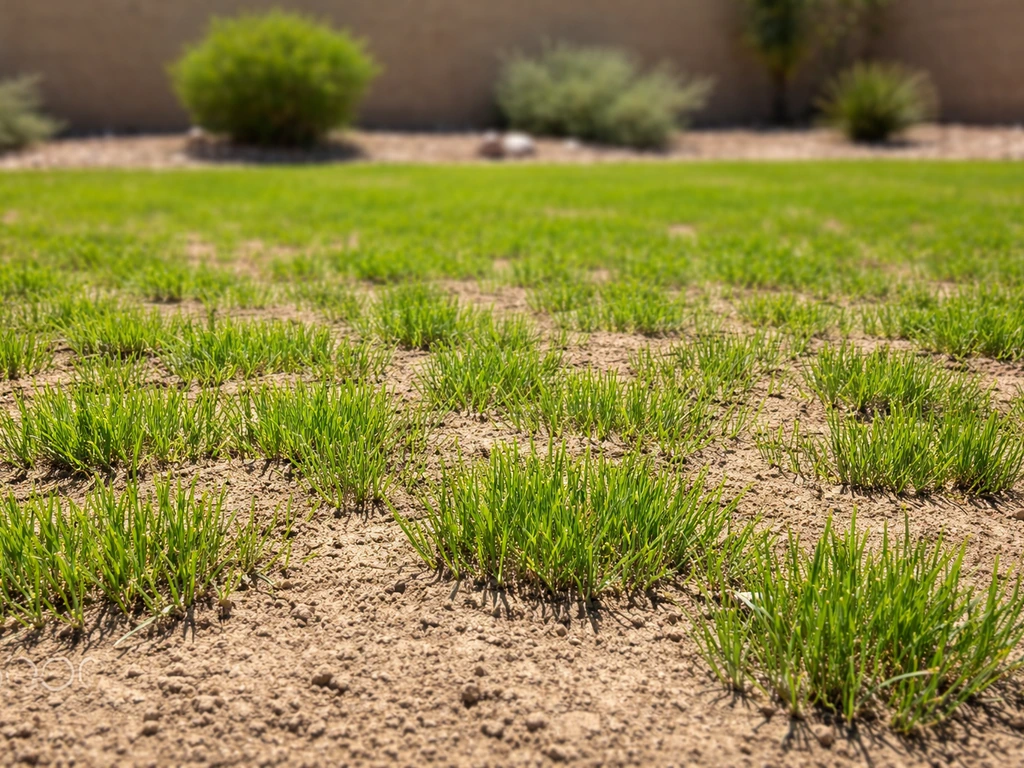
Growing grass in San Antonio comes down to one core rule: work with the heat, not against it. The city sits in USDA zones 8b to 9a, where summer soil temperatures routinely push past 90°F and winters are mild enough that warm-season grasses like Bermuda and Zoysia thrive year-round. If you seed at the right soil temperature, prep your clay or sandy soil properly, and water within SAWS restrictions, you can go from bare dirt to a dense, healthy lawn in a single growing season. For statewide tips and broader climate considerations, see how to grow grass in Texas. Skip any one of those steps and you'll be reseeding the same bare spots six months later.
How to Grow Grass in San Antonio Texas: Step-by-Step Guide
Marcus Tillwell
17 Jul 2026
Why San Antonio needs its own lawn plan
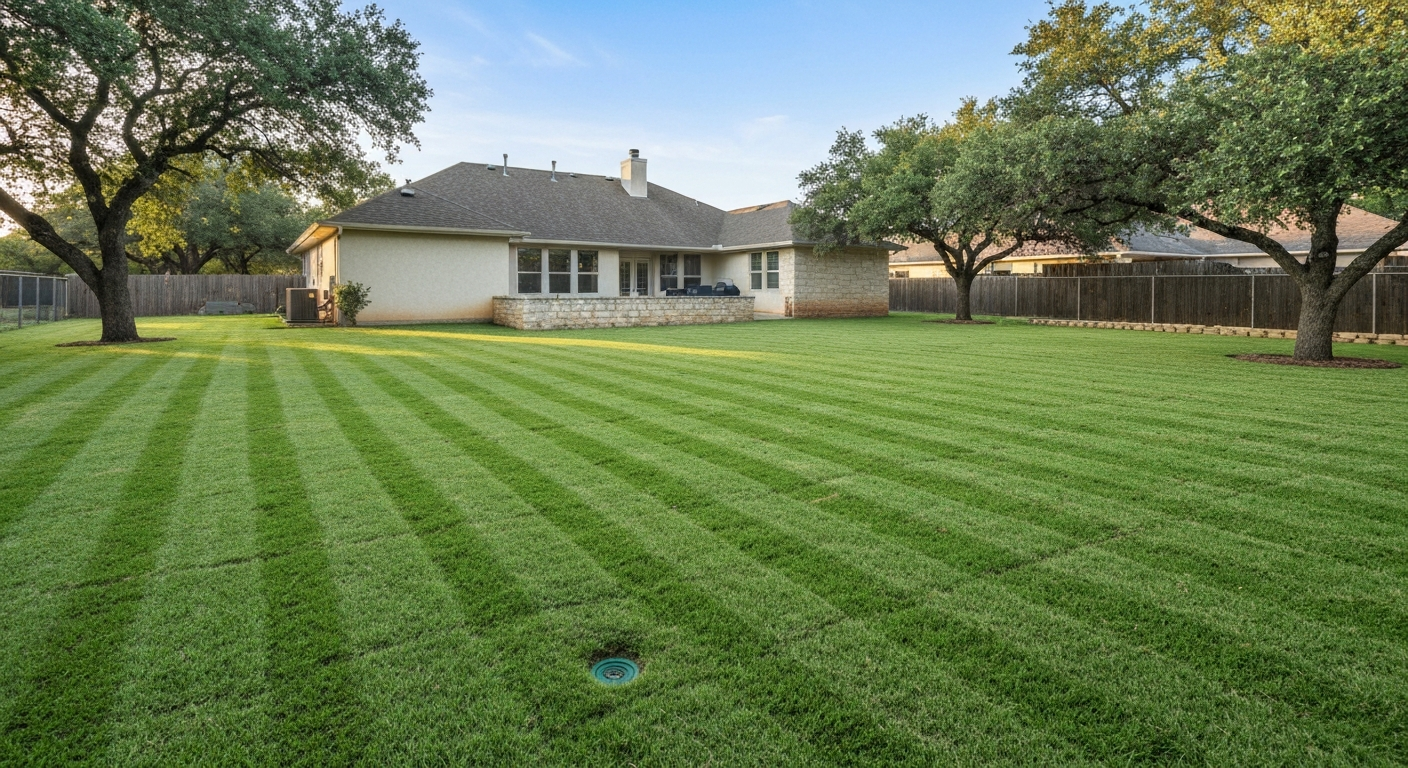
Most generic lawn advice is written for the mid-Atlantic or Pacific Northwest, where cool-season grasses dominate and summer heat is mild. For guidance tailored to a Mediterranean coastal climate, see how to grow grass in San Diego. San Antonio is a different animal. For tips tailored to hotter, drier West Texas conditions, see how to grow grass in El Paso. With a mean annual temperature of about 69.4°F and August averages hitting 85.3°F, cool-season grasses like Kentucky bluegrass simply cook out. But the city also averages lows in the low 30s in January, which rules out some of the most tropical warm-season options. The practical sweet spot is warm-season turf (Bermuda or Zoysia) for full-sun lawns, with Tall Fescue as a shaded-area alternative and Perennial Ryegrass strictly as a winter overseeding tool for temporary green color.
The soils add another layer of complexity. Much of the city sits on heavy Bexar County clay that drains poorly, compacts under foot traffic, and develops a hard crust that sheds water instead of absorbing it. North and northwest areas often have rockier, thinner topsoil over limestone. The southeastern portions can run sandy. Whatever you're dealing with, the fix starts before you ever open a bag of seed.
The choice between seed, sod, and plugs also matters more here than in cooler climates. Seeded Bermuda needs sustained warm soil to establish before the hottest stretch of summer hits. Sod gives you an instant lawn but has to be installed and watered immediately in summer heat. Plugs are the patient route, cost-effective for Zoysia but slow. Getting that decision right from the start saves you real money and time.
Seed, sod, or plugs, pick the right method first
Before you order anything, decide which establishment method actually fits your situation. Each one has a different cost profile, timeline, and effort level. Here's how to think through it quickly.
| Method | Best for | Cost (materials) | Time to full coverage | Main risk in San Antonio |
|---|---|---|---|---|
| Seed | Bermuda (full sun), Tall Fescue (shade/fall), Ryegrass (overseed) | Lowest — $0.10–$0.40/sq ft | 6–12 weeks for Bermuda; 4–8 weeks for ryegrass | Planting too early or late; weed competition during germination |
| Sod | Bermuda, Zoysia, St. Augustine — any size lawn needing fast coverage | Moderate to high — $0.35–$0.75/sq ft + install | Instant coverage; roots in 2–3 weeks | Sod dries out fast in summer; cannot sit on pallet more than 24–36 hrs |
| Plugs | Zoysia (especially improved cultivars not available as seed) | Low to moderate — $0.15–$0.35/plug | One full growing season to fill in | Slow coverage; weeds can overtake plugs before fill-in |
The practical guidance: if you need a new lawn quickly and have the budget, sod is the safest choice in San Antonio's summer heat. If you're patient and working with a large area (3,000 sq ft or more), seeded Bermuda is dramatically cheaper and still very effective when timed right. Plugs make the most sense if you want a specific Zoysia variety that isn't available as seed, or if you're filling in a partial lawn rather than starting from scratch. For a straightforward comparison with the rest of the state, the regional patterns hold fairly consistently across Central Texas.
The best grass types for San Antonio lawns
You have four realistic options for San Antonio. Two of them (Bermuda and Zoysia) are permanent warm-season grasses that will carry your lawn year-round. One (Tall Fescue) is a cool-season grass that can survive San Antonio winters but struggles hard in summer heat unless it's in real shade. The fourth (Perennial Ryegrass) is not a permanent grass here, it's an overseeding tool for winter color only and will die out once temperatures climb in spring. See Turfgrass Selection for Texas, Texas A&M AgriLife Extension (publication L‑5519) for species adaptation and recommendations favoring warm‑season grasses for most San Antonio lawns and advising cool‑season species be limited to overseeding or shaded microclimates Turfgrass Selection for Texas — Texas A&M AgriLife Extension (publication L‑5519).
Bermudagrass
Bermuda is the workhorse of San Antonio lawns. It loves heat, handles drought reasonably well once established, recovers from heavy foot traffic and pet damage faster than anything else on this list, and can be started from seed at a very low cost. The trade-off is that it goes dormant and turns brown in winter (usually November through February), it requires regular mowing during the growing season, and it can aggressively invade flower beds. It also needs full sun, at least 6 hours of direct sun daily. Under trees or on the north side of a house, it thins out and eventually dies.
Zoysiagrass
Zoysia is the premium option for San Antonio homeowners who want a finer-textured, dense lawn with slightly better shade tolerance than Bermuda. It holds its color a bit later into fall and greens up slightly earlier in spring. The downside: it's slower to establish (often a full growing season from plugs), pricier to install as sod, and its improved cultivars generally aren't available as seed. Establishing Seeded Zoysiagrass of Lawns and Golf Courses (MP476), Univ. of Arkansas Cooperative Extension reports that seeded zoysiagrass requires sustained soil temperatures in the low- to mid-70s°F and is often established by sod or plugs rather than seed Establishing Seeded Zoysiagrass of Lawns and Golf Courses (MP476) — Univ. of Arkansas Cooperative Extension. It also goes dormant in winter, just like Bermuda. If you want a lush, high-end look and are willing to wait for establishment, Zoysia is worth it.
Tall Fescue
Tall Fescue is the only cool-season grass worth attempting permanently in San Antonio, and only in the right conditions: shaded areas that get no more than 4–5 hours of direct sun, fall-planted to give roots time to establish before summer stress. Even then, expect some thinning during July and August. Tall Fescue stays green through winter, which is one reason homeowners in shaded yards like it. Plan to overseed it every fall to fill in summer losses, it doesn't spread like Bermuda, so thin areas won't self-repair.
Perennial Ryegrass (overseed only)
Perennial Ryegrass has no role as a permanent San Antonio lawn grass. What it does extremely well is provide fast, bright-green winter color over a dormant Bermuda or Zoysia lawn. It germinates in 5–10 days, establishes through the mild San Antonio winter, and then dies out as soil temperatures climb in spring, transitioning the lawn back to the warm-season base. If winter color matters to you, this is your tool.
Specific varieties worth buying
Species selection is only the first decision. Within each species, variety matters, especially for heat tolerance, texture, and disease resistance in San Antonio's specific climate.
| Grass type | Recommended cultivars/varieties | How to buy | Notes |
|---|---|---|---|
| Bermudagrass (seeded) | Riviera, Yukon, Princess 77, Sahara | Certified seed bags at feed stores, farm supply, online | Riviera and Yukon have the best cold tolerance for zone 8b; Princess 77 is finer-textured |
| Bermudagrass (sod/hybrid) | Tifway 419, TifTuf, Celebration, NorthBridge | Sod farms; local San Antonio sod suppliers | TifTuf has exceptional drought tolerance; Tifway 419 is the classic workhorse; Celebration has good shade tolerance for Bermuda |
| Zoysiagrass (sod/plugs) | Zeon, Empire, Palisades, El Toro | Sod farms; plug trays at local nurseries | Zeon is fine-textured and shade-tolerant; Empire is coarser but very heat/drought tolerant; Palisades handles moderate shade well |
| Tall Fescue | Rebel Exeda, Houndog 5, Falcon IV, Baja | Seed bags at hardware stores, garden centers | Buy blends labeled 'heat-tolerant' or 'endophyte-enhanced' for best results in South Texas heat |
| Perennial Ryegrass (overseed) | Pennant II, Zoom, Brightstar SLT, Paragon GT | Seed bags; often sold as 'winter rye' blend locally | Any quality certified perennial rye works; avoid annual ryegrass if you want consistent appearance |
When buying seed, always check the tag stapled to the bag. You're looking for a test date within the past 12 months, a germination percentage of 85% or higher, and a weed seed percentage as close to 0% as possible. To calculate the pure live seed (PLS), which tells you how much viable seed you're actually paying for, multiply the purity percentage by the germination percentage. If a bag of Bermuda is 95% pure and 90% germination, the PLS is 85.5%. If PLS is below 80%, increase your seeding rate proportionally.
Comparing grass types side by side
| Trait | Bermuda (seeded/hybrid) | Zoysia | Tall Fescue | Perennial Ryegrass (overseed) |
|---|---|---|---|---|
| Drought tolerance (established) | High | High | Moderate | Low |
| Shade tolerance | Poor (6+ hrs sun needed) | Moderate (4–5 hrs) | Good (3–4 hrs) | Moderate |
| Winter color | Brown (dormant) | Brown (dormant) | Green year-round | Green (temporary overseed) |
| Foot traffic / playability | Excellent | Good | Moderate | Moderate |
| Establishment speed | Fast (seed 6–10 wks) | Slow (plugs: full season) | Moderate (8–12 wks) | Very fast (5–10 days) |
| Maintenance level | High (frequent mow) | Moderate | Moderate-high (annual overseed) | Low (temporary) |
| Cost to establish | Low (seed) to moderate (sod) | Moderate-high | Low-moderate (seed) | Very low (overseed) |
| Best use case | Full-sun, budget, high-traffic | Premium look, moderate shade | Shaded areas, fall-seeded | Winter color over dormant warm-season |
When to plant: exact windows and soil temperature triggers
The single biggest mistake San Antonio homeowners make is going by the calendar instead of the soil thermometer. A $10 soil probe thermometer from a garden center will save you from wasted seed and frustrating failures. Measure at 1–2 inches deep, early in the morning, for three to four consecutive days before committing to a seeding date.
| Grass type | Soil temp trigger | Target planting window (San Antonio) | Notes |
|---|---|---|---|
| Bermudagrass (seed) | Consistently 65°F+ at 1–2" | Mid-April through mid-June | Earlier end of window is better — allows establishment before peak August heat |
| Bermudagrass (sod/plugs) | 50°F+ (sod can go earlier) | April through early October | Avoid late October+ as shorter days and cooling soil slow rooting |
| Zoysiagrass (seed, where available) | 70–75°F at 1–2" | May through mid-June | Seed is slow; sod or plugs preferred for most cultivars |
| Zoysiagrass (sod/plugs) | 65°F+ | April through early September | Earlier in summer = more fill-in time before dormancy |
| Tall Fescue (seed) | 65–75°F dropping (fall cooling) | Mid-September through November | October is the sweet spot — cooler air but soil still warm enough for germination |
| Perennial Ryegrass (overseed) | 50–70°F at 2" | Mid-October through late November | Mow Bermuda/Zoysia short first; ryegrass needs soil contact to germinate |
In practical terms: if you're seeding Bermuda, late April to mid-May is the most reliable window in San Antonio. Soils usually reach 65°F by early April in warmer years, but a late cold snap can reset things. Tall Fescue should go in October for best results, the soil is still warm enough to drive quick germination, but air temps are cooling, which reduces drought stress on seedlings. Ryegrass overseeding targets mid-October to early November, after your warm-season grass has gone fully dormant or close to it.
Soil testing before you do anything else
I'd argue soil testing is the most skipped and most important step in lawn establishment. Without it, you're guessing on lime and fertilizer applications, and in San Antonio's alkaline soils, that guessing usually means your grass struggles to take up nutrients even when you're applying plenty of them.
The Texas A&M AgriLife Soil, Water and Forage Testing Laboratory offers a routine Urban and Homeowner analysis for a modest fee. You collect 8–10 soil cores from the area you want to test, each core going about 4 inches deep, mix them together in a clean bucket, and send roughly a cup of that mixed soil in. The lab returns pH, macro and micronutrient levels, organic matter percentage, and specific lime and fertilizer recommendations for your grass type. For broader forage and pasture guidance, Texas A&M also offers practical resources on topics like how to grow hay in Texas through its extension materials.
For San Antonio lawns, here are the targets you're aiming for before planting:
| Parameter | Target range for warm-season grass | Target range for Tall Fescue | Notes |
|---|---|---|---|
| Soil pH | 6.0–7.0 | 5.8–6.5 | Many San Antonio soils run 7.5–8.2 due to limestone parent material — high pH locks up iron and zinc |
| Phosphorus (P) | 25–50 ppm | 30–60 ppm | Low P is common in new construction fill soils |
| Potassium (K) | 100–150 ppm | 100–150 ppm | Generally adequate in San Antonio clay soils |
| Organic matter | 2–5% | 3–5% | Most local clay and sandy soils are below 1–2% — amendment is usually needed |
| CEC (cation exchange capacity) | 10–20 meq/100g ideal | 10–20 meq/100g ideal | Sandy soils may be very low; indicates need for compost to build nutrient-holding capacity |
The high-pH problem deserves special mention. If your soil tests above 7.5 and you're planting Bermuda or Zoysia, iron deficiency (yellowing leaves) is almost certain without intervention. Sulfur applications can gradually lower pH, but in San Antonio's highly buffered limestone soils, this is a slow process. The more practical fix is to use sulfur-coated fertilizers, apply chelated iron as a foliar spray when yellowing appears, and focus on building organic matter to improve nutrient availability.
How to prep San Antonio soil, clay, sandy, and everything in between
Soil prep is where most people underinvest and then blame the seed. If your lawn area has heavy clay that puddles after rain or sandy spots that dry out within hours, the grass you plant will reflect those conditions, not the picture on the seed bag.
Heavy clay soil (most of central San Antonio)
- Till or aerate to at least 4–6 inches deep before any amendments. A rented core aerator or tiller works for areas up to a few thousand square feet.
- Apply 2–3 inches of quality compost (not just topsoil) over the entire area. Compost improves drainage, adds organic matter, and feeds soil biology.
- If drainage is severely poor (standing water for more than 30 minutes after normal rain), consider adding expanded shale at 3–4 inches per 1,000 sq ft tilled into the top 6 inches. Expanded shale is a permanent fix for clay drainage in Texas — one application lasts decades.
- Work all amendments into the top 4–6 inches with a tiller or garden fork. Don't just lay compost on top of unprepared clay and seed over it — it won't integrate.
- Rake level and let settle for a few days before seeding. A firm, level seedbed gives seed-to-soil contact, which is critical especially for Bermuda.
- Avoid adding sand to clay unless you're adding a very large quantity (at least 50% by volume). Small amounts of sand mixed with clay creates a concrete-like texture.
Sandy or thin soil (north and south edges of the city)
- Sandy soils don't hold water or nutrients well — the fix is organic matter, not clay (adding clay to sandy soil is a nightmare to work with).
- Apply 3–4 inches of compost and till it in to 4–6 inches. High-organic-matter compost (aged wood chips, leaf compost) is better here than municipal bio-solids compost, which can have high salt content.
- Consider a starter fertilizer higher in phosphorus when you plant — sandy soils often have low phosphorus, and new roots need it badly.
- Plan for more frequent watering during establishment. Sandy soil dries faster, so you may need to water twice per day in the first two weeks rather than once.
Thin topsoil over limestone (rocky areas)
If you're hitting limestone pan less than 4–6 inches down, you have a harder problem. You'll need to either import 4–6 inches of quality topsoil (blended with compost at a 3:1 ratio) to create a planting zone, or accept that this area will require more intensive irrigation and will thin out in drought years. Bermuda's deep root system (2–3 feet in good soil) is severely limited by rock pan, it will survive but won't thrive without adequate soil depth.
Seed, sod, and plug quality, what to look for before you buy
Seed label checklist
- Test date within the past 12 months (older seed has declining germination)
- Germination percentage 85% or higher for warm-season grasses; 90%+ for Tall Fescue and Ryegrass
- Purity 95%+ — what percentage of the bag is actually the species you want
- Weed seed content: 0.00% preferred; any weed seed content above 0.10% is a red flag
- Inert matter below 5%
- Certification label (blue certified tag) where available — indicates the variety is true-to-name
- Calculate PLS before adjusting rates: PLS = (purity% ÷ 100) × (germination% ÷ 100) × 100
Sod quality checklist
- Consistent thickness: 3/4 to 1.5 inches of soil attached to roots
- No yellowing or mushy patches — yellowing means the sod has been sitting too long or was stressed at the farm
- Moist but not soggy — roots should be visible and white or tan, not brown and slimy
- Tight, dense canopy with no bare or thin patches in the roll
- Install within 24 hours of delivery in summer heat; 36 hours is the absolute maximum
- Order from a reputable local sod farm that can tell you when the sod was cut
Plug quality and spacing
- Plugs should be 2–3 inches in diameter with healthy green shoots and intact root ball
- No visible disease spots, yellowing, or dried-out roots
- Standard spacing for Zoysia plugs: 6 inches on center for faster fill (more plugs, higher cost) or 12 inches on center for slower but cheaper coverage
- Bermuda hybrid sprigs: approximately 5 bushels per 1,000 sq ft pressed into a tilled, moist seedbed
- Plant plugs immediately — don't let them sit in full sun without watering
Seeding rates, sowing methods, and germination timelines
| Grass type | Seeding rate (new lawn) | Seeding rate (overseed/repair) | Germination days (ideal conditions) | Seeding depth |
|---|---|---|---|---|
| Bermudagrass (hulled seed) | 0.5–1 lb per 1,000 sq ft | 0.25–0.5 lb per 1,000 sq ft | 7–14 days | 1/8" or less — press into surface |
| Zoysiagrass (seed) | 1 lb per 1,000 sq ft | 0.5 lb per 1,000 sq ft | 14–21 days | 1/8" or less |
| Tall Fescue | 6–8 lb per 1,000 sq ft | 3–4 lb per 1,000 sq ft | 7–12 days | 1/4" |
| Perennial Ryegrass (overseed) | 6–8 lb per 1,000 sq ft | 4–6 lb per 1,000 sq ft | 5–10 days | Surface — rake lightly after broadcast |
For Bermudagrass, the biggest mistake is burying the seed. It's tiny, about the size of a grain of sand, and it needs light and surface contact to germinate. Broadcast with a rotary spreader, then drag a piece of chain-link fence or the back of a leaf rake over the area to work it into the soil surface without burying it. A light topdress of 1/8 inch of sifted compost or fine topsoil helps retain moisture around the seed without blocking light. Roll the area with a lawn roller (rentable) to improve seed-to-soil contact.
For Tall Fescue, broadcast seed with a rotary spreader in two passes at half the rate (one north-south, one east-west) for even distribution. Rake lightly to just cover seed to about 1/4 inch, then water thoroughly. Tall Fescue is a bunch-type grass, it doesn't spread by stolons or rhizomes, so any bare spots need to be manually reseeded. That's why the initial rate of 6–8 lb per 1,000 sq ft matters: you need dense seed distribution from day one.
For Ryegrass overseeding, mow your Bermuda or Zoysia base short (1 inch or less) about a week before you seed. This helps the ryegrass seed make contact with the soil rather than sitting on top of the existing thatch. Broadcast the ryegrass seed, rake lightly, and keep the surface consistently moist for the first 10 days. You'll typically see green shoots within a week.
Sodding and plugging, step-by-step procedure
- Prepare the soil as described above (till, amend, level) at least 3–5 days before your sod or plugs arrive.
- Water the prepped soil surface the day before installation so sod roots contact moist (not wet) soil.
- Start laying sod along a straight edge — a driveway, sidewalk, or string line. Work in a single direction.
- Stagger seams like brickwork: never align three or more seams in a row. Butt edges tightly together with no gaps.
- On slopes, lay sod perpendicular to the slope (horizontally) and stake the top two or three rows with biodegradable sod staples to prevent shifting.
- After laying, roll the entire area with a water-filled lawn roller to ensure full root-to-soil contact. This is non-negotiable — skip it and you'll get dry patches.
- Water immediately and deeply after rolling: irrigate until the top 3–4 inches of soil beneath the sod is moist.
- For plugs: use a plug tool or bulb planter to make holes at your chosen spacing (6 or 12 inches on center). Insert plugs, firm down with your foot, and water in thoroughly.
- Keep sod and plug areas consistently moist for the first 2 weeks. Lift a corner of sod after 10–14 days — if you feel resistance when pulling, roots are taking hold.
- Stay off new sod for at least 2 weeks, longer if you can manage it. First mow when sod has rooted and grass reaches the upper end of its recommended mowing height.
Complete planting checklist from prep to day 30
- Week minus 3: Collect soil samples and submit to Texas A&M testing lab. Confirm your SAWS watering day and current drought stage restrictions.
- Week minus 2: Apply any lime or sulfur recommended by soil test. Till or aerate. Apply compost and till in. Level with rake.
- Week minus 1: Apply starter fertilizer if soil test recommends phosphorus. Let soil settle. Pre-water to verify drainage and level any low spots.
- Day 1 (planting day): Verify soil temp at 1–2" depth meets your target for your chosen grass. Seed, sod, or install plugs using the appropriate method above. Roll or press for contact. Water in thoroughly.
- Days 2–7: Water lightly and frequently (2–3 times per day for seed; once daily for sod) to keep surface moist. Do not let seedbed dry out.
- Days 8–14: Reduce watering frequency slightly for seeded areas — encourage roots to search downward. Sod should be irrigated daily if no rain. Check for rooting by tugging sod corner.
- Days 15–21: First signs of germination and green-up for seeded lawns. Apply no fertilizer yet. Mow sod for the first time if it has reached upper height recommendation.
- Days 22–30: Most seeded Bermuda should be visibly green and spreading. Begin transitioning to deeper, less frequent irrigation. Apply a light nitrogen fertilizer (starter or slow-release) to seeded areas once 50% coverage is achieved.
Establishment watering schedule, weeks 1 through 8
Before diving in: check your SAWS watering restrictions. During drought stages, automatic sprinkler systems may be limited to once per week on a designated watering day, with allowed windows of 5:00–10:00 a.m. and 9:00 p.m. to midnight. Establishment irrigation for new seeding or sodding may require a variance or exemption from SAWS, contact them directly before you start. Hand-watering with a hose is typically less restricted, which is an important tool for the first 2 weeks when seed needs multiple daily waterings.
| Week | Frequency | Duration/amount | Target soil moisture | Adjustments for heat or rain |
|---|---|---|---|---|
| Week 1 (seeded) | 3× per day | 5–7 min per zone, or until top 1" is moist | Consistently moist top 1" | Add extra pass if surface dries within 2 hours; skip if rain exceeded 0.25" |
| Week 1 (sod/plugs) | 1–2× per day | 10–15 min per zone | Moist top 3–4" beneath sod | Water mid-morning and early evening if temps exceed 95°F |
| Weeks 2–3 (seeded) | 2× per day | 5–8 min per zone | Moist top 2" | Reduce if temps drop below 75°F or rain is consistent |
| Weeks 2–3 (sod/plugs) | 1× per day | 15–20 min per zone | Moist top 4" | Skip day after 0.5"+ of rain |
| Weeks 4–5 | Daily to every other day | 15–20 min per zone | Moist top 4–6" | Watch for wilting — water immediately if grass shows blue-gray tint |
| Weeks 6–7 | Every 2–3 days | 20–25 min per zone | Moist top 6" | In August heat, don't stretch past 3 days without water for new grass |
| Week 8+ | 2–3× per week transitioning to 1× | 25–30 min per zone | Moist top 6–8" | Move toward deep, infrequent watering to train deep roots |
The goal by week 8 is deep, infrequent irrigation that drives roots down. Shallow, frequent watering produces shallow roots that can't survive a San Antonio August drought. Once your grass is established, 1 inch of water per week (including rain) is the general rule for Bermuda and Zoysia in summer, apply it in one or two sessions rather than daily sprinkles.
Mowing heights and first-mow rules
| Grass type | Recommended mowing height | First mow (after establishment) | Frequency (active growing season) | Clippings guidance |
|---|---|---|---|---|
| Bermuda (seeded/hybrid) | 1–2 inches | When seedlings reach 3 inches | Every 5–7 days | Return clippings unless thick enough to smother — bag if over 1/3 rule violated |
| Zoysia | 1.5–2.5 inches | When sod/plugs reach 3.5 inches | Every 7–10 days | Return clippings; thatch can build up — dethatch annually if needed |
| Tall Fescue | 3–4 inches | When seedlings reach 5 inches | Every 7–10 days | Return clippings; mow high in summer to reduce heat stress |
| Perennial Ryegrass (overseed) | 1.5–2.5 inches (match base grass) | When ryegrass reaches 3.5 inches | Every 7 days during cool season | Return clippings; remove if heavy to avoid smothering base grass |
The one-third rule applies to every mow: never remove more than one-third of the leaf blade in a single cutting. If you let Bermuda get to 3 inches and then scalp it to 1 inch, you'll stress the grass and invite weeds. If you can't mow frequently enough to stay within the one-third rule, raise your mowing height temporarily and then gradually bring it down over two or three mowings.
For Tall Fescue in San Antonio summers, mow on the high end of its range (3.5–4 inches). The taller leaf blade shades the soil, reduces moisture loss, and keeps roots slightly cooler. Scalping Tall Fescue in July is one of the fastest ways to kill a shaded-area fescue lawn.
Fertilizing schedule, establishment and long-term
Don't fertilize right at seeding. New seed needs moisture and warmth to germinate, pushing nitrogen too early feeds weeds and doesn't help grass seedlings that haven't even developed roots yet. The timing below assumes you've followed the planting checklist and are working with established or actively establishing turf.
| Timing | Fertilizer type | N-P-K guidance | Amount per 1,000 sq ft | Notes |
|---|---|---|---|---|
| At planting (sod/plug only) | Starter fertilizer | Low-N, higher-P (e.g., 5-10-5) | Follow label — typically 5–10 lbs | Promotes root establishment; don't use on seeded areas until 50% coverage |
| Week 4–6 (seeded, 50%+ coverage) | Slow-release nitrogen | Balanced or N-heavy (e.g., 15-0-5) | 0.5 lb actual N per 1,000 sq ft | Slow-release feeds gently and won't burn seedlings |
| Spring (April–May) | Slow-release N | High N, moderate K (e.g., 28-0-6) | 1 lb actual N per 1,000 sq ft | First main feed of the season as warm-season grass greens up |
| Early summer (June) | Slow-release N | Balanced N-K (e.g., 15-0-15) | 1 lb actual N per 1,000 sq ft | Add potassium to improve drought and heat stress tolerance |
| Late summer (mid-August) | Slow-release N | Lower N, higher K (e.g., 10-0-20) | 0.5–0.75 lb actual N per 1,000 sq ft | Avoid heavy N after August 15 — promotes tender growth vulnerable to early frost |
| Fall (Tall Fescue only, September) | Balanced fertilizer | High N fall formulation (e.g., 24-0-12) | 1 lb actual N per 1,000 sq ft | Critical feed for Tall Fescue — supports root development before summer |
| Winter (dormant Bermuda/Zoysia) | None | None | None | Do not fertilize dormant warm-season grass — it can't use nutrients and you'll feed weeds |
For San Antonio's alkaline soils, iron supplementation is often as important as nitrogen. If your Bermuda or Zoysia shows yellowing (interveinal chlorosis) despite adequate fertilizing, apply chelated iron (ferrous sulfate or a chelated liquid iron product) as a foliar spray in early morning. Don't apply in midday summer heat, it can burn. Iron is a cosmetic fix on high-pH soils; the long-term solution is building organic matter and slightly acidifying over time with sulfur-containing fertilizers.
Overseeding with perennial ryegrass for winter color
If brown grass from November through February bothers you, overseeding with perennial ryegrass is the most effective and affordable fix. The process is simple, but the timing and transition back to your warm-season base require a little attention.
Overseeding process
- Time your overseed for mid-October to early November — when your Bermuda or Zoysia is entering or at dormancy and soil temps are 50–70°F.
- Mow the base lawn as short as possible (1 inch or lower) and bag the clippings to remove thatch that would block seed contact.
- Scalp gently with a mower or dethatch with a power rake on heavily thatched lawns before seeding.
- Broadcast perennial ryegrass at 6–8 lb per 1,000 sq ft using a rotary spreader. Make two passes at half rate for even coverage.
- Rake lightly to ensure seed contacts soil — ryegrass seed sitting on thatch or old clippings won't germinate reliably.
- Water twice daily for the first 10–14 days to keep the seed surface consistently moist. Germination typically occurs in 5–10 days.
- Once ryegrass reaches 3–4 inches, mow to 2–2.5 inches and continue regular watering through winter.
Spring transition back to warm-season turf
This is where homeowners sometimes get anxious, the ryegrass will look great in February and March, and then as soil temperatures climb above 70°F in April and May, it naturally starts to thin and die out. Help it along by gradually reducing irrigation frequency and allowing the warm-season base to reassert itself. Do not apply nitrogen fertilizer in March and April, this just extends the ryegrass competition with your Bermuda or Zoysia. If large patches of ryegrass are hanging on stubbornly past mid-May, you can mow aggressively short (scalp to 0.5 inch) to stress it and give the warm-season grass a light boost of nitrogen to accelerate green-up. By June, the transition should be complete.
Fixing the most common San Antonio lawn problems
Persistent bare spots
Before reseeding any bare spot, figure out why it's bare. Bare spots that keep coming back despite reseeding usually have an underlying cause: compacted soil, standing water after rain, heavy shade, tree root competition, or a dog's favorite elimination spot. Reseeding without addressing the cause is just wasted seed. Loosen the top 2–3 inches with a hand fork, amend if needed, then reseed at twice the normal rate for Bermuda or at full rate for Fescue. Cover lightly with a thin layer of peat moss or sifted compost and keep consistently moist.
Heavy clay compaction
If you're dealing with an existing lawn (not a new installation), core aeration is your primary tool. Rent a core aerator in early spring (April) for Bermuda and Zoysia, or in October for Tall Fescue. Pull 3-inch cores, leave them on the surface, and topdress with 1/4 inch of compost immediately after. The compost filters into the aeration holes and builds organic matter where roots need it most. Repeat annually until drainage noticeably improves.
Sandy patches that dry out fast
Sandy areas need extra organic matter and more frequent irrigation during establishment. Topdress with compost (1/4 to 1/2 inch) annually to gradually build up water-holding capacity. Wetting agents (soil surfactants) can help water penetrate hydrophobic sandy soils, apply a diluted wetting agent before irrigation in the hottest parts of summer.
Shade areas under trees
If you have dense shade (less than 3 hours of direct sun), no grass will thrive long-term. Your realistic options are: Tall Fescue (will survive with 3–4 hours of sun and annual overseeding), Zeon or Palisades Zoysia (tolerates 4–5 hours), or accepting ground cover alternatives (mulch, shade-loving plants). Raising your mowing height helps shade-stressed grass survive. Never fertilize heavily in deep shade, it promotes disease. Tree root competition for water is also severe under large oaks; deep-root watering tubes inserted 12 inches deep can deliver water past the feeder roots of the tree and directly to your grass roots.
Pet damage (urine spots and digging)
Dog urine burns spots are nitrogen overdose from a concentrated source. The fix: dilute immediately after the dog eliminates by pouring a full watering can over the spot. For existing dead spots, remove the dead grass and top 1/2 inch of soil (the salt accumulation zone), water deeply to flush the area, wait a week, then reseed with Bermuda at double rate. Bermuda recovers from pet damage faster than any other turf on this list. Digging spots are a behavioral issue, not a soil issue, reseed the same way and consider dog-specific training or designated dig zones.
Weeds during establishment
Do not apply pre-emergent herbicides before or during seeding, they will prevent your grass seed from germinating just as effectively as they prevent weed seed from germinating. Wait until your new grass has been mowed at least three times before applying any post-emergent herbicides for broadleaf weeds. Hand-pull or spot-treat during the first 60 days. For Tall Fescue lawns, use only herbicides specifically labeled safe for fescue, many common Bermuda herbicides will damage or kill Fescue.
When to call a pro
Most establishment and maintenance tasks are DIY-friendly. Call a professional (a certified Texas Master Certified Nursery Professional or a licensed turfgrass specialist) if you're dealing with large-scale grading issues or drainage problems that require French drains or site regrading; persistent fungal disease (brown patch, gray leaf spot) that doesn't respond to cultural fixes; or if your lawn has had multiple failed establishment attempts and you're not sure why. A single on-site consultation with a local extension agent or agronomist often costs little or nothing through Texas A&M AgriLife Extension's county office in Bexar County, and it can save you from a third expensive failed seeding attempt.
FAQ
What grass species are best for San Antonio (USDA 8b–9a) and what are the pros/cons of each?
Best choices and short guidance: - Bermudagrass (hybrid or common): Pros — excellent heat, drought and wear tolerance; aggressive recovery; low mowing height possible. Cons — goes dormant and brown in winter; can be invasive into beds; requires full sun and regular fertility. Varieties: improved hybrids (Tifway/ TifTuf/Princess) for sports lawns; common or hulled seed for cheaper coverage. - Zoysiagrass: Pros — good heat tolerance, finer texture, slower growth (lower mowing frequency), better shade tolerance than bermuda. Cons — slow to establish from seed or plugs; some varieties expensive; can be thatch-prone. Varieties: many improved cultivars (Meyer, Zeon, Emerald); consider sod or plugs for faster, reliable establishment. - Tall fescue (cool-season, adapted in some microclimates): Pros — stays green longer in winter and tolerates some shade; coarse texture provides a thicker look in fall/spring. Cons — summer performance is marginal in hot, humid summers without irrigation; needs more summer care. Use in shaded yards or where irrigation is reliable; prefer turf-type tall fescues for improved density. - Perennial ryegrass (overseed only in San Antonio): Pros — very fast germination and provides good winter color when overseeding warm-season lawns. Cons — not summer-hardy here; is used as a temporary winter cover only. Evidence-based selection guidance: prioritize warm-season bermuda or zoysia for most San Antonio lawns per Texas A&M AgriLife. For shade or irrigated lawns, consider tall fescue patches or blends.
When is the best time to plant seed, sod, or plugs in San Antonio and what soil temperatures trigger germination?
Planting windows and soil-temperature triggers: - Bermudagrass (seed, sod, plugs): best late spring to early summer after soil consistently reaches ~65°F at 1–2" depth; typical window May through mid-June in San Antonio. - Zoysiagrass (seed best avoided; sod/plugs preferred): late spring–early summer; seeded zoysia needs sustained mid-70s°F soils and much more time to cover. - Tall fescue (seed): fall seeding is best — Sept through Nov — when 2" soil temps are ~50–65°F to allow root development before summer. - Perennial ryegrass (overseed for winter): seed in mid- to late-September through October (germinates at ~50–65°F and often 5–10 days under good moisture). Sod can be installed more broadly during the growing season but must be laid promptly and irrigated (do not let sod sit stacked >24–36 hours in hot weather). Check local soil temps using a probe at 1–2" depth for best timing.
How should I prepare my soil before seeding or laying sod in San Antonio?
Soil prep checklist: 1) Test soil: collect 8–10 cores from 0–4" depth from the management zone, mix, and submit to Texas A&M Soil, Water & Forage Testing Lab (Urban & Homeowner). The lab gives pH and fertilizer/lime recommendations. Link: https://dallas-tx.tamu.edu/files/2010/06/Soil-Sample-Form-Urban-Homeowner_SU17.pdf 2) Correct pH: target ~6.0–7.0 for most turf species. Use test results to apply lime (if low) or sulfur (if high) well before planting (4–6 weeks if possible). 3) Amend soil texture as needed: for heavy clay — work organic matter (compost) into the upper 4–6" to improve drainage and structure (1–2" compost incorporated). For very sandy soils — add compost to increase water/nutrient holding (but avoid over-amending by creating a distinct layer). 4) Grade and remove debris: achieve a smooth final grade with good surface drainage, remove rocks, roots, and big clods. 5) Create a firm seedbed: loosen upper 2–3" for seed contact (small seeds must touch mineral soil), rake smooth, remove stones, and roll lightly. For sod, ensure soil is firm and slightly moist for good contact. 6) Apply starter fertilizer per soil test: if no test, use a starter granular fertilizer with higher phosphorus (check label) at label rates for new turf. Follow Texas A&M AgriLife guidance for exact amendment and fertilizer rates.
How do I calculate correct seeding rates and what are typical germination timelines for San Antonio turf species?
Seeding rates and expected germination: - Bermudagrass (seed): recommended seeding rate ~0.5–1.0 lb per 1,000 ft² (use certified seed). Germination: 7–21 days when soil ≥65°F and moisture maintained. Small seed; press into soil surface (≤1/8" depth). - Zoysiagrass (seed): ~1 lb per 1,000 ft² but seeded zoysia is slow and often not recommended; germination slower and requires warmer soils (low–mid 70s°F). Many homeowners prefer sod or plugs. - Tall fescue (seed): 6–8 lb per 1,000 ft² for pure stands (Sept–Nov seeding). Germination: 7–14 days at cool-season soil temps (~50–65°F). - Perennial ryegrass (overseed): 6–8 lb per 1,000 ft² for temporary winter cover. Germination: 5–10 days with good moisture. Seed-label handling: check germination and purity on seed tag and compute PLS (pure live seed = purity × germination) to adjust rates upward if PLS <100%. Buy certified seed where possible and confirm test date is recent.
Step-by-step checklist to seed a lawn (small residential area) in San Antonio
Seeding checklist: 1) Timing: pick planting window per species (see earlier); check soil temp. 2) Test soil and adjust pH/amend per lab results. 3) Clear, grade, and remove debris; rototill compacted areas if needed. 4) Incorporate 1–2" compost into top 4–6" for clay/sand improvement. 5) Rake smooth and firm surface; break clods and level. 6) Apply starter fertilizer per soil test (or label rate). 7) Spread seed uniformly (use broadcast spreader), adjust for PLS as needed. 8) Lightly rake or use a drag mat to ensure seed-to-soil contact; do not bury small seeds >1/8". 9) Cover with a light mulch/erosion blanket or wheat straw if slope exposed (avoid thick straw that blocks light). 10) Water lightly and frequently to keep top 1/4"–1/2" moist until germination (see watering schedule). 11) After seedlings are 1.5–2" high, begin deeper, less frequent irrigation to encourage roots; first mow at ~2.5–3" depending on species. 12) Follow an establishment fertilizer and weed control plan per species and soil test; do not apply post-emergent herbicides until turf is well established (typically multiple mowings).
How should I install and care for sod or plugs in San Antonio?
Sod installation and plug/sprig basics: Sod: 1) Order sod timed to install immediately upon delivery; do not store stacked >24–36 hours in heat. 2) Prepare soil as for seed (test, amend, grade). 3) Lay sod tightly in a brick pattern, staggering joints; press/roll to ensure contact. 4) Immediately irrigate to soak rooting zone (~4–6" deep) and keep sod moist but not waterlogged until rooted (usually 2–3 weeks for warm-season sod depending on season). 5) Avoid heavy foot traffic until sod roots. Plugs/Sprigs (especially bermuda/zoysia): - Sprigging rate for hybrid bermuda: ~5 bushels per 1,000 ft² (denser for faster coverage); zoysia plugs spaced 6–12" depending on desired fill-in time. - Keep soil consistently moist until sprigs/ plugs establish; expect bermuda coverage in 6–8+ weeks under good conditions; zoysia may need a full season to fill. Refer to Texas A&M AgriLife for exact bushel/spacing guidance.
Next Article
How to Grow Grass in El Paso TX: Seed, Plant, and Care
Step-by-step guide to grow grass in El Paso: pick Bermuda, Zoysia or fescue, prepare soil, seed timing, watering, fixes.