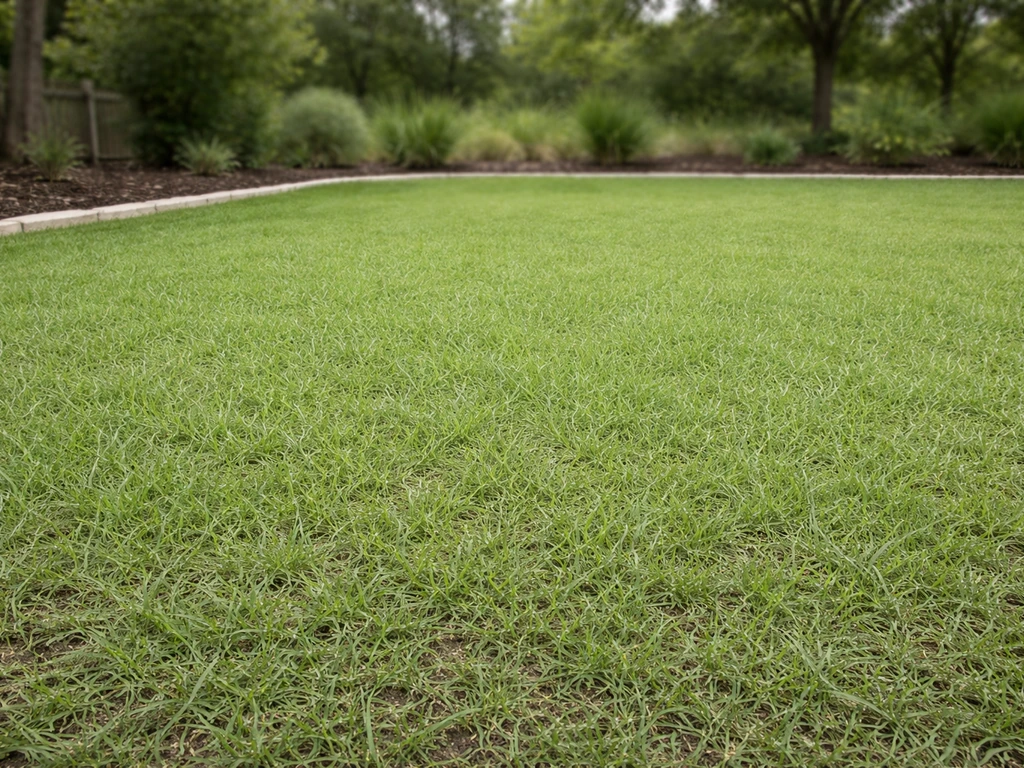
You can grow buffalo grass (Bouteloua dactyloides) from runners by cutting stolons into 3–6 inch segments with at least one node each, pressing them into a firm, moist seedbed with the crown visible, and keeping the soil surface consistently wet for the first two weeks. Plant when soil temperatures hit 70°F or above, late May through early July across most of the Great Plains, and you can expect visible rooting within 14–21 days and decent coverage by the end of your first growing season.
How to Grow Buffalo Grass from Runners: Step-by-Step Guide
Marcus Tillwell
15 Jul 2026
Why grow buffalo grass from runners in the first place
Buffalo grass spreads naturally by above-ground stolons (runners) that creep across the soil, root at nodes, and create new plants. That's the whole biology working in your favor. When you harvest those runners and replant them deliberately, you're just accelerating a process the grass already does on its own. Compared to seeding, runners skip the dormancy-breaking and slow germination phase that frustrates so many homeowners, I've seen patches from runners fill in noticeably faster in the first season than patches started from seed in the same yard. Runners are also ideal when you want to match an existing cultivar exactly, since named vegetative cultivars like '609', 'Legacy', '315', and '378' can only be propagated this way. They can't be grown true-to-type from seed.
That said, be clear about which 'buffalo grass' you're working with. In North America, buffalo grass is Bouteloua dactyloides, a drought-tolerant, fine-textured prairie native. In Australia, the grass commonly called 'buffalo' is Stenotaphrum secundatum (soft-leaf buffalo), a completely different species with different cultivar lines and care needs. Everything in this article applies to Bouteloua dactyloides and the North American context.
Runners, seed, plugs, or sod: which one is right for your situation
Runners (sprigs) sit in a middle ground between seed and sod in terms of cost, speed, and effort. Here's how to decide honestly, because the wrong choice costs you a season.
| Method | Cost | Speed of coverage | Best for | Biggest drawback |
|---|---|---|---|---|
| Runners/sprigs | Low–medium (harvest from existing lawn or buy by the bushel) | Moderate — full coverage by end of season 1 with good care | Matching existing cultivar, large areas on a budget, active DIYers | Requires irrigation discipline for first 2–3 weeks; labor-intensive |
| Seed | Lowest | Slow — 2–3 seasons for dense turf | Large open areas, budget installs, seeded cultivars (Cody, Tatanka, Bowie) | Weed pressure is severe before turf thickens; dormancy treatment needed |
| Plugs | Medium | Similar to runners, 1–2 seasons at 12–24 in spacing | Smaller areas, precise placement, low equipment need | Higher per-unit cost than sprigs for large areas |
| Sod | Highest | Immediate coverage, playable in 2–4 weeks | High-traffic areas, fast establishment needed, pets and kids | Expensive, heavy to install, requires flawless soil prep and watering |
Choose runners when you have an established buffalo grass lawn to harvest from (or a neighbor who does), you're covering a medium-to-large area, and you're willing to water frequently for the first two to three weeks. If you're starting from scratch with no source material, seed is cheaper and works fine for open sunny sites, take a look at how to grow buffalo grass from seed for that full process. Sod makes sense when the area must look good fast or will take heavy foot traffic within weeks of planting.
What you'll need: materials and equipment checklist
Most of this is standard homeowner gear. The only item you might need to borrow or rent is a lawn roller (100–300 lb), which makes a real difference in soil-to-stolon contact.
- Sharp garden shears, bypass pruners, or sod knife — for cutting clean stolon sections
- 5-gallon buckets or shallow bins with damp burlap or newspaper to hold harvested runners
- Tiller or garden fork — for breaking and loosening soil to 3–4 inch depth
- Rake (bow rake) — for leveling, grading, and removing debris
- Lawn roller (water-filled, 100–300 lb) — for tamping runners into firm soil contact
- Garden hoe or dibber — for creating shallow planting furrows or holes
- Measuring tape and string line — for spacing rows accurately
- Soil thermometer — to confirm 70°F+ soil temperature before planting
- Soil test kit or county extension lab sample bags — for pH and nutrient baseline
- Lime, sulfur, or compost — amendments based on soil test results
- Slow-release nitrogen fertilizer (ideally 30–50% slow-release nitrogen)
- Starter fertilizer (low-N, higher P and K) — for establishment phase if soil test supports it
- Irrigation system or oscillating sprinkler with timer — critical for frequent watering in weeks 1–2
- Straw erosion mat or light weed-free straw mulch (optional, light application only)
- Stakes and barrier tape or temporary fencing — to protect from foot traffic and pets during establishment
Assessing your site before you dig anything up
Buffalo grass is forgiving of a lot, but it will fail predictably in the wrong conditions. Run through these checks first and you'll save yourself from replanting the same spot twice.
Sunlight
Bouteloua dactyloides needs full sun, at least 6 hours of direct sunlight per day, and it genuinely thrives with 8 or more. If your target area is shaded for more than half the day, buffalo grass will thin out, struggle to spread, and eventually fail. For shade adjustments, there are some workarounds covered later in this article, but if you're dealing with dense tree shade, a different grass species is the honest answer.
Soil test
Get a soil test done before you buy amendments. Your county extension office can run one for $15–25 and give you exact lime or sulfur rates for your specific soil. Buffalo grass tolerates a wide pH range, roughly 6.0 to 8.0, so it's rarely the problem, but knowing your phosphorus and potassium levels prevents you from wasting money on fertilizer the soil doesn't need.
Drainage and traffic
Pour a gallon of water on the bare soil. If it pools for more than 30–60 minutes, you have a drainage problem that needs fixing before planting, buffalo grass roots rot in waterlogged conditions. Mark out any high-traffic areas (dog runs, shortcuts between gates) now, because those zones need either sod for immediate durability or a physical barrier during the 8–12 week establishment window.
Preparing the soil: the steps that actually matter
Good soil prep for runners is a little different from seed prep. You want a firm, level surface, not a fluffy deep-tilled bed. Runners need their nodes pressed into contact with the soil, they don't need loose depth to germinate.
- Remove existing vegetation: kill weeds and old turf with a non-selective herbicide or solarization (clear plastic, 4–6 weeks in summer). Wait the herbicide's re-entry interval before working the soil.
- Till to 3–4 inch depth: break up compaction and incorporate any amendments. This is shallower than you might expect — deep tilling just creates air pockets that dry out stolon nodes faster.
- Apply lime or sulfur per your soil test results and rake them in during tilling.
- Grade and level: rake the surface smooth and slope slightly away from structures for drainage. Fill any low spots now — you can't easily fix them after planting without tearing things up.
- Firm the seedbed: roll once with a light (100–150 lb) roller or simply walk across the prepared area. The surface should feel firm underfoot — not powdery or bouncy.
- Irrigate lightly before planting: moisten the top 2–3 inches the day before so the soil is damp but not muddy when you place runners.
Clay soil and sandy soil: what to do differently
Buffalo grass is native to the middle of the country where soils tend toward medium-to-fine textures, silty loams and clay loams. It actually does reasonably well in clay if drainage is managed, and it handles drought on sandy soils with more supplemental irrigation. Here's what to adjust in each case.
Clay soil adjustments
Heavy clay drains slowly and compacts quickly, which smothers the shallow stolon nodes. Before planting, core-aerate to create 1–2 inch plugs across the area, then top-dress with 1/4 to 1/2 inch of fine compost and work it into the holes. If drainage is consistently poor, consider renting a small trenching machine to install a perforated drain line at the low point of the area, this is a one-time fix that pays off for years. Don't try to fix clay by adding sand on top; without deep thorough mixing, you just create a concrete-like layer at the interface.
Sandy soil adjustments
Sandy soils dry out fast and hold few nutrients. Before planting, incorporate 2–3 inches of compost into the top 4 inches of soil, this improves both water retention and nutrient-holding capacity. Plan for more frequent watering during establishment: instead of 2–3 short cycles per day, sandy soil may need 3–4 short cycles to keep the surface from drying between them. After establishment, buffalo grass's drought tolerance partially compensates, but on pure sand you'll always irrigate more than on native prairie soil.
How to harvest and prepare buffalo grass runners
If you have an existing buffalo grass lawn or know someone who does, late spring to early summer is the best time to harvest because the grass is actively pushing new stolons. Look for healthy, green runners growing out from the edge of established turf, these have the most viable nodes and the best rooting energy.
- Identify healthy runners: choose stolons that are green, flexible, and show multiple node bumps (little joints with leaf buds) along their length. Avoid brown, dry, or diseased-looking runners.
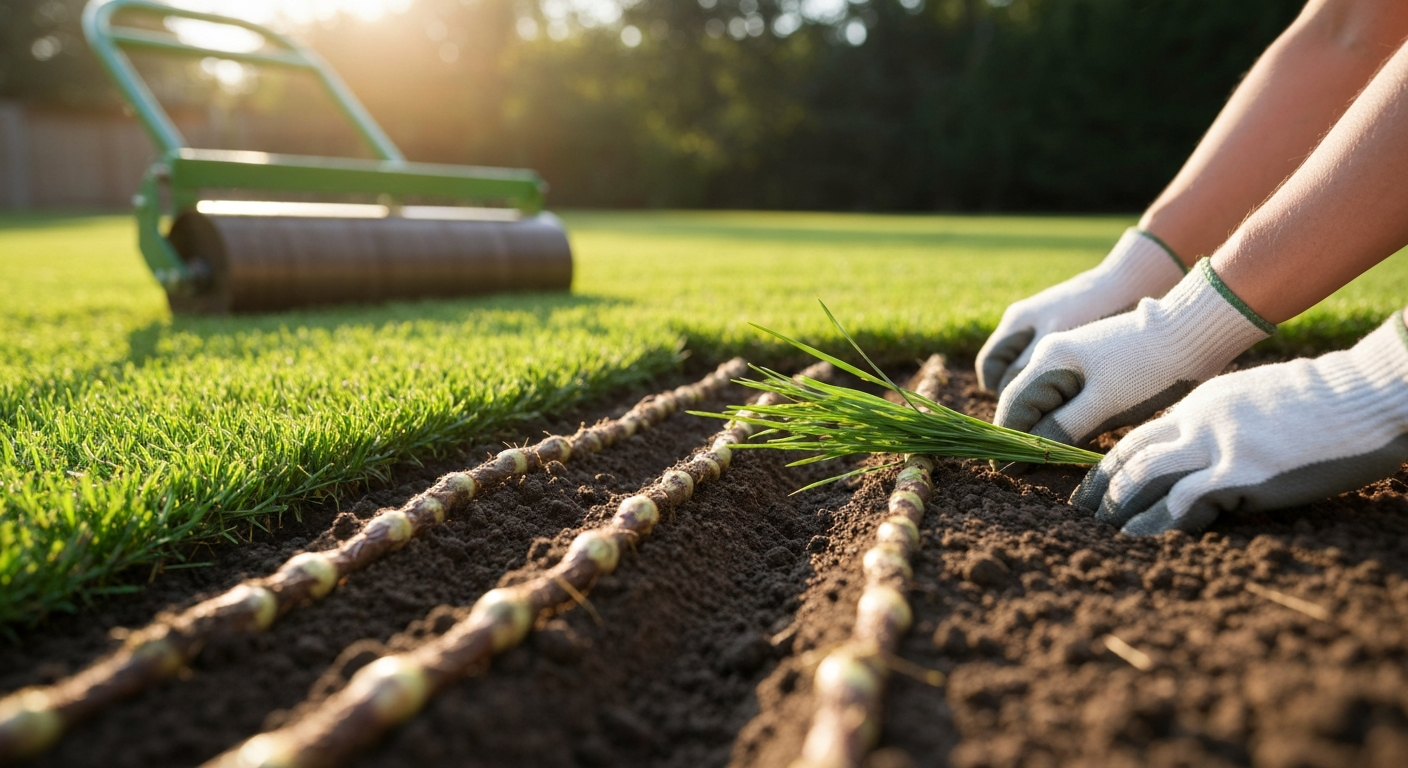
- Cut clean sections: use sharp shears or a sod knife to cut segments 3–6 inches long. Each piece must contain at least 1–2 nodes. Longer sections with 2–3 nodes root more reliably.
- Keep them moist immediately: drop cut stolons into a bucket with a damp cloth or wet burlap over them. Exposed runners dry out in under an hour on a hot day, and dried nodes won't root.
- Handle gently: don't pile runners deep or leave them in direct sun — the heat from a large pile damages the lower layers within 30–60 minutes.
- Plant the same day: ideally, harvest in the morning and plant before early afternoon. If you must hold runners overnight, keep them in a sealed bag or container with a damp cloth in a cool location (but no more than 24 hours).
- Volume estimate: for coverage at 12-inch spacing, you need roughly 2 bushels of sprigs per 1,000 sq ft; at 6-inch spacing (faster fill), budget closer to 4–5 bushels per 1,000 sq ft.
Planting runners step by step: spacing, placement, and depth
The single most common mistake I see is burying runners too deep. Buffalo grass stolons photosynthesize through their leaf blades, if you bury the crown, the plant loses its ability to produce energy while it's trying to root, and it dies. Keep the crown and foliage visible at or above the soil surface.
- Lay out your spacing grid: for standard establishment (fill by end of season 1), space rows 12 inches apart with 12 inches between plants in each row. For faster fill, drop to 6–8 inch spacing. For a budget install on a low-traffic area, 18–24 inches works but you'll wait into the second season for full coverage.
- Create shallow furrows or holes: use a hoe or dibber to make a slit or hole about 1–1.5 inches deep. The goal is to anchor the stolon, not bury it.
- Place the runner: lay each 3–6 inch section horizontally in the furrow or press it vertically (crown-end up) into a hole. The node and crown should sit at or just barely below the soil surface — no deeper than 0.5–1 inch of soil covering the node.
- Firm immediately: press each planted stolon down with your fingers, the back of a rake, or your boot sole so nodes have direct contact with moist soil. No air gaps under the runner.
- Work across the area systematically: plant one row at a time and keep your harvested runners covered in the bucket as you go.
- Roll the entire area once planting is complete: a 150–200 lb roller pressed across the whole planting zone ensures uniform soil contact and pushes any high spots back down.
| Spacing (in centers) | Approximate fill time | Sprig quantity per 1,000 sq ft | Best use case |
|---|---|---|---|
| 6 inches | End of season 1 (dense) | 4–5 bushels | High-traffic areas, fast establishment needed |
| 12 inches | End of season 1 (moderate) | 2 bushels | Standard home lawn, good soil, consistent irrigation |
| 18 inches | Season 1–2 (slow) | 1–1.5 bushels | Low-traffic areas, budget installs |
| 24 inches | Season 2 (very slow) | < 1 bushel | Very large areas with minimal budget, low-maintenance sites |
Right after planting: tamping, mulch, and protecting the area
Once the runners are in and rolled, water the entire area immediately, a slow, gentle application to wet the top 2–3 inches without washing anything away. A mist-style or fan sprinkler head is better than a pulsating sprinkler for this first pass, since the runners aren't anchored deeply enough to resist water force.
If you want to add a light mulch layer for moisture retention, use weed-free straw applied very lightly, barely visible coverage, maybe one straw deep in most spots. Heavy mulch blocks light to the stolon crowns and keeps the surface too wet, which promotes rot rather than rooting. Avoid wood chip mulch entirely on planted stolons.
Put up a physical barrier immediately after planting. Temporary plastic garden fencing or even flagging tape strung on stakes is enough to remind family members and keep pets out. A dog running across freshly planted runners can undo a full day's work in 30 seconds, the stolons get physically dislodged from their soil contact and dry out before you notice. Keep the area off-limits for at least 4–6 weeks, or until you can see the roots are anchored (tug gently on a runner, it should resist).
Watering schedule from planting day through maintenance
Getting the watering right is probably the single biggest factor in whether your runners establish or die. Buffalo grass is drought-tolerant once established, but during the rooting phase it's completely dependent on consistent surface moisture.
| Phase | Timing | Watering frequency | Depth / amount | Goal |
|---|---|---|---|---|
| Phase 1: Critical rooting | Days 0–14 | 2–3 times per day (morning, midday, late afternoon) | Light — wet top 1–2 inches only | Keep soil surface consistently moist; never let runners dry out |
| Phase 2: Active rooting | Weeks 2–6 | Once daily or every other day | Deeper — wet top 3–4 inches | Encourage roots to follow moisture downward |
| Phase 3: Canopy development | Weeks 6–12 | 2–3 times per week | 1 inch per application | Build root depth; begin drought-hardening |
| Maintenance (established) | Ongoing after week 12 | Every 2–4 weeks in summer | 1–2 inches per session | Sustain active growth; allow some dry-down between sessions |
On sandy soils, increase Phase 1 to 3–4 daily cycles. On clay, be careful not to overwater in Phase 1, let the surface just begin to dry slightly between applications to avoid waterlogging the shallow nodes. If you see any puddling, cut back immediately.
Fertilizing: timing, rates, and what to avoid
Buffalo grass is a low-input grass by nature, it evolved on native prairies with no fertilizer at all. Over-fertilizing is a real problem: too much nitrogen pushes lush, weedy growth that invites disease and reduces the grass's natural density and drought hardiness. Kansas State Extension recommends no more than 1 lb of nitrogen per 1,000 sq ft per application, with total seasonal nitrogen usually kept at 1–2 lb N per 1,000 sq ft per year.
| Timing | Product type | Rate (N per 1,000 sq ft) | Purpose |
|---|---|---|---|
| At planting (if P/K deficient per soil test) | Starter fertilizer (low N, higher P and K) | 0.5 lb N max | Support early root development; avoid excess N that burns stolons |
| 4–6 weeks after planting (once rooted) | Slow-release N (30–50% slow-release) | 1 lb N | Fuel canopy development without surge growth |
| Early June (established lawn) | Slow-release N | 1 lb N | Peak-season growth support; single application often enough |
| After August (any season) | None | 0 | Late N delays dormancy and increases winter vulnerability |
If your soil test shows adequate phosphorus and potassium, common in native prairie soils, skip the starter fertilizer entirely and rely only on the 4–6 week post-rooting application. Excess phosphorus, in particular, can encourage weedy broadleaf competition in buffalo grass lawns. Always follow your soil test over any generic product label recommendation.
Establishment timeline: what to expect and when to check progress
Here's the honest schedule. Results vary with soil temperature, irrigation consistency, runner quality, and spacing, but these milestones are realistic for a planting done in late May to early June in the central Great Plains.
| Milestone | Expected timing | What to look for | Action if not meeting milestone |
|---|---|---|---|
| First visible rooting | Days 10–21 | Light resistance when you gently tug a runner; tiny new leaf shoots emerging from nodes | Check soil moisture — likely drying out between cycles; increase frequency |
| New leaf growth from nodes | Weeks 2–4 | Small green shoots 0.5–1 inch tall at node points | If no growth by week 4, check soil temperature (must be 70°F+) and runner viability |
| Runners beginning to spread | Weeks 4–8 | Lateral stolon growth beyond original planting point | Thin, patchy spread usually means too much shade or too little nitrogen at week 4–6 |
| 50% ground cover | Weeks 6–10 (12-inch spacing) | Visible green fill between original planting points | Bare patches by week 10 likely need spot re-sprigging |
| Full coverage (dense) | End of season 1 (12-inch spacing) or season 2 (24-inch) | Continuous dense sod, minimal bare soil | Re-sprig or overseed persistent bare spots in following spring |
How to speed up establishment
If you want to push the process, these techniques genuinely help, I've used most of them on patches in my own lawn and they move the timeline up by two to four weeks in good conditions. For a short, practical guide on how to make buffalo grass grow fast, see our step-by-step sprigging and watering plan.
- Plant closer: drop spacing from 12 to 6–8 inches. This is the single most effective way to get faster coverage — it's just more labor and more runner material.
- Time your planting for peak soil warmth: wait until soil thermometer reads 75–80°F consistently (usually June in most of the Plains). Stolons root 30–50% faster at 80°F than at 65°F.
- Use a starter fertilizer if soil P is low: a light application of high-phosphorus fertilizer at planting encourages root initiation.
- Roll firmly after planting: a 200 lb roller gives much better soil contact than hand-pressing. Rent one for an afternoon — it's worth it.
- Pre-warm the soil: for a week before planting, lay clear plastic sheeting over the prepared bed. It can raise soil temperature by 5–10°F and jump-start rooting.
- Keep a thin, light-colored mulch over the area: a very sparse straw cover (not thick enough to block light) reduces surface temperature swings and retains moisture between watering cycles.
- Avoid mowing the first new growth: let new shoots reach 3–4 inches before any mowing. Early mowing stresses rooting runners.
Adjustments for shade, pets, and regional climates
Shade
Buffalo grass in partial shade (4–6 hours direct sun) will establish but will always be thinner, slower-spreading, and less dense than in full sun. If you're working with a partially shaded site, increase your planting density to 6-inch spacing to compensate for slower lateral spread. Do not fertilize heavily to 'push' shade-grown buffalo grass, it makes the plants leggy and disease-prone. Accept that edges near tree canopies will thin over time and plan to re-sprig those zones annually.
Pets
Dog urine causes nitrogen burn spots in buffalo grass just like any lawn. In high-traffic pet zones, water the area immediately after urination to dilute the nitrogen concentration, this genuinely reduces spotting. Established buffalo grass recovers from urine damage faster than fescue or bluegrass because of its stolon-based spreading habit. Physical exclusion during the 8–12 week establishment phase is non-negotiable; a single dog digging or running repeatedly across newly planted runners can set the whole area back by weeks.
Regional climates
In the central and southern Great Plains (Kansas, Oklahoma, Texas Panhandle, Nebraska, Colorado eastern plains), buffalo grass is completely at home and the timelines in this article apply directly. In the upper Midwest or northern Plains (South Dakota, Wyoming, northern Colorado), soil temperatures hit 70°F later, sometimes not until mid-June, so adjust your planting window accordingly rather than trying to force early planting. In humid regions (east of the 98th meridian, with over 30 inches annual rainfall), buffalo grass struggles with aggressive competition from broadleaf weeds and other grasses in high-moisture conditions; weed management becomes far more important, and the grass may not develop the natural density it achieves in drier climates. In those areas, planting into prepared, weed-suppressed beds and maintaining a strict weed-control program is essential for success.
Common problems and how to fix them
| Problem | Likely cause | Fix |
|---|---|---|
| Runners not rooting after 3 weeks | Soil too dry, too cold, or poor runner quality | Check soil temperature (must be 70°F+); increase watering frequency; re-sprig with fresh runners |
| Bare patches persisting past week 10 | Poor soil contact, excessive shade, or localized dryness | Re-sprig bare spots at 6-inch spacing; check for shade or drainage issues in those spots |
| Yellowing or wilting runners | Overwatering (root rot) or underwatering | Check drainage; for overwatering, reduce frequency and let surface dry slightly between cycles |
| Heavy weed pressure in new planting | Bare soil between plants is vulnerable | Hand-weed until coverage thickens; avoid pre-emergent herbicide for first 60 days; use post-emergent labeled for buffalo grass |
| Chinch bug damage (yellowing patches that expand) | Chinch bug feeding on stolon tissue | Apply labeled insecticide; consider switching to chinch-bug-resistant cultivars for replanting |
| Fungal disease (brown patches, circular patterns) | High humidity combined with overwatering or excess N | Reduce irrigation frequency; avoid evening watering; apply labeled fungicide if severe |
| Runners drying out immediately after planting | Surface drying between irrigation cycles | Increase daily watering cycles to 3–4 during Phase 1, especially on sandy soil or in wind |
| Persistent bare strip near trees | Root competition and shade from trees | Raise mowing height; re-sprig annually; consider shade-tolerant ground cover for dense-shade zones |
Maintenance after establishment: keeping it healthy long-term
Established buffalo grass is genuinely low-maintenance compared to almost any other lawn option, but 'low maintenance' doesn't mean 'no maintenance. Longer-term irrigation needs are very low, the USDA NRCS buffalograss guide recommends roughly 1–2 inches of water every 2–4 weeks in summer to maintain active growth after establishment NRCS guidance recommends about 1–2 inches of irrigation every 2–4 weeks during summer once buffalograss is established.. ' Here's what actually matters after your lawn fills in.
Mowing
Mow buffalo grass at 2–4 inches. At the low end of that range it creates a denser, more manicured appearance; at 3–4 inches it grows more slowly and requires less irrigation because the taller canopy shades the soil. Never remove more than one-third of the blade length in a single mowing. In a low-maintenance situation, buffalo grass can go several weeks between mowings and still look reasonable, one reason it's popular in water-conscious landscapes.
Aeration and overseeding
Core-aerate once per year in late spring (when the grass has broken dormancy and is actively growing) if you have clay soil or high foot traffic. Buffalo grass doesn't typically need annual overseeding, but if you see thinning areas after a tough winter or drought period, re-sprigging in late May or June is faster than seeding to restore density.
Long-term fertility
Stick to one application of slow-release nitrogen per season, around early June in most of the Plains. K‑State Extension: buffalograss nitrogen & fertilization guidance recommends about 1 lb N per 1,000 sq ft per application (typically a single application in early June), with total seasonal nitrogen generally kept to 1–2 lb N per 1,000 sq ft. Re-run your soil test every 3 years to see if phosphorus or potassium levels have changed. Over-fertilizing buffalo grass year after year gradually shifts the competitive balance toward weeds and away from the grass, which is the opposite of what you want.
Quick-reference cheat sheets
Watering and fertilizing at a glance
| Phase | Weeks | Watering | Fertilizer |
|---|---|---|---|
| Critical rooting | 0–2 | 2–3x daily, light | None (or starter if P is low) |
| Active rooting | 2–6 | Daily or every other day | 1 lb N at week 4–6 (slow-release) |
| Canopy fill | 6–12 | 2–3x per week, 1 inch | None |
| Established maintenance | 12+ | 1–2 in every 2–4 weeks | 1 lb N in early June annually |
Spacing and depth quick reference
| Planting spacing | Fill timeline | Planting depth (node) | Crown position |
|---|---|---|---|
| 6 inches | Season 1, dense | 0.5–1 inch | At or just above soil surface |
| 12 inches | Season 1, moderate | 0.5–1 inch | At or just above soil surface |
| 18–24 inches | Season 2 | 0.5–1 inch | At or just above soil surface |
Decision checklist and planting-day quick plan
Use this list before you plant. If you can check every box, you're ready. If you can't, fix the open items first, skipping them causes most of the failures I've seen.
- Soil temperature confirmed at 70°F or above (use soil thermometer at 2-inch depth)
- Soil test completed and amendments (lime/sulfur) applied and incorporated
- Bed tilled to 3–4 inch depth, leveled, and firmed
- Irrigation system or sprinklers set up and tested before planting day
- Runners harvested the same morning as planting, kept moist in covered buckets
- Spacing grid laid out with measuring tape and string
- Runners placed and pressed into furrows or holes — crown at or above soil surface
- Area rolled with 150–200 lb roller for uniform soil contact
- Initial watering completed immediately after rolling
- Physical barrier installed around entire planting zone
- Watering schedule reminder set for twice-daily cycles for the next 14 days
When to call a professional: if your drainage issues require subsurface work, if you're dealing with a disease outbreak on an existing lawn before replanting, or if you have a large area (5,000+ sq ft) and no access to commercial sprigging equipment, a licensed lawn care company with a sprigging machine can do the job in a fraction of the time. That said, for most home lawns under a few thousand square feet, this is entirely a DIY project.
Runners vs. seed, plugs, and sod: which wins for buffalo grass
Runners are the best balance of cost and speed for buffalo grass when you have access to quality stolon material and can commit to the Phase 1 irrigation schedule. They beat seed on establishment speed by 4–8 weeks in the first season and allow you to use vegetative cultivars that produce denser, more consistent turf than seeded varieties. They're less expensive than sod and give equivalent first-season results if managed well. The only scenario where seed clearly wins is a very large site (1/4 acre or more) with no access to stolon material, no irrigation infrastructure, and minimal weed pressure. If you want to explore the seed route in detail, how to grow buffalo grass from seed covers that process fully. If speed is everything, sod wins, but expect to pay 5–10 times more per square foot than a sprig install.
How buffalo grass compares to other common lawn grasses
If you're deciding between buffalo grass and other warm-season or cool-season options, this comparison covers the key real-world tradeoffs.
| Grass | Water needs | Shade tolerance | Traffic tolerance | Maintenance level | Best region |
|---|---|---|---|---|---|
| Buffalo grass (Bouteloua dactyloides) | Very low | Poor (needs 6+ hrs sun) | Moderate | Very low | Great Plains, low-rainfall areas |
| Bermuda grass | Low–medium | Poor | High | Medium–high (frequent mowing) | South, Southeast, transition zone |
| Zoysia grass | Low–medium | Moderate | High | Medium (slow establishment, dense once in) | Southeast, transition zone, mid-Atlantic |
| Tall fescue | Medium | Good | Moderate | Medium (overseeding in fall) | Transition zone, Pacific Northwest, cool climates |
| Ryegrass (perennial) | Medium–high | Moderate | Moderate | High (fast-growing, frequent mowing) | Cool climates, overseeding warm-season lawns |
| Bentgrass | High | Poor | Low (golf-only in practice) | Very high (daily mowing, fungicide) | Cool climates, golf greens only |
Buffalo grass sits at one extreme of that table: the lowest water need, lowest maintenance requirement, and best drought survival of any common lawn grass, but it pays for those advantages with poor shade tolerance and only moderate traffic durability. If your region gets over 30 inches of rain annually, bermuda or zoysia will likely outcompete it and give you a denser, more consistently green lawn. If you're in a dry, sunny climate and want to cut your irrigation bill significantly, nothing beats buffalo grass. Bentgrass is a completely different category, it's a high-maintenance, fine-textured cool-season grass used almost exclusively on golf putting greens and requires a level of daily care and chemical management that's impractical for a home lawn. For a deeper comparison of grass types by region and growing method, looking at resources on how to grow bent grass and how to grow bermuda can help clarify which direction fits your site. For a deeper look at its care requirements, see our guide on how to grow bent grass. For basic, nationwide growing tips and cultural practices, see how to grow American grass.
Final quick tips and the most common mistakes to avoid
- Do not plant before soil hits 70°F — this is the most common timing mistake and it leads to slow rooting, weed takeover, and frustration
- Do not bury the crown — keep nodes at the soil surface, not an inch below it
- Do not skip rolling after planting — poor soil contact is the second most common cause of runner failure
- Do not over-fertilize — more than 2 lb N per 1,000 sq ft per season does more harm than good in buffalo grass
- Do not apply a thick mulch layer — a light, barely-there straw cover is fine; anything heavier blocks light to the crowns
- Do not use a pre-emergent herbicide within 60 days of planting — it will suppress your stolons as effectively as the weeds
- Do irrigate immediately after planting and maintain that schedule religiously for the first 14 days — this phase makes or breaks everything
- Do tug-test runners at day 14 — if there's resistance, you're on track; if they pull out easily, check soil moisture and temperature
- Do fence the area — one dog sprint or a shortcut through the lawn can dislodge days of careful work
- Do buy a soil thermometer — it costs $10 and takes the guesswork out of the most important timing decision in the whole process
FAQ
Which species must I distinguish and why is species-level accuracy required?
Clearly state the botanical name: Bouteloua dactyloides (North American buffalograss/buffalograss) versus Stenotaphrum secundatum (soft‑leaf “buffalo” common in Australia). Management, cultivar choices, planting windows, shade tolerance and pest/disease profiles differ by species — cite university extensions and cultivar pages (USDA/NRCS, state land‑grant extension, Australian turf cultivar sources) to avoid giving regionally incorrect instructions.
What authoritative regional sources should I include and cite?
Use tier‑1 extension and government sources for regional recommendations: USDA NRCS plant guide, state land‑grant extension publications (e.g., Texas A&M AgriLife, NC State, Kansas State, SDSU iGrow), UF/IFAS soil testing guides, and FEIS species reviews. For cultivar and commercial establishment details in Australia, cite Stenotaphrum cultivar producers and Australian turf industry resources. Include cultivar breeding notes and university cultivar evaluations for establishment traits and pest resistance (tier‑2 sources where needed).
What timing and soil temperature guidance is needed for sprigging/runners?
Provide soil temperature ranges and calendar windows: plant stolons/sprigs in late spring to early summer when soil temps are ~70–95°F (21–35°C) and frost danger is past. Warn that rooting/growth is slow below ~60–65°F. Regionally adjust calendar dates (e.g., May–July in continental U.S. warm‑season regions; different timing for southern climates or Australian seasons) and cite local extension recommendations.
What soil prep steps must be specified for publication‑ready instructions?
Include: perform a formal soil test and follow lime/element recommendations; grade and remove debris/rocks; correct pH to recommended range (~6.0–8.0 for buffalograss); loosen surface 3–4 in (7–10 cm) to produce a firm, fine seedbed; add organic matter to sandy soils and improve drainage/structure in heavy clays (topsoil, organic amendments, deep ripping/aeration). Cite USDA NRCS and state extension guides.
How should homeowners harvest and handle runners/stolons to ensure viability?
Give explicit harvest specs: cut stolon segments 3–6 in (7–15 cm) long containing at least one viable node; keep material shaded, cool and moist; plant immediately or store briefly in damp sacks/containers with ventilation; avoid piling that causes heating or desiccation. Reference UF/IFAS and state extension sprigging guidance.
What planting placement, spacing and depth do I recommend?
Provide clear spacing options: for plugs/sprigs use 12 in (30 cm) centers for fastest fill, 18–24 in (45–60 cm) for lower material needs (may take until season 2 to fill). Plant stolons shallow — nodes in contact with but not buried under deep soil; leave crowns/foliage visible or cover lightly. Explain choice tradeoffs (speed vs. cost) and cite regional plug/sprig spacing guidance (SDSU/iGrow, state extensions).
Next Article
How to Grow Buffalo Grass From Seed Step by Step
Step-by-step guide to grow buffalo grass from seed, from timing and soil prep to seeding, watering, and troubleshooting