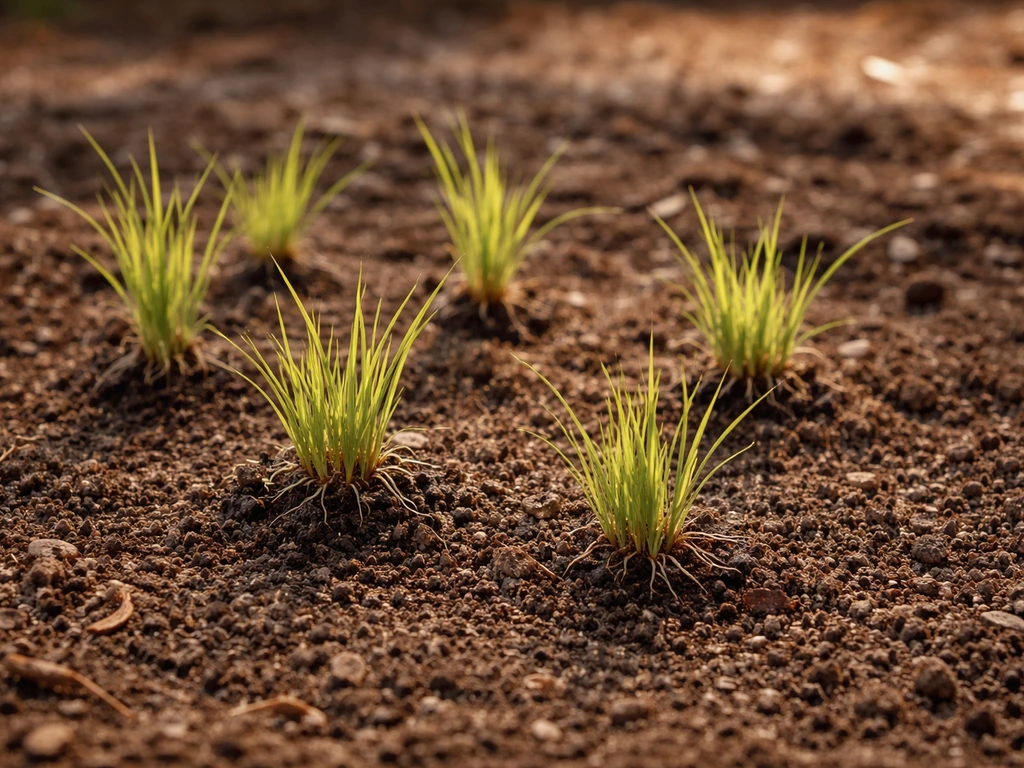
Kikuyu grass is one of the fastest-spreading warm-season lawns you can grow, and you can establish it from seed, from stolons (runners), or from sod. Seed is cheapest but slowest and fussiest about soil temperature. Stolons are a good middle ground: faster than seed, cheaper than sod, and easy to source if a neighbor already has a kikuyu lawn. Sod gives you near-instant results but costs the most. Whichever method you choose, kikuyu rewards you with a tough, drought-tolerant, self-repairing lawn that handles heavy foot traffic, dogs, and summer heat better than most grasses.
How to grow kikuyu grass: Seed, runners, care & troubleshooting
Marcus Tillwell
24 Jul 2026
What kikuyu grass is and whether it's right for your yard
Kikuyu (Pennisetum clandestinum) is a perennial warm-season grass originally from the highlands of East Africa. It spreads aggressively through both above-ground stolons and below-ground rhizomes, which is exactly why it makes such a resilient lawn, bare patches fill in on their own, and the grass bounces back after heavy wear or drought. It grows a dense, medium-textured turf that handles moderate shade, pets, and kids running on it daily.
That aggressive spread is also the reason you should think carefully before planting it. In California and parts of the American Southwest, kikuyu is listed as an invasive species because its stolons and rhizomes cross fences, invade garden beds, and outcompete native plants. Pennisetum clandestinum profile, California Invasive Plant Council (Cal‑IPC) documents kikuyu's readiness to spread via stolons, rhizomes, and seed and notes its ecological and maintenance impacts in California Pennisetum clandestinum profile — California Invasive Plant Council (Cal‑IPC). If you live in a region where kikuyu is on an invasive plant list, check local regulations before planting. In Australia, New Zealand, South Africa, and warm coastal areas of the US where it's already the dominant lawn grass, those concerns are less relevant to everyday homeowners, but you should still plan for the fact that this grass will try to go everywhere.
Kikuyu is the right choice if you want a low-maintenance, hard-wearing lawn in a warm climate, you're comfortable managing its spread, and you don't need it to look like a golf course. It's the wrong choice if you have a heavily shaded yard, you live in a cool climate with freezing winters, or your neighbors will reasonably object to kikuyu runners creeping through the fence.
Climate, hardiness, and the best time to plant
Kikuyu thrives in USDA hardiness zones 9–11 and their equivalents in other countries, think coastal California, Hawaii, the Gulf Coast, coastal Australia (especially NSW, Queensland, and WA), New Zealand's North Island, and South Africa. It prefers mean annual temperatures above 15°C (59°F) and grows most vigorously when daytime temperatures are between 25°C and 35°C (77–95°F). Below about 10°C (50°F) the grass goes dormant and can discolor or thin out. It will survive light frosts but a hard, sustained frost will kill it back.
Soil temperature is what actually drives germination and establishment. Controlled research on subtropical grasses including kikuyu shows germination rates peak at soil temperatures between 20°C and 35°C (68–95°F), with the highest germination rate index sitting closer to the 35°C end. That means your planting window is late spring through early summer in most regions, roughly October to December in the Southern Hemisphere and May to July in the Northern Hemisphere. Planting too early in cool soil is the single most common reason kikuyu seed fails to germinate.
| Region | Best planting window (seed) | Best planting window (stolons) | Notes |
|---|---|---|---|
| Eastern Australia (NSW, QLD) | Oct – Dec | Sep – Nov or Mar – Apr | Soil temp must exceed 20°C |
| Western Australia | Oct – Jan | Oct – Nov or Mar – Apr | Hot summers accelerate spread |
| New Zealand (North Island) | Nov – Jan | Oct – Nov | Shorter warm window than Aus |
| South Africa | Oct – Dec | Sep – Nov | Summer rainfall aids establishment |
| California / US Gulf Coast | May – Jul | Apr – Jun | Check invasive status locally |
| Hawaii | Year-round possible | Year-round possible | Moisture management key |
For stolon planting, the guidance from NSW Regional and Primary Industries identifies early autumn or late spring as the ideal harvest and planting times, this gives stolons mild temperatures to root without the heat stress of midsummer or the cold check of late autumn.
Seed, stolons, or sod: which method should you use
There is no single best method. The right choice depends on your budget, timeline, and how much physical work you're willing to do. Here's an honest comparison:
| Method | Cost | Time to full cover | Difficulty | Best for |
|---|---|---|---|---|
| Seed | Lowest | 3–6 months | Medium (weed competition is a real problem) | Budget-conscious, large areas, patient homeowners |
| Stolons/sprigs | Low–medium | 6–12 weeks from rooting | Medium (labour-intensive to plant) | Mid-budget, moderate areas, DIY-friendly |
| Sod | Highest | 2–4 weeks to knit | Low (physical but straightforward) | Quick results, smaller areas, budget not a concern |
Industry technical guides are consistent on this: sod is fastest, sprigs are in the middle, seed is slowest. The trade-off is purely economic. For a typical home lawn, stolons are often the best value, you can source them cheaply (sometimes free from a neighbor's trimmings), they establish in half the time of seed, and the planting process is manageable with basic tools. Seed makes the most sense if you're covering a large area and have the time and patience to manage weeds during establishment.
If you want to dig deeper into stolon-specific techniques, the topic of how to grow kikuyu grass from runners covers the planting process in more detail. For step-by-step photos, harvest tips, and troubleshooting specific to stolon planting, see the guide on how to grow kikuyu grass from runners. For step-by-step instructions on establishing china grass from runners, see how to grow china grass. For related propagation techniques on a similar turf species, see our guide on how to grow korean grass.
Reading your site before you plant
Before you buy a gram of seed or a single sprig, walk your yard and be honest about what you're working with. Kikuyu is forgiving, but it still has limits, and planting into a bad site without addressing the problems first will waste your time and money.
Sun and shade
Kikuyu wants full sun, at least 6 hours of direct sunlight per day. It will tolerate partial shade, but it thins out noticeably in areas that get fewer than 4 hours. If your yard is heavily shaded by trees or buildings, kikuyu is going to be a constant struggle. In that case, consider a shade-tolerant alternative like tall fescue for the shaded zones and reserve kikuyu for the sunny areas. Do not try to force kikuyu to work in deep shade, it won't, and the thin turf will be perpetually invaded by weeds.
Soil type
Kikuyu is not particularly fussy about soil, which is one of its genuine advantages over fussier grasses. It grows in sandy, loamy, and clay soils. However, it establishes faster and more evenly in well-drained, slightly acidic to neutral soil (pH 5.5–7.0). If your soil is compacted clay or very sandy, you'll need to do some preparation work, covered in detail in the next section.
Foot traffic and pets
Kikuyu handles foot traffic and dogs very well once established. The rhizomes run deep enough that even heavy use doesn't kill the grass, and its rapid spread means worn patches fill in without intervention. During the first 6–8 weeks after seeding or sprigging, keep traffic off the new lawn, those young plants need time to root before they can handle pressure.
Slope and drainage
Kikuyu's aggressive stoloniferous growth makes it a reasonable choice for slopes, as the runners help bind soil. On steep slopes, however, seed will wash away in rain before it germinates. Use stolons or sod on any slope steeper than about 1:4 (25%), and consider pegging the sod or covering the sprigged area with a light layer of straw mulch to prevent wash-off.
Soil preparation step-by-step
Good soil preparation is the difference between a patchy, struggling lawn and one that knits together quickly. This is true regardless of whether you're seeding, sprigging, or laying sod. Don't cut corners here.
- Clear the area: Remove all existing grass, weeds, and debris. For a new lawn, a non-selective herbicide application two weeks before you start will kill off weed competition without leaving soil residue that harms kikuyu seed. If you prefer not to use herbicide, solarize the soil by covering it with clear plastic for 4–6 weeks in summer.
- Test your soil pH: Kikuyu does best in a pH of 5.5–7.0. A cheap home test kit tells you whether you need to lime (if too acidic) or add sulfur (if too alkaline). Correct pH before anything else because amendments take weeks to work.
- Address clay soil: Clay compacts, drains poorly, and can bake into a hard crust that kikuyu stolons can't penetrate. Break clay up to at least 15 cm (6 inches) depth with a rotary hoe or garden fork. Work in a 5–8 cm (2–3 inch) layer of coarse sand and compost to improve structure and drainage. Do not add sand alone to clay without organic matter — that can make it worse, not better.
- Address sandy soil: Sandy soil drains too fast, drying out before seedlings can establish. Work in generous amounts of compost (at least a 5 cm layer incorporated to 15 cm depth) to increase water and nutrient retention. Sandy soils will need more frequent irrigation during establishment.
- Level and grade: Rake the area flat and grade it so water drains away from your house. Low spots will pool water and create muddy, moss-prone patches. A slight gradient (1–2%) away from structures is ideal.
- Firm the seedbed: For seeding especially, a loose fluffy seedbed is your enemy — it causes seeds to dry out and fall into air pockets. Tamp or roll the prepared soil before sowing. NSW extension guidance specifically stresses heavy rolling for seed-to-soil contact with kikuyu.
- Apply a starter fertiliser: A balanced starter fertiliser with phosphorus (look for an NPK like 5-10-5 or similar) worked into the top 5 cm encourages root development. Hold off on nitrogen-heavy fertilisers until after seedlings emerge — applying urea before emergence can burn young seedlings.
If you're planting into an existing lawn area with bare spots, the soil prep is simpler: loosen the bare area with a garden fork to at least 5 cm depth, remove any dead material, lightly rake, and proceed. Full-scale soil renovation is only needed for new lawn areas or severely degraded soil.
How to plant kikuyu from seed: step-by-step
Kikuyu seed is very small and it has a hard seed coat, which causes staggered germination. Some seeds will sprout in 7 days; others in the same batch may take 21 days. Don't panic if your lawn comes up patchy at first, this is normal. The key is maintaining consistent moisture throughout that entire 3-week window.
What you need
- Kikuyu grass seed (check the purity and germination rate on the label — aim for >80% germination)
- Broadcast spreader or hand seeder
- Lawn roller or tamper
- Garden rake
- Sprinkler or irrigation system
- Prilled lime or fertiliser (optional, for mixing)
Sowing rates
Sowing rates vary depending on whether you're establishing a paddock, a pasture, or a home lawn. For home lawns, New Zealand supplier guidance recommends 5–8 g per square metre for broadcast sowing intended for quick cover. NSW pasture guidance recommends around 4 kg per hectare (equivalent to about 0.4 g/m²) for agricultural sowing, but home lawn seeding is typically done at much higher density to achieve fast, even cover. Use 5 g/m² as your baseline for a new lawn, or up to 8 g/m² if you want denser establishment or are working in a site with weed pressure.
The planting process
- Confirm soil temperature is consistently above 20°C (68°F) at 5 cm depth before you sow. A cheap soil thermometer takes the guesswork out of this. Sowing into cold soil is the number one reason kikuyu seed fails to germinate.
- Water the prepared seedbed the day before sowing so the soil is moist but not wet. You want moisture in the profile, not on the surface.
- Divide your seed into two equal batches. Broadcast the first batch in one direction across the area, then the second batch at 90 degrees to the first. This cross-hatching pattern gives much more even coverage than a single pass.
- Rake lightly to barely cover the seed — a maximum depth of 1.5 cm (just over half an inch). Kikuyu seed is so small that burying it deeper than this prevents emergence. Many experienced growers barely rake at all, leaving seed at or very near the surface.
- Roll the area firmly. This is critical. Good contact between seed and soil is what triggers consistent germination. A water-filled lawn roller works well; if you don't have one, tamp the surface firmly with the back of a rake.
- Water immediately after rolling with a fine mist — not a heavy spray that washes seed into rows. The goal is to wet the surface without disturbing the seed placement.
- If mixing seed with fertiliser for broadcast application, mix with prilled lime at a ratio of about 1 kg seed to 3–4 kg lime and sow within an hour. Do not leave the seed-fertiliser mix sitting in a bucket — it will damage the seed.
- Set up your irrigation schedule: water lightly two to three times per day for the first three weeks to keep the surface moist. The top centimetre of soil must never dry out completely during the germination window or emerging seedlings will die.
Fertilising after germination
Wait until seedlings are visible (typically 10–14 days after sowing) before applying nitrogen. NSW extension guidance recommends at least 50 kg urea per hectare as a starter nitrogen application, for a home lawn that translates to roughly 5 g urea per square metre. Apply it at this point and water it in well. Over-applying nitrogen before seedlings are established can burn them; applying it after emergence pushes rapid growth.
How to establish kikuyu from runners (stolons): step-by-step
Planting kikuyu from stolons (often called sprigs or runners) is faster than seed and more reliable in sites with weed pressure, because you're starting with larger plant material that competes better. The key is to harvest stolons correctly and plant them so they can root quickly.
Harvesting stolons
If you're sourcing stolons from an existing kikuyu lawn (your own or a neighbor's), mow the donor area short first so you can see the runners clearly. Pull up or cut stolons that have at least three nodes, those small, slightly swollen joints along the stem where roots emerge. Stolons with three or more nodes have enough reserves to root successfully even if some nodes fail. Keep harvested stolons moist and plant them within a few hours; dried-out stolons have a much lower success rate.
Planting layout and spacing
NSW research guidance specifies the planting technique clearly: bury two nodes below the soil surface and leave one node above ground. The buried nodes will produce roots; the exposed node will produce shoots. Stolons laid flat on the surface and just pressed in often fail because they dry out before rooting, get those two nodes buried.
For spacing, plant stolons in rows about 30–40 cm apart, with individual stolons placed every 20–30 cm along each row. Tighter spacing means faster coverage but requires more planting material. Research on kikuyu spatial growth shows measurable radial stolon extension under good conditions, so a 30 cm spacing will typically produce full coverage within 6–10 weeks during the warm growing season. If you have limited material, space them at 50 cm and expect 10–14 weeks to full cover.
- Prepare the seedbed as described in the soil preparation section — firm, level, moist, and weed-free.
- Make shallow furrows or individual holes at your chosen spacing. A simple dibber or the corner of a trowel works well.
- Place each stolon so two nodes are below soil level and one is above. Firm the soil around each sprig with your fingers — good soil contact is just as important here as with seed.
- Water the area thoroughly immediately after planting. Then water lightly every day for the first two weeks until you see new shoot growth, which tells you the stolons have rooted. Once rooted, reduce watering frequency but increase depth.
- Apply a light nitrogen fertiliser (same rate as for seed establishment — around 5 g urea per m²) once you see new shoot growth, typically 2–3 weeks after planting.
- Keep foot traffic off the area for at least 4 weeks. Newly planted stolons that haven't fully rooted are easily disturbed.
For a more detailed breakdown of runner-based propagation, including techniques for collecting and preparing stolons from different sources, the guide on how to grow kikuyu grass from runners goes into greater depth.
What to expect week by week: germination and establishment timelines
One of the most common questions I hear is 'how do I know if it's working?' Here is an honest, realistic timeline for both methods, not the optimistic version, but what you should actually expect.
Seed establishment timeline
| Week | What you should see | Action / check |
|---|---|---|
| Week 1 | Nothing visible above ground — normal | Maintain twice-daily light watering; do not let surface dry out |
| Week 2 | First seedlings emerging (fast seeds); surface may look patchy | Do not stop watering — slow seeds still germinating; check for bare patches caused by dry spots |
| Week 3 | Most seed should have germinated; thin green fuzz across most of area | Reduce watering to once daily but increase duration; apply starter nitrogen if not done |
| Week 4–5 | Seedlings 2–3 cm tall; filling in | First mow when grass reaches 5–6 cm — set mower high (4 cm); do not scalp |
| Week 6–8 | Noticeable lateral spread beginning as stolons develop | Fertilise with balanced NPK; increase mowing frequency to weekly |
| Week 10–12 | Good coverage; occasional thin patches | Spot-overseed bare areas; assess weed competition |
| Month 3–6 | Full, established lawn | Transition to regular maintenance mowing and fertilising schedule |
Stolon establishment timeline
| Week | What you should see | Action / check |
|---|---|---|
| Week 1 | Stolons appear unchanged; some may look wilted — normal | Water daily; do not allow stolons to dry out; no foot traffic |
| Week 2 | First new shoot growth from nodes — this is your sign rooting is occurring | Continue daily watering; apply starter nitrogen if new growth is visible |
| Week 3–4 | New shoots extending; stolons are clearly rooted and growing | Reduce watering frequency; first light mow once shoots reach 5 cm |
| Week 5–6 | Visible spread from each planting point; lateral runners extending | Fertilise; begin regular mowing; light foot traffic now acceptable |
| Week 8–10 | Coverage merging between planting points; lawn looking cohesive | Assess gaps and spot-plant additional stolons if needed |
| Week 10–14 | Full coverage in most conditions | Transition to standard maintenance schedule |
Under ideal conditions, warm soil, consistent moisture, good sunlight, kikuyu can grow shoot extensions of around 25 mm (1 inch) per day, and established patches can expand several square feet per month. That rapid spread is what makes kikuyu such an effective self-repairing lawn grass, but it also means you need to plan edge management from the beginning or it will move into garden beds and beyond.
Watering, fertilising, and mowing after establishment
Watering
Once kikuyu is fully established (roughly 3 months from seed, 6–8 weeks from stolons), it is genuinely drought-tolerant. It will go dormant rather than die during extended dry periods. For an actively growing lawn, deep, infrequent watering is far better than light daily watering, aim for 20–25 mm per week in the growing season, applied in one or two sessions. This encourages deep root development. The exception is during heatwaves above 38°C (100°F), where supplemental watering every 2–3 days prevents excessive dormancy and browning.
Fertilising
Kikuyu responds very well to nitrogen. In high-production agricultural systems, seasonal nitrogen applications can reach 100–200 kg N/ha over the active growth phase. For a home lawn, you don't need those rates, but regular nitrogen feeding (3–4 times per year during the growing season) makes a significant difference to colour, density, and spread rate. A practical schedule: apply a balanced lawn fertiliser in early spring when growth resumes, again in early summer, and once more in late summer. Use a slow-release formulation for the summer application to avoid burn during heat. Stop fertilising 6–8 weeks before your region's first expected frost to avoid pushing tender growth that will be damaged.
Mowing
Kikuyu grows vigorously and needs frequent mowing during the peak growing season, typically once a week in summer. Keep it at a height of 25–40 mm (1–1.5 inches) for a neat lawn appearance. Never remove more than one-third of the leaf blade in a single mow (the 'one-third rule') or you'll stress the plant and invite weeds. One practical note: mowing kikuyu stimulates flowering, which in turn produces seed. This is part of why kikuyu spreads so readily, mowing actually encourages both vegetative and seed-based spread.
Making kikuyu grow faster: the most effective strategies
If you're impatient to get full cover (and most people are), there are a few things that genuinely make a measurable difference. For step-by-step tips on how to make kikuyu grass grow faster, see this practical guide (64b7bde2-aeee-4bae-8b0b-3610f042163a). More detail on optimizing growth rate is covered separately in the guide on how to make kikuyu grass grow faster, but here are the high-impact actions: For related propagation tips, see how to grow kusha grass.
- Get the soil temperature right first: no fertiliser or watering regime compensates for cold soil. Sow when soil hits 20°C and growth visibly accelerates.
- Apply nitrogen after emergence/rooting: a timely nitrogen hit once plants are established pushes rapid lateral spread.
- Water deeply and consistently during establishment: moisture stress during the first 4–6 weeks is the biggest cause of patchy, slow cover.
- Eliminate weed competition early: weeds steal moisture and light from young kikuyu plants. A pre-emergent herbicide applied before sowing (and cleared before emergence) dramatically improves establishment speed.
- Mow regularly once established: counter-intuitively, regular mowing pushes kikuyu to spread laterally rather than grow tall, filling in bare patches faster.
Troubleshooting common problems
Seed isn't germinating after 3 weeks
The most likely causes, in order of probability: soil temperature was below 20°C when you sowed; the surface dried out during the germination window; seed was buried too deep (over 1.5 cm); or you used old seed with low viability. Check soil temperature with a thermometer. If it's still below 20°C, be patient or wait for warmer weather. If you've had temperature and moisture right and nothing has emerged at 21 days, the seed may be poor quality, do a germination test on kitchen paper before resowing.
Bare spots persisting after establishment
Persistent bare spots are almost always caused by compacted or waterlogged soil, shade, or heavy foot traffic. Loosen the soil in the bare area, address drainage if needed, and either spot-seed or plant stolons into the gap. If the bare spot is under a tree with dense shade, kikuyu won't fix it, consider a shade-tolerant fescue for those areas.
Runners invading garden beds
This is kikuyu being exactly what it is. Install a physical root barrier (available at hardware stores) sunk at least 15 cm into the soil around garden beds. Edge the lawn perimeter every 3–4 weeks during the growing season. Kikuyu stolons and rhizomes will find any gap in a physical barrier, so this is an ongoing management task, not a one-time fix.
Yellowing or pale colour
Pale, yellowish kikuyu is nearly always nitrogen deficiency. Apply a nitrogen-rich lawn fertiliser and you'll see colour return within 7–10 days during the growing season. If the lawn stays pale despite fertilising, check soil pH, if it's outside the 5.5–7.0 range, nutrients become locked in the soil and unavailable to the plant regardless of how much you apply.
Thatch buildup
Kikuyu's vigorous growth can produce thatch (a layer of dead organic material at the base of the lawn) faster than many other grasses. If thatch exceeds about 1 cm, it blocks water and nutrient penetration. Dethatch annually using a scarifier, vertical mower, or even a heavy-tined rake for small areas. Time dethatching for late spring so the grass recovers quickly during warm weather.
Pests and diseases
Kikuyu is relatively resistant to most common turf pests. The main issues to watch for are armyworm (which can strip a lawn overnight, look for bird activity as an early warning), African black beetle larvae damaging roots in Australia, and kikuyu yellows (a soilborne fungal disease that causes irregular yellow patches and is notoriously difficult to treat). Kikuyu yellows has no reliable chemical cure, if you see it, improve drainage, reduce irrigation, and consider replacing severely affected areas with disease-resistant turf cultivars. For insect pests, follow label instructions on registered insecticides for your region.
Overseeding with cool-season grasses for winter colour
Kikuyu goes brown or dormant in cool winters. If year-round green is important to you, overseeding with a cool-season grass in autumn is a well-established practice. NSW extension guidance recommends overseeding with a short-season tetraploid ryegrass at the end of April (in Southern Hemisphere terms), using a reduced rate of around 20 kg/ha to limit competition with the underlying kikuyu. The reduced seeding rate is deliberate, you want winter green without the ryegrass becoming so dominant that it suppresses kikuyu's spring recovery.
The critical management step is grazing or mowing the ryegrass hard in spring so the warming kikuyu can come through. If you let the ryegrass grow too tall and dense in spring, it shades out the kikuyu and you end up with a patchy transition. In practice, increase mowing frequency and lower the cutting height in September/October (Southern Hemisphere) or March/April (Northern Hemisphere) to give kikuyu the light it needs to re-establish. Annual ryegrass is the most common choice for overseeding; perennial ryegrass can become a persistent competitive weed in kikuyu if not managed. Fine-leaf fescues are an alternative in regions where ryegrass doesn't suit, they're slower to establish but less aggressive.
Kikuyu vs similar grasses: which one should you choose
If you're not certain kikuyu is the right grass for your situation, a quick comparison with the most common warm-season alternatives helps clarify the decision: For a fundamentally different option used for erosion control, fragrant foliage, and hedging, see the guide on how to grow khus grass.
| Grass | Spread rate | Shade tolerance | Traffic tolerance | Drought tolerance | Best for |
|---|---|---|---|---|---|
| Kikuyu | Very fast (stolons + rhizomes) | Low–moderate | Excellent | Very good | High-traffic lawns, large areas, warm climates |
| Bermuda | Fast (stolons) | Low | Excellent | Excellent | Hot, dry climates; sports turf; fine lawns |
| Zoysia | Slow | Moderate–good | Good | Good | Low-maintenance lawns; fine appearance; some shade |
| Couch (common bermuda) | Fast | Low | Excellent | Very good | Warm climates; similar niche to kikuyu |
| Tall fescue | Non-spreading (bunch grass) | Good | Moderate | Moderate | Shaded areas; cool climates; lower-traffic lawns |
Bermuda is kikuyu's closest competitor in warm, high-traffic situations. The key differences: bermuda handles shade even less well than kikuyu but tolerates extreme heat and drought slightly better, and bermuda gives you a finer, denser turf that many people find more attractive for ornamental lawns. Zoysia is the better choice if you want lower maintenance and can accept slower establishment, it spreads slowly but forms a very dense turf that suppresses weeds effectively once established. If your primary challenge is shade, neither kikuyu nor bermuda will serve you well, and tall fescue or a shade-adapted blend is the practical answer.
A note on kikuyu as an invasive species
If you are in California, parts of the US Pacific Coast, or other regions where kikuyu appears on invasive species lists, take those listings seriously. UC IPM documents kikuyu's capacity to spread via stolons, rhizomes, and seed into natural areas, outcompeting native vegetation. In those contexts, planting new kikuyu lawns is not advisable regardless of how good a lawn grass it makes. If you already have kikuyu and are trying to manage its spread, the key points are: clean equipment thoroughly after working in kikuyu-infested areas (stolons fragment and move easily on mowers and tines), never move kikuyu sod or soil to unaffected areas, and install physical barriers to contain spread. This article is written for homeowners in regions where kikuyu is an accepted and established lawn grass, if you're in a region where it's listed as invasive, check with your local extension service before proceeding.
FAQ
What primary authoritative sources should be used to make the article accurate and trustworthy?
Use peer‑reviewed research on Pennisetum/clandestinum (growth, germination, stolon/rhizome extension), national/state agricultural extension services (e.g., NSW Regional & Primary Industries, UC ANR), invasive‑species databases (Cal‑IPC), and reputable turf industry technical guides (Barenbrug, seed suppliers). Cite local government/extension pages for regional sowing windows, and commercial supplier tech sheets for practical seed/sprig rates and product specifics.
Which regionally specific data points must the article include?
Soil temperature and calendar sowing windows by climate zone (subtropical, warm‑temperate, Mediterranean, Mediterranean‑hot), frost risk timing, expected germination time at local soil temperatures, recommended seed/sprig/sod rates and planting density per region, recommended N fertilizer rates and timing adjusted for local production/intensity, and local invasive/weed status or legal restrictions (e.g., Calif. invasive listings).
What exact propagation protocols must be provided for seed establishment?
Step‑by‑step seed protocol: prepare a fine tilth; adjust pH and amend clay/sandy soils; apply starter base fertilizer; sow shallow (no deeper than 1–1.5 cm); broadcast or direct‑drill; harrow/roll for firm seed‑soil contact; keep seedbed consistently moist; germination expected 7–21 days under 20–35°C soil; delay first high N application until seedlings established (starter N at ≈50 kg urea/ha equivalent for larger areas). Include seed rate tables (commercial home rates 5–8 g/m²; pasture rates cited ~4 kg/ha) and seed handling notes (mixing with fertiliser only if sown immediately).
What exact propagation protocols must be provided for runners (stolons/rhizomes/sprigs)?
Step‑by‑step runner protocol: harvest sprigs with 2–4 nodes; plant in prepared seedbed or shallow furrows with 2 nodes buried and one node near/above ground; press/tamp into contact; spacing guidance for plugs/sprigs (recommend plug spacing, e.g., 15–30 cm for faster closure); keep frequently moist with light irrigation until roots form; optimal planting in late spring or early autumn for many zones. Note faster establishment than seed but higher material/labor cost; include transplant density options and expected time to cover depending on temperature.
What soil preparation and amendment guidance should be included (including clay and sandy soils)?
Checklist: test soil pH and nutrients; for clay: incorporate organic matter (compost), gypsum if needed for structure, ensure drainage; for sand: add organic matter and slow‑release organic amendments to increase water/nutrient holding; aim pH ~5.5–7.5 depending on local recommendations; apply starter P and K per soil test; create a fine, level seedbed and firm with roller for small seed contact. Provide specific amendment rates where possible and advise soil testing for tailored fertiliser rates.
What watering schedule and establishment timelines should the article provide?
Provide schedule: immediately after sowing/sprigging keep surface constantly moist with light irrigation (several times daily for seed) until germination/rooting (7–21 days seed; several weeks sprigs). After initial establishment, reduce frequency and increase depth to encourage deeper roots. Give timeline examples: seed—emergence 1–3 weeks, visible turf cover 6–12 weeks in warm conditions; sprigs/plugs—rooting 2–6 weeks, spread to cover months depending on spacing and temperature. Include adjustments by zone and season.
Next Article
How to Grow Kusha Grass at Home: Step by Step Guide
Step-by-step instructions to grow kusha grass from seed at home, including site prep, planting, watering, and care timel