Yes, you can absolutely grow cat grass without dirt, and honestly it works really well. Soil-free methods give you cleaner trays, fewer bugs, and faster sprouting in many cases. Whether you use a damp paper towel, a hemp felt mat, or a vermiculite-based planter kit, your cat will have fresh grass to chew in about 7 to 10 days from seeding. Here's everything you need to make it work the first time.
How to Grow Cat Grass Without Dirt: Step-by-Step Indoor Guide

Marcus Tillwell
20 Apr 2026
Is it actually possible to grow cat grass without soil?
Absolutely. Cat grass is one of the easiest crops to grow without any potting mix at all. The seeds (usually wheat, barley, oat, or rye) carry enough stored energy to sprout and push up a few inches of lush green growth without needing nutrients from soil. All they really need to germinate is moisture, warmth, and a little light once the shoots emerge. Commercial cat grass kits like the Catit Senses Grass Planter already skip traditional soil entirely, using vermiculite as an inert growing medium instead. Sprout-focused growers use hemp felt mats soaked in water. You can even start seeds on nothing more than a wet paper towel folded in half.
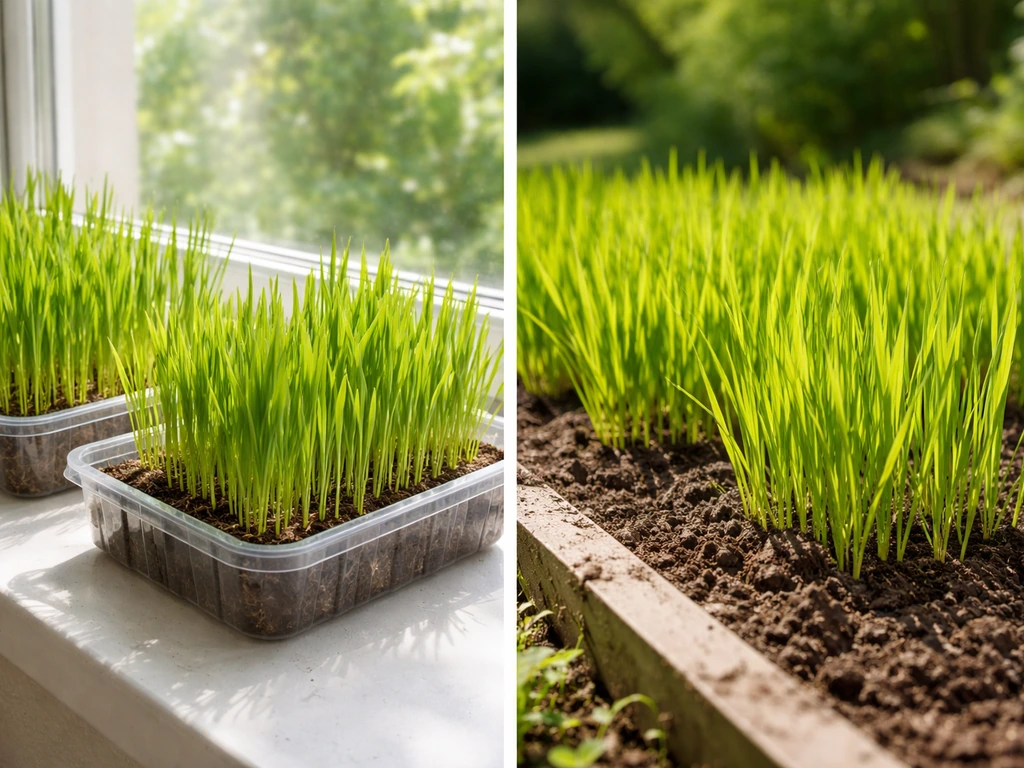
The only caveat: soil-free cat grass has a shorter productive window than a pot of actual potting mix. Without nutrients in the medium, the grass feeds off the seed's reserves, which means you'll get one good flush of growth (typically 3 to 5 inches tall) before it starts to thin and yellow. That's fine for most cats and most setups. Planting a new tray every week or two keeps a continuous supply going, which is exactly how you should approach it anyway.
What you need for an indoor soil-free setup

Container choices
Keep it shallow. Cat grass roots don't need depth because the plant is harvested young. A tray about 2 to 3 inches deep is ideal. Good options include: a plastic seed-starting tray, a shallow takeout container with drainage holes poked in the bottom, a small glass dish (for paper towel or hydroponic mat methods), or a purpose-built cat grass planter. Whatever you use, make sure water can drain or be poured off easily. Standing water at the base is the number one cause of mold in soil-free setups.
Light and temperature
Cat grass doesn't need intense light, but it does need some. A bright windowsill with indirect light (a few hours of gentle sun per day) is perfect. Direct midday sun can actually dry out your growing medium too fast in a soil-free setup, so a north- or east-facing window often works better than a south-facing one. If you don't have a good window, a basic LED grow light placed 6 to 12 inches above the tray for 12 to 14 hours a day does the job without any special equipment needed. Temperature-wise, aim for 65 to 75°F (18 to 24°C). Sprouting slows noticeably below 60°F, so keep the tray away from cold drafts or air conditioning vents.
Watering in a soil-free setup
This is where most people go wrong. Soil-free media (mats, paper towels, vermiculite) have no buffer for excess water the way soil does. They go from 'perfect' to 'soggy' very quickly, and soggy conditions are exactly what mold and fungus gnats love. For a related option, see what to grow cat grass in (water-based setups) so you know how to keep roots moist without mold. The goal is to keep the growing medium consistently damp but never sitting in water. During the sprouting phase, rinse seeds or re-wet the mat with cool water every 8 to 12 hours. If you want to <a data-article-id="AD7430F2-2A4F-496B-AD2E-0B608DE96256"><a data-article-id="2590FA7F-2462-4F2B-B123-6BA191884B44"><a data-article-id="2B786A39-3AE5-4D88-A4FF-A02BDE34EE71">grow cat grass in water</a></a></a>, focus on keeping the roots or mat moist and draining any excess to prevent mold. Once shoots are up and growing, water lightly once a day (or less if the medium still feels moist) and always pour off any pooled water from a drainage tray beneath.
Soil-free growing methods to choose from
There are three practical methods that work well for growing cat grass without dirt. mode how to grow trixie cat grassindoor without dirt is similar and uses the same soil-free methods described here so you can pick a tray setup that fits your schedule. The destination topic can be used as a related option for the seed and timing details too, but the core process stays the same as this soil-free guide allows.. Each has a slightly different feel and works better in certain situations. Here's a quick comparison so you can pick the one that fits your setup. If you also want to see an option for indoor setups beyond paper towels and mats, there are specific tips for how to grow grass indoors for cats.
| Method | Best for | Materials needed | Typical time to harvest | Main risk |
|---|---|---|---|---|
| Paper towel sprout method | Fast start, minimal materials | Paper towels, plastic bag or container, shallow dish | 7 to 9 days | Dries out quickly if not watched |
| Hemp felt / hydroponic mat | Clean, repeatable, low mess | Hemp or jute growing mat, shallow tray | 7 to 10 days | Mat can stay too wet if drainage is poor |
| Vermiculite or inert media (kit-style) | Closest feel to potting soil, good aeration | Vermiculite, shallow container with drainage | 8 to 10 days | Needs proper rinsing to avoid salt buildup |
For most people starting out today, the paper towel method is the fastest way to get going with zero special supplies. If you want something a bit more polished and repeatable, a hemp mat or jute growing pad is worth the small investment. Vermiculite-based kits like the Catit planter are a good middle ground if you want something that looks tidy on a counter and behaves more like a traditional planter.
A note on seed choices
For cat grass, you want one of these seed types: wheat (the most common, produces thick, lush blades), barley (slightly finer texture, very palatable to cats), oat (soft, fast-sprouting), or rye (the same ryegrass we use in lawns, grows quickly and tolerates indoor conditions well). Avoid mixed lawn grass seed blends sold for outdoor use, especially those containing fescue with fungicide coatings. Buy plain, untreated cat grass seed or seeds labeled specifically for sprouting/cat grass use.
Step-by-step: how to grow cat grass indoors without dirt
This method uses the paper towel and shallow dish approach, which needs no special materials. The steps for a hemp mat or vermiculite setup follow the same basic pattern, just substituting the medium.
What you'll need
- 2 to 3 tablespoons of cat grass seed (wheat, barley, oat, or rye)
- 4 to 6 sheets of paper towels (or one hemp/jute growing mat cut to fit)
- A shallow tray or dish (at least 6 inches wide, 2 to 3 inches deep)
- Plastic wrap or a loose-fitting lid (for the first 2 to 3 days)
- A spray bottle or small cup for watering
- A bright windowsill or LED grow light
The steps

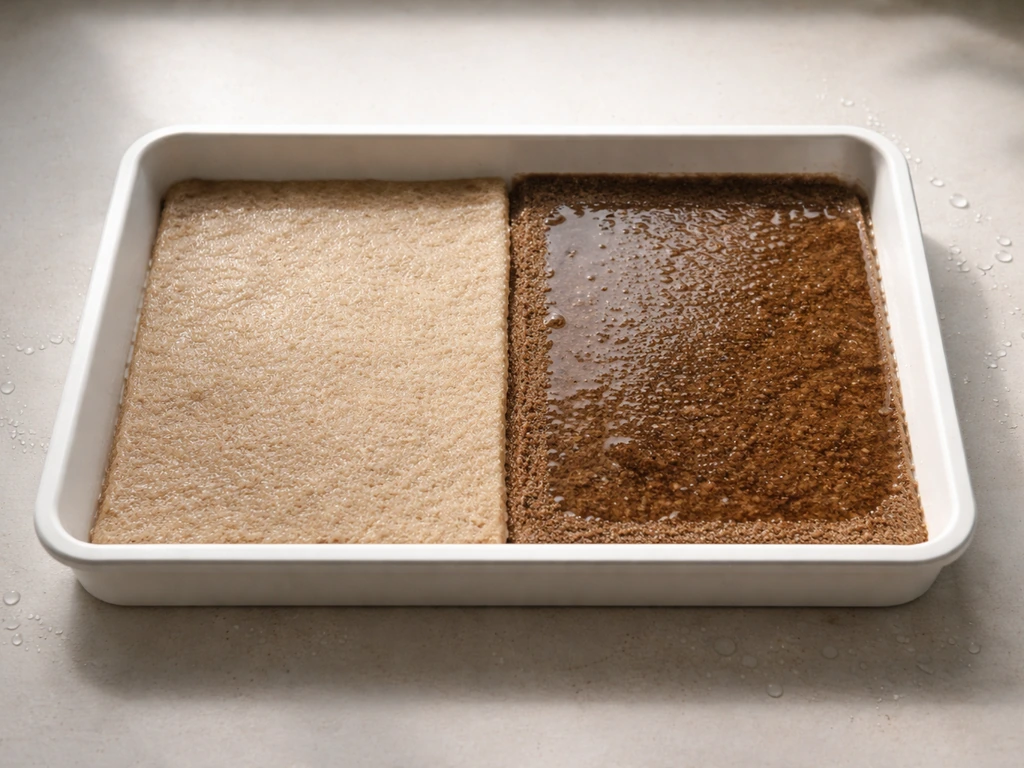
- Soak the seeds: Place your seeds in a cup of cool water and let them soak for 6 to 8 hours (or overnight). This softens the seed coat and cuts a day or two off germination time. Drain and rinse before using.
- Prepare your tray: Fold 4 to 6 paper towels to fit the base of your tray and soak them thoroughly with water. They should be very wet but not pooling. If using a hemp mat, soak it in water for 5 minutes, then squeeze out the excess so it's damp but not dripping.
- Spread the seeds: Distribute seeds in a single, even layer across the wet medium. Aim for seeds touching but not piled on top of each other. About 2 tablespoons of seed covers a 6x6 inch tray well.
- Cover and keep dark: Loosely cover the tray with plastic wrap or a second plate/tray to hold humidity in. Set it somewhere warm (65 to 75°F) but out of direct light. This mimics the dark, moist environment seeds sprout best in.
- Rinse every 8 to 12 hours for the first 2 to 3 days: Gently mist or rinse the seeds and medium with cool water, then tilt the tray to drain any pooled water. You're looking for a tiny white root tip emerging from each seed, which usually appears within 24 to 48 hours.
- Move to light once sprouts are 0.5 inch tall: When you see shoots pushing up (typically day 2 to 3), remove the cover and move the tray to your windowsill or under a grow light. Continue watering once a day by misting or adding a small amount of water, always draining excess.
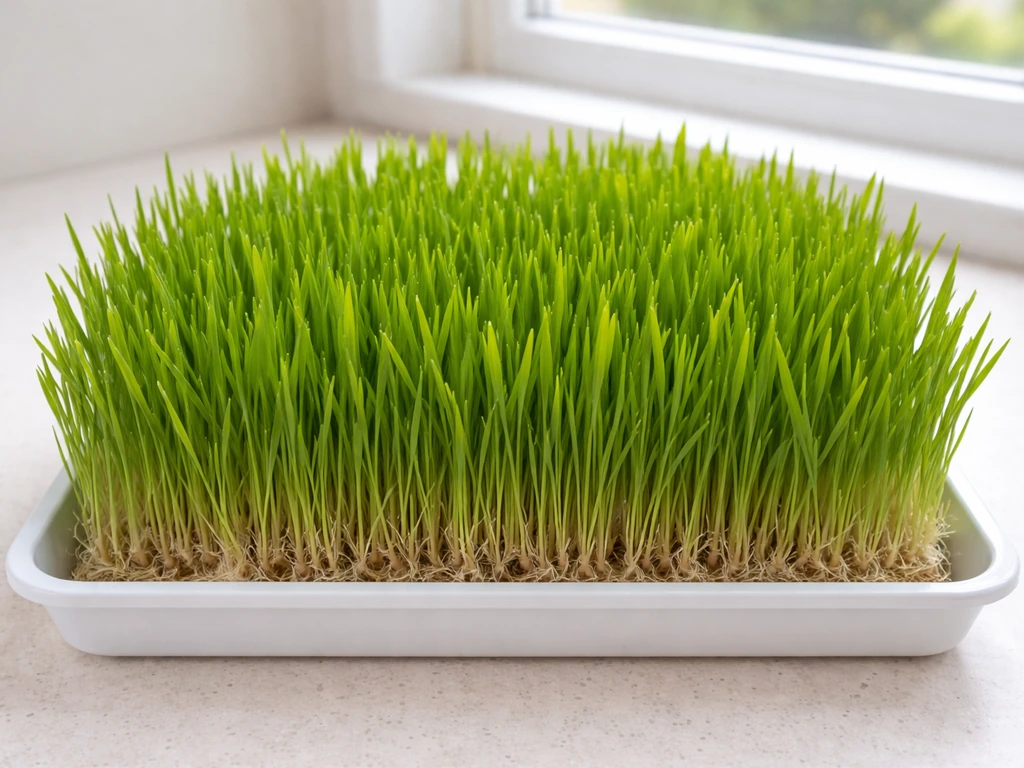
- Watch it grow: Shoots will be 1 to 2 inches tall by day 4 to 5, and 3 to 5 inches tall (harvest height) by day 7 to 10 depending on temperature and light.
- Offer to your cat when grass reaches 3 to 4 inches: At this height the blades are tender and most appealing. You can set the whole tray in front of your cat or snip a handful and put it in their bowl.
Harvesting, storing, and re-growing for a steady supply
In a soil-free setup, harvesting is simple. Just let your cat graze directly from the tray, or use scissors to snip blades at the base and offer them fresh. The grass will attempt to re-sprout after being grazed, but without nutrients from soil, regrowth is usually thinner and less vigorous than the first flush. You'll typically get one full harvest and maybe one light secondary growth before the tray starts to look tired and yellow.
The practical solution is staggered planting. Start a new tray every 5 to 7 days so you always have one tray at peak growth while another is just beginning to sprout. Three trays in rotation is usually enough for one cat. This way you're never scrambling for fresh grass, and you can compost an old tray as soon as the new one is ready. This is the same logic lawn growers use for overseeding in stages, and it works just as well for a windowsill cat garden.
For short-term storage, once the grass hits 3 to 4 inches you can slow its growth by moving the tray to the refrigerator. At fridge temps (around 38 to 40°F) the grass goes semi-dormant and stays fresh and green for 3 to 5 extra days. Take it out an hour before offering it to your cat so it returns to room temperature. Don't water it while it's in the fridge.
Fixing the most common soil-free problems
Mold on the seeds or growing medium
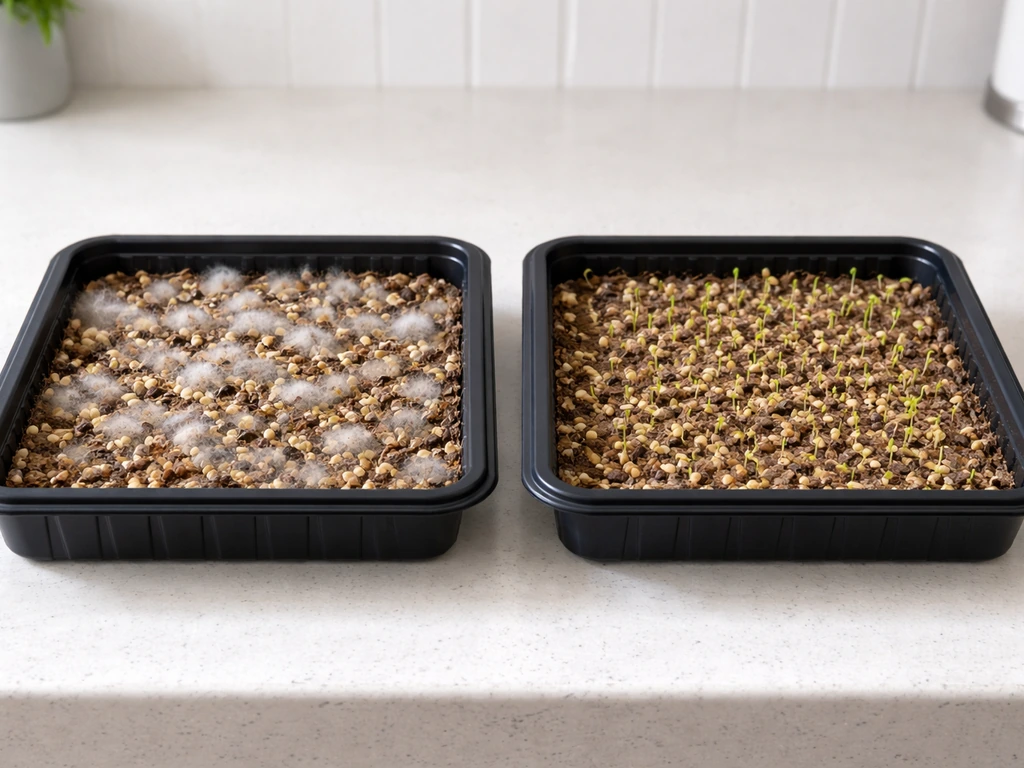
Mold is the most common issue with soil-free cat grass, and it almost always comes from one of two things: too much water or not enough airflow. If you see white fuzzy growth on or between seeds in the first few days, increase your rinse frequency and make sure you're draining all pooled water after each rinse. Moving the tray to a spot with better air circulation (away from a corner or enclosed shelf) helps a lot. Once shoots are up and growing, mold risk drops significantly as long as you're not overwatering. If you're growing hydroponically and want more detail on managing mold across different setups, the methods used in fully hydroponic cat grass growing take the same principles further. If you’re growing cat grass hydroponically, follow these same mold-prevention principles and adjust for the fully water-based setup grow cat grass hydroponically.
Seeds not germinating or germinating unevenly
If very few seeds sprout after 3 to 4 days, the most likely culprits are cold temperature or old seed. Check that your tray is in a spot at least 65°F. Seed stored for more than a year or kept in humid conditions loses viability fast. Run a quick test: drop 10 seeds on a damp paper towel, fold it over, put it in a bag, and leave it in a warm spot for 48 hours. If fewer than 7 or 8 of the 10 have sprouted, the seed is too old and you need a fresh batch. Uneven germination usually means seed is piled in some spots and sparse in others. Spread seeds in a single layer at seeding time to fix this.
Leggy, weak, or pale sprouts
Leggy growth (tall, thin, pale blades that flop over) is a light problem. The sprouts are stretching toward whatever light they can find. Move the tray closer to a window or lower your grow light to within 6 inches of the tray. Pale yellow-green color is also a light issue in most cases. If light is already good but sprouts are still weak, check that you didn't plant seeds too thick. Overcrowded seeds compete for moisture and light and end up producing weaker individual shoots.
Overwatering and soggy medium
In soil-free growing, soggy medium is easy to spot: the paper towel or mat will be waterlogged and the seeds or roots may smell slightly off. Tip the tray to drain, then let it air out for an hour or two before the next watering. Going forward, water less frequently and check the medium's moisture before adding more. It should feel damp when you press it, not wet. Gnats appearing around the tray is a sure sign of overwatering. Cut back immediately, improve drainage, and they'll move on.
Algae on a mat or vermiculite
Green or brownish algae forming on a hydroponic mat or on the surface of vermiculite means your growing medium is getting too much light while it's still wet. This is more common in clear or glass containers. Switch to an opaque tray or wrap the sides in paper or foil to block light from reaching the medium. Once the grass canopy fills in, it will shade the medium and algae growth slows on its own.
What makes soil-free the right call for indoor cat grass
Growing cat grass in dirt is perfectly fine, and if you're curious about broader container choices for cat grass, there's a lot to explore there. But for a clean, low-mess indoor setup, going soil-free is genuinely worth it. No tracking soil across the kitchen, no fungus gnats from overwatered potting mix, and faster setup time with household materials. The paper towel or mat methods also make it very easy to see root development and catch problems early. Once you've run through the process once, a fresh tray takes under 5 minutes to set up, and 7 to 10 days later your cat has a new tray of grass. That's about as simple as it gets.
FAQ
Can I reuse a paper towel or hemp mat for another cat grass batch?
It depends on cleanliness. Paper towels are usually single-use, because the towel gets trapped with mold spores or sour-smelling moisture. Hemp felt mats can sometimes be reused if they are thoroughly rinsed, then disinfected and fully dried before the next sowing, but the easiest way to avoid recurring mold is to use a fresh mat for every tray.
Do I need to rinse seeds between sprouting cycles, and how do I prevent mold during that?
Yes, during the initial sprout window, you want consistent moisture but not pooled water. Rinse or re-wet every 8 to 12 hours, then pour off any runoff, and leave the tray tilted or uncovered briefly so excess moisture evaporates. If you see fuzzy white growth, reduce the rinse frequency slightly and increase airflow (not direct sun).
What if my cat grass tray dries out too fast, especially in a sunny window?
Move the tray away from strong direct sun and drafts, then switch to a slightly more moisture-retentive medium (vermiculite kit or hemp mat) rather than thicker paper towel stacks. You can also cover the tray loosely with plastic wrap during the first 1 to 2 days to slow evaporation, just make sure there is no condensation pooling and vent it after sprouts appear.
How thick should I spread the seeds so the grass is dense but not moldy?
Spread seeds in a single, even layer, not clumped, and avoid stacking too deep in one spot. Overcrowding makes some seeds stay wet longer, which increases mold and leads to weak, leggy blades. If your tray dries unevenly, you can use fewer seeds and seed again with a second pass after 24 hours to even out density.
Is it safe for my cat if I use wheat, barley, oat, or rye seeds that are not specifically labeled cat grass?
Use untreated seeds only. Even if a seed is meant for sprouting, check for additives, coatings, or pesticide treatments. Avoid outdoor lawn or garden blends, especially those with fungicide-coated seeds, because those coatings can remain active even after soaking and sprouting.
How do I know when the grass is ready to harvest in a soil-free tray?
Aim to harvest when blades are about 3 to 4 inches tall and feel firm enough that your cat can bite without the tray pulling apart. If the grass is ready early but looks pale, give it a bit more light rather than watering more, because pale color often indicates light issues not lack of nutrients.
My cat refuses the first tray, what should I try?
Start with a different seed type, barley or oat often gets better acceptance for picky cats. Also try harvesting a little earlier or closer to peak thickness (3 to 4 inches), and offer it at room temperature if you’ve chilled it in the fridge. Flavor can vary noticeably between wheat, barley, oat, and rye.
Should I fertilize soil-free cat grass, since there is no soil?
Usually no. Soil-free grass relies on stored energy in the seed for that first flush. Adding fertilizer can increase the risk of bacterial growth, algae, or unpleasant odors in a damp medium, so if you want longer-lasting trays, the better approach is staggering new trays and using seed types that sprout reliably.
How many trays should I keep in rotation for one cat, and how do I avoid running out?
For most setups, start three trays in staggered timing (about every 5 to 7 days). This ensures one tray is at full height, one is in its first growth phase, and one is just sprouting, so you are not caught waiting if a tray has uneven germination or mold.
What should I do if only a few seeds sprout, even though temperature looks okay?
First check seed age and seed viability, even if they are not visibly old. A warm germination test can confirm viability (for example, testing a small batch on damp paper towel for 48 hours). Also ensure seeds were spread in a single layer, because clumping creates dry pockets or wet zones that stall germination.
Can I grow cat grass without dirt using a glass container, and what’s the risk?
You can, but glass increases algae risk because light reaches the wet medium. If you use glass, keep it shaded with an opaque cover or wrap the sides in paper or foil, and do not overwater. Once the canopy fills in and shades the medium, algae risk usually drops.
Next Article
How to Grow Cat Grass From Seed Indoors and Outdoors
Step-by-step guide to grow cat grass from seed indoors or outdoors, with best setup, care tips, and harvest routine.