Growing grass plugs from seed is one of the smartest ways to fill in bare spots, establish a new lawn on a budget, or convert part of your yard to a tougher grass variety without paying sod prices. The basic idea: you start grass seed in a tray or small bed, grow the seedlings to plug size, then transplant those mini-clumps into your lawn where they root and spread. It takes a bit of patience, but it works, and it gives you a level of control that buying plugs from a store just can't match.
How to Grow Grass Plugs From Seed: Step by Step
Marcus Tillwell
12 Apr 2026
What a grass plug actually is, and when it's worth the effort
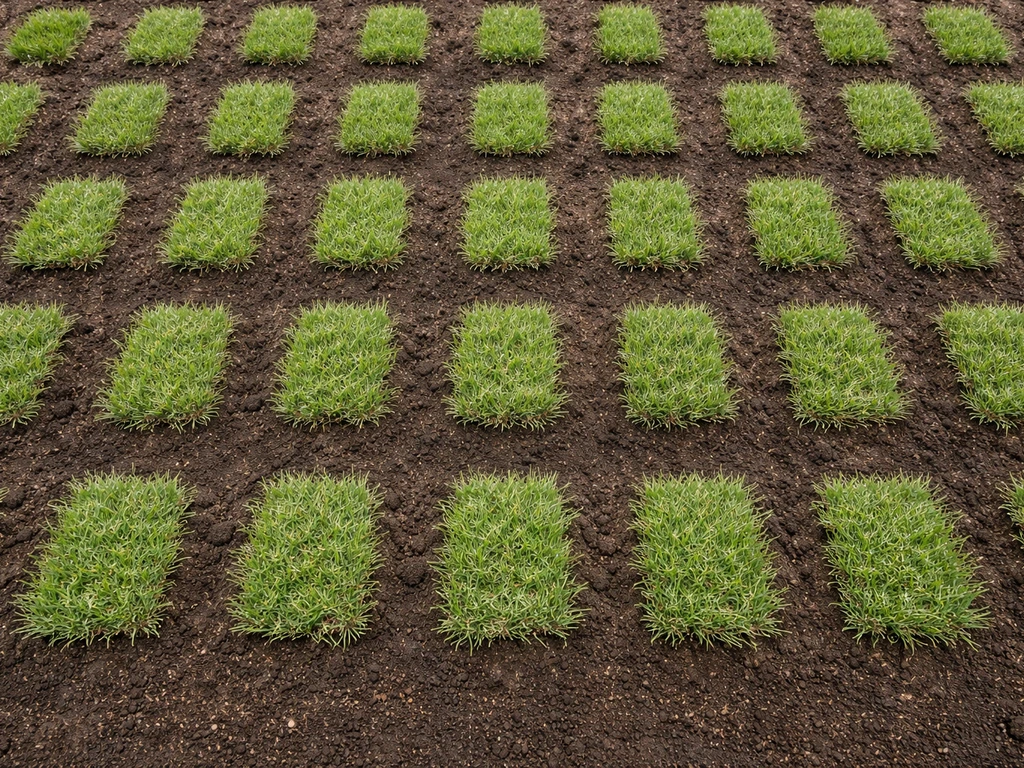
A grass plug is just a small piece of established turf, typically a 2- to 4-inch square or circular clump of grass with roots and soil attached. You plant it into a hole the same size as the plug, tamp it down, water it, and let it spread. University extension programs across the South and Mid-Atlantic describe plugging as transplanting small sod pieces into prepared holes, then rolling or firming them in and keeping the top 1 to 2 inches of soil moist until the grass roots and starts to creep outward.
Plugs make the most sense when you're working with warm-season grasses that spread aggressively by stolons and rhizomes. Bermudagrass, zoysiagrass, centipedegrass, and St. Augustinegrass all fit this description. Once a plug roots in, the grass naturally creeps outward and fills in the surrounding bare soil. For cool-season grasses like tall fescue or ryegrass, plugging is rarely necessary because those grasses establish easily and quickly from seed spread directly over the lawn. If you're working with fescue, just overseed. If you're working with bermuda or zoysia, plugging is legitimately useful.
The seed-based approach is worth it primarily for cost reasons. Store-bought plugs can run $1 to $3 each, and you might need dozens or even hundreds to cover a significant area. Growing your own from seed costs a fraction of that. The tradeoff is time: you'll spend 4 to 8 weeks growing seedlings to plug size before you ever put them in the ground. Plan that into your schedule.
Pick the right grass for your climate first
This decision matters more than any technique you use. Plant the wrong grass for your region and no amount of good plug work will save you.
Warm-season grasses (bermuda, zoysia, centipede, St. Augustine) thrive in USDA zones 7 through 10, across the Southeast, Southwest, and parts of the transition zone. They go dormant in winter and green up in spring. Cool-season grasses (tall fescue, Kentucky bluegrass, perennial ryegrass) do best in zones 4 through 7, across the northern US and higher elevations. They grow most actively in fall and spring, and struggle in summer heat.
| Grass Type | Best Region | Plug Spacing | Plug Size | Spreads By |
|---|---|---|---|---|
| Bermudagrass | Southeast, Southwest, transition zone | 6–12 inches | ~2 inches | Stolons and rhizomes |
| Zoysiagrass | Southeast, Mid-Atlantic, transition zone | 8–12 inches | ~2 inches | Stolons and rhizomes |
| St. Augustinegrass | Deep South, Gulf Coast, Florida | 12–18 inches | 3–4 inches | Stolons |
| Centipedegrass | Southeast | 12–18 inches | 3–4 inches | Stolons |
| Tall Fescue | Transition zone, North | Not typical for plugs | N/A | Bunch-type, seed only |
| Perennial Ryegrass | North, cool climates | Not typical for plugs | N/A | Bunch-type, seed only |
Zoysiagrass is one of the most popular choices for plug establishment, especially in the Mid-Atlantic and Southeast. It's dense, drought-tolerant once established, and handles moderate shade better than bermuda. If you want to dig deeper into zoysia specifically, there's a thorough breakdown of how to grow zoysia that covers its quirks in detail. For bermuda, seed is widely available and germination is reliable, which makes it a practical seed-based plug candidate. For St. Augustine, note that seed is hard to find commercially, so you're usually stuck buying plugs or sod for that grass.
Your seed-starting plan: timing, soil mix, and containers
Timing is everything. Warm-season grasses need soil temperatures of at least 65°F, and ideally 70°F or higher, to germinate reliably. In most of the Southeast and South, that means starting seed indoors or in a greenhouse in late March through April, with outdoor transplanting in May or June. In the Southwest, you can push that earlier. In the Mid-Atlantic or transition zone, late April through May is more realistic for starting seed outdoors.
For cool-season grasses, if you're still determined to try a plug approach (it's unusual but not impossible), start seed in late summer, around mid-August, so plugs are established before winter.
What you'll need to get started
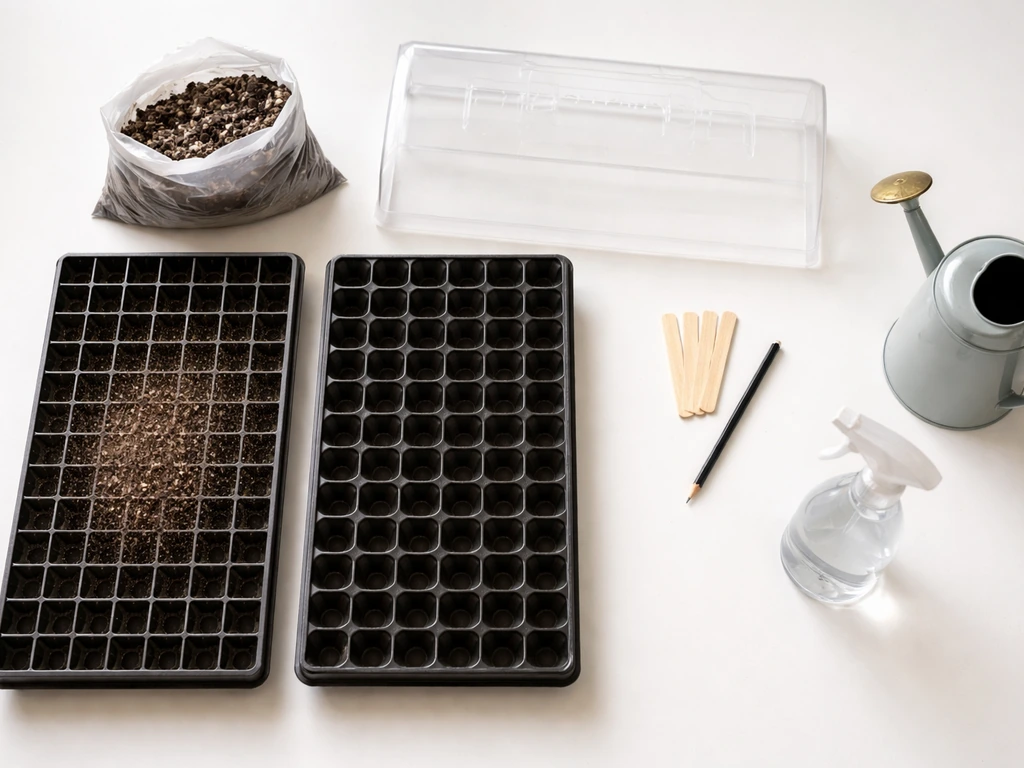
- Seed trays or small nursery flats (standard 1020 trays work well, or use cell packs for easy separation later)
- Plug trays with large cells (2-inch cells are ideal for bermuda and zoysia; 3- to 4-inch cells for centipede or St. Augustine if you can find seed)
- A good seed-starting mix: combine two parts high-quality potting mix with one part coarse sand for drainage
- Grass seed appropriate for your region (see table above)
- A spray bottle or gentle watering wand to avoid washing seed around
- A grow light or a south-facing window with strong direct sun
- Clear plastic dome or plastic wrap to hold humidity during germination
Fill your trays to about a half-inch from the top. For bermudagrass, seed depth is critical: plant no deeper than 1/8 inch, and many growers have better results pressing seed lightly into the surface and just misting over the top. Deeper planting cuts germination rates significantly. For zoysia, the same rule applies. Spread seed at roughly 3 to 5 seeds per cell if you're using plug trays, or about 15 to 20 seeds per square inch if using a flat tray you'll cut apart later. You want dense enough seedlings that each plug has multiple tillers, but not so crowded that they compete into weakness.
Cover the tray with a plastic dome or loose plastic wrap and place it somewhere warm: ideally 75 to 85°F. A heat mat designed for seed starting is a worthwhile investment if your space runs cool. Keep the surface consistently moist but not waterlogged. Bermuda and zoysia seed will rot if the surface is constantly saturated.
What to expect during germination and early growth
Bermudagrass typically germinates in 7 to 14 days under good conditions (warm soil, consistent moisture). Zoysia is notoriously slower, often taking 14 to 21 days and sometimes stretching to 28 days. Don't give up on zoysia seed trays too early. Centipedegrass falls somewhere in between, usually 14 to 21 days. If you're not seeing any sprouts after 3 weeks, check your soil temperature first. Cold soil is the number one reason grass seed sits dormant instead of germinating.
Once seedlings emerge, remove the plastic dome and move the tray to your brightest light source. If you're using a grow light, keep it 2 to 4 inches above the tops of the seedlings and run it for 14 to 16 hours a day. Thin, leggy seedlings are a sign of insufficient light, not something you can fix later. At this stage, water when the top of the soil feels slightly dry, not on a fixed schedule. You want the seedlings to develop a modest drought response, which toughens them up.
After 2 to 3 weeks of active growth, start feeding with a diluted starter fertilizer. Look for a product with a higher middle number (phosphorus), something like a 10-20-10 or similar ratio. Phosphorus supports root development in young seedlings, which is exactly what you need before transplanting. Mix it at half the recommended rate and apply once a week.
Plugs are ready to transplant when they have a well-developed root system that holds the soil together when you pop them out of the tray, and when the grass blades are at least 2 to 3 inches tall with visible tillering (multiple stems from one base). For bermuda and zoysia, this typically takes 4 to 6 weeks from germination. Before transplanting, harden off your plugs by moving them outside to a sheltered spot for 5 to 7 days, gradually increasing their exposure to direct sun and outdoor temperatures.
How to transplant your plugs the right way
Prep the planting area first
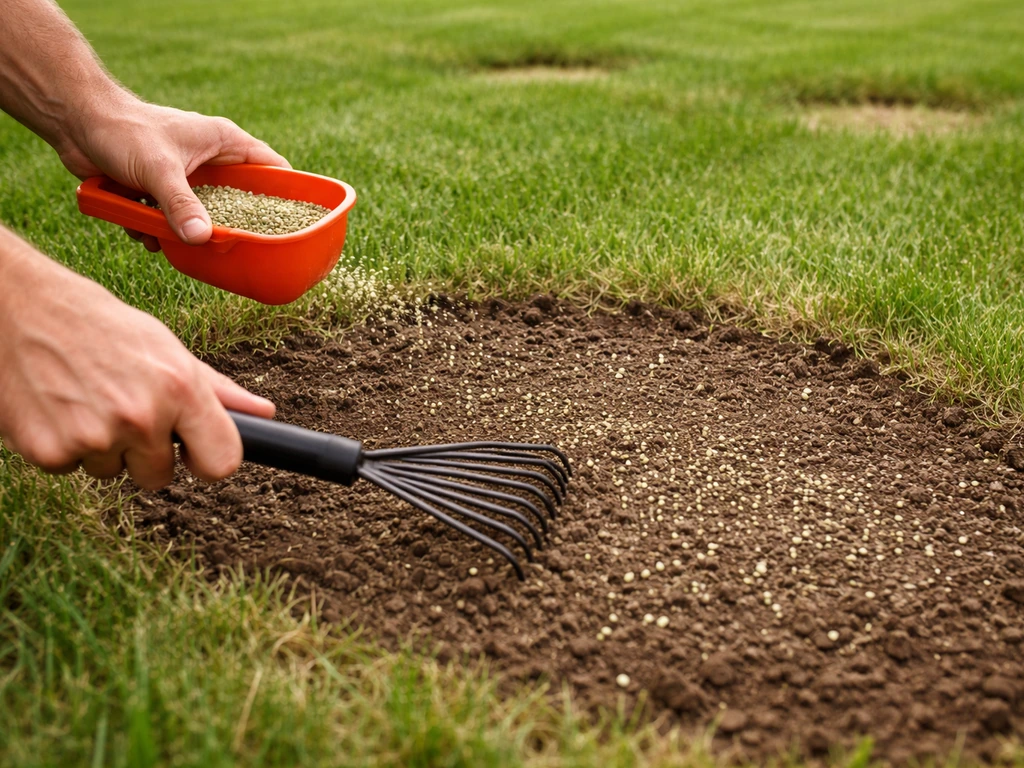
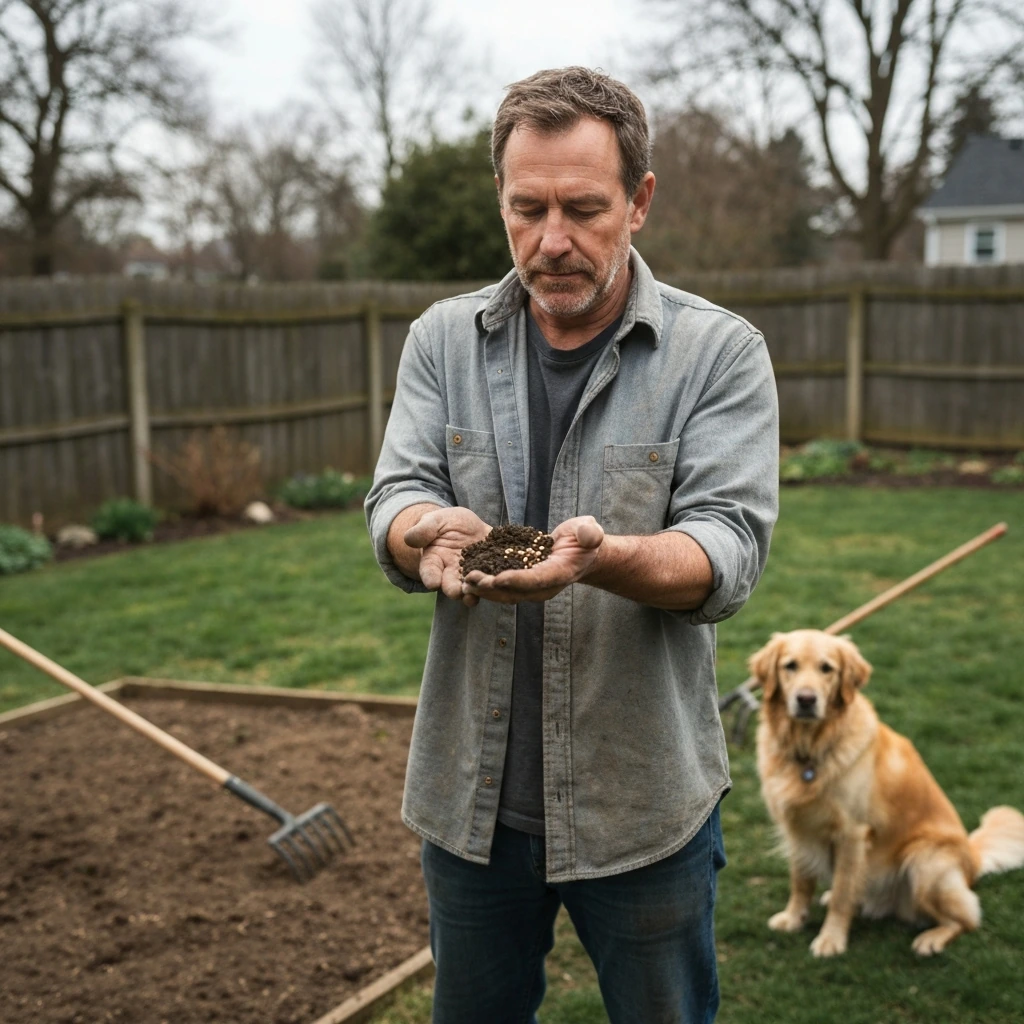
Site preparation for plugging is very similar to what you'd do before seeding or laying sod. Mow the existing grass short if you're filling in gaps in an established lawn. Remove weeds, especially any perennials with deep roots. Loosen the top 2 to 3 inches of soil. If the area is bare, till or rake it to break up any crust. For clay soils, work in an inch or two of compost to improve drainage and aeration. For sandy soils, compost helps too, this time for water retention. Firm the seedbed slightly before planting so plugs don't sink unpredictably after watering.
Apply a starter fertilizer to the prepared area before plugging. Rake it lightly into the top inch of soil. This gives the newly transplanted plugs an immediate nutrient source as they reach their roots into the surrounding soil.
Spacing, depth, and planting technique
Spacing your plugs is a tradeoff between cost (or in this case, how many seedlings you grew) and how fast you want full coverage. For bermudagrass, 6- to 12-inch spacing is common. For zoysiagrass, university extension guidance recommends 8- to 12-inch centers to account for its comparatively slower spread rate. Tighter spacing means faster fill-in but requires more plugs. If you're in a hurry, go tighter. If you started your seedlings with limited trays, go to 12 inches and accept that full coverage will take longer.
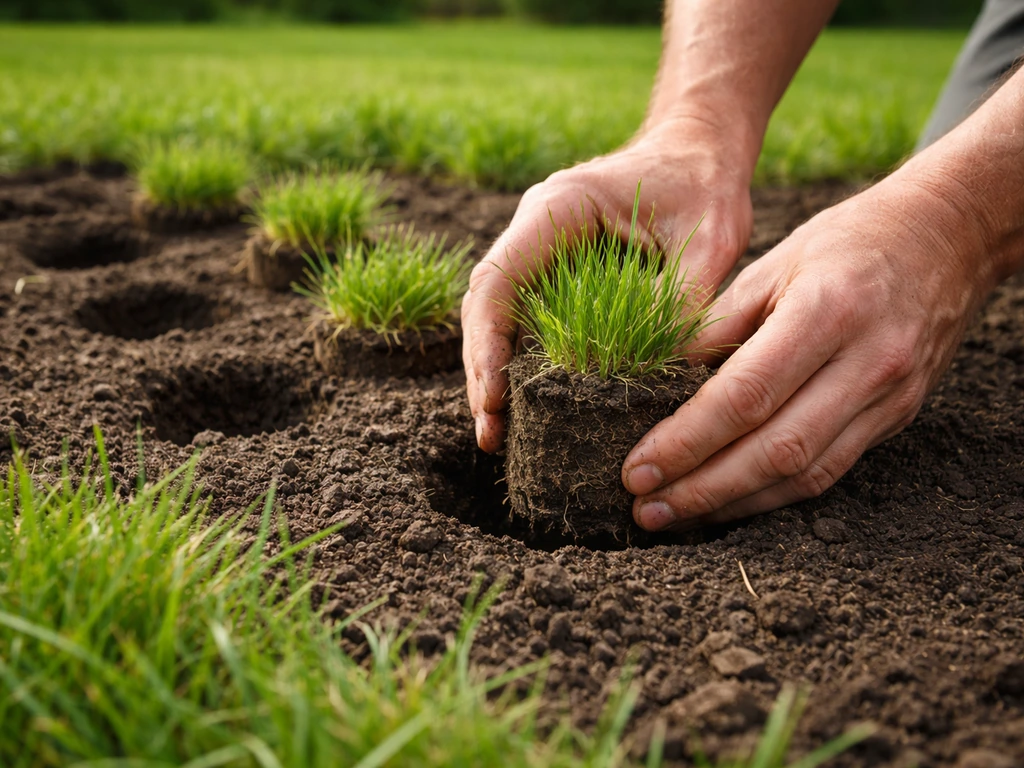
Dig or punch holes the same diameter as your plug and just deep enough so the plug sits with its crown (the base of the grass blades) at or slightly above soil level. Setting a plug too deep buries the crown and can kill it. Use a bulb planter, a dedicated plug planter tool, or even a large wooden dowel for small plugs.
Drop the plug in, press it firmly so there are no air pockets underneath, then tamp the surrounding soil. Firm contact between plug roots and native soil is critical. PlantAnswers similarly emphasizes proper establishment so you press plugs in firmly and avoid simply placing a plug on the soil surface [firm contact between plug roots and native soil is critical](https://www. plantanswers.
com/Turf/publications/estab. html). This is exactly what extension guidance from Georgia and Oklahoma both emphasize: firm the plug in, don't just drop it and hope.
Larger plugs establish faster. If your seedling trays produced plugs that are closer to 3 or 4 inches in diameter rather than 2 inches, use them as-is. Virginia Tech extension research notes that blank" rel="noopener noreferrer">larger plugs of at least 4-inch diameter can meaningfully accelerate grow-in for warm-season grasses because there's simply more living tissue ready to creep outward from day one. If you want to dig further into the specifics of establishing zoysia this way, this guide on how to grow zoysia grass plugs goes into additional detail about plug sizing and spacing for that specific species.
Watering, fertilizing, and keeping things alive until they knit in

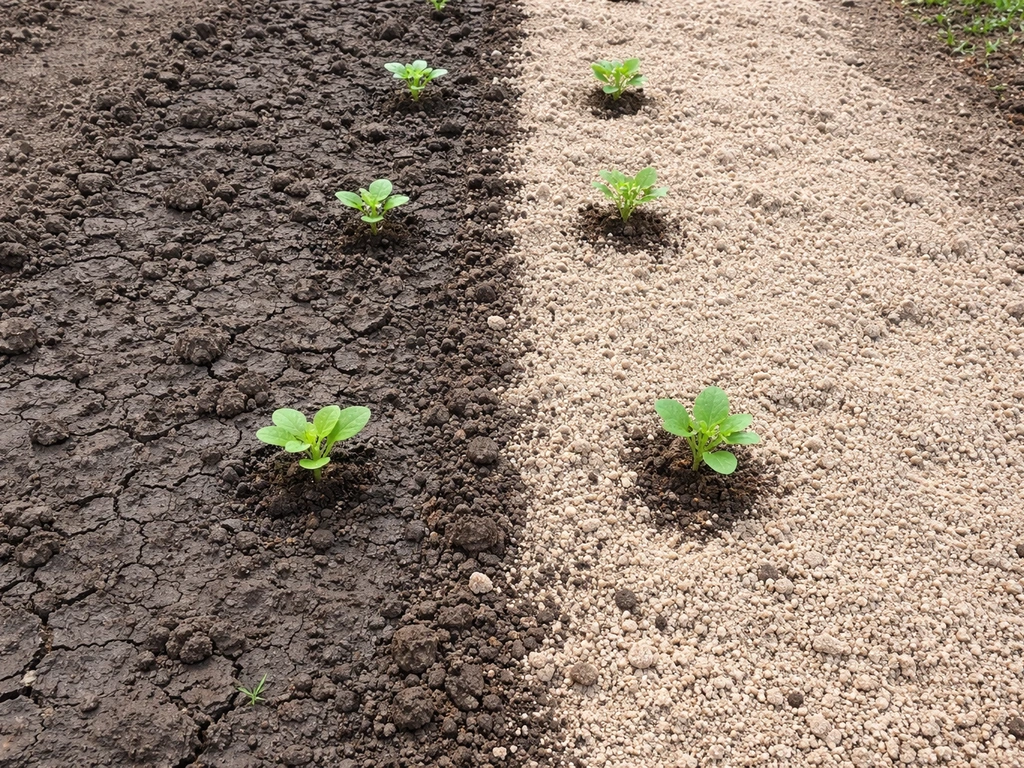
The first two weeks after transplanting are the most critical. Your plugs have been uprooted and replanted, and their root systems are stressed. Water immediately after planting, enough to saturate the soil around each plug. For the first 10 to 14 days, keep the top 1 to 2 inches of soil consistently moist. That usually means watering lightly once or twice a day in warm, sunny weather, especially if you're transplanting in summer. Don't let the soil surface dry out completely during this window.
After the first two weeks, if plugs are showing new green growth (a reliable sign they've rooted), start backing off the watering frequency. Shift to deeper, less frequent watering, something like every 2 to 3 days, soaking the soil to a depth of 4 to 6 inches. This encourages roots to grow downward rather than staying near the surface. Deep roots mean drought tolerance later.
About 3 to 4 weeks after transplanting, apply a balanced lawn fertilizer appropriate for your grass type. For warm-season grasses in active growth, something in the range of 16-4-8 or similar works well. Avoid high-nitrogen applications too early because they push blade growth at the expense of root development. If you're trying to understand how to push coverage faster, the advice in this article on how to make zoysia grass grow faster covers the fertilizer timing and mowing strategies that actually move the needle.
Mowing helps. Once your plugs are actively spreading and the grass reaches about 3 inches, mow it. This stimulates lateral growth in stoloniferous grasses, which is exactly what fills in the gaps between plugs. Set your mower high at first (3 inches for zoysia, 1.5 to 2 inches for bermuda) and don't bag the clippings; they return organic matter to the soil. Expect a plugged lawn area to reach full coverage in one full growing season if spacing was tight, or two seasons if you went wider.
When things go wrong: troubleshooting by problem and site type
Plugs aren't spreading or look stunted
The most common cause is insufficient warmth. Warm-season grasses essentially stall when soil temperatures drop below 65°F. If you transplanted too early in spring and hit a cold snap, your plugs may just be sitting there, alive but not growing. They'll usually pick up once temperatures stabilize. If they're not spreading even in warm weather, check for compacted soil around the plug. When native soil is hard and dense, roots struggle to penetrate outward. Aerating the soil between plugs, even just with a garden fork, can make a real difference.
Clay soil problems
Clay soil holds too much water around plug roots, which leads to rot, and it can also form a hard shell that stolons can't penetrate. Before transplanting into clay, work at least 2 inches of compost into the planting area. After planting, top-dress between plugs with a thin layer of compost or coarse sand mix to give creeping stolons a better medium to root into as they spread. Avoid overwatering in clay: let the top inch dry slightly between watering sessions once plugs are rooted, or you'll keep the root zone waterlogged.
Sandy soil problems
Sandy soil drains so fast that plugs can dry out between waterings, especially during the first critical two weeks. Water more frequently (daily in hot weather is not excessive) and work compost heavily into the sandy soil before planting. A light layer of straw mulch between plugs helps retain moisture without smothering the stolons as they spread.
Shade areas
If you're plugging in a shaded area, your grass choice matters enormously. Bermudagrass needs full sun and will thin out and eventually die in moderate to heavy shade. Zoysiagrass handles moderate shade better than most warm-season grasses, which is one reason it's popular in the transition zone. For deep shade, consider whether a grass lawn is even the right choice. That said, if you're working with a partly shaded yard, learning how to grow zoysia grass on an existing lawn in those conditions can be a practical path forward since zoysia competes well with existing turf and tolerates light gaps in tree canopy better than bermuda does.
Pets and foot traffic
Dogs and kids are hard on newly transplanted plugs. The plugs need roughly two weeks of minimal disturbance to root in properly. Use stakes and string, a temporary wire fence, or even a few small flags to mark off the area. If you can keep traffic off for just the first two weeks, you dramatically improve your survival rate. Bermudagrass is the most traffic-tolerant warm-season option once established; zoysiagrass is also tough but recovers more slowly from physical damage.
Weeds taking over between plugs
Bare soil between plugs is an open invitation for weeds. This is one of the most frustrating parts of plug establishment. Hand-pull weeds in the first season, especially before they go to seed. Avoid pre-emergent herbicides until plugs are fully established and actively spreading, since some pre-emergents can inhibit the grass's own spread. A very thin layer of straw mulch between plugs (about a quarter inch) can help suppress weeds while still allowing stolons to creep through.
Slow germination in your seed trays
If you're not seeing sprouts in your plug trays after two to three weeks, check three things: soil temperature (below 65°F will stall most warm-season grasses entirely), moisture (seed surface should be consistently damp but not sitting in water), and seed viability (old seed or improperly stored seed germinates poorly). Zoysia is genuinely slow even under ideal conditions, so give it a full 28 days before deciding germination failed. If you want to understand more about what makes zoysia seed tricky to germinate, reading up on how to grow zoysia from seed covers the nuances in more depth than most general turfgrass guides.
The realistic timeline: what to expect season by season
Here's the honest picture for a warm-season plug project started from seed in spring in a typical southeastern or transition-zone climate:
- Weeks 1 to 2: Seed germination in trays (bermuda faster, zoysia slower)
- Weeks 3 to 6: Seedlings grow to plug size with tillering and visible root mass
- Week 6 to 7: Harden off plugs outdoors, then transplant into prepared lawn area
- Weeks 8 to 10: Plugs root in, early signs of lateral spread visible
- Months 3 to 4: Noticeable spreading between plugs, fewer bare spots
- End of first growing season: 50 to 75 percent coverage with tight spacing, less with wider
- End of second growing season: Full coverage in most cases, lawn knitted in and manageable as normal
Zoysiagrass plugs will be on the slower end of that timeline due to the grass's naturally measured spread rate. Bermudagrass will be on the faster end, especially in hot summers with plenty of moisture. Either way, this is a multi-season project, not a quick fix. But if you want a durable, low-input lawn that you grew yourself from a bag of seed, the investment in time and patience pays off. If you want a broader picture of the whole zoysia establishment process from variety selection through long-term care, the full guide on zoysia grass and how to grow it is a good companion to this article.
FAQ
Can I grow grass plugs from seed if my yard is mostly shade?
Yes, but your species choice is everything. Bermudagrass will thin in anything beyond partial sun, while zoysiagrass is the safer warm-season option in moderate shade. Before committing, spend a day observing, track how many hours get direct sun, and consider whether deep shade means you should use a different groundcover or tolerate a thinner turf density rather than expecting full lawn coverage.
What should I do if my plug trays look wet but seeds are not sprouting?
Overly saturated trays are a common failure point, even when the soil feels “moist.” Stop misting until the surface is damp, not glossy or constantly dripping, and improve airflow under the dome by loosening the wrap slightly. Also confirm the room or tray temperature stays warm, because cold soil can keep seeds dormant even when moisture is perfect.
How do I know when a plug is truly ready to transplant, not just tall enough?
Use a pull test. Gently lift one plug, it should hold together with roots that are tangled through the soil and resist falling apart. Leaf height alone is misleading, especially for zoysiagrass, which can look green but still have a weak root mass that stalls after transplanting.
Do I need to fertilize before transplanting, or is it better to wait?
Fertilize the prepared planting area before transplanting, then feed the plugs in trays before they go in the ground. For the tray stage, use a starter with higher phosphorus, but avoid heavy nitrogen. After transplanting, wait about 3 to 4 weeks before a balanced fertilizer so you do not stimulate blade growth while roots are still recovering.
Can I transplant plugs during hot weather, or will they burn out?
You can, but plan for consistent water the first 10 to 14 days. Water immediately after planting, and in heat waves, water more frequently early in the day rather than relying on late-day watering. If you expect extreme heat, consider temporarily shading newly planted plugs for the first few days to reduce stress while roots are reestablishing.
Should I aerate or loosen the soil before planting plugs in an established lawn?
Yes, especially if the surrounding lawn is compacted or matted. Loosen the top 2 to 3 inches in the planting zone, and for tight clay, aerate between plugs so stolons can extend and roots can penetrate outward. Punching holes into rock-hard soil creates a “dead zone” where plugs may root but the surrounding turf cannot knit into them.
What’s the right spacing if I want faster fill-in but I only have limited plugs?
Use the tradeoff deliberately. Tighter spacing accelerates coverage, but wider spacing is more realistic if you are running short. For example, bermuda often fills well at roughly 6 to 8 inches, while zoysia typically benefits from wider spacing like 8 to 12 inches because it spreads more slowly. If you are impatient, go tighter, but only if you can maintain the early watering and mowing needed to help lateral growth.
Can I use plastic wrap or a dome after transplanting, too?
Avoid keeping the entire transplant zone sealed for long periods. Unlike germination trays, the goal after transplanting is firm root-to-soil contact and moisture balance, not high humidity and stagnant air. If temperatures are extreme, use short-term shading or a light barrier, but remove it as soon as the first signs of rooting appear.
Will compost or sand top-dressing help stolons, or can it smother them?
A thin top-dress is helpful, especially in clay-heavy areas. Use a light layer between plugs so creeping stolons have a better rooting medium, but do not bury crowns or create a thick layer that blocks light and physically prevents spread. If you are unsure, err thinner and reapply only if you see dry, unrooted gaps persisting.
Is it okay to use pre-emergent weed control right after plugging?
Usually no in the immediate phase. Pre-emergents can interfere with new grass establishment, so it is safer to delay until plugs are actively spreading and are well established. In the first season, rely on hand-pulling and, if needed, a very thin straw layer between plugs to suppress weeds without blocking stolon movement.
How long will a plug project take to look “finished”?
Expect multi-season results. Even with good conditions and tighter spacing, plugged areas typically take one full growing season for a close, filled look if everything goes right, or up to two seasons if spacing was wider or early establishment was slowed by cool weather or heat stress.
What should I check first if my plugs are alive but spreading barely at all?
Start with temperature and soil compaction. Warm-season grasses stall when soil temperatures drop below the mid-60s range, and cold snaps can delay spread even if blades stay green. If it is warm and you still see little creep, check for hard soil around the plugs (especially in clay) and consider aerating or forking lightly between plugs to create pathways for stolons.
Next Article
How to Grow Zoysia Grass Plugs Step by Step Guide
Step-by-step guide to grow zoysia grass plugs fast: timing, soil prep, spacing, watering, mowing, fertilizing, troublesh