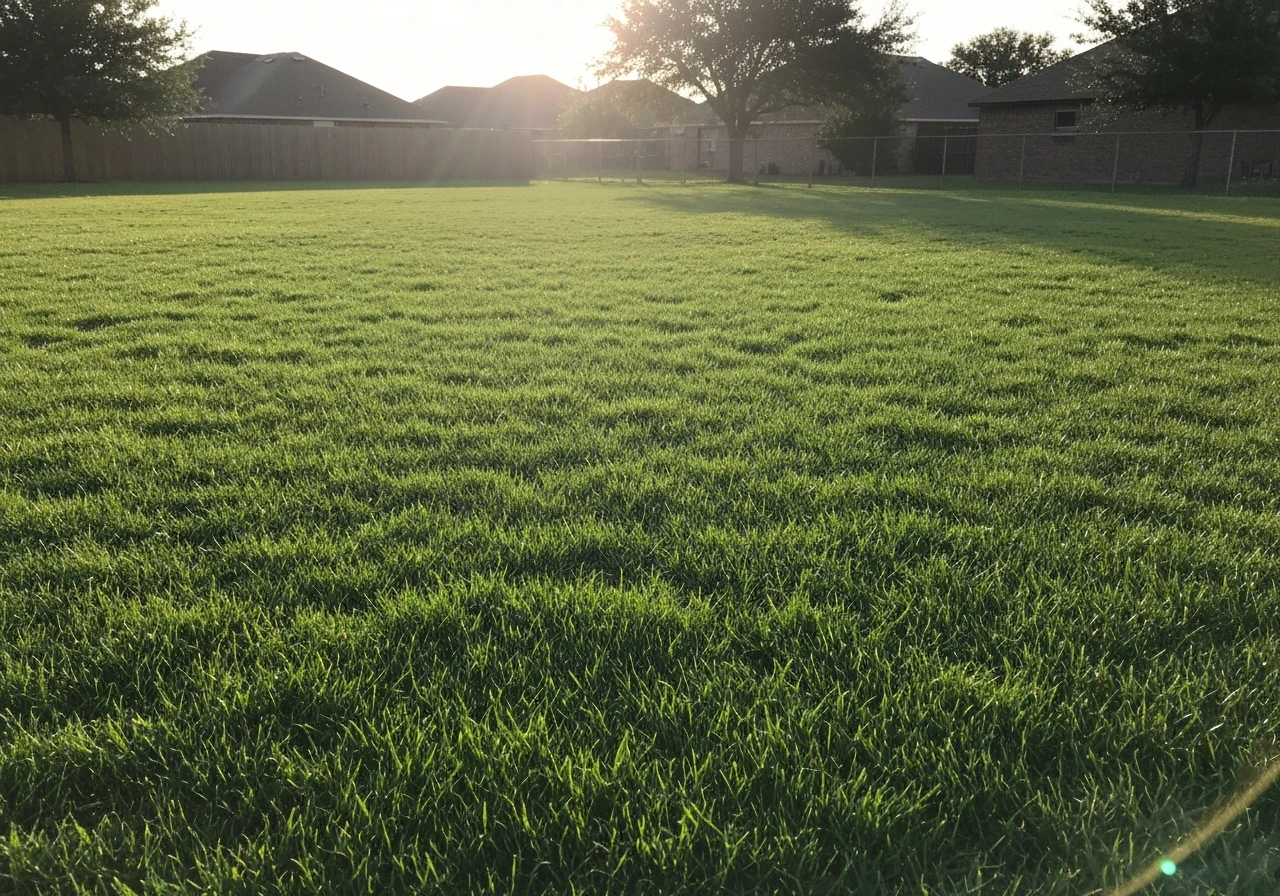
Bermuda grass sod gives you a functional lawn in weeks instead of months, but it only works if the soil is warm enough, the ground is properly prepped, and you water correctly in those first two weeks. Lay it when soil temperature at 2 to 4 inches deep is at least 65°F, keep the sod and the top inch of soil consistently moist for the first 7 to 14 days, and you can expect shallow rooting by day 14 and solid anchoring by day 21. Rush any of those three things and you'll end up with brown, crispy slabs that never knit to the soil.
How to Grow Bermuda Grass Sod: Step-by-Step Home Guide
Marcus Tillwell
19 Jul 2026
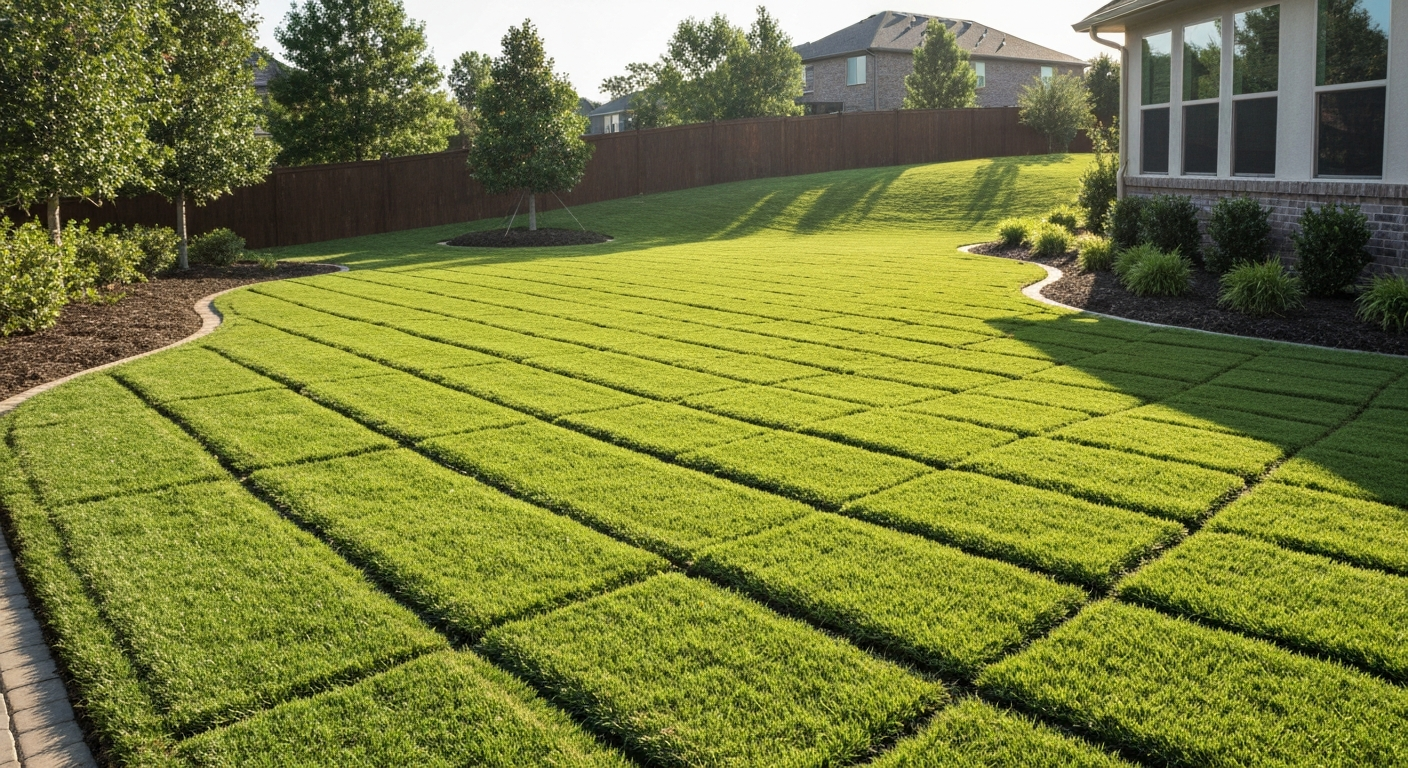
What to expect when establishing Bermuda grass from sod
Sod is essentially mature turf that was grown at a farm, sliced from the ground with a thin layer of roots and soil attached, then rolled and shipped. When you lay it on your yard, the clock starts immediately. The grass is already stressed from harvest, so your only job in the first two weeks is to keep it alive long enough for new roots to push down into your native soil.
Here is a realistic timeline you can count on under normal warm-season conditions. Days 1 through 7: the sod is surviving on the root mass it arrived with. Days 7 through 14: new root tips begin reaching into the soil beneath. Days 14 through 21: you can tug on a corner and feel real resistance, meaning anchoring has started. Weeks 3 through 6: rooting deepens to 4 to 6 inches and the turf can handle light foot traffic. Full establishment with mowing, normal traffic, and fertilization typically takes 4 to 6 weeks total, and longer if temperatures cool off, soil was poorly prepped, or irrigation was inconsistent.
One honest expectation to set: Bermuda sod is not a weekend-and-forget project. The first two weeks require daily attention to watering. Miss a day in hot weather and sections can die back. After that transition period, Bermuda's aggressive stolon growth takes over and the grass becomes genuinely low-maintenance. The front-loaded effort is worth it.
Warm-season timing and when to lay sod in your region
The single most important timing rule for Bermuda sod is soil temperature. You need at least 65°F at 2 to 4 inches deep before laying. Air temperature is a rough proxy, but the soil reading is what actually matters. You can buy a cheap probe thermometer at a garden center and check first thing in the morning for three consecutive days. If you're averaging 65°F or above, you're in the window. Cooler soil means slow rooting, which means extended vulnerability to drought, disease, and weed pressure.
In most of the South, late spring through early summer is the sweet spot. That gives the sod a full warm season to root deeply before fall dormancy. Avoid laying sod within 6 to 8 weeks of the first expected fall frost, because Bermuda needs that time to anchor before it goes dormant. Dormant sod is fragile sod.
Texas timing
In Texas, soil temperatures hit 65°F as early as late March in South Texas and the Rio Grande Valley, mid-April across Central Texas including the Austin-San Antonio corridor, and early to mid-May in North Texas and the Dallas-Fort Worth area. The practical installation window runs from that point all the way through August, though a late-summer install means you'll need to water aggressively through September. If you're dealing with the specific climate challenges of Texas heat, rocky soils around the Hill Country, or the alkaline soils common in West Texas, those factors layer on top of the timing guidance here. For step-by-step regional guidance, see our guide on how to grow Bermuda grass in Texas.
Georgia timing
In Georgia, soil temperatures typically cross 65°F in mid-April across the Piedmont region and earlier in coastal areas near Savannah. The University of Georgia recommends May through July as the prime window for Bermuda establishment. For step-by-step, Georgia-specific instructions, see our guide on how to grow bermuda grass in Georgia. North Georgia, especially in the mountains above Atlanta, runs 2 to 4 weeks behind the Piedmont, so don't rush it if you're at elevation. Georgia's humidity is actually an advantage during establishment because it reduces the evaporation load on new sod, but it also increases the risk of fungal issues if you keep the surface wet for too long after week two.
| Region | Soil hits 65°F | Best install window | Latest safe install |
|---|---|---|---|
| South Texas / Gulf Coast | Late March | April through August | Early September |
| Central Texas | Mid-April | April through August | Early September |
| North Texas / DFW | Early to mid-May | May through August | Late August |
| Coastal Georgia | Mid-April | April through July | Mid-August |
| Georgia Piedmont (Atlanta area) | Late April | May through July | Mid-August |
| North Georgia (mountain region) | Mid-May | Late May through July | Early August |
Choosing the right Bermuda sod: varieties and what to look for
Not all Bermuda sod is the same grass. Hybrid varieties like Tifway 419, TifTuf, Celebration, and TifGrand are vegetatively propagated cultivars that were bred for specific traits. Common Bermuda, on the other hand, is seeded and tends to be coarser and less uniform. For most homeowners laying sod, you're almost certainly getting a hybrid, but it's worth asking the supplier which variety they grow.
Tifway 419 is the most widely available and a solid all-around choice for high-traffic yards. TifTuf was released by the University of Georgia and has notably better drought and shade tolerance than most other hybrids, making it a smart pick for yards with partial shade or water restrictions. UGA Extension's 'Lawns in Georgia: Selection and Species' provides cultivar guidance and notes TifTuf's improved drought and shade tolerance. Celebration is popular in the Southeast for its density and recovery speed. TifGrand was specifically bred for better shade performance, though 'better' is relative: Bermuda still needs at least 6 to 7 hours of direct sun regardless of the variety. If your yard gets less than that, Bermuda may not be your best option.
Sod quality checklist before you buy
Bad sod happens. Here is what to check before accepting delivery or loading pallets into your truck.
- Color: uniform medium to dark green with no yellowing, browning, or mold
- Thickness: consistent 3/4 to 1 inch of soil layer across all rolls or slabs
- Root mass: pull back a corner and look for white or tan roots; good sod tears slightly when you tug, poor sod falls apart or has almost no roots
- Moisture: sod should feel cool and slightly moist inside the roll, not dry or slimy
- Weeds: check the surface carefully for broadleaf weeds or other grass species
- Harvest freshness: sod more than 24 to 36 hours off the pallet degrades quickly, especially in heat
- Certification: ask if the sod comes with variety certification, especially for named hybrids like Tifway or TifTuf
Buying directly from a sod farm is the best option if you have one nearby. You can see the field condition, ask about fertilizer and mowing history, and sometimes choose your own harvest date. Big-box retailers are convenient but you lose that quality visibility. If you go retail, check the delivery date sticker and avoid anything sitting on a hot pallet in a parking lot.
Tools, materials, and what it actually costs
A DIY Bermuda sod install is genuinely doable without specialized equipment. Here is what you need and what to expect to spend.
| Item | Purpose | Estimated cost |
|---|---|---|
| Sod (hybrid Bermuda) | The grass itself | $0.35–$0.75 per sq ft, or $175–$375 per pallet (450 sq ft) |
| Rototiller (rented) | Breaking up and loosening native soil | $60–$100/day rental |
| Sod cutter (rented, if removing old grass) | Clean removal of existing turf | $80–$120/day rental |
| Lawn roller (rented) | Pressing sod into soil contact | $25–$50/day rental |
| Soil pH and nutrient test | Guiding amendments before install | $15–$25 through a university lab |
| Compost or soil amendment | Improving clay or sandy soils | $30–$60 per cubic yard |
| Starter fertilizer | Phosphorus boost for root establishment | $20–$40 per bag (covers 5,000 sq ft) |
| Garden hose, sprinkler, or irrigation system | Critical first-2-week watering | Varies; basic sprinkler $10–$30 |
| Straight-edge knife or sod knife | Cutting sod to fit edges | $10–$20 |
| Wheelbarrow | Moving pallets of sod and amendment | Owned or borrowed |
Time estimate: for a 1,000 square foot project, plan on one full day for site prep (tilling, grading, amending) and another half to full day for laying sod, rolling, and initial watering. Larger projects of 2,500 square feet or more benefit from an extra set of hands on install day. Sod is heavy and physically demanding work, especially in summer heat.
Soil testing before you lay a single piece of sod
Skipping soil testing is the most common mistake homeowners make, and it's the easiest to avoid. A basic test costs $15 to $25 through your state's university extension lab and takes about a week to get results. You need that information before you lay sod, not after.
To collect a good sample, use a garden trowel or soil probe to pull 12 to 20 cores from the top 3 to 4 inches across your installation area. Mix them together in a clean bucket, remove any roots or debris, then fill the sample bag the lab provides. Submit it with a note that you're establishing warm-season turf.
The numbers you're looking for are straightforward. Bermuda grass performs best at a soil pH between 6.0 and 7.0. Most university labs also report Mehlich-3 phosphorus and potassium levels. If your pH is below 5.5, you'll need to incorporate lime before planting. If it's above 7.5, especially common in areas with alkaline caliche soils, you may need sulfur or acidifying fertilizer to bring it down. Don't guess at this. In alkaline soil, Bermuda can yellow from iron and manganese deficiency even if you fertilize it correctly, because high pH locks those nutrients out.
Fixing problem soils before you lay sod
Clay soil fixes
Clay soil is the more common challenge, especially across Georgia, the Carolinas, and parts of East Texas. Heavy clay compacts easily, drains slowly, and can suffocate roots if water pools after rain. The fix isn't magic: you need to work organic matter into the top 4 to 8 inches before tilling. Apply 1 to 2 cubic yards of compost per 1,000 square feet, spread it 1 to 2 inches deep across the surface, then till it in thoroughly. This changes the soil structure over time, not overnight, but it's enough to get sod rooting successfully in the first season. If drainage is severe, consider a shallow French drain or regrading the area. Note that gypsum, which is often marketed as a clay loosener, is only effective for sodium-affected (sodic) clay soils. Test first before spending money on it.
Sandy soil fixes
Sandy soils drain so fast that new sod can dry out within hours on a hot day, which is a serious problem during the critical first two weeks. The same organic matter amendment applies here: 1 to 2 cubic yards of compost per 1,000 square feet worked into the top 4 to 6 inches improves water and nutrient retention dramatically. The practical difference from clay work is that sandy soil needs more frequent irrigation during establishment, not less. Even with amended soil, you may need to water 3 times per day in the first week if temperatures are above 90°F. Sandy soil also tends to be lower in nutrients, so a soil test is especially important to catch any phosphorus or potassium deficiencies before you lay sod.
Step-by-step sod installation
- Remove existing vegetation: use a sod cutter for established turf or kill existing grass with a non-selective herbicide 2 weeks before install. Wait the full label period before tilling so you're not working herbicide into the soil.
- Till the top 4 to 6 inches: use a rototiller on a dry or slightly moist day. Break up any compacted layers and remove rocks, roots, and debris.
- Spread amendments: apply compost, lime, sulfur, or starter fertilizer based on your soil test results. Spread evenly across the surface before final tilling.
- Till amendments in: make a second pass with the tiller to work everything into the top 4 inches.
- Grade and level: use a garden rake or leveling board to create a smooth, even surface that slopes gently away from your house (about 1 to 2 inches of drop per 10 feet). Eliminate any low spots where water pools.
- Firm the soil lightly: roll the area once with a light water roller (filled one-quarter full) or tamp by walking in a grid pattern. You want the soil firm enough that your footprints are about 1/2 inch deep, not spongy.
- Moisten the soil: water lightly before laying sod so the surface is moist but not muddy. This improves first contact.
- Lay the first row along a straight edge: use a driveway, sidewalk, or string line as your reference. Lay rolls end to end in a straight line with no gaps and no overlapping.
- Stagger subsequent rows like brick work: offset each row by at least half a roll length so joints don't line up. This prevents erosion channels and improves knitting.
- Butt edges tightly: press pieces firmly against each other with no gaps. Gaps dry out and die. Don't stretch the sod to fit.
- Cut to fit edges: use a sod knife or sharp straight-edge to trim around curves, beds, and obstacles. Cut pieces should be at least half a roll wide when possible; smaller scraps dry out and die quickly.
- Roll the installed sod: go over the entire area with a half-filled lawn roller. This presses the sod root layer into firm contact with your prepared soil, which is critical for rooting.
- Water immediately and thoroughly: before you pack up your tools, run your sprinkler long enough to wet the sod and the top 3 to 4 inches of native soil beneath it.
A note on shady areas: if part of your yard gets fewer than 6 hours of direct sun, Bermuda will struggle there regardless of how well you install it. TifTuf and TifGrand offer some improvement over standard hybrids, but they are not shade grasses. In deep-shade zones under tree canopies or on north-facing slopes, consider whether Bermuda is the right choice at all. Zoysia, St. Augustine, or a fine fescue blend will outperform any Bermuda cultivar in those conditions.
First two weeks: the most important watering of your lawn's life
The number one reason Bermuda sod fails is inconsistent watering in the first two weeks. New sod has almost no connection to your soil yet, so it's living entirely off the moisture in its own thin root layer. That layer dries out fast, especially in July or August heat. Here is the schedule to follow.
| Time period | Frequency | Target | Goal |
|---|---|---|---|
| Days 1–7 | 2 to 3 times per day | Keep top 1 inch of soil continuously moist | Survival and initial root contact |
| Days 7–14 | Once daily | Wet sod and top 2 to 3 inches of native soil | Encourage roots to reach downward |
| Weeks 2–4 | Every other day | Wet top 4 to 6 inches of rootzone | Deepen root system, reduce surface dependence |
| Weeks 4–6 and beyond | 2 to 3 times per week as needed | 1.0 to 1.5 inches per week total (rain + irrigation) | Fully established maintenance watering |
If you don't have an irrigation system, use a sprinkler on a timer. The practical way to know if you're applying enough is the tuna-can method: set out several empty tuna cans across your lawn zone and run the sprinkler. When the can has collected about 1/3 inch of water, that's a good session for the first week. In weeks 3 and beyond, you're trying to apply closer to 1/2 to 3/4 inch per session to push moisture deeper. One inch of water applied over 1,000 square feet equals roughly 623 gallons, so this is meaningful in terms of your water bill.
A few non-negotiables in the first two weeks: don't let the sod surface turn gray or curl at the edges, that's drought stress and it means water right now. Keep foot traffic off the sod completely for the first two weeks, and even then, limit it until the turf anchors fully around week 4 to 6. Pets are a real problem here: dog urine causes chemical burn and traffic damage to unrooted sod, so fence them off if you can. If that's not possible, water any pet areas immediately after use during the establishment period.
Fertilizing newly laid sod
Do not apply a high-nitrogen fertilizer at install. Nitrogen pushes leaf growth, which is the opposite of what you want new sod to do. What you want is root growth, and that's driven by phosphorus. Apply a starter fertilizer (one with a relatively high middle number, the phosphorus value) either at the time of installation or within the first 2 to 3 weeks. This is especially important if your soil test showed low phosphorus levels.
Once the sod is anchored and actively growing, which usually means around 4 to 6 weeks after install, you can begin a regular nitrogen program. University extension guidelines for Bermuda grass recommend annual nitrogen rates of roughly 3 to 7 pounds per 1,000 square feet per year depending on your region, desired density, and maintenance level. For any single application, keep soluble nitrogen at no more than 0.5 to 0.9 pounds per 1,000 square feet to avoid burning. Apply nitrogen only during active growth, not heading into dormancy.
First mow and early mowing routine
Wait until the sod has rooted enough that it doesn't shift or pull up when you walk on it, typically 2 to 3 weeks after installation. For the first mow, set your mower to about 1.5 to 2 inches. Bermuda prefers to be mowed short (3/4 to 1.5 inches for most varieties) but cutting it too low before it's established stresses the plant. Ease it down over several mowings. Never remove more than one-third of the leaf blade in a single mow.
Troubleshooting: when sod won't root or shows bare spots
If sections of your sod are yellowing, dying, or lifting easily after two weeks, work through this checklist before deciding you have a disease or a bad batch of sod.
- Underwatering: the most common cause. Press down on the sod and lift a corner. If the soil beneath is dry and the sod root layer is dry, increase watering frequency immediately.
- Poor soil contact: if the sod feels loose and spongy and the underside is dry even though you've watered, the sod wasn't rolled firmly enough and isn't touching the soil. Roll the affected area again and water.
- Cool soil temperature: if weather cooled after installation and soil dropped below 60°F, rooting stalls. Keep the sod moist and wait for temperatures to rebound.
- Fungal disease: large irregular brown patches that expand over days, especially with humid weather, can indicate Rhizoctonia large patch or other fungal issues. Look for a ring pattern or a smoky-gray border. Reduce watering frequency and consider a fungicide if the pattern grows.
- Gaps or dried seams: sod pieces that weren't butted tightly dry out at the edges and die back. Fill narrow gaps with topsoil and overseed with Bermuda seed if rooting won't close them in time.
- Dog or heavy foot traffic damage: crushed, yellowed strips in traffic patterns. Rest the area completely and water consistently. Bermuda's stolon growth will typically fill in within 2 to 4 weeks in warm weather.
For bare spots that develop after establishment, Bermuda's aggressive spread means that small spots (under 6 inches) often fill in on their own within 2 to 4 weeks during the growing season. Larger spots, or any that don't fill in by midsummer, can be repaired with sod plugs cut from a healthy area of your lawn or purchased from a supplier. For step-by-step instructions on how to grow Bermuda grass plugs, see our guide on how to grow Bermuda grass plugs. Plugs are a practical, cost-effective repair option for established Bermuda lawns.
Common pests and diseases to watch for
Bermuda is a tough grass but it has predictable vulnerabilities. Armyworms and sod webworms are the most common insect threats, especially in summer. Signs include patches of closely cropped or eaten turf, often noticed first near wood or structure edges. Check by placing a soapy water drench (2 tablespoons dish soap per gallon of water) on a 1 square foot area: insects will surface within minutes. Treat with a bifenthrin-based insecticide or a biological control like spinosad for lighter infestations.
On the disease side, Rhizoctonia large patch (formerly brown patch) is the most common fungal problem in warm, humid regions. It typically appears in fall and spring when nighttime temperatures are between 55°F and 75°F and surfaces are wet. The pattern is circular to irregular yellowish or tan patches with a darker, water-soaked border. Cultural controls include watering in the morning rather than evening, mowing at the correct height, and not over-fertilizing with nitrogen. Fungicide treatment is available when cultural controls aren't enough, especially in high-humidity regions like Georgia's coastal plain.
Sod vs. seed vs. plugs: which method is right for you
Sod is the fastest and most predictable establishment method, but it costs significantly more than seed or plugs and requires more physical effort upfront. Here is a practical comparison.
| Method | Cost per 1,000 sq ft | Time to usable lawn | Best for | Main drawback |
|---|---|---|---|---|
| Sod | $350–$750 installed | 3–6 weeks | Full lawn installs, erosion-prone slopes, immediate results | High cost, physical labor, narrow transplant window |
| Seed | $15–$60 in seed | 8–16 weeks (common Bermuda only) | Large areas on a budget, patient homeowners | Hybrid Bermuda can't be seeded; longer establishment |
| Plugs | $50–$150 in plugs | 8–16 weeks to fill in | Small repairs, cost-conscious full installs over time | Slow to fill in, requires consistent care between plugs |
The short recommendation: if you want a full lawn quickly, can physically handle a sod install, and have the budget, sod wins. If you're covering a large area on a budget and have patience, seeded common Bermuda is viable but you won't get the hybrid performance. Plugs sit in between and work especially well for targeted repairs or phased installation of a new lawn over one to two growing seasons.
Keeping your Bermuda sod lawn thriving after establishment
Once Bermuda is established (typically 4 to 6 weeks after install), the maintenance routine becomes simple and satisfying. For step-by-step guidance on how to grow Bermuda grass at home, see our detailed guide. Mow at 3/4 to 1.5 inches every 5 to 7 days during peak growing season. Keep nitrogen applications to the active growing window (late spring through summer) and stop fertilizing 6 to 8 weeks before the first expected frost in your region. Water deeply 2 to 3 times per week to deliver 1.0 to 1.5 inches total per week unless rainfall covers it. Core aerate once per year in late spring or early summer to relieve compaction, especially important in clay soils. Dethatch if the thatch layer exceeds 1/2 inch, which for aggressive Bermuda hybrids can happen within a season or two.
The regional specifics of your location, whether that's the intense summer heat of Texas, the humidity of Georgia, or the alkaline soils common across parts of the South, will shape how you fine-tune these routines over time. The foundation, though, always comes back to what you did in those first few weeks: warm soil, tight sod-to-soil contact, and consistent moisture. Get those three things right and Bermuda will reward you with one of the most durable, drought-resilient lawns available.
FAQ
What are the essential research questions to answer to create an accurate, actionable homeowner guide for establishing Bermuda grass from sod?
List the precise, testable questions you must answer: 1) What soil temperature and calendar windows define suitable timing for sod installation in warm‑season climates and specific regions (Texas, Georgia)? 2) What soil preparation steps (depth, pH, amendments, compaction relief) measurably improve sod rooting and how should they be performed? 3) What objective sod‑selection criteria (cultivar, sod age/thickness, root mass, weed/disease status, certified sources) predict successful establishment? 4) What exact first‑hours and first‑weeks irrigation schedule (frequency, minutes/run‑time, inches/day) and measurable watering transition timeline to reach a target rootzone moisture (4–8 in)? 5) What starter and early fertilization programs (N‑P‑K amounts, timing in lb/1,000 ft²) best promote root development without causing burn or disease? 6) What mowing heights and timing milestones (first mow criteria, height in inches, frequency) during establishment? 7) What are empirically observed rooting timelines (days to initial root contact, 14–21 day anchoring, 3–6+ weeks traffic tolerance) under typical backyard conditions? 8) What diagnostic checklist (symptoms, causes, tests) and staged corrective actions when sod won’t root (poor contact, drought, cold soil, disease, poor sod quality)? 9) How to repair bare spots, pet/traffic damage, and integrate spot‑repair protocols with timelines and material choices (sod patches, plugs, seed)? 10) What practical fixes and amendment rates for problem soils (heavy clay, sandy/low‑OM soils, high sodium) including organic matter volumes and when to use engineered topsoil or gypsum? 11) How to manage shady sites—realistic expectations for bermudagrass vs alternatives, cultivar recommendations, and cultural tweaks to improve light and rooting? 12) Which pests and diseases most commonly affect new bermuda sod, what environmental triggers to watch for, and what cultural and labeled chemical controls are recommended? 13) What objective comparisons (labor, cost, time to full cover, establishment risk) of sod vs seed vs plugs for Bermuda under homeowner conditions produce a decision matrix? 14) Which measurable maintenance benchmarks (weekly water volumes in inches, seasonal N totals lb/1,000 ft², dates to transition care) should be included as a post‑establishment plan? 15) What authoritative, region‑specific further reading and resources (extension factsheets, soil testing labs, certified sod growers) should be linked for deeper technical detail?
Which categories of authoritative sources are required to answer those research questions reliably?
Primary source categories to consult: 1) Land‑grant university extension publications and regional maintenance calendars (UF/IFAS, NC State, Texas A&M, UGA, Oklahoma State, NMSU, Clemson) for region‑specific timing, irrigation and fertility guidance. 2) Peer‑reviewed turf science research (sod production, root biomass, cultivar trials) for evidence on sod characteristics, harvest age and establishment performance. 3) Industry and state sod certification/QA program documentation and reputable sod‑grower technical specs for cultivar identity, harvest practices and quality metrics. 4) University and municipal irrigation guidance and hydrology resources (catch‑can methodology, inches per run‑time conversions) for precise watering schedules. 5) Soil testing labs and extension soil‑science resources for sampling protocols, pH/liming tables, and amendment rates for clay/sand remediation. 6) Regional integrated pest management (IPM) and turf disease pages from extension services for diagnosis, cultural controls and labeled chemical recommendations. 7) Local climatology/soil temperature datasets (soil sensors, coop extension soil temp maps) to link installation calendar to measurable soil‑temp thresholds. 8) Practical how‑to case studies and extension installation checklists (sod handling, rolling, immediate watering) for stepwise homeowner procedures. 9) Manufacturer and fertilizer label documentation for safe starter mixes and application rates. 10) State regulations and fertilizer ordinances (where applicable) that affect application timing or N limits.
What specific soil‑temperature and calendar data sources should be consulted for regional timing (e.g., Texas and Georgia)?
Use: 1) Local extension soil‑temperature advisories and regional planting calendars from Texas A&M AgriLife and University of Georgia Extension. 2) Local weather station soil‑temperature sensors (2–4 in depth) or nearby NRCS/Coop station records. 3) Extension recommendations that reference the ~65°F 2–4 in soil temperature threshold for bermudagrass active rooting. 4) State university maintenance calendars (NC State, UF/IFAS) to convert soil‑temp thresholds into practical installation windows for warm‑season lawns.
What measurements and tools are required to give homeowners exact irrigation schedules and volumes?
Provide: 1) A catch‑can or small container test to measure sprinkler output (convert minutes runtime to inches using collected depth). 2) Conversion factor: 1 inch over 1,000 ft² ≈ 623 gallons; and methods to compute zone delivery. 3) Soil moisture checks: hand‑probe or a 4–8 in soil probe to verify wetting depth. 4) Watering schedule expressed in inches/day or minutes/run‑time per zone with guidance to start with frequent light waterings first 7–14 days then progressively deeper, less frequent cycles to reach 4–8 in rootzone. 5) Examples of target volumes: keep surface and topsoil constantly moist first 7–14 days (multiple short cycles daily), then transition to wetting 4–6 in every 2–3 days in weeks 2–3, then target ~1–1.5 in/week (established turf) once roots reach depth.
What soil testing and amendment protocols must be cited and why?
Cite university soil‑testing protocols: 1) Composite sampling of 12–20 cores from top 3–4 in for sod sites; submit to a university lab for pH and Mehlich‑3 P/K. 2) Use extension interpretation tables to set lime and fertilizer amendments; aim pH 6.0–7.0 for bermudagrass. 3) Recommend pre‑installation amendments incorporated when practical; give rates tied to lab buffer index or extension charts rather than generic doses. 4) For clay/sand remediation cite recommended organic matter incorporation rates (approx. 1–2 yd³ per 1,000 ft² into top 4–8 in) and note gypsum only for sodic soils after testing.
What authoritative guidance is needed on sod quality and selection?
Reference: 1) Extension guidance on inspecting sod at delivery (uniform color/texture, minimal bare areas, soil adhering to roots, harvest age and thickness). 2) Sod producer QA/certification program standards and cultivar provenance documentation. 3) Peer‑reviewed studies linking root biomass, sod tensile strength and harvest timing to establishment success. 4) Region/cultivar recommendations from university cultivar trials (TifTuf, Tifway, Celebration etc.) with notes on shade or drought tolerance.
Next Article
How to Grow Bermuda Grass in Texas: Step-by-Step Guide
Step-by-step guide to grow Bermuda grass in Texas: timing, site prep, planting, watering, mowing, and troubleshooting ba