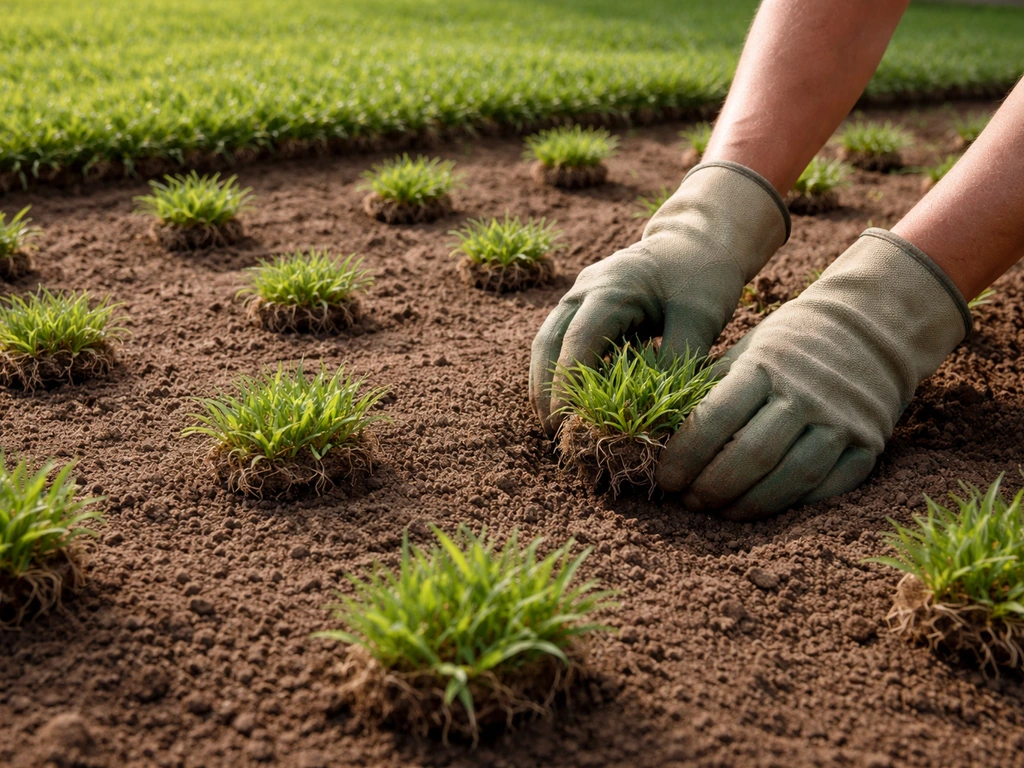
You can grow St. Augustine grass from runners by cutting healthy stolon pieces with at least two or three nodes, prepping bare soil with good contact in mind, laying the pieces 6–12 inches apart, pressing them firmly into the ground, and keeping the soil consistently moist for the first two to four weeks. Done right during the warm growing season, you'll see rooting within 7–14 days and meaningful spread within four to six weeks. Done wrong, the runners dry out, sit on top of hard soil, and die before they ever root. This guide walks you through every step so you don't waste time or plant material. If you want the best way to grow St. Augustine grass, focus on warm-season timing, strong node-to-soil contact, and consistent moisture until it roots.
How to Grow St Augustine Grass From Runners Step by Step

What St. Augustine Runners Actually Are (and When to Plant Them)
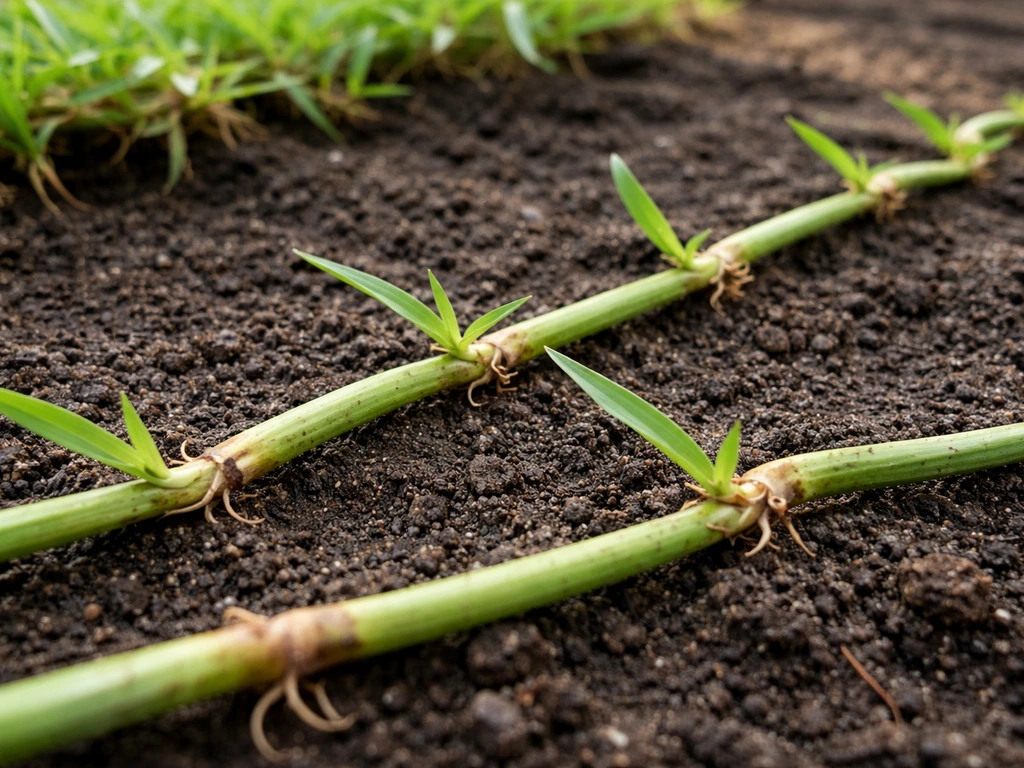
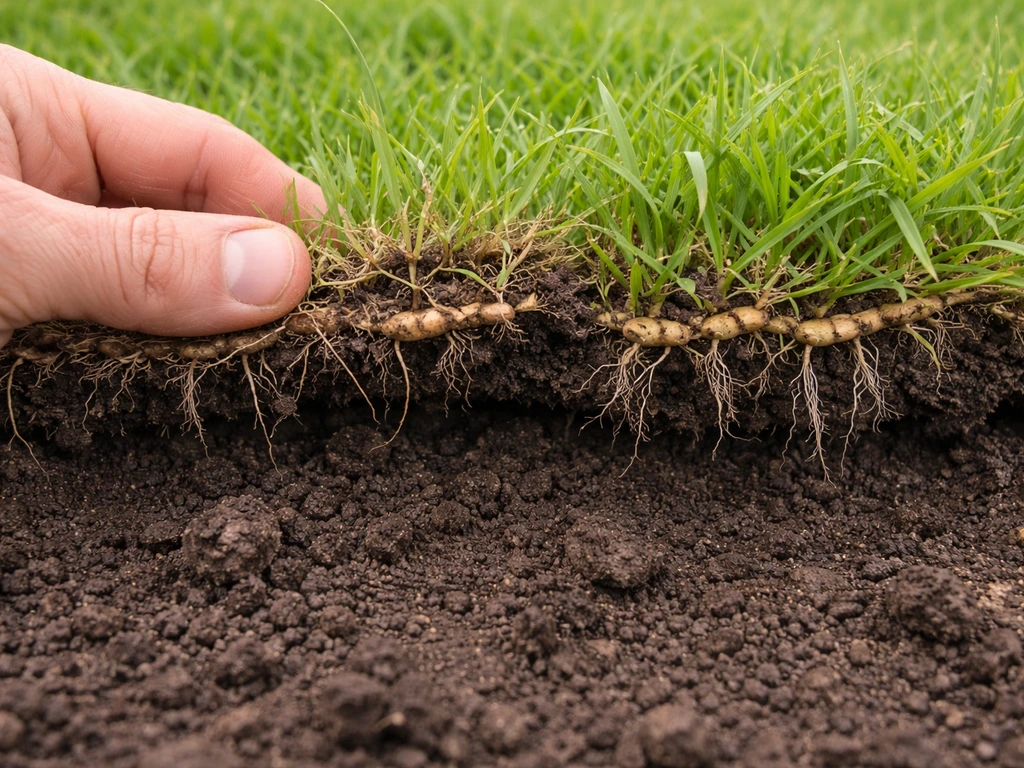
St. Augustine grass spreads through aboveground stems called stolons, which most people just call runners. These runners creep horizontally across the soil surface, and at regular intervals along the stem there are nodes. Nodes are the joints where leaves attach, and they're the only spots that can produce new roots and shoots. If a piece of runner has no nodes, it can't root and it will die. That's the single most important biology fact to understand before you start.
In practice, this means you're not planting grass blades. You're planting stem segments that contain those node points. Once a node makes contact with moist soil, it sends roots downward and new shoots upward. Over time, those new shoots send out their own runners, and the lawn fills in. It's slower than sod but much cheaper, and it works well if you follow the process.
Timing matters a lot here. St. Augustine is a warm-season grass and it only grows actively when soil temperatures are warm, roughly above 65°F and ideally in the 70s–80s. The best planting window is late spring through midsummer, generally May through July in most of the South and Gulf Coast states. In South Florida and similar frost-free areas you can plant nearly year-round, but rooting still slows when temperatures drop. In central and north Florida, Texas, and other transitional climates, aim to get runners in the ground early enough that they have at least 60–90 days of warm weather to root before any chance of frost. Planting in late summer is risky because establishment may not finish before cold weather hits. Planting in winter or during a dry summer heat spike is a recipe for failure.
Picking the Right Runner Pieces
You can source runners from an existing St. Augustine lawn (yours or a neighbor's), or buy them from a sod farm or nursery. If you're harvesting from an existing lawn, look along the edges where runners are actively growing outward. These edge runners tend to be the most vigorous. Avoid pieces from thin, yellowed, or diseased areas.
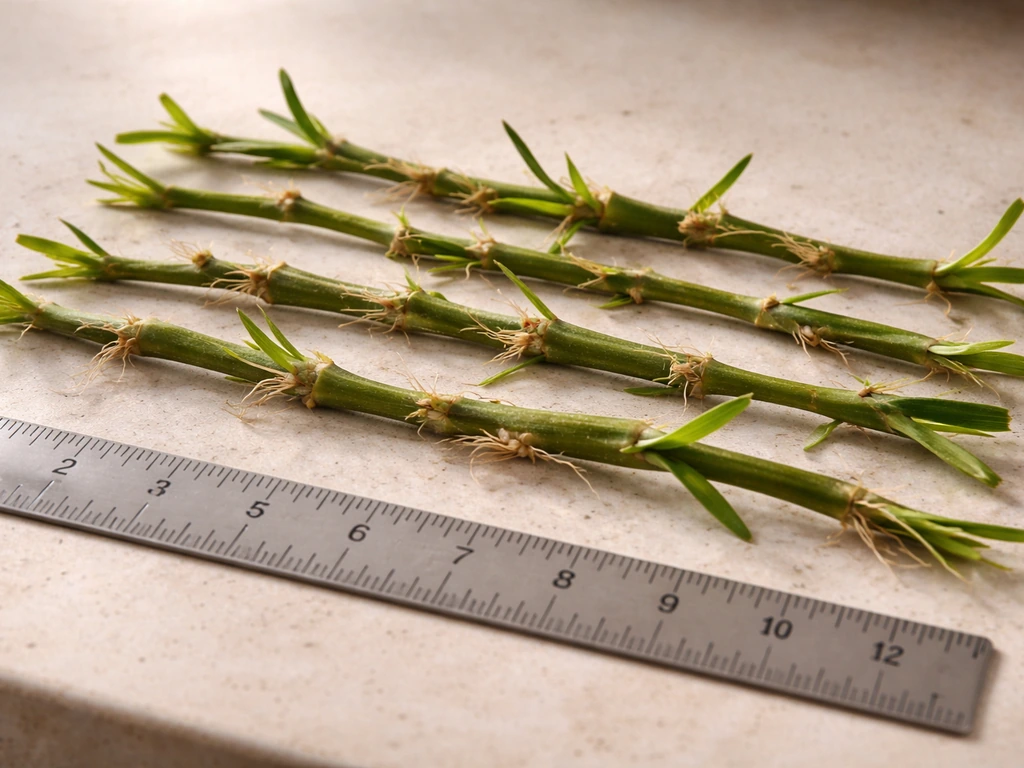
For each piece you cut, aim for segments that are 6–12 inches long and have at least two to three visible nodes. Nodes look like slight thickenings or joints along the stem, often with a small leaf blade or short root stub already visible. Discard any runners that are dried out, brown all the way through, or mushy. Fresh, green, pliable stems are what you want.
Keep your cut runners moist and out of direct sun between harvesting and planting. They don't have roots yet, so they dry out fast. If you can't plant within a few hours, wrap them loosely in damp burlap or a wet towel. Don't leave them sitting in a pile in the sun for half a day and expect them to perform. Work in smaller batches and get them in the ground as quickly as possible.
Soil and Yard Prep: This Step Makes or Breaks the Whole Thing
Poor soil contact is the number one reason runners fail to root. A runner lying on top of hard, compacted soil has almost no chance. The node needs to touch moist, somewhat loose soil to produce roots. Getting that contact right is worth more effort than anything else at this stage.
Test for Compaction First
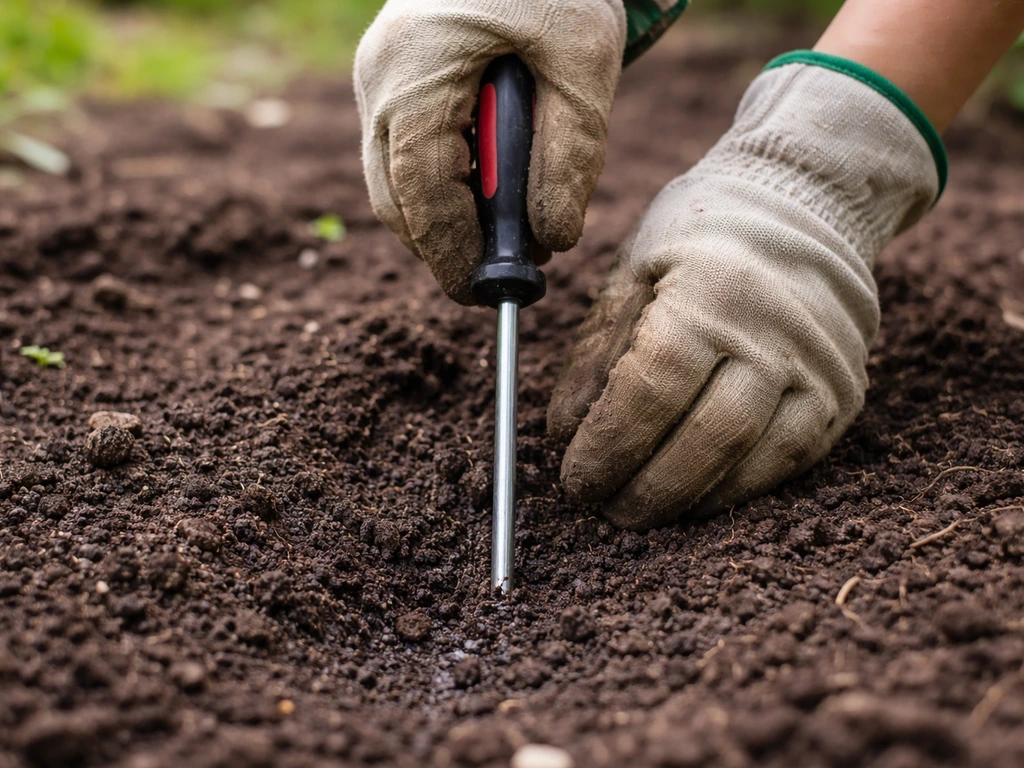
Push a screwdriver or a thin rod into the moist soil. If you can't push it in more than two or three inches without real effort, the soil is compacted enough to slow or prevent rooting. Compaction can extend 12 inches or more below the surface, and it doesn't fix itself. Run a core aerator over the area at minimum, or till to 6–8 inches deep if you're starting from bare dirt. Addressing compaction before you plant is non-negotiable.
Handle Clay and Sandy Soils Differently
If your soil is heavy clay, aeration alone often isn't enough. Work in a 1–2 inch layer of coarse sand or compost and till it into the top 6 inches to improve drainage and loosen texture. Runners sitting in waterlogged clay will rot rather than root. If you're dealing with sandy soil, which is common across coastal areas and much of Florida, the opposite problem applies: water moves through too fast and the nodes dry out before they can root. Adding a thin layer of topsoil or compost helps sandy ground hold moisture long enough to support rooting.
Kill Existing Weeds Before You Plant
Weed competition during establishment is brutal for young runners because they have no root system to fight back with. If the area has existing turf, weeds, or bermudagrass coming through, apply a nonselective herbicide like glyphosate two to three weeks before planting and let it fully break down. Don't try to plant into an area with active weed growth and plan to deal with it later. Once runners are in the ground, your herbicide options get very limited because many products that kill grassy weeds will also damage St. Augustine.
Grade, Moisture, and Final Prep
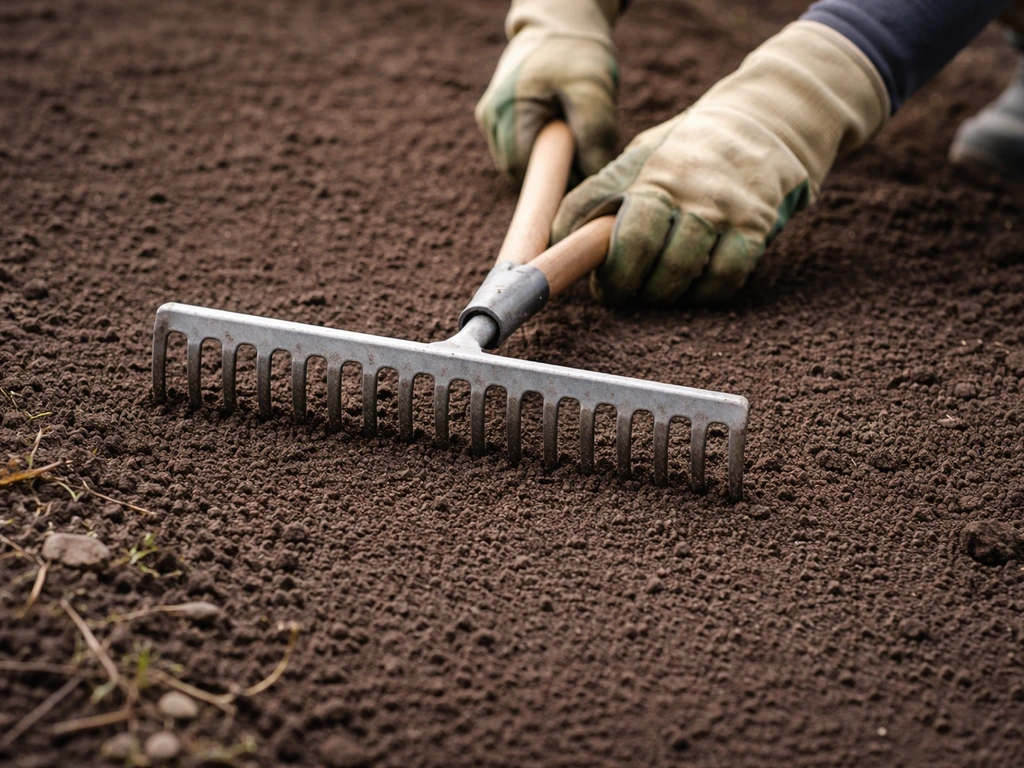
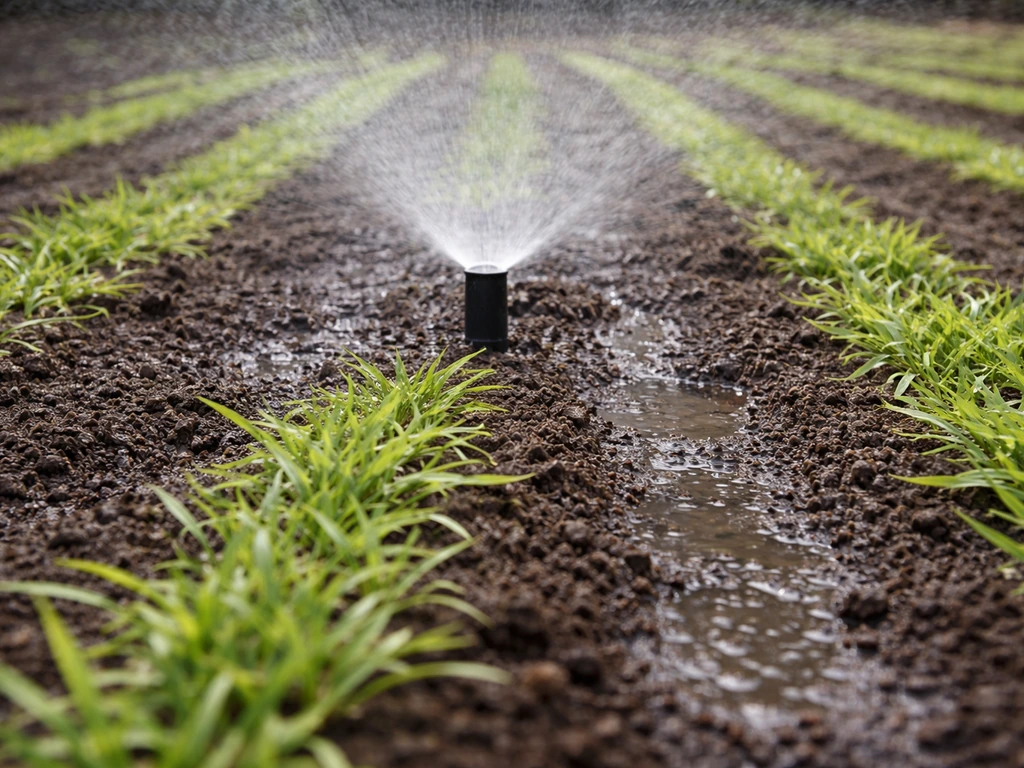
Rake the area smooth before planting. You want a level surface without low spots that collect standing water or high mounds that dry out. If you amended the soil or tilled it, water the area thoroughly the day before planting so the ground is moist but not muddy when you're laying runners. Also check that you have a way to water the area consistently during the first few weeks. If you're relying on dragging a hose across a large area twice a day, you'll likely miss spots. Even a basic sprinkler setup will save you.
How to Lay Runners: Spacing, Pegging, and Coverage
There are two practical approaches to laying runners, and the right one depends on how much plant material you have and how fast you need coverage.
Method 1: Furrow Planting (Best for Consistent Coverage)
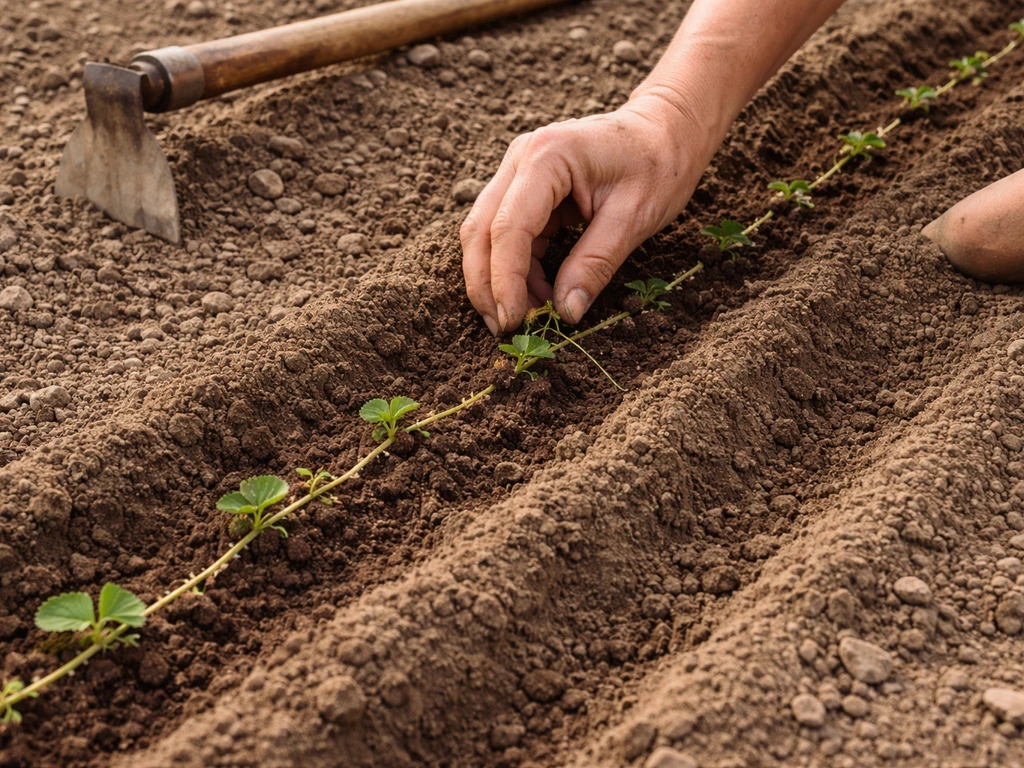
Use a hoe or edger to create shallow furrows about 2 inches deep, spaced 6–12 inches apart across the area. The tighter the spacing, the faster it fills in. Lay runner pieces end-to-end inside each furrow so the nodes are in contact with the furrow walls and base. Cover each runner with about 1 inch of soil, leaving a short leaf tip exposed so the runner can photosynthesize. Firm the soil around each piece by stepping on the row or rolling over the area with a lawn roller. That firming step is critical because it eliminates air pockets that prevent root-to-soil contact.
Method 2: Surface Placement with Pegging (Good for Patchy Areas)
For small bare spots or irregular areas, lay runners flat on the soil surface at your desired spacing and use landscape pins, small wire staples, or even a notched stick to press the runner down so nodes touch the soil. Push one end of each piece slightly into the soil with your finger or a blunt tool. You don't need to bury the whole runner, just ensure the nodes have solid contact with moist soil. Press the surrounding soil firmly against each piece. This method works well for repairs and small-scale projects.
Spacing Guide at a Glance
| Spacing Between Rows | Fill-In Timeline | Best Use Case |
|---|---|---|
| 6 inches | 4–8 weeks | Fastest coverage, uses more material |
| 12 inches | 8–16 weeks | Good balance of speed and material use |
| 18+ inches | 4–6 months | Budget stretching, very slow coverage |
After laying all your runners, water the entire area immediately and thoroughly. This first watering settles the soil around the pieces and initiates the moisture signal that triggers root growth at the nodes.
Watering Plan for the First 2–6 Weeks
Watering during runner establishment is different from watering an established lawn. You're keeping nodes alive and encouraging root initiation, not servicing a mature root system. The goal is consistent moisture in the top inch or two of soil at all times during the first week or two, then gradually backing off as roots develop.
Days 1–10: Frequent Light Watering
For the first seven to ten days, water two to three times per day in short sessions, enough to keep the soil surface visibly moist but not puddling. Think of it as misting the area rather than soaking it. Early morning, midday, and late afternoon is a reasonable schedule. The goal is to prevent the exposed runner pieces from drying out before roots can form. In hot, dry weather this might mean watering even more frequently. Check the soil with your finger: if the top half-inch is dry, it's time to water again.
Days 10–21: Transition to Deeper, Less Frequent Watering
Once you see new green shoots emerging from the nodes, which usually starts around 7–14 days, you can begin transitioning to once-daily watering for about 20–30 minutes depending on your sprinkler output. The goal now is encouraging roots to grow deeper into the soil, not just keeping the surface wet. You can test your sprinkler's output by placing a flat-sided container under it for 15 minutes and measuring the water collected. If you get a quarter inch in 15 minutes, run it for 30–45 minutes to apply a half inch.
Weeks 3–6: Backing Off Toward a Normal Schedule
By weeks three to four, if rooting is going well, you can start watering every other day or even less if rain is helping. Watch for stress signals: leaf blades that begin folding lengthwise, a blue-gray tint instead of green, or footprints that stay visible after you walk across the area all mean the grass needs water now. These same signals apply whether you're in the establishment phase or maintaining a mature lawn.
Signs You Need to Adjust Your Watering
- Runner pieces look shriveled or are turning brown within the first week: you're not watering frequently enough, or water isn't reaching the root zone
- Soil stays soggy for hours after watering: you're overwatering or drainage is poor, both of which invite rot and fungal problems
- New shoots are yellowing after appearing: could be fungal disease triggered by excess moisture, especially in humid climates
- Footprints stay visible hours after walking on the area: grass is already drought-stressed, water immediately
- Runners are lifting out of the soil: they haven't rooted yet, press them back down and check moisture levels
What to Expect: Timeline from Planting to Full Coverage
Here's an honest breakdown of what typically happens when runners are planted correctly in warm conditions during the active growing season.
| Timeframe | What You Should See |
|---|---|
| Days 1–7 | Runners still look the same; rooting is happening underground at nodes, no visible changes yet |
| Days 7–14 | Small new green shoots begin emerging from node points; runners start to resist being pulled up |
| Weeks 2–4 | New lateral growth is visible; shoots are developing their own small leaves; color becomes more uniform green |
| Weeks 4–8 | Clear spreading is underway; new runners extending outward from planted pieces, gaps beginning to shrink |
| 2–4 months | Significant coverage depending on spacing; lawn starts knitting together |
| Full season (4–6 months) | Complete coverage with 6–12 inch spacing planted in spring; ready for normal maintenance |
First mowing should happen once new growth reaches about 4 inches tall, which is usually three to five weeks after planting in warm conditions. Set your mower to 3.5–4 inches for standard St. Augustine varieties. Do not mow low during establishment. Scalping young runners stresses them severely and can kill patches you've already waited weeks to establish. Dwarf varieties like Seville can be maintained at 2–2.5 inches once fully established, but even those should be kept higher during the initial rooting phase.
Aftercare: Fertilizing, Weed Control, and Mowing Height
When and How to Fertilize
Hold off on heavy fertilizer applications until runners have been in the ground for four to six weeks and are visibly spreading. Applying high-nitrogen fertilizer to unrooted runners can burn them. Once growth is established, apply 0.5 to 1 pound of nitrogen per 1,000 square feet during the growing season, typically two to four applications spread through spring and summer. In Texas and similar climates, make your last nitrogen application at least four to six weeks before your area's average first frost date. Fertilizing too late in the fall encourages soft growth that's vulnerable to cold damage. Use a slow-release nitrogen source when possible to avoid the feast-famine cycle that stresses young grass.
Weed Control After Planting
This is the tricky part. Most preemergence herbicides need to be applied before weeds germinate, and if you miss that window they won't help. The problem is you can't apply most preemergence herbicides immediately after planting without risking damage to your young runners. Your best strategy: kill everything before planting (as described in the prep section), then hand-pull any weeds that emerge during the first four to six weeks. Once your St. Augustine is well established with a dense canopy, it's naturally competitive enough to suppress many weeds on its own. For established areas, use only herbicides specifically labeled safe for St. Augustine, because products that kill bermudagrass or other grassy weeds can also damage St. Augustine if you're not careful.
Ongoing Mowing Height
Once the lawn is established, maintain standard St. Augustine varieties at 3.5–4 inches. This isn't just an aesthetic choice. Mowing lower stresses the plant, reduces the leaf area available for photosynthesis, exposes the soil to weed seed germination, and makes the grass more susceptible to disease and pest problems. Never remove more than one-third of the blade height in a single mowing. If you've let it get away from you, step the height back down gradually over multiple cuts rather than dropping it all at once.
Troubleshooting: Why Runners Fail and How to Fix It
Runners Aren't Rooting After Two Weeks
The most common cause is poor soil contact combined with insufficient moisture. Pull up a piece and look at the nodes. If they're dry and brown with no visible root hairs, the soil around them wasn't moist enough or they weren't pressed in firmly enough. Re-peg loose runners, press soil firmly around them, and increase watering frequency. Also check whether you planted during a cool period. Soil temperature below 65°F significantly slows or halts rooting even if air temperature feels warm.
Patchy Results: Some Areas Rooted, Some Didn't
Patchy establishment almost always traces back to uneven soil prep or uneven watering. High spots dry out faster, compacted areas won't let roots penetrate, and shaded areas stay wet too long. Walk the area and identify which spots failed. In shaded areas, understand that St. Augustine tolerates more shade than most warm-season grasses but still needs four or more hours of sunlight daily. Deep shade will consistently fail no matter how well you plant. For those spots, you may need to address tree canopy or accept limitations.
Runner Die-Off After Initial Rooting
If runners appeared to root but then died, look at two main culprits. First, disease: large patch and gray leaf spot are common St. Augustine diseases, and both are made worse by excess moisture and heat. If you see brown, sunken circular patches or grayish lesions on the blades, you're likely dealing with a fungal issue. Back off on watering frequency and improve air circulation if possible. Second, look at whether temperatures dropped suddenly. Even a brief cold snap below 40°F can kill newly established runners that haven't hardened off.
Heat and Drought Stress During Establishment
In full-sun areas during July and August heat peaks, newly planted runners are extremely vulnerable. Water stress shows up fast on areas without an established root system. If you're dealing with a summer heatwave, you may need to water three or even four times a day in the first week. Shade cloth temporarily placed over a newly planted area can reduce soil temperature enough to make a real difference. If temperatures are regularly above 95°F and you have no irrigation system, consider waiting until early fall in your area when temperatures moderate but warm weather still remains.
Bermudagrass or Weeds Taking Over
If bermudagrass was present before you planted and you didn't fully kill it first, it will almost certainly outcompete your young St. Augustine runners. Bermudagrass is very difficult to selectively remove from St. Augustine once both are established. If this is your situation, you may need to start over: apply glyphosate to kill everything, wait two to three weeks, then replant. It's frustrating, but trying to nurse St. Augustine runners through a bermudagrass invasion is usually a losing battle.
Runners vs. Other Planting Methods: Quick Comparison
Runner propagation sits between plugs and sod in terms of cost and effort. Sod gives you instant coverage and the fastest establishment (3–4 weeks to full root-in), but it costs significantly more. If you want the quickest route to a finished yard, review these tips on how to grow St. Augustine sod. Plugs are similar to runners in concept but come as small rooted squares of turf with an existing root system, which gives them a slight head start over bare runners. Growing St. Augustine from seed is technically possible but extremely difficult in practice because most named varieties like Floratam don't produce viable seed, so seed propagation is rarely practical for homeowners. If you still want to try, focus on seed viability and the same warmth and moisture principles you use for successful runner establishment how to grow st augustine grass from seed. If you're dealing with a large bare area and have access to an established St. Augustine lawn to harvest from, runners are the most cost-effective approach. If you only need to fill a few bare spots, plugs might be easier. If you're wondering how this compares to a faster start, see how to grow St. Augustine grass plugs for step-by-step plug planting and care. If budget isn't a concern and you need fast results, sod wins.
The runner method requires more patience and attention during the establishment window, but it works reliably when you nail the three fundamentals: plant during active warm-season growth, ensure solid soil contact at the nodes, and keep moisture consistent for the first two to three weeks. Get those three things right and you'll have a spreading lawn. Skip any one of them and you'll be replanting.
FAQ
Can I harvest St. Augustine runners and store them for a day or two before planting?
Yes, but only if they are cut from healthy, green stolons with visible nodes and you keep them alive. Store harvested runners in damp burlap or a damp towel in a cool, shaded area, and avoid stacking thick piles that heat up. Plant as soon as possible, ideally the same day, because runners without roots dry out fast even when wrapped.
What if it rains right after I plant the runners, is that good or bad?
It can, but the process becomes more about timing and recovery. Planting in rain or right before rain helps moisture, but avoid saturating heavy clay to the point the runners sit in puddles. If you see standing water after the rain, postpone planting until the area drains, or improve drainage first so nodes can take root instead of rot.
How deep should I bury the runners (and should the nodes be covered)?
For St. Augustine, the most important “depth” is node-to-soil contact, not how deep you bury the whole runner. If nodes are exposed or hovering, they dry out or fail to root. If you bury too deep, the runner may struggle to photosynthesize until it establishes, so follow the approach in the steps: about 1 inch of cover for furrow or pressed methods, keeping a small leaf tip exposed.
How can I tell if I’m overwatering or underwatering runner establishment?
If you water and the soil stays wet without drying at all, that often increases disease risk and can lead to rot, especially in warm weather. Use the fingertip test described in the guide, then adjust so the top inch or two stays consistently moist, not waterlogged. If water is pooling, reduce run time, increase frequency only if it prevents drying, and consider aeration or light top-dressing to improve drainage.
Can I plant runners in late spring if the nights are cool, and how do I judge when it’s safe?
In general, you want new runners in the ground before cold threatens, but the key is your available warm soil window. Even if air temperatures look mild, soil below about 65°F slows or stops rooting, so use the soil temperature rule of thumb. If a cold snap is forecast, consider covering the area with a temporary shade cloth or light frost protection to reduce temperature swings.
If my runners don’t root, can I just “rescue” them later without replanting?
No, it’s not reliable for fixing a failed job. If runners were placed without solid contact, they may look alive briefly and then die once the stored energy runs out. The best fix is to re-peg or re-press nodes into moist soil immediately, and if large sections still show no green shoots after about two weeks, pull them up and replant with fresh, pliable runners.
What should I do about weeds that show up after I’ve already planted the runners?
Expect weeds to be the biggest early competition problem, but you can still act if you already planted. If you have emerged weeds in the first weeks, hand-pulling is usually the safest option because many preemergence and selective herbicides risk harming St. Augustine or delaying establishment. The guide recommends killing weeds before planting, so if you skipped that step, plan on manual removal early.
When is it safe to mow newly rooted runner grass, and what height should I start with?
Mowing timing matters more than mower height alone. If you mow before there is enough rooted growth, you can stress patches and slow lateral spread. A practical rule is to wait until new growth reaches roughly 4 inches, then mow at a higher setting, about 3.5 to 4 inches for standard varieties, and never scalp.
Can I fertilize soon after planting runners to speed up spread?
Yes, but only after rooting is underway, typically around 4 to 6 weeks. Applying nitrogen too early can burn unrooted runners and may create thin, stressed turf that invites weeds. If you fertilize, use slow-release nitrogen and stick to moderate rates, spread across the warm season as the guide outlines, rather than one heavy application.
Will shade cloth help if I’m planting runners during extreme heat, and how should I use it?
Yes, but only for limited, well-planned conditions. A common mistake is expecting shade cloth to replace watering, or placing it too long so the grass struggles to photosynthesize and establish. If you use it during extreme July or August heat, use temporary coverage to reduce soil temperature and monitor moisture closely, then remove it as soon as the heat wave passes or growth resumes normally.
I had bermudagrass nearby, how can I avoid it taking over my new St. Augustine runners?
Yes, but it is a major “plan ahead” issue. If bermudagrass was present and you didn’t fully eliminate it, it can grow through and dominate the slower-forming St. Augustine. Once runners are established, selective control is difficult, so if bermudagrass is actively coming up, the realistic path is usually full kill first, wait for breakdown, then replant.
How much shade can St. Augustine runners handle during establishment?
St. Augustine can tolerate some shade, but establishment still fails in deep shade because soil stays too wet and growth is too weak to keep spreading. A useful decision aid is this: if you can’t get at least 4 hours of sun daily, treat runner planting as a lower-success project and consider canopy management, trimming, or adjusting expectations for coverage.
What happens if my runner segments are too short or have only one node?
Runners that are too short are more likely to fail because they contain fewer nodes and have less stored energy to bridge stressful conditions. Aim for 6 to 12 inches with at least two or three nodes as the guide says, and avoid long gaps without nodes. If you must use shorter segments, increase the number of planted pieces per area so nodes are still distributed densely.
How to Grow St Augustine Grass From Seed: Step by Step
Learn how to grow St Augustine grass from seed with timing, soil prep, seeding, watering, and fixes for bare spots.